I was supposed to be making granola bars. Honest to goodness, I had the oats measured out, the honey ready, and a baking sheet greased and waiting. But somewhere between answering a text and trying to find my missing oven mitt—which, let me tell you, was in the fridge next to the milk—the oven preheated to 425°F instead of 350°F. I didn’t notice until the kitchen started smelling like a campfire. By then, the granola bar plan was toast, literally. I stood there staring at the hot oven, the bowl of sticky oat mixture on the counter, and thought, “Well, that’s dinner prep ruined.” My husband was due home in an hour, and I had nothing to show for my time but a very warm kitchen and a headache.
So I did what any reasonable person would do. I chucked a handful of peanut butter into the bowl, added some chocolate chips because I was already having a day, and started rolling the whole mess into little balls with my hands. I figured they’d be a sad snack at best, something to nibble on while I figured out a real meal. But then I bit into one. And honestly, I just stood there in the middle of the kitchen, chewing, completely confused. It was better than the granola bars would have been. Way better. The texture was perfect—chewy, a little bit crunchy from the oats, and rich without being heavy. I ate three before my husband walked through the door, and he ate four before I could tell him the story.
Maybe you’ve been there, right? That moment when a recipe fails so hard it circles back to being a win? This is one of those. These no-bake peanut butter energy balls saved my afternoon, and now I make them on purpose. Every single week. They’re the kind of recipe that makes you feel like you accidentally stumbled onto something brilliant, and you just have to share it with everyone.
Why You’ll Love This Recipe
Let me tell you why these little guys have become my absolute go-to. I’ve tested this recipe at least a dozen times, tweaking the ratios, swapping ingredients, and even letting my neighbor’s kids be the taste testers. They gave it a thumbs up, and those kids are brutally honest. So trust me when I say this version is the one.
- Quick & Easy: These come together in under 10 minutes. No baking, no waiting, no fancy techniques. Just mix, roll, and eat. Perfect for those days when you need a snack now.
- Simple Ingredients: You probably have everything in your pantry already. Oats, peanut butter, honey, chocolate chips—that’s it. No trips to a specialty store required.
- Perfect for Hosting: When guests are coming over, you want something that looks impressive but takes zero effort. Set these out on a platter, and everyone thinks you spent hours in the kitchen. I won’t tell if you won’t.
- Crowd-Pleaser: I’ve brought these to potlucks, game nights, and even a book club meeting. They disappear fast. Kids love them, adults love them, and nobody guesses they’re actually pretty good for you.
- Unbelievably Delicious: The combo of creamy peanut butter, sweet honey, and melty chocolate chips is pure comfort. Plus, the oats give it this satisfying chew that makes one ball feel like a real treat.
What makes this recipe different from the hundreds of other energy ball recipes out there? It’s the texture. I spent a long time figuring out the perfect oat-to-peanut butter ratio so they hold together without being dry or crumbly. And I use a little trick—chilling the mixture for just five minutes before rolling—that makes all the difference. Trust me, you’ll feel it the first time you bite into one.
This isn’t just a snack. It’s the kind of thing that makes you close your eyes after the first bite, even if you’re just standing in your kitchen in yesterday’s sweatpants. It’s comfort food that actually fuels you, and it’s perfect for impressing guests without breaking a sweat.
What Ingredients You Will Need
This recipe uses simple, wholesome ingredients that work together to create a perfectly balanced energy ball. No weird stuff, no hard-to-find items. Just pantry staples that deliver big on flavor and texture.
- 1 cup old-fashioned rolled oats (I prefer Quaker or Bob’s Red Mill for the best texture. Don’t use instant oats—they get mushy and the balls won’t hold their shape as well.)
- 1/2 cup creamy peanut butter (Natural peanut butter works, but make sure it’s well-stirred. I like Skippy Natural or Justin’s for a smooth, consistent texture. If you use the kind with oil on top, stir it really well or your balls might be greasy.)
- 1/3 cup honey (Local honey is great if you have it, but any liquid honey works. Maple syrup is a good substitute if you want a slightly different flavor.)
- 1/2 cup mini chocolate chips (I use semi-sweet because it balances the peanut butter perfectly. Milk chocolate works too if you like it sweeter. For a dairy-free option, Enjoy Life brand is my go-to.)
- 1/4 cup ground flaxseed (This is optional, but I love adding it for extra fiber and omega-3s. It also helps bind the mixture. If you don’t have it, just add an extra 1/4 cup of oats.)
- 1/4 teaspoon salt (Only if your peanut butter is unsalted. If you’re using salted peanut butter, skip this. A tiny pinch of flaky sea salt on top before serving is also amazing.)
- 1 teaspoon vanilla extract (Pure vanilla extract is best, but imitation works in a pinch. It adds warmth and depth to the flavor.)
That’s it. Seven ingredients, and you probably have six of them in your kitchen right now. The flaxseed is the only one I sometimes have to buy, but it’s cheap and lasts forever in the fridge.
Equipment Needed
You don’t need much for this recipe, which is part of the beauty. Here’s what I use:
- Large mixing bowl (Any medium-to-large bowl works. I use a glass Pyrex bowl because it’s easy to clean and doesn’t hold onto smells.)
- Measuring cups and spoons (Standard set. Nothing fancy, just make sure you level off your measurements for consistency.)
- Rubber spatula or wooden spoon (A sturdy spatula is my favorite for mixing this thick dough. A wooden spoon works too, but you’ll need a little elbow grease.)
- Baking sheet or plate (For chilling the balls after rolling. A small baking sheet lined with parchment paper is perfect.)
- Parchment paper or wax paper (Makes cleanup a breeze and prevents sticking. You can also use a silicone baking mat.)
- Small cookie scoop (optional) (If you want perfectly uniform balls, a 1-tablespoon cookie scoop is a game-changer. I got mine at a kitchen supply store for like $5.)
If you don’t have a cookie scoop, just use your hands. That’s honestly what I do most of the time anyway. And if you don’t have parchment paper, you can skip it—just make sure your hands are slightly damp so the mixture doesn’t stick to you.
Preparation Method
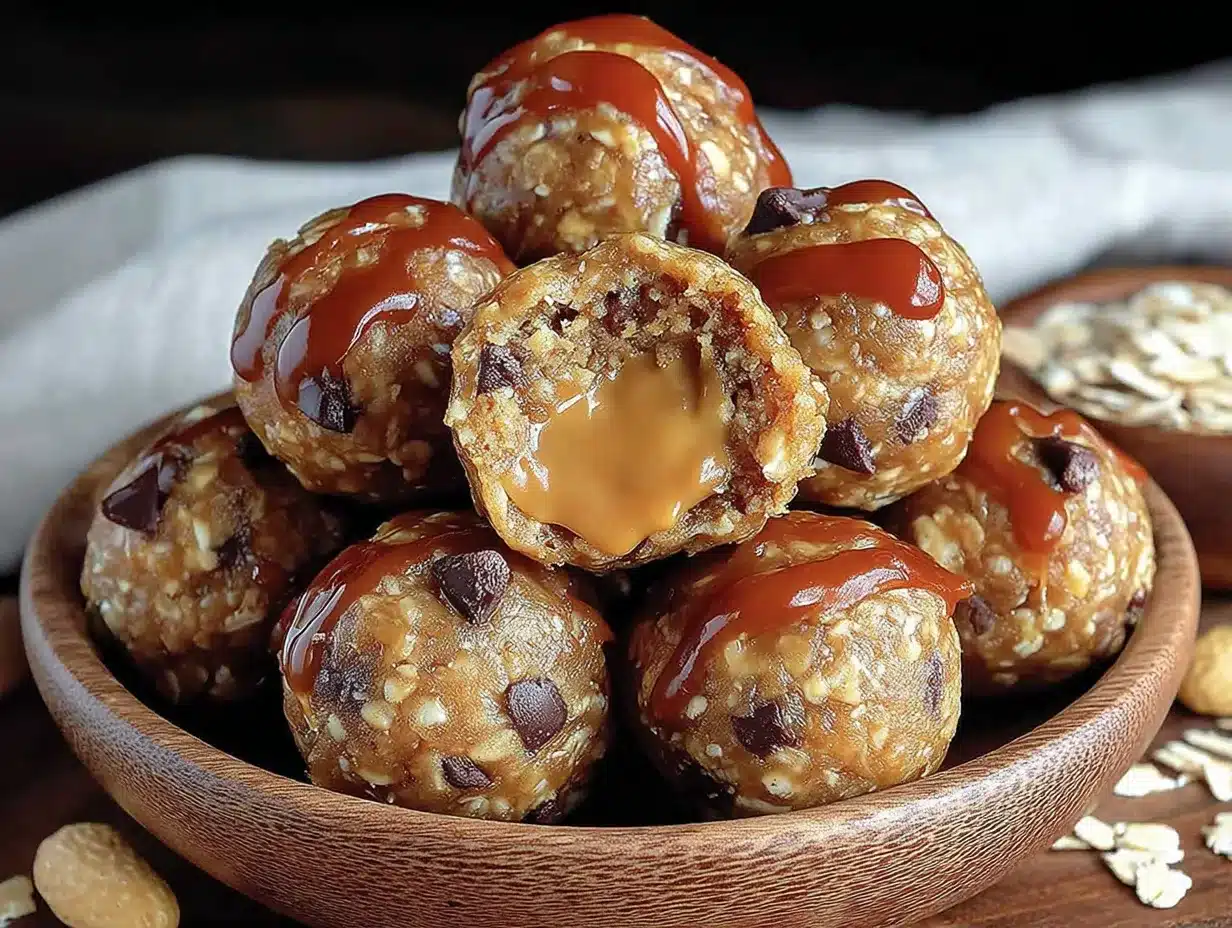
Alright, let’s get rolling. This is so simple you’ll memorize it after one batch.
- Combine the dry ingredients. In your large mixing bowl, add 1 cup old-fashioned rolled oats, 1/2 cup mini chocolate chips, 1/4 cup ground flaxseed (if using), and 1/4 teaspoon salt (if needed). Give it a quick stir with your spatula so everything is evenly distributed. You don’t want a pocket of salt in one ball—trust me, I’ve been there, and it’s not pleasant.
- Add the wet ingredients. Pour in 1/2 cup creamy peanut butter, 1/3 cup honey, and 1 teaspoon vanilla extract. At this point, the mixture will look like a sticky, messy situation. That’s okay. Don’t panic.
- Mix until combined. Use your spatula or spoon to stir everything together. It will be thick and a little stubborn at first. Keep going. You want every oat to be coated in peanut butter and honey. This takes about 1 to 2 minutes of solid stirring. If your arm gets tired, you’re doing it right. The mixture should hold together when you press it between your fingers. If it’s too dry, add a teaspoon more honey. If it’s too sticky, add a tablespoon more oats.
- Chill the mixture (optional but recommended). Pop the bowl in the fridge for 5 to 10 minutes. This makes the mixture firmer and easier to roll. I know you’re impatient—I am too—but this step saves you from sticky hands and lopsided balls. Use this time to clear your counter or line your baking sheet with parchment paper.
- Roll into balls. Scoop out about 1 tablespoon of the mixture and roll it between your palms to form a smooth ball. You should get about 16 to 18 balls, depending on how generous you are with your scoops. If the mixture starts sticking to your hands again, dampen your palms slightly with water. Don’t use oil—it’ll make the balls greasy.
- Place on prepared baking sheet. As you roll each ball, set it on the parchment-lined baking sheet. Leave a little space between them so they don’t stick together. If you’re stacking them later, you can place a piece of parchment between layers.
- Chill again (optional but helpful). Pop the baking sheet in the fridge for another 15 to 20 minutes. This helps the balls set up firmly. If you’re in a rush, you can skip this and eat them right away—they’ll just be a little softer.
- Serve or store. Transfer the balls to an airtight container and store them in the fridge. They’ll keep for up to two weeks, but honestly, they never last that long in my house.
One thing I learned the hard way: don’t overmix. If you stir too aggressively, the oats break down and the texture gets gummy. Just mix until everything is combined, then stop. Your hands will thank you.
Cooking Tips & Techniques
I’ve made this recipe more times than I can count, and I’ve picked up a few tricks along the way. Here’s what I wish someone had told me the first time.
Use room-temperature peanut butter. Cold peanut butter is a nightmare to mix. If yours has been in the fridge, let it sit on the counter for 15 minutes before starting. Or microwave it for 10 seconds to soften it up. Just don’t overheat it or it’ll get runny.
Toast the oats for extra flavor. This is totally optional, but if you have an extra 5 minutes, spread the oats on a baking sheet and toast them in a 350°F oven for 5 to 7 minutes. Let them cool completely before mixing. It adds a nutty, toasty depth that makes these balls taste almost like a baked good. I did this once when I was feeling fancy, and I haven’t gone back.
Don’t skip the chill time. I know I said it’s optional, but honestly, it makes a huge difference. The mixture is much easier to handle when it’s cold, and the balls hold their shape better. If you skip the chill, you’ll end up with flatter, messier balls. Still delicious, just not as pretty.
Keep your hands slightly damp. This is the number one tip for sticky mixtures. Wet your hands just a little before rolling, and the mixture won’t cling to your skin. Too much water will make the balls slippery, so just a light mist is all you need.
Make a double batch. Seriously, these disappear fast. If you’re making them for a party or just want to have snacks for the week, double the recipe. They freeze beautifully, so you can always have some on hand.
One mistake I made early on: using chunky peanut butter. I love crunchy peanut butter on toast, but in these energy balls, the chunks create uneven texture and the balls don’t hold together as well. Stick with creamy for the best results. Save the chunky for your morning toast.
Variations & Adaptations
One of the best things about this recipe is how flexible it is. I’ve tried all sorts of variations, and they’ve all been delicious in their own way.
Chocolate Peanut Butter Dream: Swap the mini chocolate chips for dark chocolate chunks and add 1 tablespoon of cocoa powder to the dry ingredients. You get a double-chocolate hit that’s absolutely decadent. I made these for a friend’s birthday, and she asked for the recipe before I even left her house.
Vegan Version: Replace the honey with maple syrup or agave nectar. Make sure your chocolate chips are dairy-free (most dark chocolate chips are). That’s it. Everything else is already plant-based. These are just as sticky and satisfying as the original.
Nut-Free Option: Use sunflower seed butter or tahini instead of peanut butter. They have a slightly different flavor, but they work beautifully. Just be aware that sunflower seed butter can turn green when combined with baking soda—not an issue here since we’re not baking, but good to know.
Protein-Packed Balls: Add 2 tablespoons of vanilla or chocolate protein powder to the dry ingredients. You might need to add an extra tablespoon of honey or a splash of milk to keep the mixture from getting too dry. I’ve used both whey and plant-based protein powders with great results.
Seasonal Swaps: In the fall, try adding 1/4 teaspoon of pumpkin pie spice and swapping the chocolate chips for dried cranberries. In the summer, use white chocolate chips and add a tablespoon of freeze-dried strawberry powder. The base recipe is so forgiving that you can really play around.
I once made a batch with crushed pretzels instead of some of the oats. It added this amazing salty-crunchy element that was honestly genius. The only problem was I ate the entire batch in one day. No regrets.
Serving & Storage Suggestions
These energy balls are incredibly versatile when it comes to serving. Here’s how I like to do it.
Serving temperature: I prefer them straight from the fridge. They’re firm, chewy, and the chocolate chips have a satisfying snap. But they’re also great at room temperature if you’re packing them for a lunchbox or a road trip. Just keep in mind they’ll be a bit softer.
Presentation for guests: Arrange them on a nice platter or wooden board. I like to sprinkle a little flaky sea salt over the top for a fancy touch. Pair them with fresh fruit, a cheese board, or a bowl of mixed nuts for a gorgeous snack spread. They also look beautiful in a small jar tied with a ribbon—perfect for hostess gifts.
What to serve alongside: These are great on their own, but they also pair wonderfully with a glass of cold milk, a cup of coffee, or a smoothie. For a dessert board, I’ll add some dark chocolate squares, dried apricots, and almond biscuits. It’s an easy, no-cook dessert that looks impressive.
Storage instructions: Keep the energy balls in an airtight container in the refrigerator. They’ll stay fresh for up to 2 weeks. If you want to keep them longer, you can freeze them for up to 3 months. Just place them in a single layer on a baking sheet, freeze until solid, then transfer to a freezer-safe bag or container. Thaw in the fridge overnight or at room temperature for about 15 minutes.
How flavors develop: These actually get better after a day or two in the fridge. The oats absorb some of the moisture from the honey and peanut butter, making the texture even more cohesive. The flavors meld together, too. So if you can resist eating them all on day one, you’re in for a treat on day three.
Nutritional Information & Benefits
These energy balls are a great balance of carbs, protein, and healthy fats. Here’s a rough estimate per ball (based on 16 balls):
- Calories: Approximately 140-160
- Protein: 5-6 grams
- Fat: 8-10 grams
- Carbohydrates: 16-18 grams
- Fiber: 2-3 grams
- Sugar: 10-12 grams (mostly from honey and chocolate chips)
The oats provide slow-release energy and are rich in beta-glucan, a type of soluble fiber that supports heart health. Peanut butter adds protein and healthy monounsaturated fats, plus vitamin E and magnesium. The flaxseed (if you use it) is a fantastic source of omega-3 fatty acids and lignans, which have antioxidant properties.
These are naturally vegetarian and can easily be made vegan or gluten-free (just use certified gluten-free oats). They’re nut-free if you swap the peanut butter for sunflower seed butter. The main allergen to watch for is peanuts, so be mindful if you’re serving them at a party.
I love that these give me a quick energy boost without the crash you get from processed snacks. They’re my go-to for pre-workout fuel or a mid-afternoon pick-me-up.
Conclusion
These no-bake peanut butter energy balls are proof that the best recipes often come from happy accidents. They’re quick, easy, and made with ingredients you already have. Plus, they’re endlessly adaptable, so you can make them your own.
I love that I can whip up a batch in under 10 minutes and have snacks for the whole week. They’ve saved me from countless hangry moments and have become my most-requested recipe for parties and potlucks. Every time I bring them somewhere, someone asks for the recipe. And I love telling the story of how they came to be—the failed granola bars, the overheated oven, the moment of desperation that turned into something amazing.
Now it’s your turn. Give these a try, and don’t be afraid to experiment with the variations. I’d love to hear how they turn out for you. Drop a comment below and let me know your favorite add-in or swap. And if you’re feeling generous, share this recipe with a friend who needs a quick, foolproof snack in their life.
Happy rolling, friend. You’ve got this.
Frequently Asked Questions
Can I use quick oats instead of rolled oats?
You can, but I don’t recommend it. Quick oats are finer and more processed, which means they’ll absorb moisture differently and the balls can turn out mushy or too dense. Rolled oats give you that perfect chewy texture that makes these energy balls so satisfying. If quick oats are all you have, reduce the honey by a tablespoon and add an extra tablespoon of peanut butter to compensate.
How long do these energy balls last at room temperature?
They’re best kept in the fridge, but they’ll last at room temperature for about 24 hours. If you’re taking them to a picnic or packing them in a lunchbox, they’ll be fine for the day. Just don’t leave them out in a warm car or in direct sunlight, or the chocolate chips might melt and the balls can get too soft.
Can I make these without chocolate chips?
Absolutely! The chocolate chips add sweetness and texture, but you can leave them out or swap them for dried fruit like raisins, chopped dates, or dried cranberries. I’ve also made them with chopped nuts or shredded coconut instead. The base recipe is very forgiving, so feel free to customize based on what you have on hand.
Why are my energy balls too dry and crumbly?
This usually happens if you added too many oats or not enough peanut butter or honey. The fix is easy: add a tablespoon of peanut butter or honey at a time, mix well, and test the consistency. You want the mixture to hold together when you press it between your fingers. If it falls apart, it needs more moisture. Also, make sure you’re using creamy peanut butter—natural peanut butter that’s separated can be drier.
Can I freeze these energy balls?
Yes, they freeze beautifully! Place the rolled balls on a baking sheet in a single layer and freeze until solid (about 1-2 hours). Then transfer them to a freezer-safe bag or container. They’ll keep for up to 3 months. To thaw, just move them to the fridge overnight or let them sit at room temperature for 15-20 minutes. I like to grab one straight from the freezer on a hot day—it’s like a little frozen treat.
Pin This Recipe!
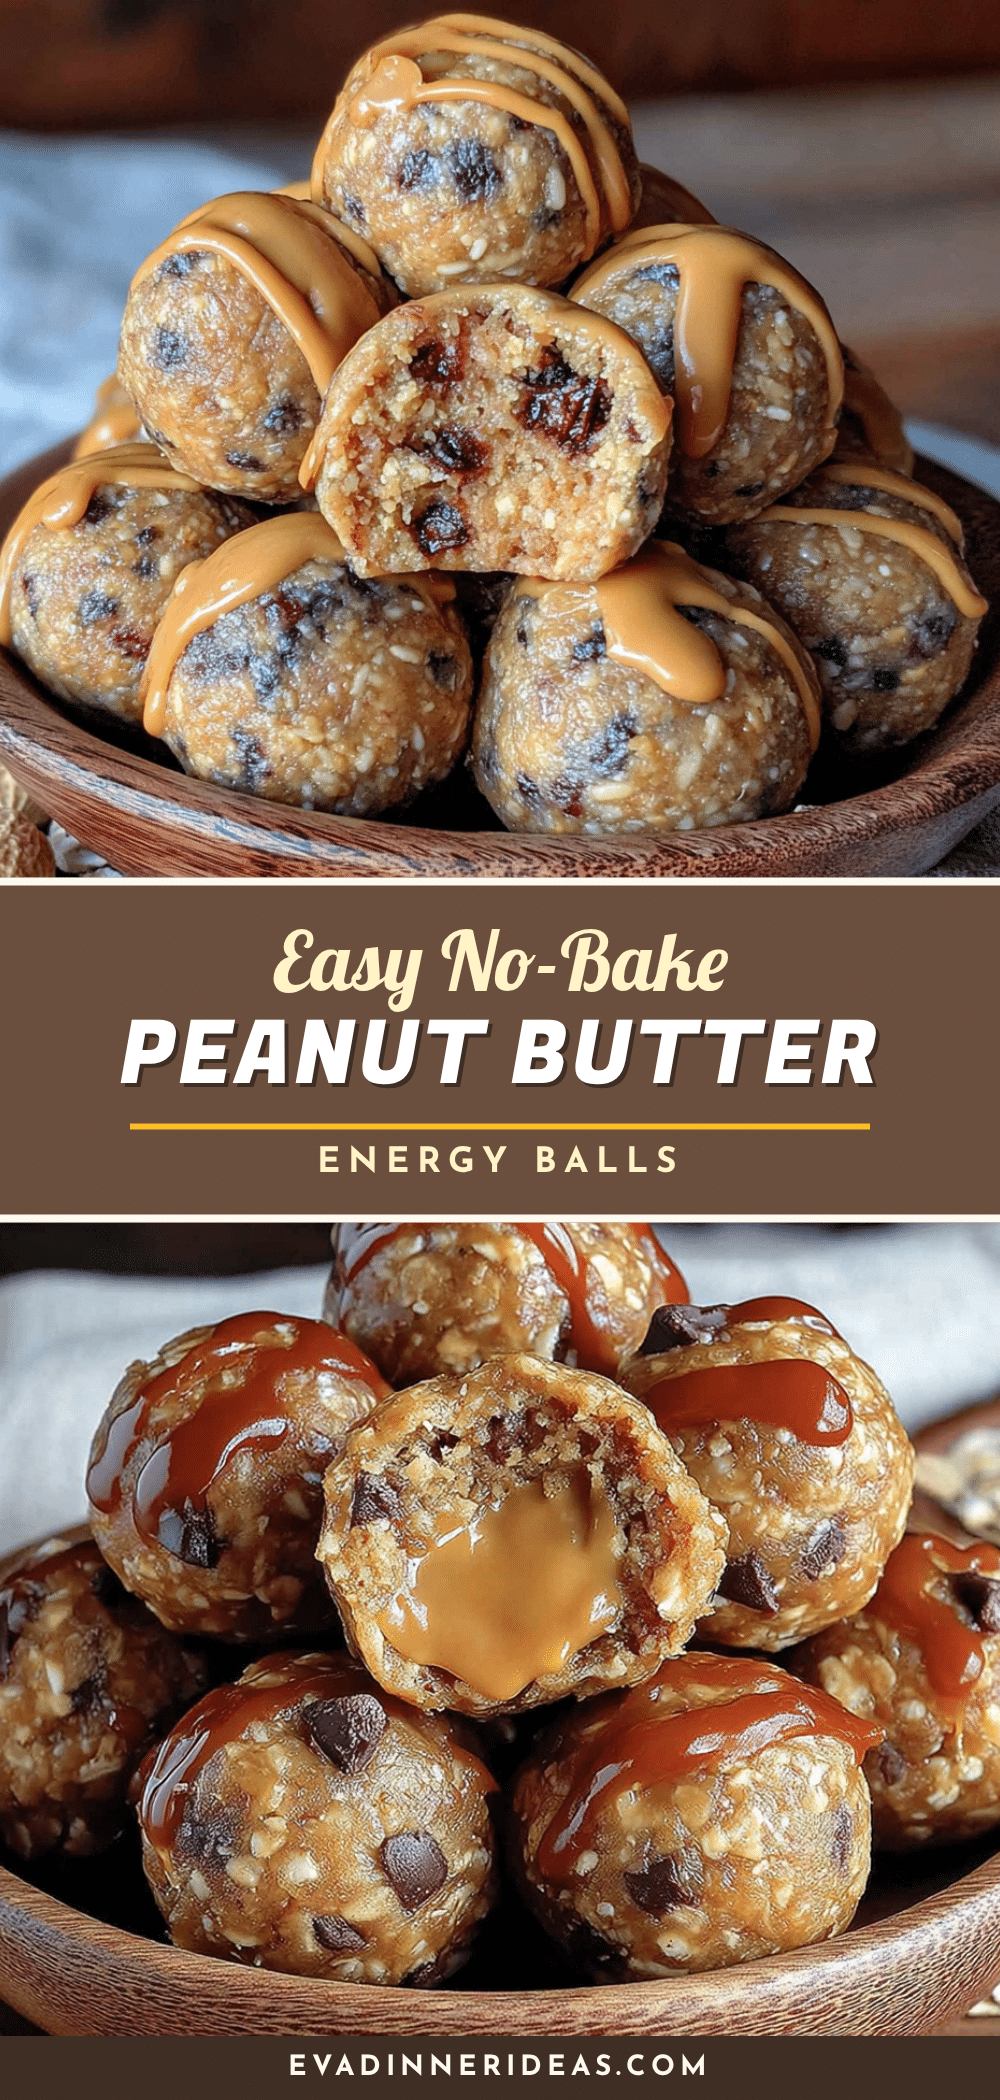
Easy No-Bake Peanut Butter Energy Balls: 5-Minute Recipe
These no-bake peanut butter energy balls are quick, easy, and made with simple pantry ingredients. Perfect for a healthy snack or dessert that comes together in under 10 minutes.
- Prep Time: 10 minutes
- Cook Time: 0 minutes
- Total Time: 10 minutes
- Yield: 16-18 servings 1x
- Category: Snack
- Cuisine: American
Ingredients
- 1 cup old-fashioned rolled oats
- 1/2 cup creamy peanut butter
- 1/3 cup honey
- 1/2 cup mini chocolate chips
- 1/4 cup ground flaxseed (optional)
- 1/4 teaspoon salt (if peanut butter is unsalted)
- 1 teaspoon vanilla extract
Instructions
- Combine the dry ingredients: In a large mixing bowl, add 1 cup old-fashioned rolled oats, 1/2 cup mini chocolate chips, 1/4 cup ground flaxseed (if using), and 1/4 teaspoon salt (if needed). Stir to evenly distribute.
- Add the wet ingredients: Pour in 1/2 cup creamy peanut butter, 1/3 cup honey, and 1 teaspoon vanilla extract. The mixture will be sticky.
- Mix until combined: Stir with a spatula or spoon until every oat is coated. This takes about 1-2 minutes. The mixture should hold together when pressed between fingers. If too dry, add a teaspoon more honey; if too sticky, add a tablespoon more oats.
- Chill the mixture (optional but recommended): Refrigerate the bowl for 5-10 minutes to make the mixture firmer and easier to roll.
- Roll into balls: Scoop about 1 tablespoon of the mixture and roll between your palms to form smooth balls. You should get about 16-18 balls. Dampen hands slightly with water if mixture sticks.
- Place on prepared baking sheet: Set each ball on a parchment-lined baking sheet, leaving a little space between them.
- Chill again (optional but helpful): Refrigerate the baking sheet for 15-20 minutes to help the balls set firmly.
- Serve or store: Transfer to an airtight container and store in the refrigerator for up to 2 weeks, or freeze for up to 3 months.
Notes
Use room-temperature peanut butter for easier mixing. Toast the oats for extra flavor (optional). Don’t skip the chill time for best texture. Keep hands slightly damp when rolling to prevent sticking. These get better after a day or two in the fridge as flavors meld.
Nutrition
- Serving Size: 1 ball
- Calories: 150
- Sugar: 11
- Sodium: 60
- Fat: 9
- Saturated Fat: 2.5
- Carbohydrates: 17
- Fiber: 2.5
- Protein: 5.5
Keywords: no-bake energy balls, peanut butter energy balls, healthy snack, easy snack, no-bake recipe, energy balls, peanut butter oats