The school bake sale was in twelve hours and I’d completely forgotten. My son, Leo, had reminded me three times that week—once on a sticky note shaped like a star, once during a commercial break, and once while I was half-asleep brushing my teeth. I’d nodded, smiled, and promptly filed it in the mental trash can. Now it was 9 PM on a Tuesday, the pantry was looking sad, and the pressure was on. Every other parent would be bringing elaborate, Pinterest-perfect creations—cakes with fondant unicorns, cookies with perfectly piped royal icing. I had a half-empty jar of peanut butter, a bag of Hershey’s Kisses I’d bought for a “rainy day” emergency, and a very anxious second-grader watching me with those big, trusting eyes. Honestly, I was about ten seconds away from buying a box of store-bought cookies and pretending I’d made them. But then I remembered a recipe my own mom used to throw together when we had nothing in the house: soft peanut butter blossom cookies. They weren’t fancy, but they were good. And as I pulled out the mixer, I figured they’d at least be edible.
Let me tell you, the panic was real. I was measuring flour with a shaking hand and praying the butter was soft enough to cream. I didn’t have time for a complicated recipe with a million steps. I needed something that worked the first time, every time. And you know what? These cookies did. They came together in a blur of peanut butter, sugar, and hope. The kitchen smelled incredible, and Leo stopped looking worried and started looking excited. We pressed the chocolate kisses into the warm cookies together, and he gave me a flour-dusted high-five. The next day, I dropped off the batch with zero confidence. When I picked him up from school, he ran to the car holding an empty container and a first-place ribbon. “They sold out in ten minutes, Mom!” he shouted. I was shocked. I still am, a little bit. These simple, soft peanut butter blossom cookies—the ones I threw together in a panic—won over a whole school. Maybe you’ve been there, staring at a bare pantry and a tight deadline. This recipe is your answer. It’s the one that saved me, and it’s the one I keep coming back to, even when there’s no bake sale on the line.
Why You’ll Love This Recipe
Let’s be honest—there are a million peanut butter blossom cookie recipes out there. But this one is different. It’s the one I’ve tested and tweaked until it was just right, and it’s the one that gets requested for every family gathering, school event, and lazy Sunday afternoon. Here’s why it’s earned a permanent spot in my kitchen.
- Quick & Easy: From start to finish, you’re looking at about 30 minutes. No chilling the dough, no complicated techniques. Just mix, roll, bake, and press. Perfect for a last-minute school bake sale or a sudden cookie craving.
- Simple Ingredients: You probably have everything in your pantry right now. Peanut butter, sugar, butter, an egg, flour—the basics. No weird ingredients you have to hunt down at a specialty store.
- Perfect for Family Baking: This is the recipe you pull out when the kids want to help. Rolling the dough into balls is easy for little hands, and pressing the chocolate kiss into the center is the most fun part. It’s a guaranteed good time in the kitchen.
- Crowd-Pleaser: Honestly, I’ve never met a person who doesn’t like these. They’re a hit with kids and adults alike. The combination of soft, salty peanut butter cookie and smooth milk chocolate is just unbeatable.
- Unbelievably Soft: The secret is in the technique—we use a little extra brown sugar and the perfect baking time to keep these cookies soft and chewy for days. No dry, crumbly cookies here!
What makes this version stand out from the rest? It’s all about the texture. I spent a lot of time figuring out how to get that perfect soft, almost melt-in-your-mouth crumb without the cookies spreading into flat pancakes. The answer was a simple swap: a bit more brown sugar than white, and making sure you don’t over-bake them. It’s a small change that makes a huge difference. This isn’t just another version of a classic cookie—it’s the best version. It’s the kind of cookie that makes you close your eyes after the first bite. It’s comfort food, pure and simple, and it’s perfect for making a simple afternoon feel special.
What Ingredients You Will Need
This recipe uses simple, wholesome ingredients to deliver that classic, irresistible flavor and perfectly soft texture. Most of these are pantry staples, so you can probably whip up a batch without a trip to the store.
For the Cookie Dough
- 1/2 cup (1 stick) unsalted butter, softened – Makes the cookies tender and rich. I always use unsalted so I can control the salt level. If you only have salted butter, just skip the added salt in the recipe.
- 1/2 cup creamy peanut butter – The star of the show! I recommend a standard brand like Jif or Skippy for the best texture. Natural peanut butter that separates can make the cookies greasy and dry, so stick with the processed stuff for this recipe. It really does work best.
- 1/2 cup granulated sugar – Adds sweetness and helps with spreading.
- 1/2 cup packed light brown sugar – This is the secret to the soft texture! Brown sugar has molasses in it, which keeps the cookies moist and chewy.
- 1 large egg, room temperature – Binds everything together. A room-temperature egg mixes in more evenly, creating a smoother dough.
- 1 teaspoon vanilla extract – Enhances the flavor of the peanut butter and chocolate. Pure vanilla extract is best, but imitation will work in a pinch.
- 1 1/2 cups all-purpose flour – Gives the cookies structure. Spoon the flour into your measuring cup and level it off with a knife for the most accurate measurement.
- 3/4 teaspoon baking soda – Helps the cookies rise and spread just a little.
- 1/2 teaspoon salt – Balances the sweetness. If you use salted peanut butter, you can reduce this to 1/4 teaspoon.
For the Topping
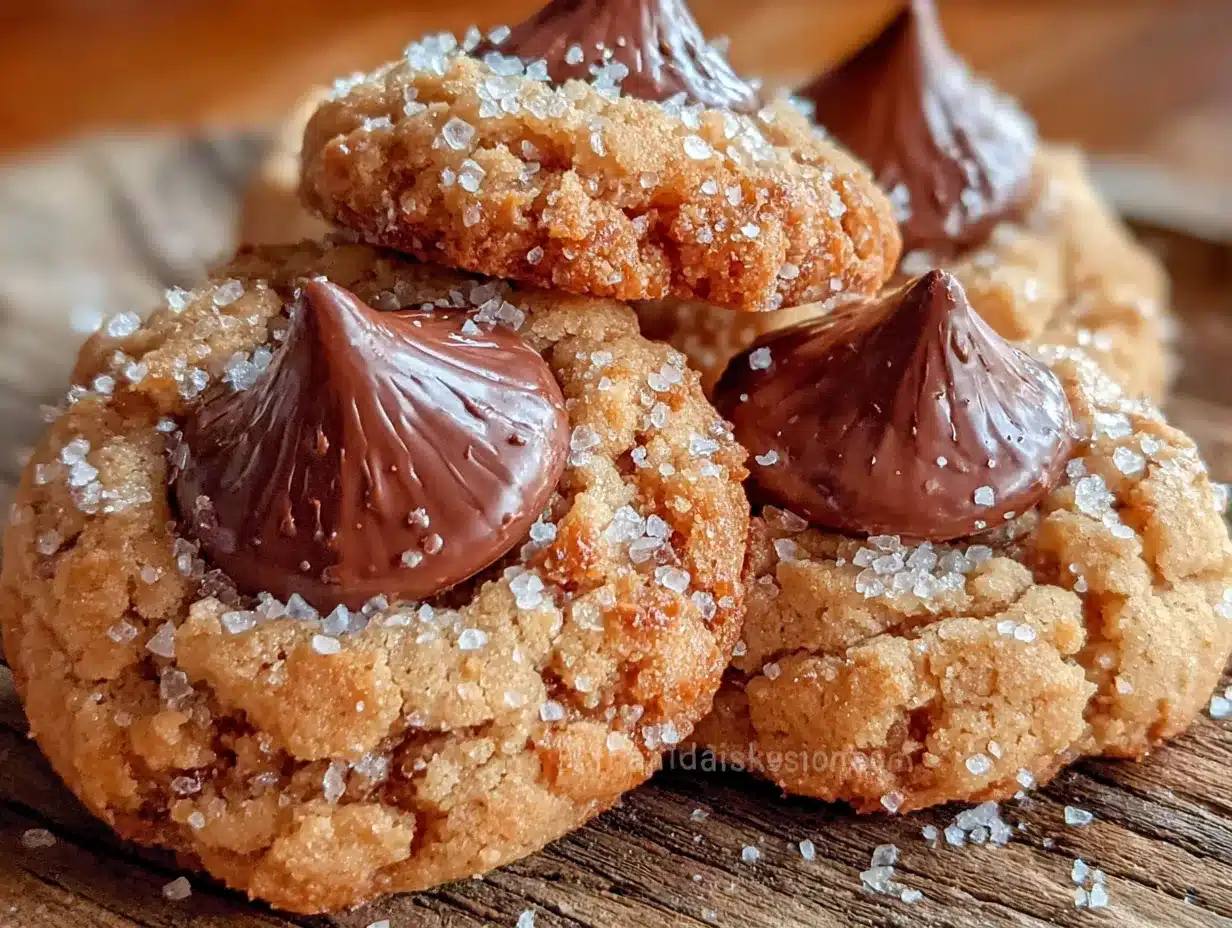
- About 36 milk chocolate Hershey’s Kisses, unwrapped – The classic choice! The milk chocolate is sweet and creamy, which pairs perfectly with the salty peanut butter. You can also use dark chocolate or white chocolate kisses for a different flavor.
- Extra granulated sugar, for rolling – About 1/4 cup. This gives the cookies a sparkly, slightly crunchy exterior that contrasts beautifully with the soft inside.
Ingredient Tip: For the best results, make sure your butter is truly softened—it should give slightly when you press it, but not be melted. If you’re in a hurry, you can cut the butter into small cubes and let it sit on the counter for 15 minutes. Also, don’t skip the step of unwrapping the kisses before you start baking! It’s a small thing, but it saves a lot of frantic fumbling when the cookies are hot out of the oven.
Equipment Needed
You don’t need any fancy tools for this recipe, which is part of its charm. Here’s what you’ll need to get started.
- Electric Mixer (Hand or Stand): A hand mixer works perfectly. A stand mixer with the paddle attachment is even easier, but not necessary. You can cream the butter and sugar by hand with a wooden spoon, but it takes a good bit of elbow grease.
- Mixing Bowls: One large bowl for the dough, and a small bowl for the rolling sugar.
- Baking Sheets: You’ll need two large baking sheets. If you only have one, you can bake the cookies in batches. Just let the sheet cool completely between batches so the dough doesn’t start to melt before it goes in the oven.
- Parchment Paper or Silicone Baking Mat: Highly recommended! It prevents the cookies from sticking and makes cleanup a breeze. A silicone mat also helps the cookies bake more evenly.
- Cooling Rack: Essential for cooling the cookies properly. If you leave them on the hot baking sheet, they’ll continue to cook and can get overdone.
- 1-Tablespoon Cookie Scoop (Optional): Not necessary, but it makes portioning the dough super quick and ensures all your cookies are the same size, so they bake evenly.
Budget-Friendly Tip: If you don’t have parchment paper, you can grease your baking sheets lightly with butter or non-stick spray. Just keep an eye on the cookies—they might spread a tiny bit more.
Preparation Method
Follow these steps, and you’ll have a batch of perfect, soft peanut butter blossom cookies in no time. I’ve added some of my own hard-learned tips along the way to help you avoid my mistakes!
- Preheat and Prep: Preheat your oven to 375°F (190°C). Line two baking sheets with parchment paper or silicone baking mats. This is a small step that makes a big difference.
- Cream the Butter and Sugars: In a large mixing bowl, beat the softened butter, creamy peanut butter, granulated sugar, and packed brown sugar together with an electric mixer on medium speed until the mixture is light and fluffy. This should take about 2-3 minutes. Don’t rush this step—creaming the butter and sugar incorporates air, which helps the cookies rise and gives them a tender texture. It should look pale and a bit grainy when you’re done.
- Add the Wet Ingredients: Beat in the room-temperature egg and the vanilla extract until everything is well combined. Scrape down the sides and bottom of the bowl with a rubber spatula to make sure everything is mixed in. The mixture will look smooth and glossy.
- Combine the Dry Ingredients: In a separate, small bowl, whisk together the all-purpose flour, baking soda, and salt. Whisking ensures the baking soda and salt are evenly distributed throughout the flour, so you don’t end up with a pocket of salt in one cookie.
- Mix Dry into Wet: Gradually add the dry ingredients to the wet mixture, mixing on low speed. Mix just until the flour disappears. Over-mixing at this stage will develop the gluten in the flour, resulting in tough, dense cookies. Stop the mixer as soon as you see the last streak of flour disappear. The dough will be soft, slightly sticky, and very fragrant.
- Shape the Dough: Place the extra 1/4 cup of granulated sugar in a small bowl. Using a 1-tablespoon cookie scoop or your hands, roll the dough into 1-inch balls. A slightly heaping tablespoon is the perfect size. Roll each ball between your palms until it’s smooth, then roll it in the bowl of granulated sugar to coat it completely.
- Bake the Cookies: Place the sugar-coated dough balls about 2 inches apart on the prepared baking sheets. They will spread a little, so give them some room. Bake for 10-12 minutes, or until the cookies are lightly golden brown around the edges and the tops look set and slightly cracked. The centers will still look soft and a little puffy—that’s perfect! My biggest tip: Don’t over-bake them! They will continue to cook on the hot baking sheet after you take them out. If you bake them until they look fully done in the oven, they will be hard and dry when they cool.
- Add the Kisses Immediately: This is the most important step, and you have to work fast. As soon as you pull the baking sheet out of the oven, let the cookies cool on the sheet for exactly 2-3 minutes. Then, working quickly, press an unwrapped Hershey’s Kiss into the center of each cookie. Press down gently until the cookie cracks just a little around the edges. The heat from the cookie will soften the chocolate just enough. If you wait too long, the cookies will cool and the chocolate won’t stick. If you do it right away, the chocolate might melt into a puddle. That 2-3 minute wait is the sweet spot.
- Cool Completely: Carefully transfer the cookies (with the kisses still in them) to a wire cooling rack. Let them cool completely before serving or storing. The chocolate will harden back up as they cool, creating that perfect, iconic blossom shape.
Cooking Tips & Techniques
Over the years, I’ve made a lot of mistakes with this recipe. I’ve had cookies that spread into giant, flat pancakes, and I’ve had cookies that were so dry they crumbled when I tried to press the kiss in. Here’s what I learned so you don’t have to repeat my failures.
The Dough Temperature Trick: If your dough feels too sticky to roll into balls, don’t add more flour! That will make the cookies tough. Instead, pop the bowl of dough in the refrigerator for 15-20 minutes. Chilling the dough solidifies the fat, making it much easier to handle and preventing the cookies from spreading too much in the oven.
Why Your Cookies Might Spread: The most common reason cookies spread is that the butter is too soft or melted. Make sure your butter is softened, not melted. Also, make sure your baking sheet is cool before you put the next batch of dough on it. A hot baking sheet will melt the butter in the dough before it even goes in the oven, leading to flat cookies.
The Perfect Kiss Placement: Don’t push the kiss all the way down to the baking sheet. You want it to sit right in the center of the cookie, so the cookie puffs up around it. If you push it too far, the chocolate will melt and create a mess. A gentle press is all it takes.
Timing is Everything: This is not a recipe you can walk away from. Set a timer for 10 minutes and check the cookies. Every oven runs a little differently. You’re looking for golden edges and a soft, puffy center. When in doubt, take them out. Under-baked cookies are soft and chewy. Over-baked cookies are hard and dry.
Variations & Adaptations
This recipe is a fantastic base for all kinds of fun variations. Here are a few ways I’ve changed it up over the years to keep things interesting.
- Chocolate Swap: Instead of milk chocolate Hershey’s Kisses, try using dark chocolate kisses, white chocolate kisses, or even a chocolate hug (the striped ones) for a different look and flavor. Dark chocolate is great for adults who prefer a less sweet cookie.
- Peanut Butter Upgrade: For an extra peanut-y punch, use crunchy peanut butter instead of creamy. The little bits of peanut add a wonderful texture. You can also use natural peanut butter, but the cookies will be a little less soft and may spread more. I’ve tried it, and the texture is definitely different—still good, but not as perfect.
- Holiday Twist: For Christmas, roll the dough balls in red or green sanding sugar instead of plain granulated sugar. For Halloween, use orange sugar. You can also use the seasonal Hershey’s Kisses flavors, like Candy Cane or Pumpkin Spice.
- Gluten-Free Option: I’ve made these with a 1:1 gluten-free baking flour blend (like Bob’s Red Mill or King Arthur) with great results. The texture is slightly more delicate, but they’re still soft and delicious. Just be sure to measure the flour carefully using the spoon-and-level method.
- Nut-Free Version: If you need a nut-free option for school, you can substitute the peanut butter with a sunflower seed butter like SunButter. The cookies will turn a slightly greenish color (that’s a natural reaction from the sunflower seeds), but they will taste just as good! Add an extra tablespoon of brown sugar to help with the texture.
Serving & Storage Suggestions
These cookies are best served at room temperature, when the chocolate kiss is firm and the cookie is soft and chewy. They’re perfect on their own, but they also make a fantastic addition to a holiday cookie platter or a bake sale table.
How to Serve: Arrange the cookies on a pretty plate and watch them disappear. They pair beautifully with a cold glass of milk (for the kids) or a hot cup of coffee (for the adults). I also love crumbling one over a bowl of vanilla ice cream for a quick and easy sundae.
Storage Instructions: Store the cookies in an airtight container at room temperature for up to 5 days. To keep them extra soft, add a slice of white bread to the container. The bread will absorb excess air and release moisture, keeping the cookies perfectly soft. I’ve been doing this for years, and it works like magic. Just be sure to replace the bread slice every day or two.
Freezing Instructions: These cookies freeze beautifully! You can freeze the baked cookies (with the kisses pressed in) in a freezer-safe bag or container for up to 3 months. Thaw them at room temperature for about 20 minutes before serving. You can also freeze the unbaked dough balls. Roll them into balls, coat them in sugar, and place them on a baking sheet in the freezer until solid. Then transfer the frozen dough balls to a freezer bag. When you’re ready to bake, just place the frozen dough balls on a baking sheet and add 2-3 minutes to the baking time. Fresh cookies anytime you want them!
Nutritional Information & Benefits
While these are definitely a treat, they do have a few redeeming qualities! Here’s a rough estimate of the nutritional information per cookie (based on 36 cookies).
| Nutrient | Amount Per Cookie |
|---|---|
| Calories | ~120 |
| Total Fat | 7g |
| Saturated Fat | 3g |
| Cholesterol | 15mg |
| Sodium | 85mg |
| Total Carbohydrates | 14g |
| Sugars | 9g |
| Protein | 3g |
Pin This Recipe!
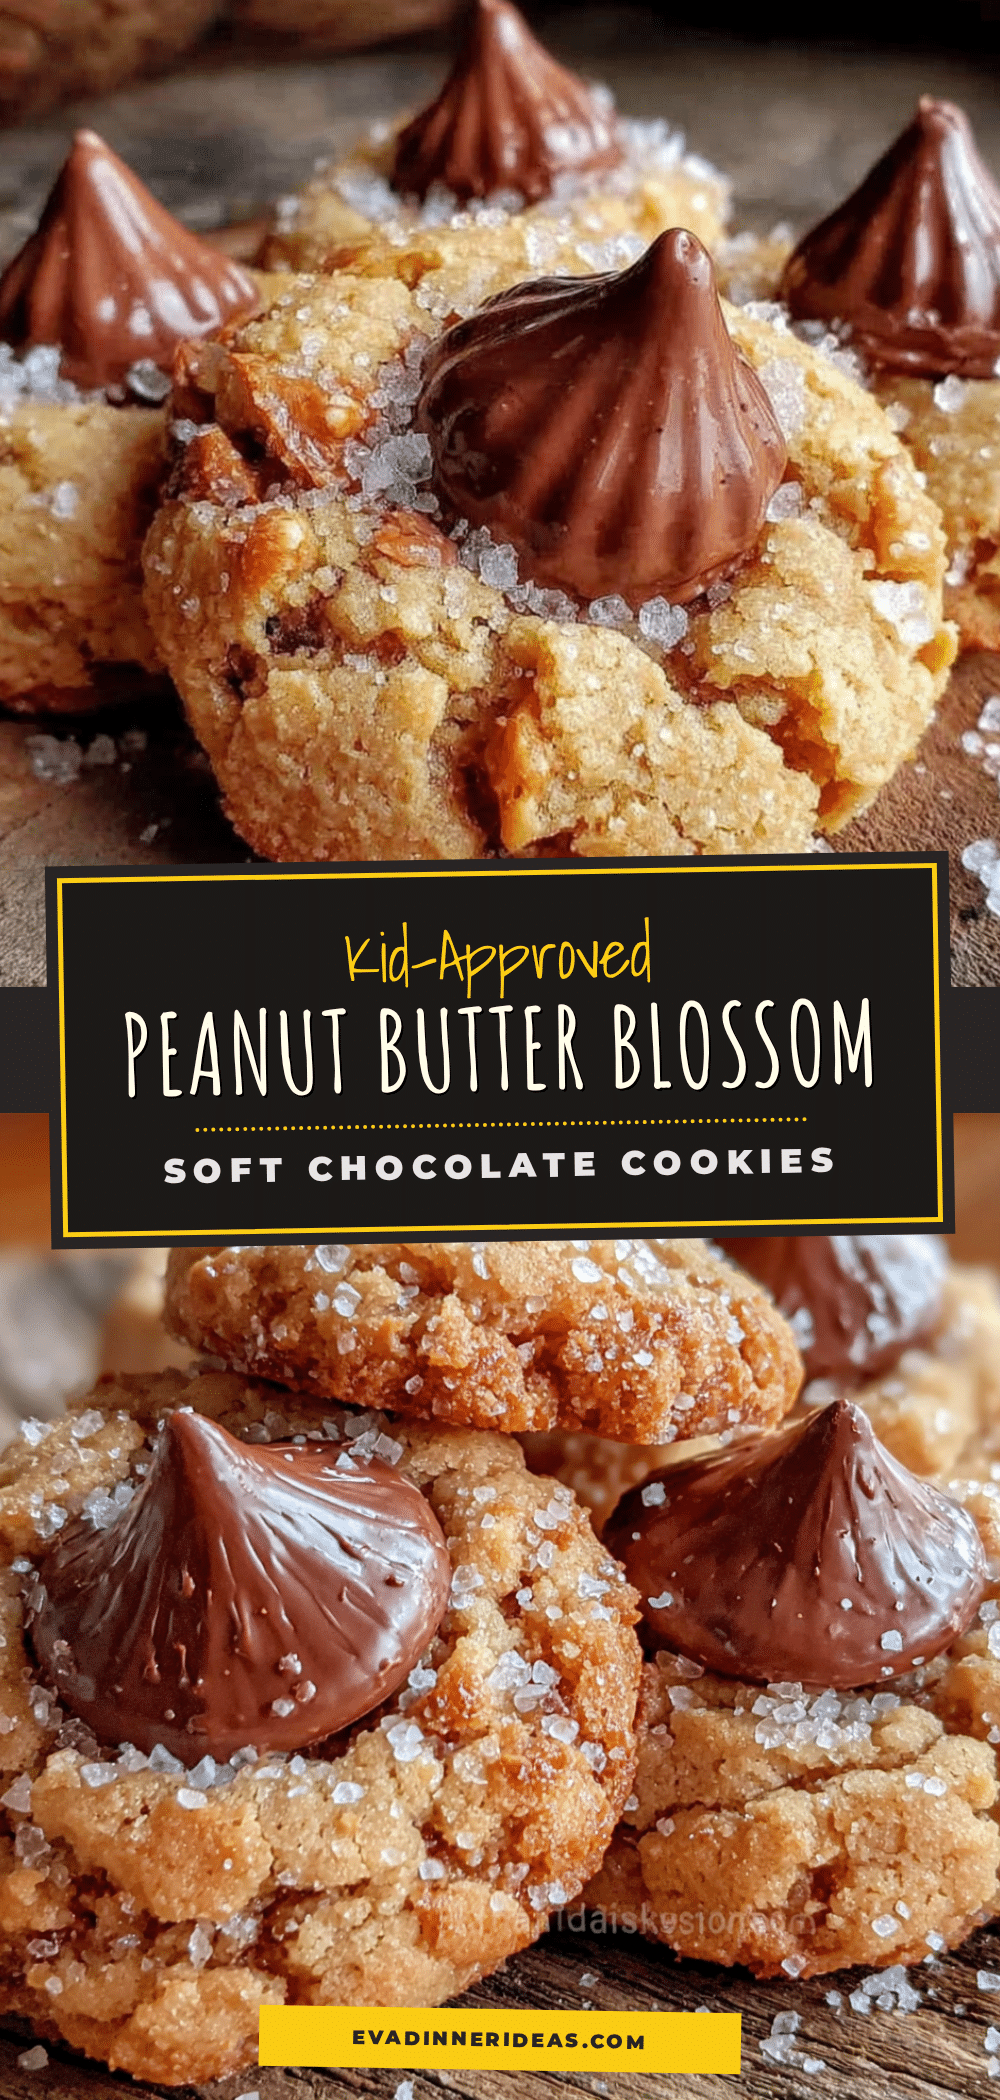
Perfect Soft Peanut Butter Blossom Cookies

These soft peanut butter blossom cookies are quick, easy, and made with simple pantry ingredients. They’re the perfect last-minute treat for bake sales, family gatherings, or a cozy afternoon with the kids.
- Prep Time: 15 minutes
- Cook Time: 12 minutes
- Total Time: 27 minutes
- Yield: 36 cookies 1x
- Category: Dessert
- Cuisine: American
Ingredients
- 1/2 cup (1 stick) unsalted butter, softened
- 1/2 cup creamy peanut butter
- 1/2 cup granulated sugar
- 1/2 cup packed light brown sugar
- 1 large egg, room temperature
- 1 teaspoon vanilla extract
- 1 1/2 cups all-purpose flour
- 3/4 teaspoon baking soda
- 1/2 teaspoon salt
- About 36 milk chocolate Hershey’s Kisses, unwrapped
- Extra granulated sugar, for rolling (about 1/4 cup)
Instructions
- Preheat your oven to 375°F (190°C). Line two baking sheets with parchment paper or silicone baking mats.
- In a large mixing bowl, beat the softened butter, creamy peanut butter, granulated sugar, and packed brown sugar together with an electric mixer on medium speed until light and fluffy, about 2-3 minutes.
- Beat in the room-temperature egg and vanilla extract until well combined. Scrape down the sides and bottom of the bowl.
- In a separate small bowl, whisk together the all-purpose flour, baking soda, and salt.
- Gradually add the dry ingredients to the wet mixture, mixing on low speed just until the flour disappears. Do not over-mix.
- Place the extra 1/4 cup of granulated sugar in a small bowl. Using a 1-tablespoon cookie scoop or your hands, roll the dough into 1-inch balls. Roll each ball in the sugar to coat completely.
- Place the sugar-coated dough balls about 2 inches apart on the prepared baking sheets. Bake for 10-12 minutes, until lightly golden brown around the edges and the tops look set and slightly cracked. The centers will still look soft.
- Remove from the oven and let the cookies cool on the baking sheet for exactly 2-3 minutes. Then, working quickly, press an unwrapped Hershey’s Kiss into the center of each cookie, pressing gently until the cookie cracks slightly around the edges.
- Carefully transfer the cookies to a wire cooling rack and let them cool completely before serving or storing.
Notes
For the best results, use standard processed peanut butter like Jif or Skippy, not natural peanut butter. Don’t over-bake the cookies; they will continue to cook on the hot baking sheet. The 2-3 minute wait before pressing in the kisses is crucial for the perfect texture. Store in an airtight container with a slice of white bread to keep them soft for up to 5 days.
Nutrition
- Serving Size: 1 cookie
- Calories: 120
- Sugar: 9
- Sodium: 85
- Fat: 7
- Saturated Fat: 3
- Carbohydrates: 14
- Protein: 3
Keywords: peanut butter blossom cookies, soft peanut butter cookies, Hershey's Kiss cookies, easy cookie recipe, bake sale cookies, classic cookies


