Marta watched me wrestling with the cookie press for a good ten minutes before she finally set down her basket of wild mushrooms. She didn’t laugh, not exactly, but there was this knowing smile that said she’d been exactly where I was. We’d only met that morning at the community garden, bonding over overgrown zucchini plants, and somehow she’d invited me back to her tiny apartment for coffee. Now here I was, covered in a fine dusting of flour, while her grandmother’s cookie press sat on the counter like some kind of judgmental metal sculpture.
“You’re fighting it,” she said, her accent softening the words. “The dough, it tells you when it’s ready. You have to listen, not push.” She took the press from my hands, her movements slow and deliberate, and showed me how the dough should feel against her palm. Not too stiff, not too soft. Just right. That afternoon, somewhere between the third failed batch and the first perfect little wreath that actually held its shape, I learned something important about baking that no recipe had ever taught me. It’s a conversation, not a command.
The cookies that came out of her oven that day were simple butter spritz cookies—the kind her mother had made for every Polish Christmas she could remember. But Marta had this trick of browning the butter first, just a little, and she’d brush the warm cookies with a whisper-thin almond glaze that made them taste like something from a fancy bakery. Honestly, I almost cried when I bit into one. Maybe you’ve been there—when a cookie is so good it feels personal, like it was made just for you. I went home that evening with the recipe scribbled on a napkin and a new understanding of what makes a cookie truly special.
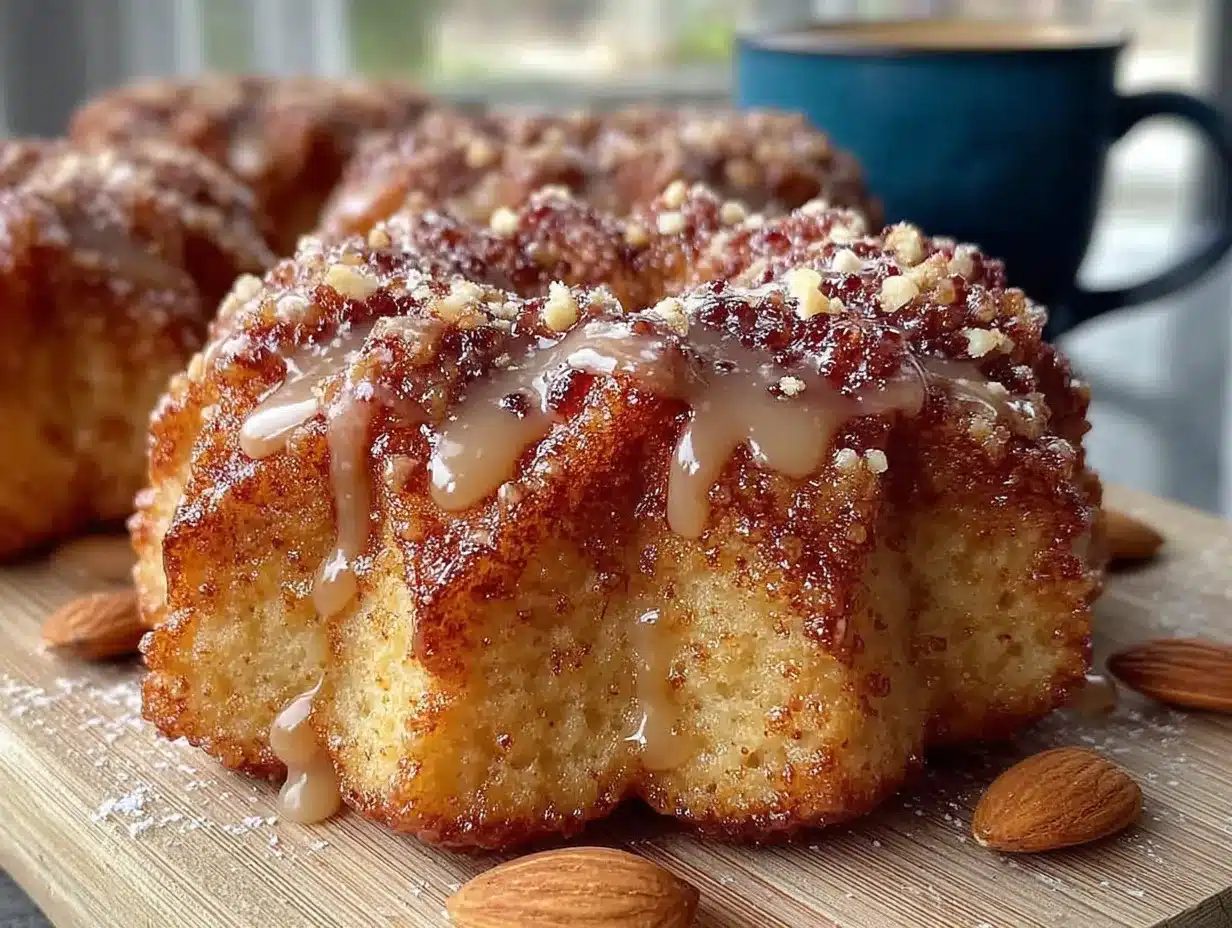
These Perfect Brown Butter Spritz Cookies with Almond Glaze have become my go-to for every holiday gathering, every dinner party, every time I need to show up with something that says “I cared enough to make these from scratch.” They’re the cookies that disappear first from the platter, the ones people hover around pretending they’re not taking another one. And honestly? I love that about them.
Why You’ll Love This Recipe
Let me tell you why these cookies are worth every bit of effort. I’ve tested this recipe more times than I care to admit, tweaking the brown butter timing, adjusting the flour ratio, and even experimenting with different cookie press shapes. What I landed on is a cookie that’s crisp on the edges, tender in the middle, and absolutely bursting with that nutty, caramelized flavor that only brown butter can deliver.
- Impressive Without the Stress: These cookies look like they took hours of piping and decorating, but the cookie press does all the heavy lifting. Your guests will think you’re a pastry chef, and you can keep that little secret to yourself.
- That Brown Butter Magic: Taking an extra five minutes to brown the butter transforms these from ordinary spritz cookies into something truly memorable. It adds this deep, almost toffee-like richness that pairs perfectly with the almond glaze.
- Perfect for Holiday Gatherings: Spritz cookies were practically made for Christmas cookie platters, but this almond-glazed version works beautifully for bridal showers, birthday parties, or any occasion where you want to impress.
- Scales Like a Dream: Need 50 cookies? No problem. This recipe doubles and triples beautifully, and the cookies stay fresh for days, making them ideal for baking ahead of a party.
- That Almond Glaze: It’s not just a drizzle—it’s the finishing touch that makes these cookies unforgettable. The glaze sets to a shiny, crackled finish that looks gorgeous and tastes even better.
What makes these different from every other spritz cookie recipe out there? It’s the brown butter, plain and simple. Most recipes use plain melted butter, but taking that extra step to brown it adds a layer of flavor that makes people stop mid-bite and ask what you did. Plus, I’ve dialed in the exact dough consistency that works with any cookie press, so you won’t end up with mangled cookies and a messy countertop.
These cookies are the kind that make you close your eyes after the first bite—the kind your friends will text you about the next morning asking for the recipe. They’re comfort food reimagined, a little bit fancy but still familiar, and absolutely perfect for hosting.
What Ingredients You Will Need
This recipe uses simple, everyday ingredients, but each one plays an important role in creating that perfect texture and flavor. Most of these are probably already in your pantry, which makes these cookies even more appealing when you need a last-minute showstopper.
For the Brown Butter Spritz Cookies
- 1 cup (226g) unsalted butter (I prefer Kerrygold or Plugrà for their higher fat content, which gives better browning and richer flavor)
- ¾ cup (150g) granulated sugar (regular white sugar works perfectly here—no need for anything fancy)
- 1 large egg yolk (room temperature, please! Cold egg yolk will seize up your butter mixture)
- 1 teaspoon vanilla extract (use pure vanilla extract, not imitation—it makes a real difference in the final flavor)
- ½ teaspoon almond extract (this is the secret ingredient that makes people wonder what that subtle, nutty flavor is)
- 2 cups (250g) all-purpose flour (spoon and level your flour—scooping directly from the bag packs in too much and makes the dough stiff)
- ½ teaspoon salt (fine sea salt or table salt—if using kosher salt, increase to ¾ teaspoon)
For the Almond Glaze
- 1 cup (120g) powdered sugar (sift it if it’s lumpy—nobody wants lumpy glaze on their pretty cookies)
- 2 tablespoons milk or heavy cream (cream gives a richer, more luxurious glaze, but milk works just fine)
- ½ teaspoon almond extract (this is the star of the glaze, so use a good quality extract)
- Pinch of salt (trust me on this—salt balances the sweetness and makes the almond flavor pop)
A few notes on ingredients before we move on. The type of butter you use matters more here than in most cookie recipes because we’re browning it. European-style butters with higher fat content brown more evenly and produce a deeper, nuttier flavor. I’ve tested this with standard American butter too, and it works fine—just watch it more carefully as it can go from brown to burnt faster.
For the almond extract, I highly recommend Nielsen-Massey or Simply Organic. The cheaper extracts can taste artificial and harsh, and since almond is the dominant flavor in both the cookies and the glaze, you want it to taste good. If you’re serving these to someone with nut allergies, you can omit the almond extract and use all vanilla instead—they’ll still be delicious, just different.
One more thing about the flour: if you live in a humid climate, you might need an extra tablespoon or two of flour to get the right dough consistency. The dough should be soft but not sticky, and it should hold its shape when pressed through the cookie press. If it’s too sticky, add flour a tablespoon at a time until it feels right.
Equipment Needed
You don’t need a ton of fancy equipment for these cookies, but a few specific tools will make your life much easier. Here’s what I use:
- Cookie Press: This is non-negotiable for spritz cookies. I use an OXO Good Grips cookie press, which I love because it’s sturdy and the dough doesn’t leak out the back. Wilton also makes a good one that’s more budget-friendly. If you’re using an antique press like Marta’s, just make sure it’s clean and the plunger moves smoothly.
- Heavy-Bottomed Skillet or Saucepan: You need something with a light-colored interior (stainless steel or enameled) so you can see the butter browning. Dark nonstick pans make it hard to tell when the butter is done. I use my trusty All-Clad stainless steel skillet.
- Stand Mixer or Hand Mixer: A stand mixer with the paddle attachment is ideal, but a hand mixer works perfectly too. You just need to cream the butter and sugar until light and fluffy.
- Baking Sheets: I recommend light-colored, rimmed baking sheets. Dark sheets can cause the cookies to brown too quickly on the bottom. If all you have are dark sheets, reduce your oven temperature by 25°F.
- Parchment Paper or Silicone Baking Mats: Spritz cookies are delicate when they’re warm, and parchment paper makes removal a breeze. Silicone mats work too, but the cookies might spread slightly more.
- Cooling Racks: You’ll need these for the glaze to set properly. Don’t skip them—glazing cookies on a flat surface leads to puddles of glaze around the edges.
- Small Whisk or Fork: For mixing the glaze. A fork actually works surprisingly well for this.
If you don’t have a cookie press, I’m sorry to say you can’t really make spritz cookies without one. That said, you could pipe the dough through a piping bag fitted with a star tip—it won’t have quite the same shape, but the flavor will be identical. I’ve done this in a pinch, and nobody complained.
Preparation Method
Alright, let’s get to the good stuff. I’m going to walk you through every step of making these cookies, including all the little tricks I’ve learned from countless batches. Take your time with the brown butter—it’s the most important step, and rushing it will cost you flavor.
Step 1: Brown the Butter
Cut your butter into tablespoon-sized pieces and place them in a light-colored skillet or saucepan. Set it over medium heat and let the butter melt completely, swirling the pan occasionally. Once it’s melted, it’ll start to foam and sputter—that’s the water evaporating. Keep cooking, stirring or swirling frequently, until you see brown specks forming on the bottom of the pan and the butter smells nutty and toasty. This usually takes 5-7 minutes. As soon as it reaches a deep amber color (think the color of a penny), remove it from the heat immediately and pour it into a heatproof bowl to stop the cooking. Let it cool completely—you want it solid but soft, like room-temperature butter. If you try to use it warm, your cookies will spread into flat puddles.
Step 2: Cream the Butter and Sugar
Once your brown butter has cooled to room temperature (it should be soft but not melted), scrape it into the bowl of your stand mixer. Add the granulated sugar and beat on medium-high speed until light and fluffy, about 3 minutes. You’ll notice the mixture looks a little different than regular creamed butter—it’ll be more golden and have a slightly grainier texture. That’s totally normal. Scrape down the sides of the bowl halfway through.
Step 3: Add the Wet Ingredients
Add the egg yolk, vanilla extract, and almond extract to the butter-sugar mixture. Beat on medium speed until everything is well combined and the mixture looks smooth and glossy, about 1 minute. Scrape down the bowl again to make sure everything is incorporated. The mixture should look almost like a thick, shiny paste at this point.
Step 4: Add the Dry Ingredients
In a separate bowl, whisk together the flour and salt. With the mixer on low speed, gradually add the flour mixture to the butter mixture. Mix just until the flour disappears—overmixing will make the cookies tough. The dough should be soft and pliable but not sticky. If it feels too sticky to handle, add an extra tablespoon of flour. If it feels dry and crumbly, add a teaspoon of milk. Trust your hands here.
Step 5: Load the Cookie Press
This is where the magic happens. Fit your cookie press with the disc of your choice—I love the wreath shape for Christmas, but the star and flower shapes work beautifully too. Pack the dough into the press cylinder, making sure to press out any air pockets. Air bubbles will cause the dough to come out unevenly, so take your time with this. Marta taught me to pack it in small handfuls, pressing firmly with my fingers after each addition.
Step 6: Press the Cookies
Hold the cookie press perpendicular to your baking sheet (lined with parchment paper, remember?) and press down firmly, then lift straight up. The dough should release cleanly. If it sticks, your dough might be too warm—pop it in the fridge for 10 minutes. If it comes out ragged or uneven, the dough might be too stiff—let it sit at room temperature for a few minutes. Space the cookies about 1 inch apart—they don’t spread much, but they need a little breathing room. If you’re adding sprinkles or colored sugar, do it now before baking.
Step 7: Bake the Cookies
Preheat your oven to 350°F (175°C). Bake the cookies for 8-10 minutes, or until the edges are just barely golden brown. The centers should still look pale and slightly soft. These cookies go from perfectly baked to overbaked very quickly, so watch them carefully. I start checking at 7 minutes, just to be safe. Let the cookies cool on the baking sheet for 2 minutes, then transfer them to a wire rack to cool completely before glazing.
Step 8: Make the Almond Glaze
While the cookies are cooling, make the glaze. In a small bowl, whisk together the powdered sugar, milk or cream, almond extract, and salt. Start with 2 tablespoons of liquid and add more if needed—you want the glaze to be thick but pourable, like honey. If it’s too thick, add milk a teaspoon at a time. If it’s too thin, add more powdered sugar. This glaze sets up quickly, so make it right before you’re ready to use it.
Step 9: Glaze the Cookies
Once the cookies are completely cool, drizzle the glaze over them using a spoon or a small piping bag. I like to hold the cookie over the bowl and let the excess drip off before placing it on the cooling rack. The glaze will set in about 30 minutes to a beautiful, slightly crackled finish. If you want to add sprinkles or chopped almonds, do it while the glaze is still wet.
Cooking Tips & Techniques
After making these cookies more times than I can count, I’ve collected a few tips that will save you from the same mistakes I made. Take it from someone who’s scraped more than a few burnt butter pans in her day.
Don’t rush the brown butter. I know it’s tempting to crank up the heat and get it over with, but medium heat is your friend here. High heat will burn the butter before it browns evenly, and you’ll end up with bitter, acrid butter that ruins the whole batch. Low and slow is the way to go—it gives you more control and a deeper, more complex flavor. Also, use a light-colored pan so you can actually see what’s happening. I learned this one the hard way after ruining three batches of butter in a dark nonstick skillet.
Temperature matters more than you think. The brown butter needs to be completely cool before you cream it with the sugar. If it’s even slightly warm, the sugar will start to melt and your cookies will spread into thin, crispy discs instead of holding their shape. I usually brown my butter first thing in the morning and let it sit on the counter while I do other things. If you’re in a hurry, you can speed up the cooling by spreading the butter in a thin layer on a plate and popping it in the fridge for 10-15 minutes.
Listen to your dough. Marta’s advice about listening to the dough was spot-on. The perfect spritz cookie dough should be soft enough to press easily but firm enough to hold its shape. If your dough is too stiff, the press will struggle and you’ll get ragged edges. If it’s too soft, the cookies will spread and lose their definition. The ideal consistency is like Play-Doh—malleable but not sticky. If you’re unsure, press a small test cookie. If it looks good, you’re golden.
Work in batches. Don’t try to press all your cookies at once if you’re making a large batch. The dough warms up from the heat of your hands and the friction of the press, and warm dough doesn’t hold its shape as well. Press a sheet of cookies, bake them, and let the dough rest in the fridge while they’re in the oven. This gives you consistent results from the first cookie to the last.
Glaze with confidence. The almond glaze is forgiving, so don’t stress about making it perfect. If it’s too thick, thin it with milk. If it’s too thin, add more powdered sugar. The key is to glaze the cookies when they’re completely cool—warm cookies will melt the glaze into a sticky mess. And don’t be shy with the glaze; a generous drizzle makes these cookies look like they came from a fancy bakery.
Variations & Adaptations
One of the best things about this recipe is how adaptable it is. I’ve played around with different flavors and additions over the years, and here are some of my favorite variations.
Chocolate-Dipped Spritz Cookies: Instead of the almond glaze, dip half of each cooled cookie in melted dark chocolate. Let the excess drip off, then place on parchment paper to set. The combination of brown butter cookies and dark chocolate is absolutely heavenly. I did this for a friend’s birthday party, and people couldn’t stop talking about them.
Lemon-Glazed Spritz Cookies: Swap the almond extract in the glaze for lemon extract and add a teaspoon of fresh lemon zest. The bright, citrusy flavor cuts through the richness of the brown butter beautifully. This version is perfect for spring gatherings or bridal showers.
Gluten-Free Version: Substitute the all-purpose flour with a good quality gluten-free flour blend that contains xanthan gum. I’ve had great results with King Arthur Measure for Measure and Bob’s Red Mill 1-to-1. The texture will be slightly more tender and crumbly, but the flavor is still fantastic. Just be aware that gluten-free dough can be a bit more fragile, so handle the cookies gently.
Spiced Holiday Version: Add ½ teaspoon of cinnamon, ¼ teaspoon of nutmeg, and a pinch of cloves to the flour mixture. The warm spices complement the brown butter and almond flavors beautifully. I make these every Christmas, and they always disappear first from the cookie platter.
Vegan Adaptation: Use vegan butter (I recommend Miyoko’s or Country Crock Plant Butter) and replace the egg yolk with 2 tablespoons of aquafaba (the liquid from a can of chickpeas). The cookies won’t be quite as rich, but they’ll still be delicious. Use a plant-based milk in the glaze, and you’ve got a vegan-friendly treat that everyone can enjoy.
Serving & Storage Suggestions
These cookies are best served at room temperature, with the glaze fully set and slightly crackled. I like to arrange them on a large platter or cake stand, grouped by shape if I’ve used multiple cookie press discs. They look beautiful alongside other holiday cookies or as part of a dessert spread for a dinner party.
For a truly impressive presentation, serve these cookies with a cup of strong coffee or a glass of cold milk. The bitterness of the coffee or the creaminess of the milk balances the sweetness of the glaze perfectly. If you’re hosting a holiday gathering, arrange them on a platter with fresh cranberries, rosemary sprigs, or edible flowers for a festive touch.
Storing the Cookies: Once the glaze is fully set (about 30 minutes), store the cookies in an airtight container at room temperature. Layer them between sheets of parchment paper to prevent the glaze from sticking together. They’ll stay fresh for up to 5 days, though I doubt they’ll last that long. The cookies actually improve after a day or two as the flavors meld together.
Freezing Instructions: You can freeze both baked and unbaked cookies. For baked cookies, freeze them unglazed in an airtight container for up to 3 months. Thaw at room temperature, then glaze and serve. For unbaked dough, shape it into a log, wrap tightly in plastic wrap, and freeze for up to 3 months. Thaw in the refrigerator overnight, let it come to room temperature, then press and bake as directed. I always keep a log of this dough in my freezer for emergency cookie situations.
Reheating Tips: These cookies don’t really need reheating, but if you want that just-baked warmth, pop them in a 300°F oven for 3-4 minutes. Don’t microwave them—the glaze will melt and get sticky.
Nutritional Information & Benefits
Let’s be honest: these are cookies, not health food. But that doesn’t mean they can’t be part of a balanced lifestyle. Here’s the estimated nutritional breakdown for one cookie (based on a batch of 48 cookies):
- Calories: 85-95
- Total Fat: 5g
- Saturated Fat: 3g
- Carbohydrates: 10g
- Sugar: 7g
- Protein: 1g
The brown butter in this recipe does offer some nutritional advantages over regular butter. The browning process creates compounds called melanoidins, which have antioxidant properties. Plus, the small amount of almond extract in the glaze adds a subtle nutty flavor without any actual nuts, making these cookies suitable for those with nut allergies (just be sure to use a nut-free facility extract).
If you’re watching your sugar intake, you can reduce the sugar in the cookie dough to ½ cup without affecting the texture too much. The glaze is harder to reduce since it provides structure and shine, but you can use a sugar-free powdered sugar alternative if needed. These cookies are also naturally vegetarian and can be adapted to be gluten-free or vegan as mentioned in the variations section.
The key is moderation. One or two of these cookies with a cup of tea or coffee is a lovely treat that won’t derail your healthy eating goals. They’re meant to be enjoyed, not feared.
Conclusion
These Perfect Brown Butter Spritz Cookies with Almond Glaze have become a staple in my kitchen for good reason. They’re the cookies I turn to when I need to impress, when I want to show up with something special, or when I just need a little bit of that brown butter magic in my life. The recipe is forgiving enough for beginners but impressive enough for experienced bakers, and the flavor is absolutely unforgettable.
I hope you’ll make these cookies your own. Maybe you’ll add a little extra almond extract, or swap the glaze for chocolate, or press them into shapes that remind you of your own family traditions. That’s the beauty of a good recipe—it’s a starting point, not a rulebook. Marta understood that, and now I do too.
When you make these cookies (and I really hope you do), I’d love to hear about it. Drop a comment below and tell me how they turned out, what variations you tried, or just share your favorite cookie memory. And if you’re feeling generous, tag me in your photos on social media—there’s nothing that makes my day quite like seeing these cookies in someone else’s kitchen. Happy baking, friends!
Frequently Asked Questions
Why did my spritz cookies spread and lose their shape?
This usually happens when the dough is too warm or the butter was too soft when you mixed it. Make sure your brown butter is completely cool before creaming it with the sugar. If your kitchen is warm, chill the dough for 10-15 minutes before pressing. Also, make sure your baking sheets are cool—hot sheets will cause the cookies to spread immediately.
Can I use salted butter instead of unsalted?
Yes, but reduce the added salt in the recipe to ¼ teaspoon. Salted butter has varying amounts of salt depending on the brand, so it’s harder to control the final flavor. I prefer unsalted for baking because it gives me more control, but if all you have is salted, it’ll work just fine.
How do I clean my cookie press?
Clean your cookie press immediately after use—dried dough is much harder to remove. Disassemble the press and wash the parts in warm, soapy water. Use a small brush or toothpick to clean out the discs. Most modern cookie presses are dishwasher-safe, but I prefer to hand wash mine to prevent any damage to the mechanism.
Can I make the dough ahead of time?
Absolutely! You can make the dough up to 3 days in advance and store it in the refrigerator. Let it sit at room temperature for about 15 minutes before pressing, as cold dough is too stiff to press evenly. You can also freeze the dough for up to 3 months—just thaw it in the refrigerator overnight before using.
Why is my almond glaze too thin or too thick?
Glaze consistency depends on the ratio of powdered sugar to liquid. If it’s too thin, add more powdered sugar a tablespoon at a time. If it’s too thick, add milk a teaspoon at a time. The perfect glaze should be thick but pourable, like honey or warm maple syrup. It should coat the back of a spoon but still drip off slowly.
Pin This Recipe!
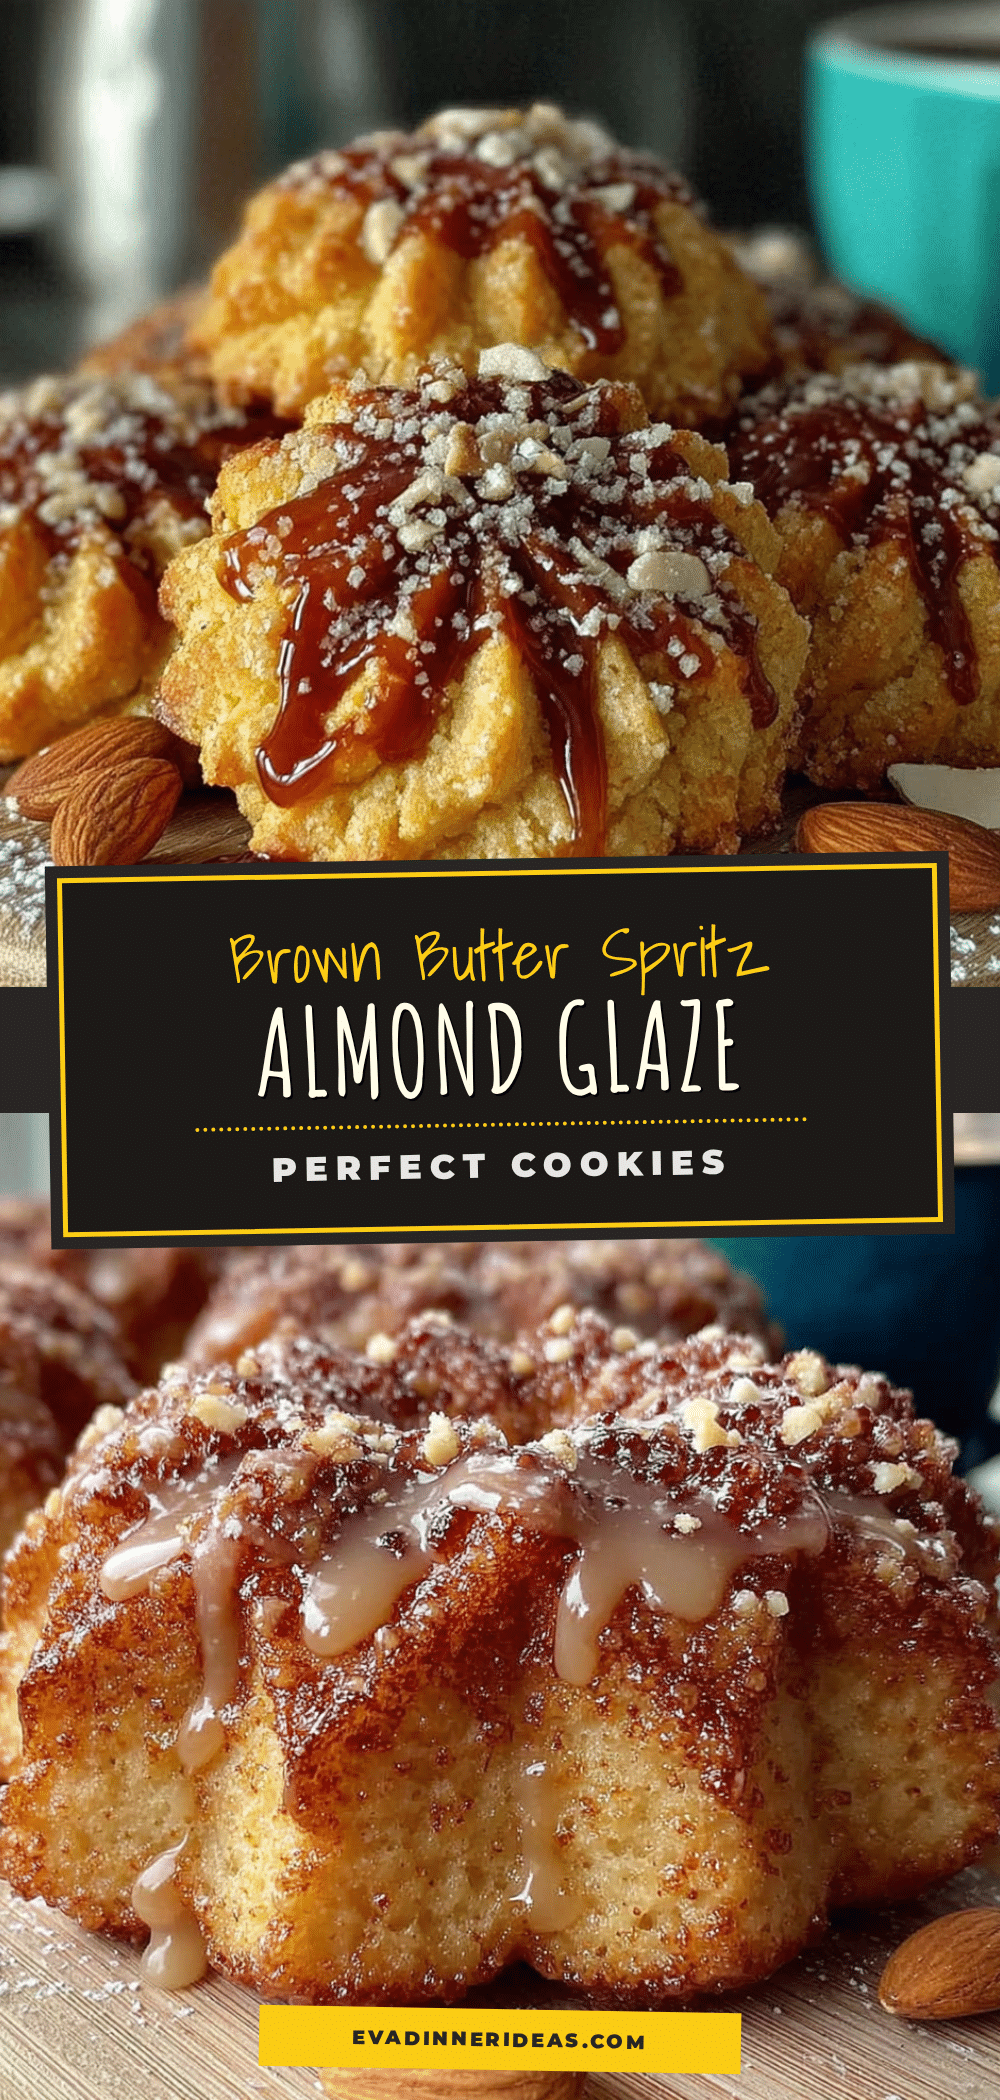
Perfect Brown Butter Spritz Cookies with Easy Almond Glaze
These brown butter spritz cookies are crisp on the edges, tender in the middle, and bursting with nutty, caramelized flavor. Topped with a whisper-thin almond glaze, they look like they came from a fancy bakery but are surprisingly easy to make with a cookie press.
- Prep Time: 20 minutes
- Cook Time: 10 minutes
- Total Time: 1 hour 30 minutes (includes cooling and glazing)
- Yield: 48 cookies 1x
- Category: Dessert
- Cuisine: Polish-American
Ingredients
- 1 cup (226g) unsalted butter
- ¾ cup (150g) granulated sugar
- 1 large egg yolk, room temperature
- 1 teaspoon vanilla extract
- ½ teaspoon almond extract
- 2 cups (250g) all-purpose flour
- ½ teaspoon fine sea salt or table salt
- 1 cup (120g) powdered sugar
- 2 tablespoons milk or heavy cream
- ½ teaspoon almond extract
- Pinch of salt
Instructions
- Brown the butter: Cut butter into tablespoon-sized pieces and place in a light-colored skillet or saucepan over medium heat. Cook, swirling occasionally, until butter melts, foams, and develops brown specks on the bottom and a nutty aroma (5-7 minutes). Immediately remove from heat and pour into a heatproof bowl. Let cool completely until solid but soft (like room-temperature butter).
- Cream the butter and sugar: In a stand mixer with paddle attachment (or using a hand mixer), beat cooled brown butter and granulated sugar on medium-high until light and fluffy, about 3 minutes. Scrape down sides halfway through.
- Add wet ingredients: Add egg yolk, vanilla extract, and ½ teaspoon almond extract. Beat on medium until well combined and smooth, about 1 minute. Scrape down bowl.
- Add dry ingredients: In a separate bowl, whisk together flour and ½ teaspoon salt. With mixer on low, gradually add flour mixture to butter mixture. Mix just until flour disappears. Dough should be soft and pliable but not sticky. If too sticky, add 1 tablespoon flour; if too dry, add 1 teaspoon milk.
- Load the cookie press: Fit press with desired disc. Pack dough into cylinder, pressing out air pockets. Pack in small handfuls, pressing firmly after each addition.
- Press the cookies: Hold press perpendicular to parchment-lined baking sheet. Press firmly, then lift straight up. Space cookies about 1 inch apart. If dough sticks, chill 10 minutes; if ragged, let dough sit at room temperature a few minutes.
- Bake: Preheat oven to 350°F (175°C). Bake 8-10 minutes until edges are just barely golden; centers should still look pale and slightly soft. Cool on baking sheet 2 minutes, then transfer to wire rack to cool completely.
- Make the almond glaze: In a small bowl, whisk together powdered sugar, milk or cream, ½ teaspoon almond extract, and pinch of salt. Start with 2 tablespoons liquid; add more if needed. Glaze should be thick but pourable, like honey.
- Glaze the cookies: Once cookies are completely cool, drizzle glaze over them using a spoon or small piping bag. Hold cookie over bowl to let excess drip off, then place on cooling rack. Glaze sets in about 30 minutes to a crackled finish.
Notes
Brown butter must be completely cool before creaming with sugar to prevent spreading. Use a light-colored pan to monitor browning. Dough consistency should be like Play-Doh. Work in batches to keep dough cool. Glaze sets quickly; make it right before using. Cookies stay fresh up to 5 days in an airtight container at room temperature. Freeze unglazed baked cookies up to 3 months, or freeze dough log up to 3 months.
Nutrition
- Serving Size: 1 cookie
- Calories: 90
- Sugar: 7
- Sodium: 50
- Fat: 5
- Saturated Fat: 3
- Carbohydrates: 10
- Protein: 1
Keywords: spritz cookies, brown butter, almond glaze, Christmas cookies, holiday baking, cookie press cookies, easy cookies


