I was standing in the produce aisle last November, staring at a pile of apples like they held the answer to something, when this specific smell hit me. It wasn’t the apples themselves, but a mix of something earthy and sweet drifting over from the bakery section. And just like that, I was seven years old again, sitting cross-legged on the floor of my friend Maria’s kitchen, watching her abuela pull a pan of cornbread from the oven. The whole room went quiet for a second, just that warm, grainy smell filling every corner.
That woman never measured anything, I swear. She’d toss in a handful of this, a splash of that, and the cornbread always came out golden with edges that crunched when you bit into them. I remember the way she’d crumble it into a huge bowl with her hands, letting the pieces fall like snow. I tried to copy her once, and I made such a mess my mom banned me from “helping” with stuffing for two years. Honestly, fair.
This recipe is my grown-up attempt to catch that feeling again. The nutty brown butter, the sweet pop of apple, the sage that smells like Thanksgiving morning. But I wanted it lighter, you know? Less of the brick-heavy stuffing that sits in your stomach all afternoon. More of the stuff you actually want seconds of. Maybe you’ve been there, chasing a taste you can’t quite name, trying to get it right. This one is pretty close.
Why You’ll Love This Recipe
I’ve tested this stuffing more times than I care to admit, and let me tell you, this version is the one. It has everything you want from a stuffing—the crispy edges, the soft middle, that savory-sweet thing happening—but it doesn’t leave you feeling like you need a nap immediately after. Here is why this one stands out:
- Quick & Easy: From start to table in about 45 minutes, most of which is hands-off baking time. Perfect for when you are juggling a dozen other dishes on the big day.
- Simple Ingredients: No hunting down obscure items. Cornbread, apples, sage, butter, and a few pantry staples. You probably have most of it right now.
- Perfect for Thanksgiving: It fits right in next to the turkey and mashed potatoes, but honestly, I make it for regular Sunday dinners too. It is that good.
- Crowd-Pleaser: I brought this to a Friendsgiving last year, and three people asked for the recipe before the turkey was even carved. It gets rave reviews from picky eaters and foodies alike.
- Unbelievably Delicious: The brown butter adds this deep, nutty richness that makes the whole dish feel decadent, while the apples keep it fresh and bright. It is comfort food that doesn’t weigh you down.
What makes this different from every other cornbread stuffing out there? It is the technique of browning the butter first. That one extra step changes everything. It adds a toasty, almost caramel flavor that pairs perfectly with the sage and the sweetness of the apple. Plus, I use a lighter hand on the broth, so the stuffing stays fluffy and crisp instead of turning into a soggy mess. It is stuffing you can actually feel good about eating.
What Ingredients You Will Need
This recipe uses simple, wholesome ingredients that work together to create something truly special. The magic is in the balance—earthy cornbread, sweet-tart apples, aromatic sage, and that rich brown butter pulling it all together. Most of these are everyday staples, which makes this dish easy to pull off even on a busy holiday morning.
- For the Cornbread Base:
- 1 batch of homemade cornbread (about 6 cups crumbled), preferably a day old (stale cornbread absorbs the broth better without getting mushy)
- Or 1 (16-ounce) store-bought cornbread loaf, crumbled into 1-inch pieces (I like the one from Whole Foods bakery in a pinch)
- For the Brown Butter and Aromatics:
- 6 tablespoons unsalted butter (use a good quality brand like Kerrygold for the richest flavor)
- 1 medium yellow onion, diced (about 1 ½ cups)
- 2 celery stalks, diced (about 1 cup)
- 1 medium Honeycrisp or Fuji apple, peeled, cored, and diced into ½-inch cubes (about 1 cup)
- 3 cloves garlic, minced
- 2 tablespoons fresh sage leaves, chopped (about 8-10 leaves)
- 1 teaspoon fresh thyme leaves (or ½ teaspoon dried)
- ½ teaspoon kosher salt, plus more to taste
- ¼ teaspoon black pepper
- For the Liquid and Eggs:
- 1 ¼ cups low-sodium chicken or vegetable broth (I use Swanson low-sodium chicken broth)
- 2 large eggs, lightly beaten
- Optional Add-ins:
- ¼ cup dried cranberries or chopped dried apricots (adds a nice pop of sweetness)
- ¼ cup toasted pecans or walnuts (for extra crunch)
- ½ cup cooked and crumbled Italian sausage (if you want a non-vegetarian version)
Ingredient Selection Tips: For the best texture, use a cornbread that is not too sweet. A savory, slightly crumbly cornbread works best here. If your cornbread is fresh, you can toast the cubes in a 300°F oven for 10-15 minutes to dry them out a bit. For the apples, you want something that holds its shape when baked, like Honeycrisp, Fuji, or Granny Smith. A softer apple like McIntosh might break down too much.
Equipment Needed
You do not need a fancy kitchen to pull this off. Here is what you will need:
- Large skillet or sauté pan (for browning the butter and cooking the vegetables)
- Large mixing bowl (for combining the stuffing ingredients)
- 9×13-inch baking dish (or a similar 3-quart casserole dish)
- Whisk (for beating the eggs)
- Wooden spoon or silicone spatula (for stirring the vegetables)
- Chef’s knife and cutting board
- Measuring cups and spoons
If you don’t have a 9×13 dish, you can use a 10-inch cast iron skillet for a more rustic presentation. I actually prefer the cast iron skillet sometimes because it gives the edges a deeper, crispier crust. Just make sure to adjust the baking time slightly, as cast iron holds heat longer. A glass or ceramic dish works beautifully too. And honestly, if all you have is a metal baking pan, it will still be delicious. I once made this in a disposable aluminum pan at a friend’s cabin, and it was perfect.
Preparation Method
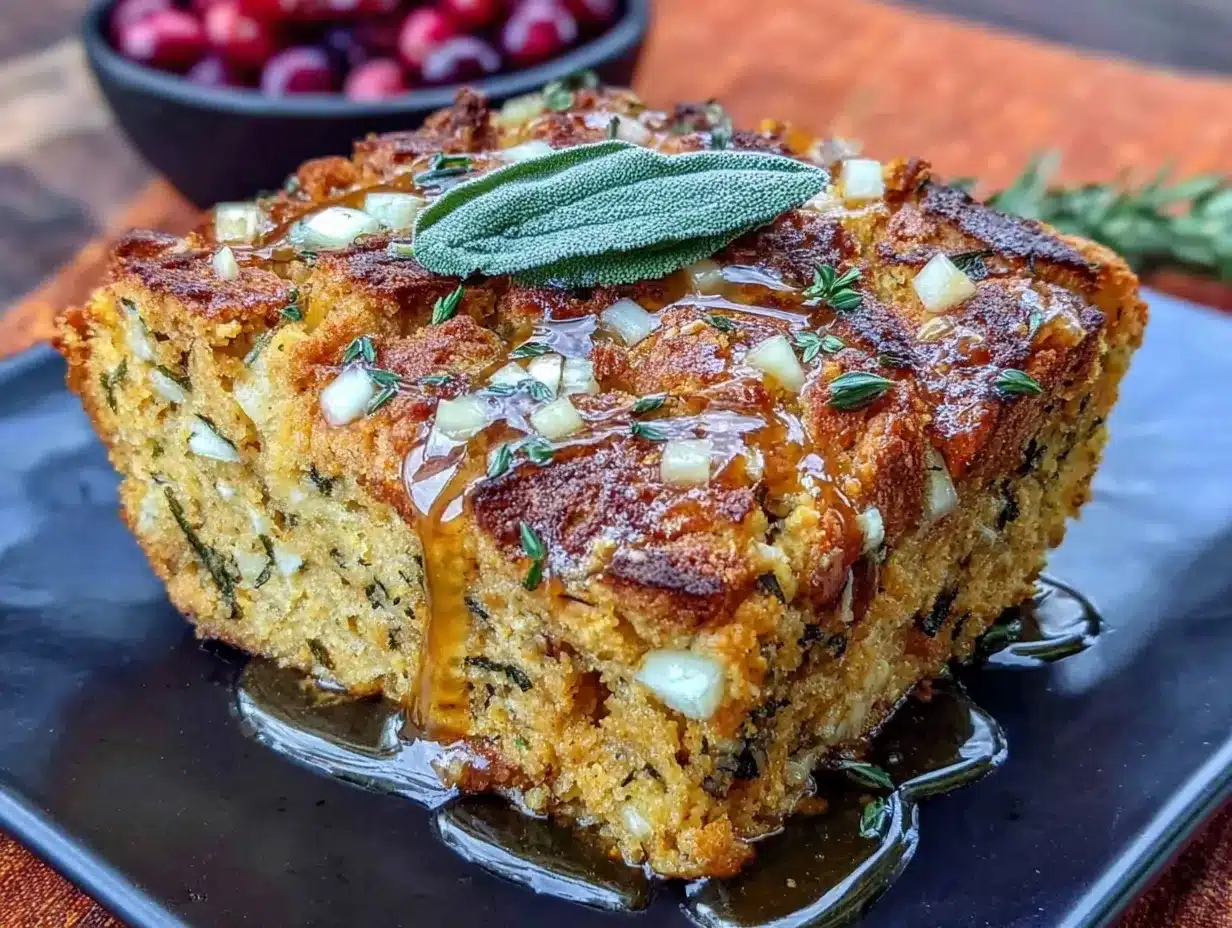
Let’s get cooking. I’ll walk you through this step by step, with all the little details I wish someone had told me the first time.
- Preheat your oven to 375°F (190°C). Position a rack in the middle of the oven. While it is heating, lightly grease your 9×13 baking dish with a little butter or non-stick spray.
- Brown the butter. Place the 6 tablespoons of butter in your large skillet over medium heat. Let it melt completely, then swirl the pan occasionally. The butter will start to foam and then turn a light golden color. Watch it carefully here—it can go from perfect to burnt in seconds. When you see little brown specks forming at the bottom of the pan and it smells nutty and amazing (about 4-5 minutes), immediately pour it into a heatproof bowl, leaving the browned bits in the pan. Set the browned butter aside to cool slightly.
- Cook the vegetables. In the same skillet (with the browned butter bits still in it), add the diced onion and celery. Cook over medium heat, stirring occasionally, for about 6-7 minutes until the onions are translucent and the celery has softened. The browned bits will dissolve into the vegetables, adding so much flavor.
- Add the apple and aromatics. Stir in the diced apple, minced garlic, chopped sage, and thyme. Cook for another 3-4 minutes until the apple has softened slightly but still holds its shape. Season with the salt and pepper. Remove from heat and let this mixture cool for a few minutes.
- Combine the dry ingredients. In your large mixing bowl, add the crumbled cornbread. If you are using dried cranberries or nuts, toss them in now. The cornbread should be in irregular pieces—some smaller crumbs, some bigger chunks. That texture variety is what makes the stuffing interesting.
- Mix the wet ingredients. In a small bowl or liquid measuring cup, whisk together the chicken broth, beaten eggs, and the reserved browned butter. Make sure the browned butter has cooled slightly so it doesn’t cook the eggs when you mix them.
- Bring it all together. Pour the cooked vegetable mixture over the cornbread and toss gently to combine. Then, pour the broth mixture over the top. Use a spatula to fold everything together until the cornbread is evenly moistened. Don’t overmix—you want some texture, not a paste. The mixture should look moist but not soupy. If it looks dry, add a splash more broth.
- Bake the stuffing. Transfer the mixture to your prepared baking dish and spread it into an even layer. Bake uncovered for 30-35 minutes, until the top is golden brown and crispy around the edges. The center should be set and not jiggly. For extra crispy edges, you can broil it for the last 2-3 minutes, but watch it like a hawk.
- Rest and serve. Let the stuffing rest for 5-10 minutes before serving. This allows the flavors to settle and the texture to firm up slightly. Serve warm.
Sensory Cues: When the brown butter is ready, it will smell like toasted nuts and caramel. The vegetables are done when the onions are translucent and the celery has lost its raw crunch. The finished stuffing should have a golden-brown top with crispy edges, and the inside should be tender and fragrant with sage and apple.
Cooking Tips & Techniques
I have made this stuffing about a dozen times, and I have learned a few things the hard way. Here are my best tips to make sure yours turns out perfect.
- Dry cornbread is your friend. Fresh, moist cornbread will turn into mush. I always make my cornbread a day or two ahead and leave it out on the counter, uncovered, to dry out. If you are in a hurry, you can cube it and toast it in a 300°F oven for 10-15 minutes.
- Don’t skip the browning step. I know it adds an extra few minutes, but that nutty flavor is the backbone of this dish. The first time I made this, I was impatient and skipped it. The stuffing was fine, but it was missing that something special. Brown the butter. Trust me.
- Watch the butter like a hawk. The line between browned butter and burnt butter is thin. Once you see those brown specks form and smell that nutty aroma, pour it out immediately. I once got distracted by my phone and ended up with black butter. The whole kitchen smelled like burnt popcorn.
- Use low-sodium broth. Cornbread can be salty on its own, and you want to control the seasoning. Low-sodium broth lets you adjust the salt level to your taste.
- Don’t overmix. You want distinct pieces of cornbread, not a homogeneous paste. Gently fold the ingredients together until just combined. A few dry spots are fine; they will absorb moisture during baking.
- Let it rest. I know it is hard to wait when the whole house smells amazing, but letting the stuffing rest for 5-10 minutes helps it set and makes it easier to serve. It also allows the flavors to meld together.
Variations & Adaptations
This recipe is a great base, and you can easily adapt it to fit your needs or what you have on hand. Here are some of my favorite variations:
- Vegetarian/Vegan: Use vegetable broth instead of chicken broth. For a vegan version, substitute the butter with a high-quality vegan butter (I like Miyoko’s) and use a flax egg (1 tablespoon ground flaxseed mixed with 3 tablespoons water, let sit for 5 minutes) in place of the regular eggs. It works surprisingly well.
- Gluten-Free: This recipe is naturally gluten-free if you use a gluten-free cornbread. Most traditional cornbread recipes are made with cornmeal, which is gluten-free, but check your baking powder and any add-ins. Make sure your broth is also certified gluten-free.
- Add Some Protein: For a heartier stuffing, add ½ cup of cooked and crumbled Italian sausage, bacon, or diced pancetta. Cook it in the skillet before the vegetables and use the rendered fat in place of some of the butter. It adds a smoky, savory depth that is incredible.
- Change the Fruit: No apples? Use a firm pear like Bosc or Anjou. In the summer, I have used diced peaches (drained well) for a completely different but delicious twist. Dried cherries or cranberries also work beautifully.
- Herb Swap: If you don’t have fresh sage, you can use 1 teaspoon of dried rubbed sage. Rosemary also works well here—use 1 tablespoon of fresh, finely chopped rosemary. A mix of parsley and thyme is another great combination.
- Make it Spicy: Add a pinch of red pepper flakes or a diced jalapeño (seeds removed) when cooking the vegetables. The heat pairs surprisingly well with the sweet apple and nutty brown butter.
Serving & Storage Suggestions
This stuffing is best served warm, straight from the oven, with the edges still crispy and the inside soft and fragrant. I love to serve it alongside a classic roast turkey, but it is also fantastic with roasted chicken, pork chops, or even a simple green salad for a lighter meal. A dollop of cranberry sauce on the side is never a bad idea.
Storage: Leftover stuffing keeps well in an airtight container in the refrigerator for up to 4 days. The flavors actually meld together overnight, so it might taste even better the next day. I have been known to eat it cold, straight from the fridge, for breakfast. No judgment.
Reheating: The best way to reheat stuffing is in the oven. Place it in a baking dish, add a splash of broth or water to keep it moist, cover with foil, and bake at 350°F for 15-20 minutes. Uncover for the last 5 minutes to re-crisp the top. You can also reheat individual portions in the microwave, but the texture will be softer. For a quick fix, I sometimes reheat it in a skillet over medium heat with a little butter, which gives it a nice crispy crust.
Freezing: You can freeze this stuffing either before or after baking. To freeze before baking, assemble the stuffing in the baking dish, cover tightly with plastic wrap and then foil, and freeze for up to 3 months. Thaw in the refrigerator overnight before baking. To freeze after baking, let it cool completely, then wrap and freeze. Reheat from frozen in a 350°F oven, covered, for about 30-40 minutes.
Nutritional Information & Benefits
This lighter version of cornbread stuffing swaps out heavy cream and excess butter for the rich flavor of brown butter and the natural sweetness of apples. Here is an approximate nutritional breakdown per serving (based on 8 servings):
- Calories: 285
- Fat: 14g
- Saturated Fat: 8g
- Cholesterol: 75mg
- Sodium: 480mg
- Carbohydrates: 34g
- Fiber: 3g
- Sugar: 9g
- Protein: 6g
Health Benefits: This recipe uses wholesome ingredients that offer real nutritional value. Apples provide fiber and vitamin C, while sage is known for its antioxidant and anti-inflammatory properties. Using low-sodium broth helps control salt intake, and the eggs add a good amount of protein to help keep you full. By browning the butter, you get maximum flavor with less overall fat than a traditional stuffing recipe. It is comfort food that works with your health goals, not against them.
Dietary Considerations: This recipe is naturally vegetarian and can be made vegan and gluten-free with simple substitutions. It contains dairy (butter) and eggs.
Conclusion
This Lighter Brown Butter Cornbread Stuffing with Sage and Apple is the dish I keep coming back to. It has that nostalgic, soul-warming quality of the stuffing I remember from Maria’s kitchen, but it feels right for how I want to eat now. It is rich and satisfying without being heavy, and it brings a little brightness to the table with those sweet chunks of apple and the earthy sage.
I hope you give it a try, whether for Thanksgiving, a cozy Sunday dinner, or just because you are craving something warm and delicious. Feel free to make it your own—swap in your favorite herbs, add some nuts, or go all in with the sausage. That is the beauty of a recipe like this. It is a starting point, not a rulebook.
I would love to hear how it turns out for you. Drop a comment below and let me know if you tried any variations or if this has become a new favorite in your kitchen. And if you share a photo on Pinterest, tag me so I can see your beautiful creation. Happy cooking, friends!
Frequently Asked Questions
Can I make this stuffing ahead of time?
Absolutely! You can assemble the stuffing completely, cover it, and refrigerate it for up to 24 hours before baking. Just add about 10 minutes to the baking time since you are starting from cold. It is a huge time-saver on a busy holiday.
Can I use boxed cornbread mix?
Yes, you can use a boxed mix. Just bake it according to the package directions and let it cool completely before crumbling. I recommend using a savory mix rather than a sweet one, as the sweetness can overpower the other flavors. Jiffy cornbread mix works fine, but reduce any added sugar in the recipe.
My stuffing came out too dry. What did I do wrong?
There are a few possible reasons. Your cornbread might have been too dry to begin with, or you might not have used enough broth. The mixture should look moist and shiny before baking. Next time, add an extra ¼ cup of broth and make sure the cornbread pieces are evenly coated. Also, make sure you are covering the dish if you are reheating it, as uncovered baking can dry it out.
Can I use dried sage instead of fresh?
Yes, you can substitute 1 teaspoon of dried rubbed sage for the 2 tablespoons of fresh sage. Dried herbs are more concentrated, so you need less. Add it when you add the salt and pepper to the vegetable mixture so it can rehydrate and release its flavor.
How do I get extra crispy edges on my stuffing?
For the crispiest edges, spread the stuffing in a thinner layer in a larger baking dish. You can also broil it for the last 2-3 minutes of baking. Just watch it carefully so it doesn’t burn. A cast iron skillet also gives amazing crispy edges because it holds heat so well.
Pin This Recipe!
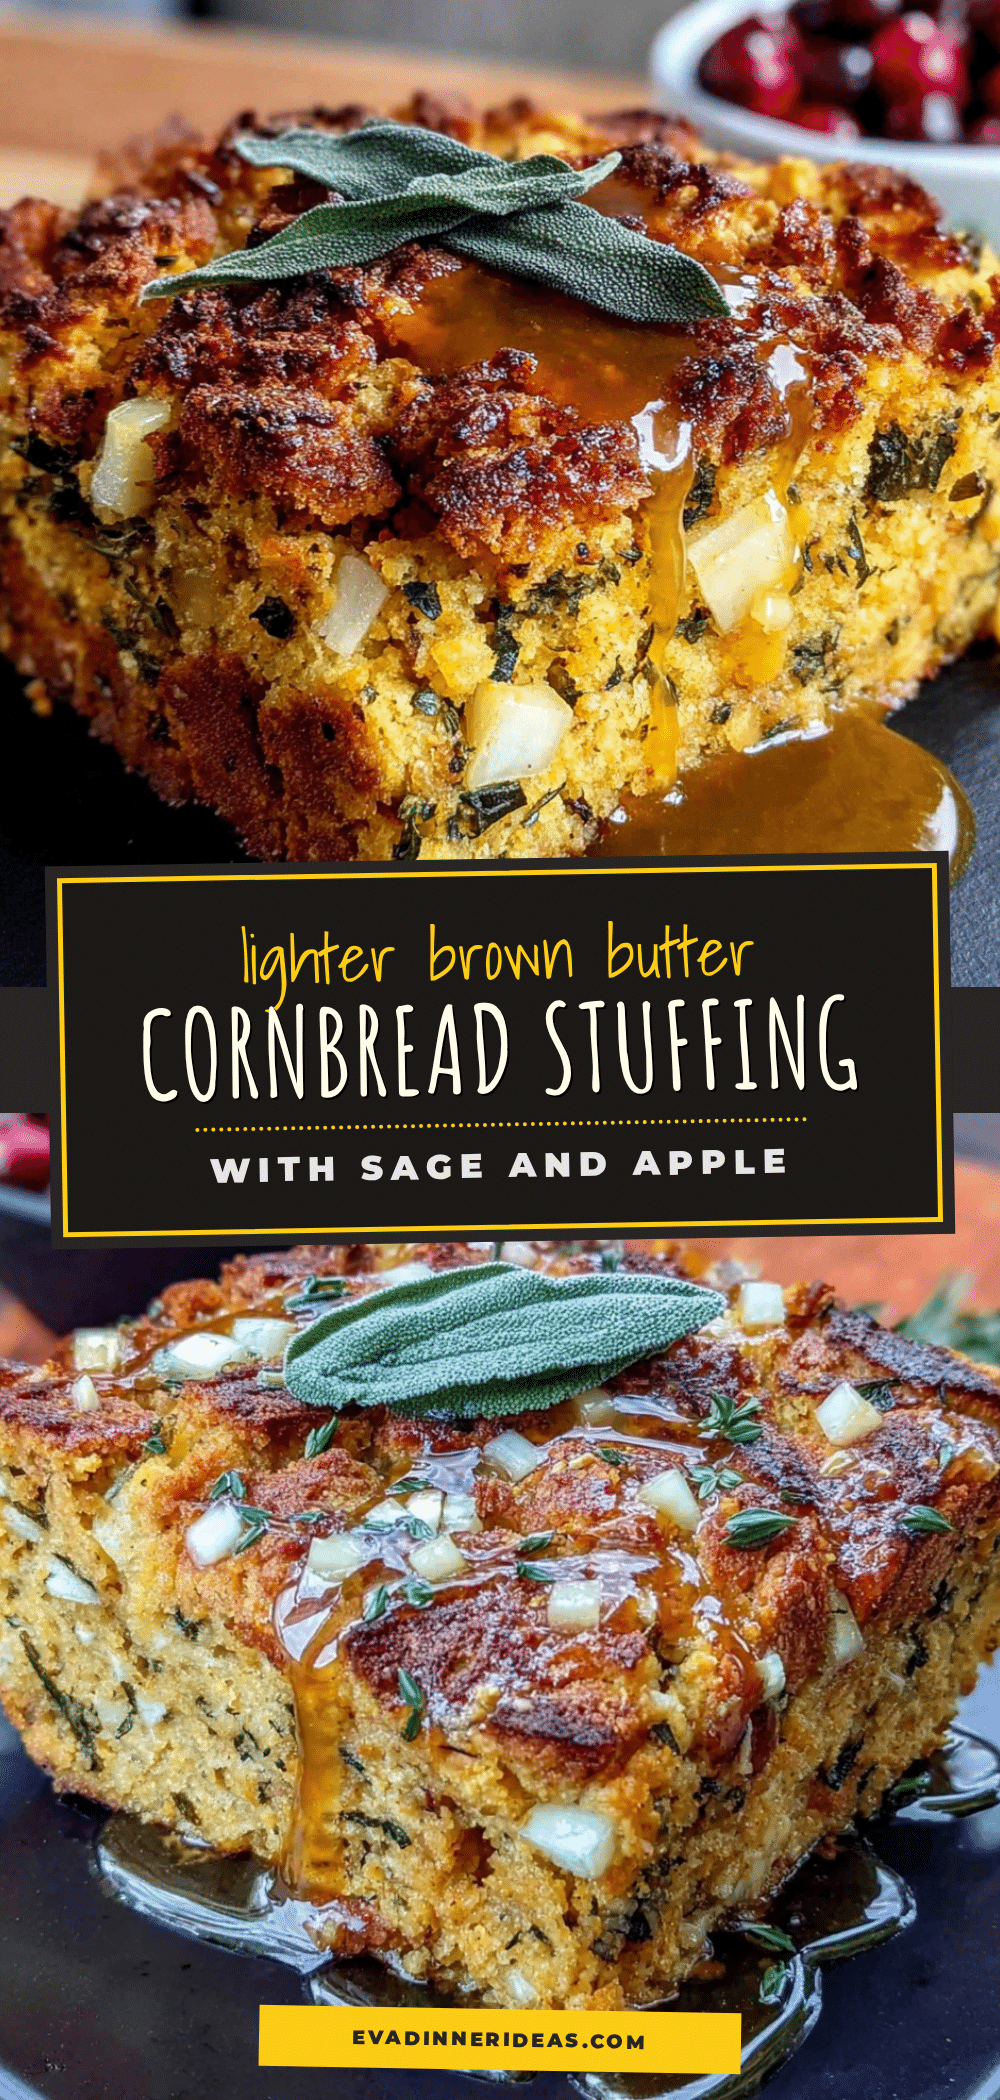
Lighter Brown Butter Cornbread Stuffing with Sage and Apple
A lighter, fluffier cornbread stuffing with nutty brown butter, sweet apples, and aromatic sage. Perfect for Thanksgiving or any cozy dinner, this recipe delivers crispy edges and a soft, flavorful center without the heavy feeling.
- Prep Time: 15 minutes
- Cook Time: 35 minutes
- Total Time: 50 minutes
- Yield: 8 servings 1x
- Category: Side Dish
- Cuisine: American
Ingredients
- 1 batch homemade cornbread (about 6 cups crumbled), preferably a day old
- Or 1 (16-ounce) store-bought cornbread loaf, crumbled into 1-inch pieces
- 6 tablespoons unsalted butter (e.g., Kerrygold)
- 1 medium yellow onion, diced (about 1 ½ cups)
- 2 celery stalks, diced (about 1 cup)
- 1 medium Honeycrisp or Fuji apple, peeled, cored, and diced into ½-inch cubes (about 1 cup)
- 3 cloves garlic, minced
- 2 tablespoons fresh sage leaves, chopped (about 8–10 leaves)
- 1 teaspoon fresh thyme leaves (or ½ teaspoon dried)
- ½ teaspoon kosher salt, plus more to taste
- ¼ teaspoon black pepper
- 1 ¼ cups low-sodium chicken or vegetable broth (e.g., Swanson)
- 2 large eggs, lightly beaten
- ¼ cup dried cranberries or chopped dried apricots (optional)
- ¼ cup toasted pecans or walnuts (optional)
- ½ cup cooked and crumbled Italian sausage (optional)
Instructions
- Preheat your oven to 375°F (190°C). Position a rack in the middle of the oven. Lightly grease a 9×13-inch baking dish with butter or non-stick spray.
- Brown the butter: Place 6 tablespoons of butter in a large skillet over medium heat. Melt completely, then swirl occasionally. When the butter foams and turns light golden with brown specks and a nutty aroma (about 4-5 minutes), immediately pour into a heatproof bowl, leaving browned bits in the pan. Set aside to cool slightly.
- Cook the vegetables: In the same skillet, add diced onion and celery. Cook over medium heat, stirring occasionally, for 6-7 minutes until onions are translucent and celery is softened.
- Add apple and aromatics: Stir in diced apple, minced garlic, chopped sage, and thyme. Cook for 3-4 minutes until apple softens slightly but holds its shape. Season with salt and pepper. Remove from heat and let cool a few minutes.
- Combine dry ingredients: In a large mixing bowl, add crumbled cornbread. If using dried cranberries or nuts, toss them in now.
- Mix wet ingredients: In a small bowl or liquid measuring cup, whisk together chicken broth, beaten eggs, and reserved browned butter (cooled slightly).
- Bring it together: Pour cooked vegetable mixture over cornbread and toss gently. Then pour broth mixture over the top. Fold with a spatula until evenly moistened. Do not overmix. Mixture should look moist but not soupy.
- Bake: Transfer mixture to prepared baking dish and spread evenly. Bake uncovered for 30-35 minutes until top is golden brown and edges are crispy. Center should be set. For extra crispy edges, broil for 2-3 minutes, watching carefully.
- Rest and serve: Let stuffing rest for 5-10 minutes before serving. Serve warm.
Notes
For best texture, use day-old or toasted cornbread. Watch brown butter carefully to avoid burning. Use low-sodium broth to control salt. Let stuffing rest before serving for best texture. Can be assembled up to 24 hours ahead and refrigerated before baking.
Nutrition
- Serving Size: 1 serving (about 1 c
- Calories: 285
- Sugar: 9
- Sodium: 480
- Fat: 14
- Saturated Fat: 8
- Carbohydrates: 34
- Fiber: 3
- Protein: 6
Keywords: cornbread stuffing, brown butter stuffing, sage apple stuffing, Thanksgiving stuffing, lighter stuffing, holiday side dish


