The lady at the community garden plot next to mine watched me trying to dig up a stubborn carrot for a good two minutes before she finally spoke. “You’re fighting that dirt like it owes you money,” she said, handing me a little hand fork from her basket. Her name was Eleanor, and she was probably seventy-five, with dirt permanently embedded under her fingernails and the kind of laugh that made you want to tell her all your secrets. We got to talking, and somehow—the way these things happen when you’re both kneeling in the soil—she told me about the red velvet cake she used to make for her husband’s birthday every single year. “But these days,” she said, wiping her forehead with the back of her hand, “I want something lighter. Something that doesn’t sit in your stomach like a brick.”
I thought about Eleanor’s words for weeks after that afternoon. Honestly, I couldn’t shake the idea of a red velvet dessert that felt airy instead of heavy. You know that feeling when you want the richness of cheesecake and the charm of red velvet, but you also want to be able to move after you eat it? That’s exactly what I was chasing. I went home and started experimenting, and let me tell you—the first batch was a disaster. I forgot the cocoa powder entirely, and the brownies came out looking like weird pinkish blobs. I mean, they still tasted okay, but visually? A total mess. Eleanor would have laughed at me.
But the second batch? That was the one. I swapped in a lighter cream cheese mixture, cut back on the butter just a touch, and found that perfect balance where the brownie is fudgy but not heavy, and the cheesecake swirl is creamy but not dense. The result is these Light & Dreamy Red Velvet Cheesecake Brownies—a dessert that gives you all the nostalgic red velvet flavor without that overly rich feeling afterward. Every time I make them, I think of Eleanor and her garden fork and the way she said “lighter” like it was a magic word. Maybe you’ve been there too—wanting a dessert that feels indulgent but doesn’t weigh you down. This one’s for you. And for Eleanor.
Why You’ll Love This Recipe
These Light & Dreamy Red Velvet Cheesecake Brownies aren’t just another pretty dessert. They’re the result of a lot of trial and error, a few honest kitchen failures, and a genuine desire to make something that tastes decadent without being heavy. Here’s why I think you’ll fall for them:
- Quick & Easy: From start to finish, you’re looking at about an hour. That includes baking and cooling time. Perfect for a weekend afternoon project or a last-minute treat for unexpected guests.
- Simple Ingredients: You probably have most of these in your pantry already. No weird specialty items, no expensive extracts you’ll only use once. Just straightforward, honest ingredients.
- Perfect for Celebrations: The red color makes these brownies a natural fit for Valentine’s Day, Christmas, anniversaries, or honestly, just a Tuesday that needs a little cheering up. They’re festive without being fussy.
- Crowd-Pleaser: I’ve brought these to potlucks, book club meetings, and family dinners. They disappear every single time. Kids love the color, adults love the flavor, and everyone loves that they don’t feel too heavy.
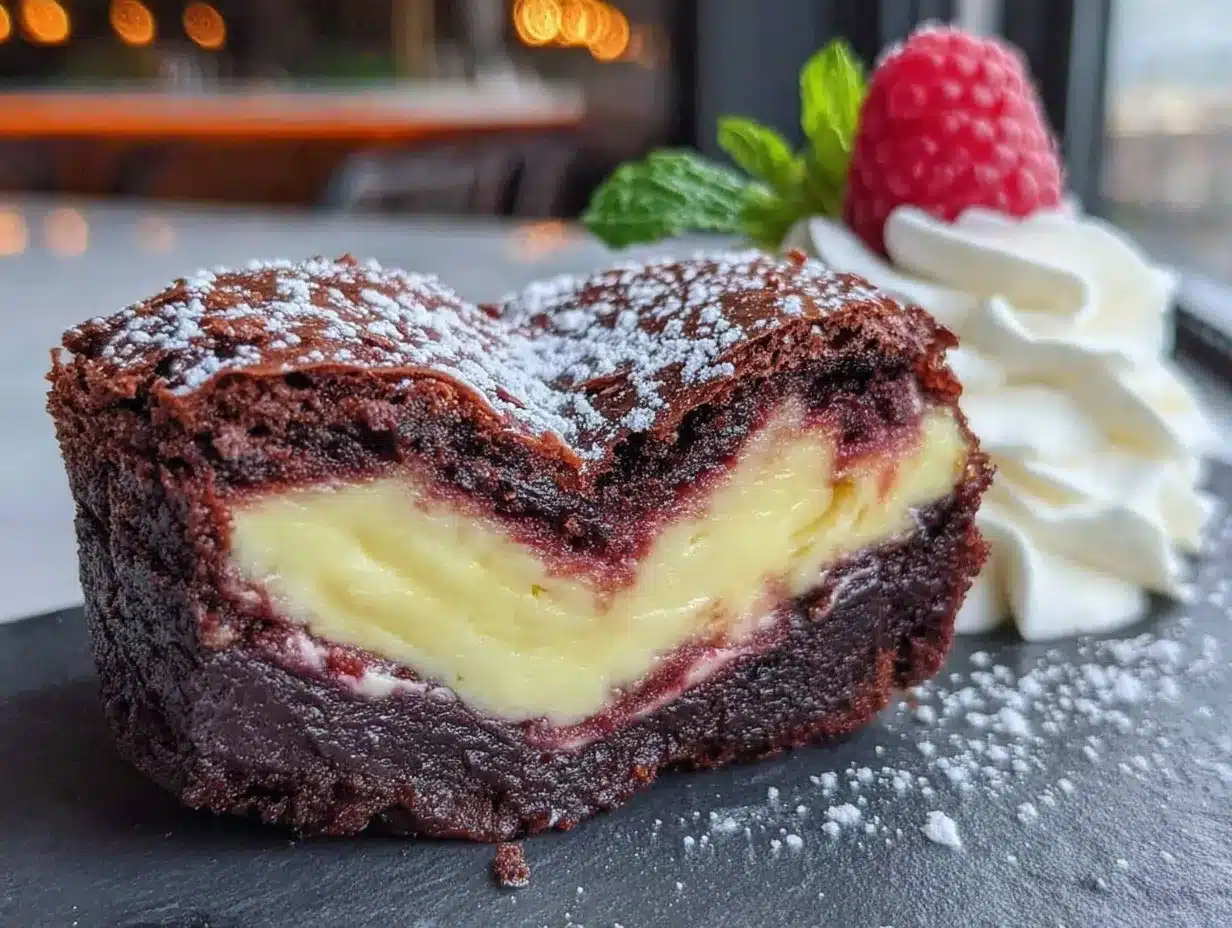
- Unbelievably Delicious: The texture is where these really shine. The brownie layer is tender and moist with that classic red velvet tang, and the cheesecake swirl is light, creamy, and just sweet enough. Together? Absolute magic.
What makes these different from every other red velvet cheesecake brownie recipe out there? It’s the technique. I blend the cream cheese with a touch of sour cream for extra lightness, and I use a specific ratio of cocoa to buttermilk that gives you that signature red velvet flavor without making the brownie dense. I’ve tested this at least six times—my neighbors have been very patient taste-testers—and this version is the one that consistently gets the “can I have the recipe?” response. It’s comfort food reimagined: healthier in spirit, faster to make, but with the same soul-soothing satisfaction you want from a really good dessert.
What Ingredients You Will Need
This recipe uses simple, wholesome ingredients to deliver that signature red velvet flavor and dreamy cheesecake swirl without any unnecessary fuss. Most of these are pantry staples, which makes this a great recipe to pull together on a whim.
For the Red Velvet Brownie Layer
- 1/2 cup (113g) unsalted butter, melted (I use Kerrygold for its rich flavor, but any good unsalted butter works)
- 3/4 cup (150g) granulated sugar
- 1/4 cup (50g) light brown sugar, packed (adds a subtle molasses note that deepens the flavor)
- 2 large eggs, room temperature (room temperature is important here—cold eggs can make the batter seize up)
- 1 teaspoon vanilla extract
- 1 tablespoon (15ml) buttermilk (the acid in buttermilk is key for that classic red velvet tang; if you don’t have it, you can add 1 teaspoon of white vinegar to regular milk and let it sit for 5 minutes)
- 1 1/4 cups (160g) all-purpose flour
- 1 tablespoon (8g) unsweetened cocoa powder (use a natural cocoa powder like Hershey’s, not Dutch-process—the acidity helps the color)
- 1/2 teaspoon salt
- 1 tablespoon (15ml) red food coloring (I prefer gel food coloring for a more vibrant color without thinning the batter)
- 1/2 teaspoon white vinegar (helps activate the baking soda and enhances the red color)
- 1/2 teaspoon baking soda
For the Cheesecake Swirl
- 8 oz (226g) cream cheese, softened (full-fat is best for texture; I’ve tried low-fat and it works but the swirl is less creamy)
- 1/4 cup (50g) granulated sugar
- 1 large egg yolk (just the yolk—using the whole egg makes the swirl too loose)
- 1/2 teaspoon vanilla extract
- 2 tablespoons (30g) sour cream (this is my secret for a lighter, dreamier cheesecake layer)
Ingredient Selection Tips
For the best color, look for a red food coloring that’s gel-based rather than liquid. The gel gives you a deeper, more vibrant red without adding extra liquid to the batter. I personally use Wilton’s red gel, but any brand works. For the cocoa powder, stick with natural unsweetened—Dutch-process cocoa is too mellow and can make the brownies taste flat. And please, please use room temperature eggs and cream cheese. I know it’s tempting to rush, but cold ingredients can make your batter lumpy and your cheesecake swirl less smooth. Trust me, I learned this the hard way after a particularly lumpy batch that looked more like cottage cheese than cheesecake.
Equipment Needed
You don’t need a professional bakery setup for these Light & Dreamy Red Velvet Cheesecake Brownies. Here’s what you’ll want to have on hand:
- 8×8-inch square baking pan (a metal pan gives you more even baking than glass, but either works)
- Parchment paper (for lining the pan—makes lifting the brownies out so much easier)
- Two mixing bowls (one medium, one small)
- Electric hand mixer or stand mixer (you can do this by hand with a whisk, but the mixer makes the cheesecake swirl much smoother)
- Rubber spatula
- Measuring cups and spoons
- Small offset spatula or butter knife (for creating the swirl pattern)
- Toothpick or cake tester
- Wire cooling rack
If you don’t have an 8×8 pan, a 9×9 will work—just reduce the baking time by about 5 minutes and keep an eye on it. And honestly, if you don’t have parchment paper, you can grease the pan well with butter and dust it with cocoa powder. It’s not quite as foolproof, but it’ll get the job done.
Preparation Method
Let’s get into the actual making of these beauties. Take your time with each step—rushing is the enemy of a good swirl.
Step 1: Prep Your Pan and Preheat
Preheat your oven to 350°F (175°C). Line your 8×8-inch baking pan with parchment paper, leaving a little overhang on two opposite sides. This creates handles that make lifting the brownies out later a breeze. Lightly grease the parchment with a tiny bit of butter or non-stick spray.
Step 2: Make the Brownie Batter
In a medium mixing bowl, whisk together the melted butter, granulated sugar, and brown sugar until well combined. The mixture should look glossy and smooth. Add the eggs one at a time, whisking well after each addition. Stir in the vanilla extract and buttermilk. In a separate small bowl, whisk together the flour, cocoa powder, and salt. Gradually add the dry ingredients to the wet ingredients, mixing just until combined—overmixing will make the brownies tough. In a tiny bowl or cup, stir together the red food coloring and white vinegar. Add this to the batter and fold gently until the color is evenly distributed. Finally, sprinkle the baking soda over the batter and fold it in quickly. The batter will be thick and a beautiful deep red.
Step 3: Make the Cheesecake Swirl
In a small mixing bowl, beat the softened cream cheese with an electric mixer until smooth and creamy—about 1 minute. Add the sugar and beat until combined, scraping down the sides as needed. Add the egg yolk and vanilla extract, beating on low speed until just incorporated. Fold in the sour cream gently with a spatula. The mixture should be smooth, thick, and pale. Don’t overbeat it, or the cheesecake layer can become too thin and runny.
Step 4: Layer and Swirl
Spread about two-thirds of the brownie batter evenly into your prepared pan. It will be a thick layer—use your spatula to push it into the corners. Drop spoonfuls of the cheesecake mixture evenly over the brownie layer. Then, drop the remaining brownie batter in small spoonfuls on top of the cheesecake. Now for the fun part: use a butter knife or small offset spatula to gently swirl the two mixtures together. Don’t over-swirl! You want distinct ribbons of cheesecake and brownie, not a muddy pink mess. About 5-6 figure-eight motions should do it. The batter should look marbled, not mixed.
Step 5: Bake to Perfection
Bake at 350°F (175°C) for 28-32 minutes. The edges should look set and slightly pulling away from the pan, and the center should still have a slight jiggle—like a soft cheesecake. A toothpick inserted into the center should come out with a few moist crumbs, not wet batter. Overbaking is the most common mistake here; the brownies will continue to set as they cool. Let them cool in the pan on a wire rack for at least 30 minutes, then transfer to the refrigerator to chill completely—at least 2 hours, but overnight is better. This step is crucial for clean slices and the best texture.
Cooking Tips & Techniques
I’ve made these Light & Dreamy Red Velvet Cheesecake Brownies more times than I care to count, and I’ve learned a few things the hard way. Here are my best tips:
- Don’t skip the chilling step. I know you want to eat them right away. I get it. But cutting into warm brownies will give you a gooey mess. The cheesecake layer needs time to firm up. Patience pays off here.
- Use gel food coloring. Liquid food coloring can thin out your batter and make the color look washed out. Gel gives you that gorgeous deep red with just a tablespoon. If you want to skip artificial coloring, you can use beet powder, but the color will be more of a rusty red than a vibrant crimson.
- Room temperature ingredients aren’t optional. Cold cream cheese creates lumps that won’t smooth out, and cold eggs can make your batter seize. Set everything out on the counter about an hour before you start baking.
- Test for doneness carefully. The toothpick test can be tricky here because you’re testing two different textures. Aim for the brownie part, not the cheesecake swirl. If you hit the cheesecake, the toothpick will come out looking wet even when it’s done.
- Use a sharp knife for cutting. For clean slices, use a long, sharp knife and wipe it clean between each cut. I run mine under hot water and dry it off before each slice—it makes a huge difference.
One of my biggest failures with this recipe happened when I tried to rush the cooling process. I put the pan directly into the fridge while it was still warm, and condensation formed on top, making the surface soggy. Learn from my mistake—let them cool on the counter for at least 30 minutes first.
Variations & Adaptations
This recipe is wonderfully adaptable. Here are some variations I’ve tried and loved:
- Gluten-Free Version: Substitute the all-purpose flour with a good 1:1 gluten-free baking flour blend. I’ve used Bob’s Red Mill with great results. The texture is slightly more tender, but the flavor is spot on.
- Dairy-Free Adaptation: Use vegan butter and a dairy-free cream cheese alternative. For the buttermilk, add 1 teaspoon of vinegar to unsweetened almond milk and let it sit for 5 minutes. The texture will be slightly less creamy, but still delicious.
- White Chocolate Drizzle: After the brownies have chilled and been cut, melt 1/4 cup of white chocolate chips with 1 teaspoon of coconut oil and drizzle over the top. It adds a lovely sweetness and makes them look even more special.
- Peppermint Twist: Add 1/2 teaspoon of peppermint extract to the brownie batter for a festive holiday version. This is amazing around Christmas.
- Extra Chocolatey: Fold 1/2 cup of dark chocolate chips into the brownie batter before layering. It adds little pockets of melted chocolate that are absolutely divine.
My personal favorite variation is the white chocolate drizzle—I made it for a friend’s birthday party and people literally asked for the recipe before they’d even finished their first bite. It takes these from “really good brownies” to “oh wow, what are these?”
Serving & Storage Suggestions
These Light & Dreamy Red Velvet Cheesecake Brownies are best served cold or at cool room temperature. I personally love them straight from the fridge—the cheesecake layer is firmer and the flavors seem more pronounced. If you prefer them softer, let them sit at room temperature for about 15 minutes before serving.
For presentation, I like to cut them into 16 even squares and arrange them on a white platter. A light dusting of powdered sugar just before serving adds a beautiful snowy contrast to the red and white swirl. They pair beautifully with a hot cup of coffee, a glass of cold milk, or even a scoop of vanilla ice cream if you’re feeling extra indulgent.
For storage, keep the brownies in an airtight container in the refrigerator. They’ll stay fresh for up to 5 days—though in my experience, they rarely last that long. You can also freeze them for up to 3 months. To freeze, wrap each brownie individually in plastic wrap, then place them in a freezer-safe bag. Thaw in the refrigerator overnight before serving. The flavor actually deepens slightly after a day in the fridge, so don’t be afraid to make them a day ahead.
Nutritional Information & Benefits
While these are definitely a treat, they’re lighter than traditional red velvet cheesecake brownies. Here’s the estimated nutrition per brownie (based on 16 servings):
- Calories: Approximately 210
- Fat: 12g
- Carbohydrates: 24g
- Protein: 4g
- Sugar: 16g
The cream cheese and sour cream provide a good amount of calcium and protein, and the cocoa powder contains antioxidants. By using a lighter hand with the butter and incorporating sour cream for moisture, we’ve managed to keep the calorie count reasonable without sacrificing flavor. That said, these are still a dessert—enjoy them mindfully, and savor every bite. For me, part of eating well is allowing yourself the occasional indulgence that feels truly satisfying, so you don’t feel deprived. These brownies fit that philosophy perfectly.
Conclusion
These Light & Dreamy Red Velvet Cheesecake Brownies are everything I hoped they’d be when I first started experimenting after that conversation with Eleanor. They’re rich enough to feel like a real dessert, but light enough that you don’t regret that second piece. The red velvet layer has that perfect tangy-sweet balance, and the cheesecake swirl is creamy without being heavy. Honestly, they’ve become my go-to for almost any occasion—birthdays, holidays, or just a quiet evening when I want something special.
I hope you give these a try and make them your own. Maybe you’ll add the white chocolate drizzle, or maybe you’ll discover a variation I haven’t thought of yet. That’s the beauty of a good recipe—it’s a starting point, not a rulebook. Let me know how yours turn out in the comments below. Did you try a fun variation? Did your family fight over the last piece? I want to hear all about it. And if you share them on social media, tag me—I love seeing your creations. Happy baking, friend. You’ve got this.
Frequently Asked Questions
Can I use natural food coloring instead of artificial?
Yes, you can use beet powder or natural red food coloring, but the color will be more muted—think rusty red rather than bright crimson. You may need to use more than the recipe calls for to get a noticeable red hue. The flavor won’t be affected, just the appearance.
Why did my cheesecake swirl sink into the brownie layer?
This usually happens if the cream cheese mixture is too thin or if you over-swirl. Make sure your cream cheese is properly softened but not warm, and don’t overmix the cheesecake batter. Also, be gentle with your swirling motion—5-6 figure-eights is plenty.
Can I make these brownies ahead of time?
Absolutely. In fact, they taste even better the next day after the flavors have had time to meld. You can make them up to 2 days in advance and store them in the refrigerator. Just keep them covered so they don’t dry out.
My brownies turned out dry. What went wrong?
The most common culprit is overbaking. Remember, the center should still have a slight jiggle when you take them out of the oven. They continue to cook from residual heat as they cool. Also, make sure you’re measuring your flour correctly—spoon it into the measuring cup and level it off, don’t scoop directly from the bag.
Can I use a different pan size?
A 9×9-inch pan will work, but your brownies will be thinner and will bake faster—check them at the 22-minute mark. For a 9×13 pan, you’ll need to double the recipe and bake for about 35-40 minutes. The baking time will vary, so keep an eye on them and use the toothpick test to check for doneness.
Pin This Recipe!
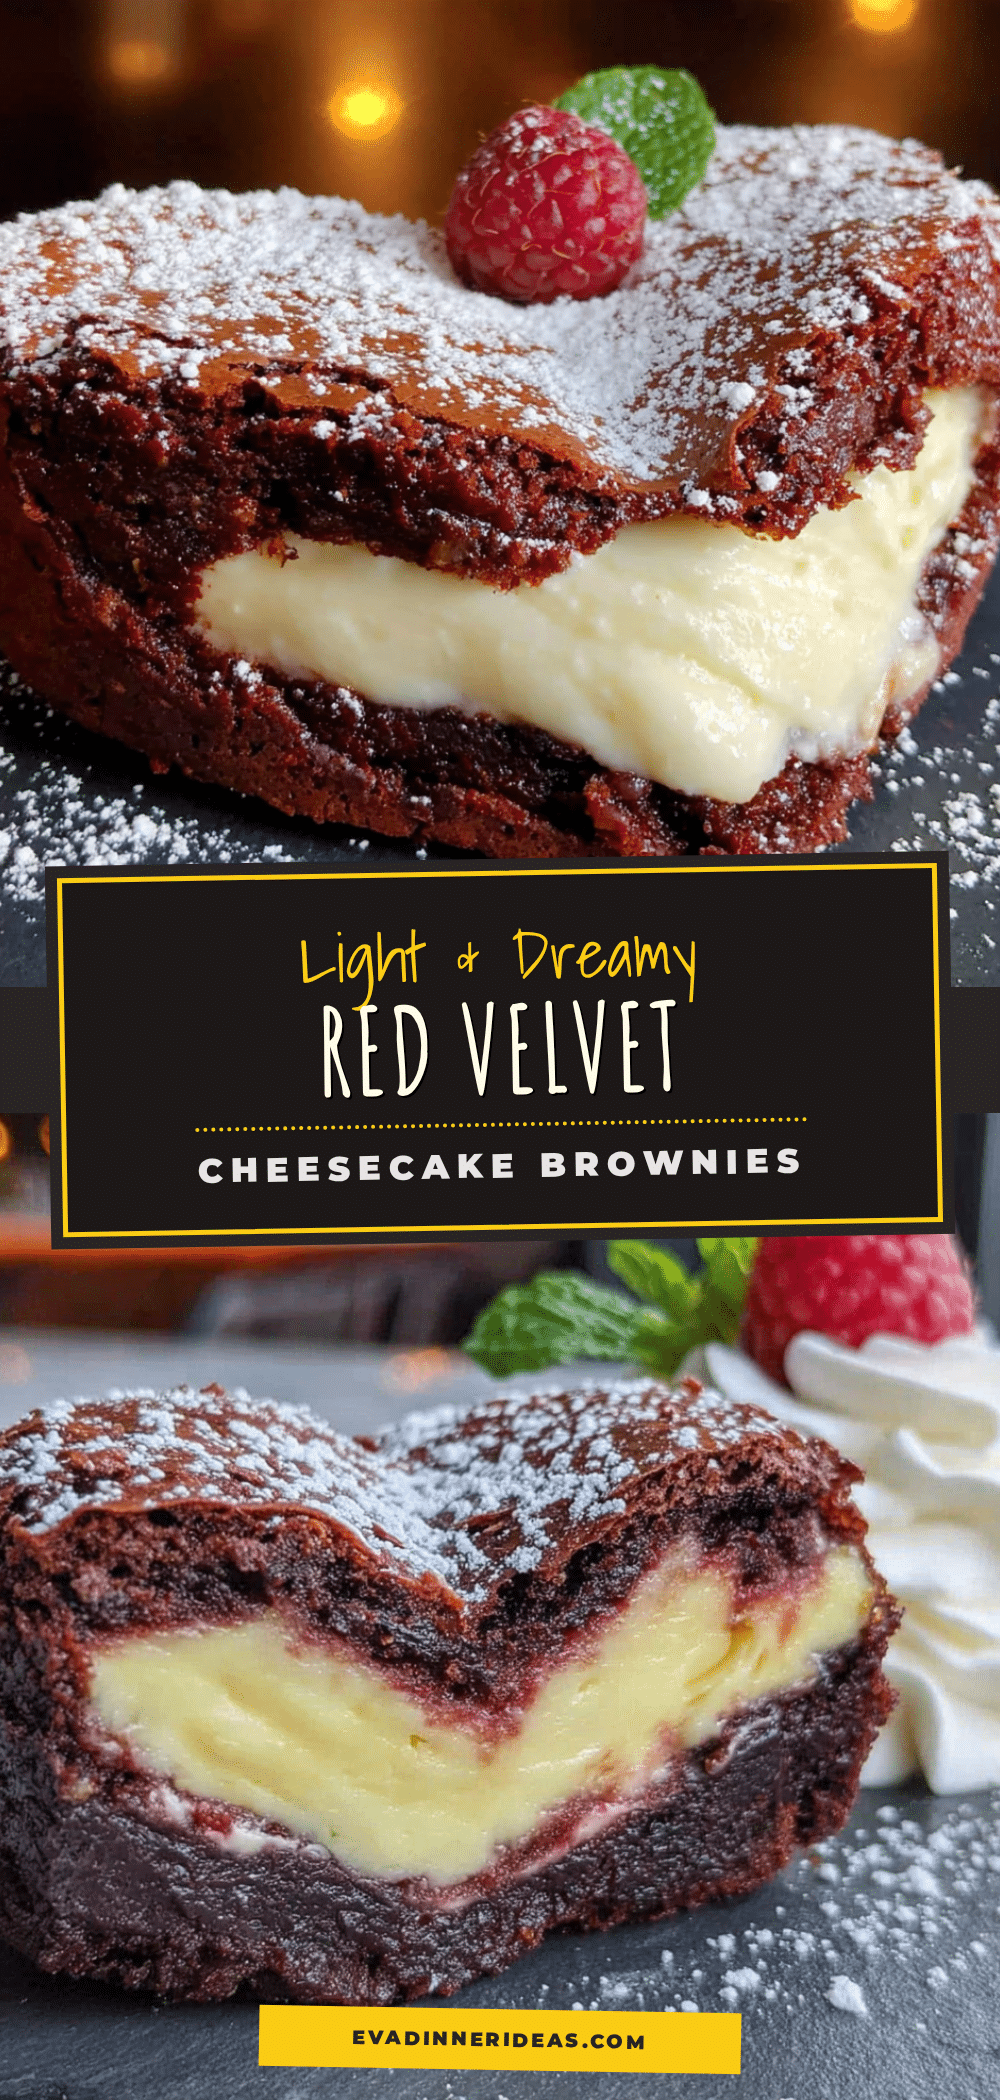
Light & Dreamy Red Velvet Cheesecake Brownies
These Light & Dreamy Red Velvet Cheesecake Brownies are a lighter take on a classic dessert, featuring a fudgy red velvet brownie layer and a creamy cheesecake swirl. Perfect for celebrations or a cozy treat, they’re quick to make and use simple ingredients.
- Prep Time: 15 minutes
- Cook Time: 30 minutes
- Total Time: 45 minutes
- Yield: 16 servings 1x
- Category: Dessert
- Cuisine: American
Ingredients
- 1/2 cup (113g) unsalted butter, melted
- 3/4 cup (150g) granulated sugar
- 1/4 cup (50g) light brown sugar, packed
- 2 large eggs, room temperature
- 1 teaspoon vanilla extract
- 1 tablespoon (15ml) buttermilk
- 1 1/4 cups (160g) all-purpose flour
- 1 tablespoon (8g) unsweetened cocoa powder
- 1/2 teaspoon salt
- 1 tablespoon (15ml) red food coloring (gel preferred)
- 1/2 teaspoon white vinegar
- 1/2 teaspoon baking soda
- 8 oz (226g) cream cheese, softened
- 1/4 cup (50g) granulated sugar
- 1 large egg yolk
- 1/2 teaspoon vanilla extract
- 2 tablespoons (30g) sour cream
Instructions
- Preheat oven to 350°F (175°C). Line an 8×8-inch baking pan with parchment paper, leaving overhang on two sides. Lightly grease the parchment.
- In a medium bowl, whisk together melted butter, granulated sugar, and brown sugar until glossy and smooth. Add eggs one at a time, whisking well after each. Stir in vanilla and buttermilk.
- In a small bowl, whisk together flour, cocoa powder, and salt. Gradually add to wet ingredients, mixing just until combined.
- In a tiny bowl, stir together red food coloring and white vinegar. Add to batter and fold gently until evenly distributed. Sprinkle baking soda over batter and fold in quickly.
- For the cheesecake swirl: In a small bowl, beat softened cream cheese with an electric mixer until smooth. Add sugar and beat until combined. Add egg yolk and vanilla, beating on low until just incorporated. Fold in sour cream gently.
- Spread about two-thirds of the brownie batter into the prepared pan. Drop spoonfuls of cheesecake mixture evenly over the batter. Drop remaining brownie batter in small spoonfuls on top. Use a butter knife to gently swirl the mixtures together with 5-6 figure-eight motions.
- Bake for 28-32 minutes, until edges are set and center has a slight jiggle. A toothpick inserted into the brownie part should come out with a few moist crumbs.
- Cool in the pan on a wire rack for 30 minutes, then refrigerate for at least 2 hours (or overnight) before slicing. Use a sharp knife, wiping clean between cuts.
Notes
Don’t skip the chilling step for clean slices. Use gel food coloring for vibrant color. Room temperature ingredients are crucial. For gluten-free, use a 1:1 gluten-free flour blend. For dairy-free, use vegan butter and dairy-free cream cheese. White chocolate drizzle is a great variation.
Nutrition
- Serving Size: 1 brownie
- Calories: 210
- Sugar: 16
- Sodium: 180
- Fat: 12
- Saturated Fat: 7
- Carbohydrates: 24
- Fiber: 1
- Protein: 4
Keywords: red velvet, cheesecake, brownies, easy dessert, holiday baking, Valentine's Day, cream cheese, fudgy


