It was 11:17 PM on a random Thursday, and I had a ridiculous craving for something cold, creamy, and sweet. You know that feeling when a bowl of ice cream just won’t cut it? I wanted a dessert that felt special but required zero effort. I didn’t have the energy to bake, and honestly, I didn’t have the ingredients for anything fancy anyway. But I had a block of cream cheese that needed using up, a can of cherry pie filling in the back of the pantry, and a vague memory of a dessert my grandma used to call “Snow on the Mountain.” I figured, why not? I threw it together in about ten minutes, took one bite, and literally laughed out loud. It was so good, so simple, and so ridiculously pretty that I immediately texted my sister a photo. She called me a genius. I called it a happy accident. This is that recipe.
Let me tell you, this Kid-Friendly Cherries in the Snow Cream Cheese Dessert is the kind of thing you make when you need a win. It’s not complicated. There’s no oven involved, no fancy techniques, and no stress. It’s just a few ingredients layered together to create something that looks like you spent hours on it. I mean, the first time I made it for a family dinner, my picky nephew asked for seconds before he even finished his first serving. That’s the kind of power this dessert has. It’s creamy, it’s fruity, and it has that perfect balance of sweet and tangy that keeps you coming back for just one more bite.
Honestly, this recipe has become my secret weapon. It’s what I bring to potlucks when I want to impress without breaking a sweat. It’s what I make on a Tuesday night when the kids are begging for something sweet and I don’t want to say no. And it’s the dessert I turn to when I just need something that works. No fuss, no fail, just pure, creamy, cherry-topped joy. I think you’re going to love it as much as I do.
Why You’ll Love This Recipe
This isn’t just another dessert recipe. After testing this about four times in one week (tough job, I know), I can tell you exactly why this one works so well. It’s a recipe that has been family-approved, kid-tested, and busy-parent certified. Here is what makes it special:
- Quick & Easy : This comes together in about 15 minutes of active time. No baking, no complicated steps. Just mix, layer, and chill. It’s perfect for those afternoons when the kids are restless and you need a quick win.
- Simple Ingredients : You probably have most of these in your kitchen right now. Cream cheese, whipped topping, powdered sugar, vanilla, and a can of cherry pie filling. That’s it. No special trips to the store required.
- Perfect for Family Gatherings : This dessert is a showstopper at potlucks, birthday parties, and holiday dinners. It looks fancy in a glass dish, but it’s secretly the easiest thing on the table.
- Crowd-Pleaser : I have yet to meet a kid who doesn’t love this. The creamy filling is like a cloud, and the cherries on top are sweet and fun. Adults love it too, by the way. It’s one of those rare desserts that makes everyone happy.
- Unbelievably Delicious : The texture is what gets you. It’s light and fluffy from the whipped topping, but rich and tangy from the cream cheese. The cherry topping adds that perfect pop of sweetness. It’s comfort food in a bowl.
What makes this recipe different from all the other cherry desserts out there? It’s the texture. Most versions I’ve tried are either too heavy or too sweet. This one uses a specific ratio of cream cheese to whipped topping that creates a mousse-like consistency. It’s not dense. It’s not watery. It’s just right. Plus, using a good quality cherry pie filling makes a huge difference. I’ve tested this with cheaper brands, and the flavor just isn’t the same. Trust me on this one.
This recipe is the kind that makes you close your eyes after the first bite. It’s comfort food reimagined — faster, simpler, but with the same soul-soothing satisfaction. Perfect for impressing guests without stress, or turning a simple Tuesday into something memorable.
What Ingredients You Will Need
This recipe uses simple, wholesome ingredients to deliver bold flavor and satisfying texture without the fuss. Most of these are pantry staples, which makes this dessert perfect for last-minute cravings.
For the Cream Cheese Layer
- 8 ounces cream cheese, softened (full-fat works best for richness, but Neufchâtel is fine too)
- 1/2 cup powdered sugar (adds sweetness without grittiness)
- 1 teaspoon vanilla extract (use pure vanilla if you have it, imitation works in a pinch)
- 1 1/2 cups frozen whipped topping, thawed (like Cool Whip — I recommend the brand for best texture)
For the Topping
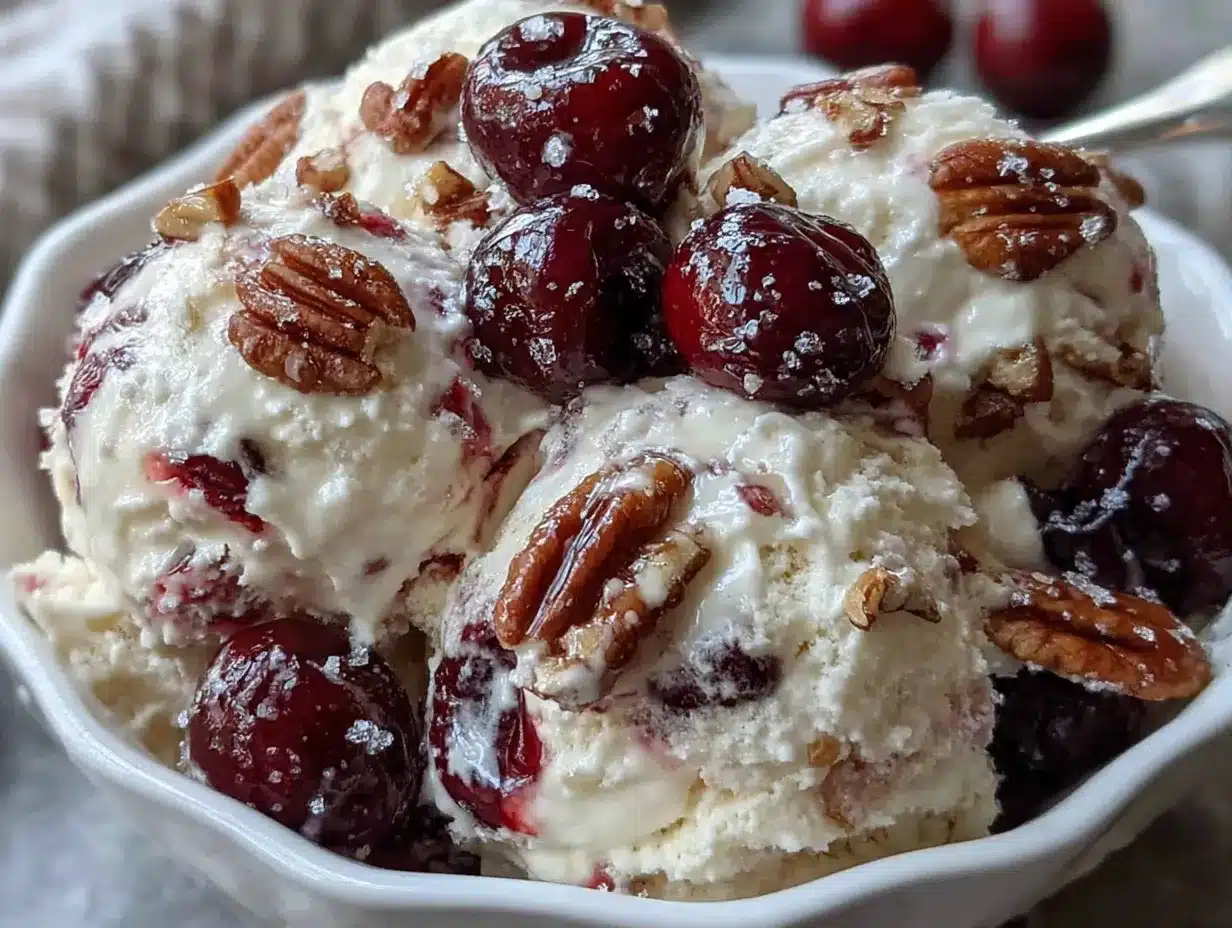
- 1 can (21 ounces) cherry pie filling (look for one with real cherries, not just syrup)
- Optional: 1/4 cup chopped pecans or walnuts (for a little crunch, but skip if serving picky eaters)
Ingredient Tips and Substitutions
Let me share a few things I’ve learned from making this about a dozen times. First, the cream cheese absolutely needs to be softened. If you try to mix it cold, you’ll end up with lumps, and nobody wants a lumpy “snow.” Leave it on the counter for about 30 minutes before you start. If you’re in a hurry, you can microwave it for about 10-15 seconds, but be careful not to melt it.
For the whipped topping, I’ve tried making this with homemade whipped cream, and honestly, it’s not the same. The stabilized whipped topping holds its shape better and keeps the dessert light. If you want to use heavy cream, add a tablespoon of powdered sugar and whip it to stiff peaks, but know that it won’t hold up as well after a day in the fridge.
The cherry pie filling is where you have a choice. I personally love the Lucky Leaf brand because the cherries are firm and the syrup isn’t too runny. If you want to make your own cherry topping, you can simmer 2 cups of frozen cherries with 1/4 cup sugar and 1 tablespoon of cornstarch until thickened. But honestly? The canned stuff works perfectly and saves so much time.
For a fun twist, you can swap the cherry pie filling for strawberry, blueberry, or even lemon pie filling. Each version has its own charm, but the cherry is the classic for a reason.
Equipment Needed
You don’t need much for this recipe, which is part of its beauty. Here’s what you’ll need:
- Large mixing bowl (for the cream cheese mixture)
- Electric hand mixer or stand mixer (a whisk works too, but your arm will get tired)
- Spatula (for scraping the bowl and spreading the layers)
- 8×8 inch baking dish or 9-inch pie plate (a glass dish lets you see the pretty layers)
- Measuring cups and spoons
- Plastic wrap or lid (for chilling)
If you don’t have an electric mixer, you can absolutely do this by hand. Just make sure the cream cheese is really soft, and use a sturdy whisk. It’ll take a few extra minutes, but it’s totally doable. I’ve done it at a cabin with no electricity, and it worked fine.
For the dish, I prefer an 8×8 inch glass baking dish because it shows off the layers nicely. A pie plate works too, and it makes the dessert look even more elegant. If you’re bringing this to a party, a clear glass dish is always a hit.
Preparation Method
Alright, let’s get to the fun part. This recipe is so simple that you’ll memorize it after one try. Here’s how to make the perfect Kid-Friendly Cherries in the Snow Cream Cheese Dessert.
- Soften the cream cheese. Take the cream cheese out of the fridge about 30 minutes before you start. It should be soft enough that you can easily press your finger into it. If you forgot to plan ahead, unwrap it and microwave it on 50% power for 10-15 seconds. Check it and repeat if needed, but don’t let it get hot.
- Mix the cream cheese base. In a large mixing bowl, beat the softened cream cheese with an electric mixer on medium speed until it’s smooth and fluffy. This takes about 1-2 minutes. Scrape down the sides of the bowl with a spatula.
- Add the sugar and vanilla. Add the powdered sugar and vanilla extract to the cream cheese. Beat on low speed first so the sugar doesn’t fly everywhere, then increase to medium and beat for another minute until everything is well combined and smooth. The mixture should be thick and creamy.
- Fold in the whipped topping. Add the thawed whipped topping to the cream cheese mixture. Use a spatula to gently fold it in. Don’t stir vigorously — you want to keep the air in the whipped topping so the dessert stays light and fluffy. Fold until you don’t see any white streaks. The mixture should look like a soft, pillowy cloud.
- Spread the cream cheese layer. Transfer the cream cheese mixture to your 8×8 inch baking dish. Use the spatula to spread it evenly. Don’t worry if it’s not perfect — the cherry topping will cover it. Just make sure it’s relatively even so every bite has the same ratio of creamy to fruity.
- Add the cherry topping. Open the can of cherry pie filling and stir it gently with a spoon to break up any clumps. Spoon the cherry mixture evenly over the cream cheese layer. Spread it gently so you don’t mix the layers together. You want that beautiful contrast between the white “snow” and the red cherries.
- Chill, chill, chill. This is the hardest part. Cover the dish with plastic wrap or a lid and refrigerate for at least 2 hours. Overnight is even better. The chilling time allows the layers to set and the flavors to meld together. If you try to serve it right away, it will be too soft and messy.
- Serve and enjoy. When you’re ready to serve, scoop it into bowls or onto plates. If you added nuts, sprinkle them on top right before serving so they stay crunchy. The dessert should be cold, creamy, and perfectly set.
A few notes from my kitchen to yours: If you notice the cream cheese mixture is a little lumpy, don’t panic. Just keep beating it for another minute or two. Sometimes cream cheese just needs a little extra encouragement. Also, if you’re using a glass dish, you can see if the layers are even by looking at the sides. This is helpful if you’re making it for a special occasion and want it to look perfect.
Cooking Tips & Techniques
After making this dessert more times than I can count, I’ve picked up a few tricks that make a real difference. Let me share them with you.
Don’t overmix the whipped topping. This is probably the most common mistake. When you fold the whipped topping into the cream cheese mixture, be gentle. If you mix too vigorously, you’ll deflate the whipped topping and end up with a dense, heavy dessert. You want it to be light and airy, like a cloud. Fold just until it’s combined, even if you see a tiny streak or two.
Room temperature ingredients matter. I know I keep saying this, but it’s true. Cold cream cheese doesn’t mix well, and cold whipped topping doesn’t fold in evenly. Let everything sit on the counter for about 20-30 minutes before you start. Your dessert will be smoother and more consistent.
Make it ahead of time. This is one of those desserts that actually gets better after a day in the fridge. The flavors meld together, and the texture becomes even more creamy. I often make this the night before a party, and it’s always a hit. Plus, it takes one thing off your plate on the day of the event.
Use a good quality cherry pie filling. I learned this the hard way. Cheap cherry pie filling is mostly syrup with a few sad cherries. Spend a little extra for a brand that has real, firm cherries. It makes a huge difference in both texture and flavor. My personal favorite is Lucky Leaf or Oregon Fruit.
Let it chill for the full time. I know it’s tempting to dig in after an hour, but trust me, wait the full two hours. The dessert needs time to set so it holds its shape when you scoop it. If you’re impatient like me, set a timer and walk away. Your patience will be rewarded.
Variations & Adaptations
One of the best things about this recipe is how flexible it is. Here are some variations I’ve tried and loved.
Berry Bliss Version: Swap the cherry pie filling for a mixed berry pie filling or even a homemade strawberry topping. The tartness of the berries pairs beautifully with the sweet cream cheese layer. I made this for a summer barbecue, and it was gone in minutes.
Chocolate Cherry Dream: Add 2 tablespoons of cocoa powder to the cream cheese mixture before folding in the whipped topping. It turns the “snow” into a chocolate cloud, and the cherries on top create that classic chocolate-cherry combo. My kids went absolutely crazy for this version.
Lighter Version: Use reduced-fat cream cheese and light whipped topping. The texture will be slightly less rich, but it’s still delicious. I’ve made this for myself when I wanted a treat without the guilt, and it totally hits the spot.
Individual Servings: Instead of using a large dish, layer the cream cheese mixture and cherry topping into small dessert cups or mason jars. This is perfect for parties or for portion control. Plus, they look adorable on a dessert table.
Nutty Crunch: Sprinkle a layer of crushed graham crackers or shortbread cookies on the bottom of the dish before adding the cream cheese layer. It adds a nice crunch and makes the dessert feel even more indulgent. I did this for a holiday dinner, and everyone thought I had spent hours on it.
Serving & Storage Suggestions
This dessert is best served cold, straight from the fridge. The contrast between the chilly, creamy layer and the sweet cherry topping is what makes it so satisfying. I like to serve it in small bowls or on dessert plates with a spoon.
For presentation, you can garnish each serving with a fresh mint leaf or a dollop of extra whipped cream. If you’re feeling fancy, sprinkle some chocolate shavings or crushed nuts on top. It makes the dessert look even more special.
Storage Instructions: Cover the dish tightly with plastic wrap or a lid and store it in the refrigerator. It will keep for up to 3 days. After that, the texture starts to get a little watery, so I recommend eating it within that window.
Freezer Tips: You can freeze this dessert, but be aware that the texture will change slightly. The cream cheese layer can become a bit icy after thawing. If you want to freeze it, assemble the dessert without the cherry topping, freeze it for up to a month, then add the cherry topping after it thaws in the fridge overnight.
Reheating: This is a cold dessert, so no reheating needed! Just take it out of the fridge about 10 minutes before serving to take the chill off if you prefer.
One thing I love about this recipe is that the flavors actually get better after a day or two. The cherry syrup seeps into the cream cheese layer just a little, creating a beautiful marbled effect. It’s even more delicious on day two.
Nutritional Information & Benefits
While this is definitely a treat, it’s not as heavy as you might think. Here’s the estimated nutritional breakdown per serving (based on 9 servings):
- Calories: 280
- Fat: 16g
- Carbohydrates: 32g
- Protein: 4g
- Sugar: 24g
One of the benefits of this dessert is that it uses cream cheese, which provides a good amount of protein and calcium. The cherries are also a great source of antioxidants, particularly anthocyanins, which are known for their anti-inflammatory properties. So while this is a dessert, it does have some redeeming qualities.
If you’re watching your sugar intake, you can use a sugar-free cherry pie filling and a sugar substitute like Swerve in the cream cheese mixture. The texture will be slightly different, but it’s still a delicious option.
For those with dietary restrictions, this recipe can be made gluten-free easily since there’s no flour involved. Just make sure your cherry pie filling is certified gluten-free if that’s a concern.
Conclusion
So there you have it — my favorite last-minute, no-bake, always-a-hit dessert. This Kid-Friendly Cherries in the Snow Cream Cheese Dessert is proof that you don’t need fancy techniques or exotic ingredients to create something truly special. It’s the kind of recipe that saves you on a busy weeknight, impresses at a potluck, and makes your family feel loved.
I hope you give this recipe a try and make it your own. Maybe you’ll add a different fruit topping, or maybe you’ll layer it in individual cups. Whatever you do, I’d love to hear about it. Drop a comment below and let me know how it turned out. Did your kids love it? Did you add your own twist? Sharing is what makes cooking so fun.
Here’s to simple desserts, happy families, and the joy of a spoonful of something sweet. Happy cooking, friends!
Frequently Asked Questions
Can I use homemade whipped cream instead of Cool Whip?
Yes, you can, but the texture will be different. Homemade whipped cream is less stable and can start to separate after a day in the fridge. If you want to use it, whip 1 cup of heavy cream with 2 tablespoons of powdered sugar until stiff peaks form, and use it immediately.
How long does this dessert need to chill?
At least 2 hours, but overnight is best. The chilling time allows the cream cheese layer to set properly so it holds its shape when served. If you’re in a rush, 1 hour will work, but the texture won’t be as firm.
Can I use low-fat cream cheese?
Absolutely. Neufchâtel cheese (which has less fat) works well in this recipe. The texture will be slightly less rich, but it’s still delicious. Just make sure it’s softened before mixing.
What other fruits can I use instead of cherries?
So many options! Strawberry, blueberry, raspberry, or even lemon pie filling all work beautifully. You can also use fresh fruit that has been lightly sweetened, like sliced strawberries or peaches.
Can I make this dessert ahead of time for a party?
Yes, and I actually recommend it. This dessert tastes even better after a day in the fridge. Make it the night before, cover it tightly, and it will be perfect for your party the next day.
Pin This Recipe!

Kid-Friendly Cherries in the Snow Cream Cheese Dessert

A quick, no-bake dessert with a creamy, mousse-like cream cheese layer topped with sweet cherry pie filling. Perfect for busy weeknights, potlucks, and family gatherings.
- Prep Time: 15 minutes
- Cook Time: 0 minutes
- Total Time: 2 hours 15 minutes (includes chilling)
- Yield: 9 servings 1x
- Category: Dessert
- Cuisine: American
Ingredients
- 8 ounces cream cheese, softened
- 1/2 cup powdered sugar
- 1 teaspoon vanilla extract
- 1 1/2 cups frozen whipped topping, thawed (like Cool Whip)
- 1 can (21 ounces) cherry pie filling
- Optional: 1/4 cup chopped pecans or walnuts
Instructions
- Soften the cream cheese by leaving it on the counter for about 30 minutes, or microwave on 50% power for 10-15 seconds.
- In a large mixing bowl, beat the softened cream cheese with an electric mixer on medium speed until smooth and fluffy, about 1-2 minutes. Scrape down the sides of the bowl.
- Add the powdered sugar and vanilla extract. Beat on low speed first, then increase to medium and beat for another minute until well combined and smooth.
- Add the thawed whipped topping to the cream cheese mixture. Gently fold it in with a spatula until no white streaks remain, keeping the mixture light and airy.
- Transfer the cream cheese mixture to an 8×8 inch baking dish or 9-inch pie plate. Spread it evenly with a spatula.
- Open the can of cherry pie filling and stir gently. Spoon the cherry mixture evenly over the cream cheese layer, spreading gently without mixing the layers.
- Cover the dish with plastic wrap or a lid and refrigerate for at least 2 hours, or overnight for best results.
- Serve cold. If using nuts, sprinkle them on top right before serving.
Notes
Cream cheese must be softened to avoid lumps. Use full-fat cream cheese for best richness. Homemade whipped cream can be substituted but is less stable. For best texture, chill at least 2 hours or overnight. Cherry pie filling can be swapped for strawberry, blueberry, or lemon. Add a layer of crushed graham crackers for crunch.
Nutrition
- Serving Size: 1 serving (1/9 of re
- Calories: 280
- Sugar: 24
- Sodium: 180
- Fat: 16
- Saturated Fat: 10
- Carbohydrates: 32
- Fiber: 1
- Protein: 4
Keywords: no-bake dessert, cherry dessert, cream cheese dessert, kid-friendly, easy dessert, potluck dessert, cherries in the snow


