I was standing in the frozen foods aisle last October, staring at a bag of something called “spooky spider rings” that were absolutely not going to fool anyone, when the weirdest thing happened. The fluorescent lights hummed overhead, and somebody’s cart squeaked past me, and then I caught it — the faint, sharp smell of vinegar and paprika drifting from the deli section. And just like that, I was six years old again, standing on a step stool in my Aunt Margie’s tiny yellow kitchen, watching her peel eggs while she hummed along to the radio. She’d been gone five years by then, and I hadn’t thought about those deviled eggs in decades. But there I was, in the middle of a grocery store, feeling the exact weight of that wooden spoon in my hand and the way she’d let me sprinkle the paprika because “you have a steady hand, kid.” I didn’t even like deviled eggs back then — too much mayo, too mustardy — but watching her make them was pure magic. She passed away when I was twelve, and I never got her recipe. So for years, I’ve been trying to recreate that feeling, that specific warmth, through trial and error and way too many hard-boiled eggs. Honestly, I’ve made some real disasters. You know that feeling when you peel an egg and half the white comes off with the shell? Yeah, I’ve been there more times than I’d like to admit. But last Halloween, I finally cracked it — pun absolutely intended. I wanted something that would make people stop mid-conversation at a party, something that honored Aunt Margie’s classic recipe but brought that spooky, playful energy a Halloween gathering deserves. These monster eyeball deviled eggs are it. They’re the recipe I wish I’d had all those years ago, the one that makes people laugh and grab another one before they’ve even finished the first. And let me tell you, when I brought them to my neighbor Carla’s Halloween party last year, they disappeared faster than the candy bowl.
Why You’ll Love This Recipe
Listen, I’ve tested this recipe about a dozen times — for potlucks, family dinners, and one very memorable Halloween party where somebody accidentally ate three before realizing they were supposed to be “scary.” These monster eyeball deviled eggs are the real deal, and here’s why they keep showing up on my holiday table:
- Quick & Easy : You can have these done in under 40 minutes, start to finish. Most of that time is just waiting for the eggs to boil and cool. Perfect for when you realize the party starts in an hour and you promised to bring something.
- Simple Ingredients : Eggs, mayo, mustard, paprika, olives, and a few pantry staples. No weird specialty items that you’ll use once and forget about until next Halloween.
- Perfect for Halloween Parties : These are the kind of appetizer that makes people pull out their phones for a picture before they take a bite. They’re creepy in the best way, but not so scary that kids won’t eat them.
- Crowd-Pleaser : I’ve watched people who “don’t like deviled eggs” eat two of these. Something about the eyeball design makes them irresistible — maybe it’s the fun factor, maybe it’s the olive-to-egg ratio. Either way, they work.
- Unbelievably Delicious : The filling is creamy, tangy, and perfectly seasoned. The olive “pupil” adds a briny pop that cuts through the richness. It’s comfort food with a spooky twist, and the texture is absolutely spot-on.
What makes this recipe different from all the other deviled egg recipes out there? It’s the balance. I spent months tweaking the mustard-to-mayo ratio, testing different ways to get the filling perfectly smooth, and figuring out how to keep the olive from sliding off the egg white. This isn’t just another version — it’s the one that finally made me feel like I’d honored Aunt Margie’s memory without copying her recipe exactly. It’s comfort food reimagined for a Halloween crowd, with the same soul-soothing satisfaction but a whole lot more personality. Perfect for impressing guests without stress, or turning a simple appetizer into the star of the spread.
What Ingredients You Will Need
This recipe uses simple, everyday ingredients to create something that looks way more complicated than it actually is. Most of these are probably in your kitchen right now, which is exactly how I like to cook.
- 12 large eggs (room temperature works best for even cooking, but cold is fine too)
- 1/3 cup mayonnaise (I prefer Duke’s or Hellmann’s for the creamiest texture; avoid Miracle Whip unless you want a tangier filling)
- 1 tablespoon yellow mustard (regular yellow mustard gives that classic deviled egg color and tang; Dijon works if you want a more sophisticated flavor)
- 1 teaspoon white vinegar (adds brightness and helps balance the richness)
- 1/4 teaspoon salt (plus more for the water when boiling)
- 1/8 teaspoon black pepper (freshly ground if you have it)
- 1/4 teaspoon paprika (smoked paprika adds a deeper flavor, but regular works great too)
- 1 jar large pitted black olives (you’ll need about 24 olive slices total, so get a decent-sized jar)
- 1 jar pimentos or roasted red peppers (for the “bloodshot” effect — just a tiny strip per egg)
- Optional: 1 tablespoon pickle relish (drained well; adds sweetness and texture if you like it)
- Optional: 1 teaspoon hot sauce (for a little kick — I use Tabasco or Cholula)
A few notes on ingredients: Look for large eggs that are at least a week old — fresher eggs are actually harder to peel after boiling. I learned that the hard way after destroying about eight eggs in one afternoon. For the olives, get the biggest ones you can find. The jumbo pitted black olives work perfectly because they give you a nice wide slice that covers most of the egg white. And if you can’t find pimentos, a tiny piece of roasted red pepper from a jar works just as well. I’ve even used a sliver of cherry tomato in a pinch, though it’s a little more watery. For a dairy-free version, swap the mayo with a vegan alternative — just make sure it’s a thick, creamy one, not the runny kind.
Equipment Needed
You don’t need anything fancy for these monster eyeball deviled eggs, which is part of the beauty. Here’s what you’ll need:
- Large pot (big enough to hold 12 eggs in a single layer without crowding)
- Mixing bowl (medium size, for the filling)
- Fork or potato masher (for mashing the yolks — I prefer a fork because it gives me more control)
- Piping bag or zip-top bag (for filling the egg whites neatly; a zip-top bag with the corner snipped works great)
- Small knife (for slicing olives and trimming pimentos)
- Cutting board (small one is fine)
- Serving platter (something with a rim works best to keep the eggs from sliding around)
If you don’t have a piping bag, honestly, don’t worry about it. A zip-top bag works perfectly — just fill it, squeeze the air out, snip a tiny corner, and pipe away. I’ve also used a small spoon to fill the eggs, and while it’s not as pretty, it still tastes the same. For the olive slicing, a paring knife is ideal, but any small, sharp knife will do. My tip? Use a serrated knife for the olives — it cuts through them cleanly without squishing them flat. And please, for the love of all things spooky, don’t use your good chef’s knife for this. Olives are slippery little things, and I’ve had more than one close call.
Preparation Method
Alright, let’s get into the nitty-gritty. I’ve broken this down step by step so you don’t end up with a kitchen disaster like I did the first time I tried to make these.
- Boil the eggs. Place your 12 eggs in a single layer in a large pot. Cover them with cold water by about an inch. Add a generous pinch of salt — this helps the whites set faster and makes peeling easier. Bring the water to a rolling boil over high heat. Once it’s boiling hard, cover the pot, turn off the heat, and let it sit for exactly 12 minutes. Set a timer. I’m serious. I’ve forgotten and ended up with green-ringed yolks more times than I want to admit.
- Ice bath time. While the eggs are sitting, fill a large bowl with ice and cold water. When the timer goes off, use a slotted spoon to transfer the eggs straight into the ice bath. Let them sit for at least 10 minutes. This stops the cooking process and makes peeling a million times easier. Pro tip: crack the shells slightly before dropping them in the ice bath — water seeps in between the shell and the egg, and peeling becomes almost effortless.
- Peel the eggs. Gently tap each egg on the counter to crack the shell all over, then roll it between your palms to loosen the shell. Start peeling from the wider end — that’s where the air pocket is, and it gives you an easier starting point. Rinse the peeled eggs under cold water to remove any tiny shell fragments. If you end up with a few ugly ones, don’t panic. They’ll still taste fine, and you can hide the imperfections under the olive “eyeball.”
- Slice and scoop. Using a sharp knife, slice each egg in half lengthwise. Gently pop out the yolks into a medium mixing bowl. Arrange the egg white halves on your serving platter, cut side up. If they wobble, slice a tiny sliver off the bottom to create a flat surface. This is one of those little tricks that makes a huge difference when you’re serving them.
- Make the filling. Add the mayonnaise, yellow mustard, white vinegar, salt, black pepper, and paprika to the bowl with the yolks. If you’re using pickle relish or hot sauce, add it now. Mash everything together with a fork until it’s completely smooth. I like to let it sit for a minute and then mash again — the extra time helps the flavors meld. Taste it and adjust the seasoning. You want it tangy, creamy, and just a little bit sharp.
- Fill the egg whites. Spoon the filling into a piping bag or a zip-top bag with a tiny corner snipped off. Pipe the filling into each egg white half, mounding it slightly. You want it to look generous and full, not flat. If you don’t have a bag, use a small spoon — just pile it up nicely. I usually get about 24 filled halves from 12 eggs.
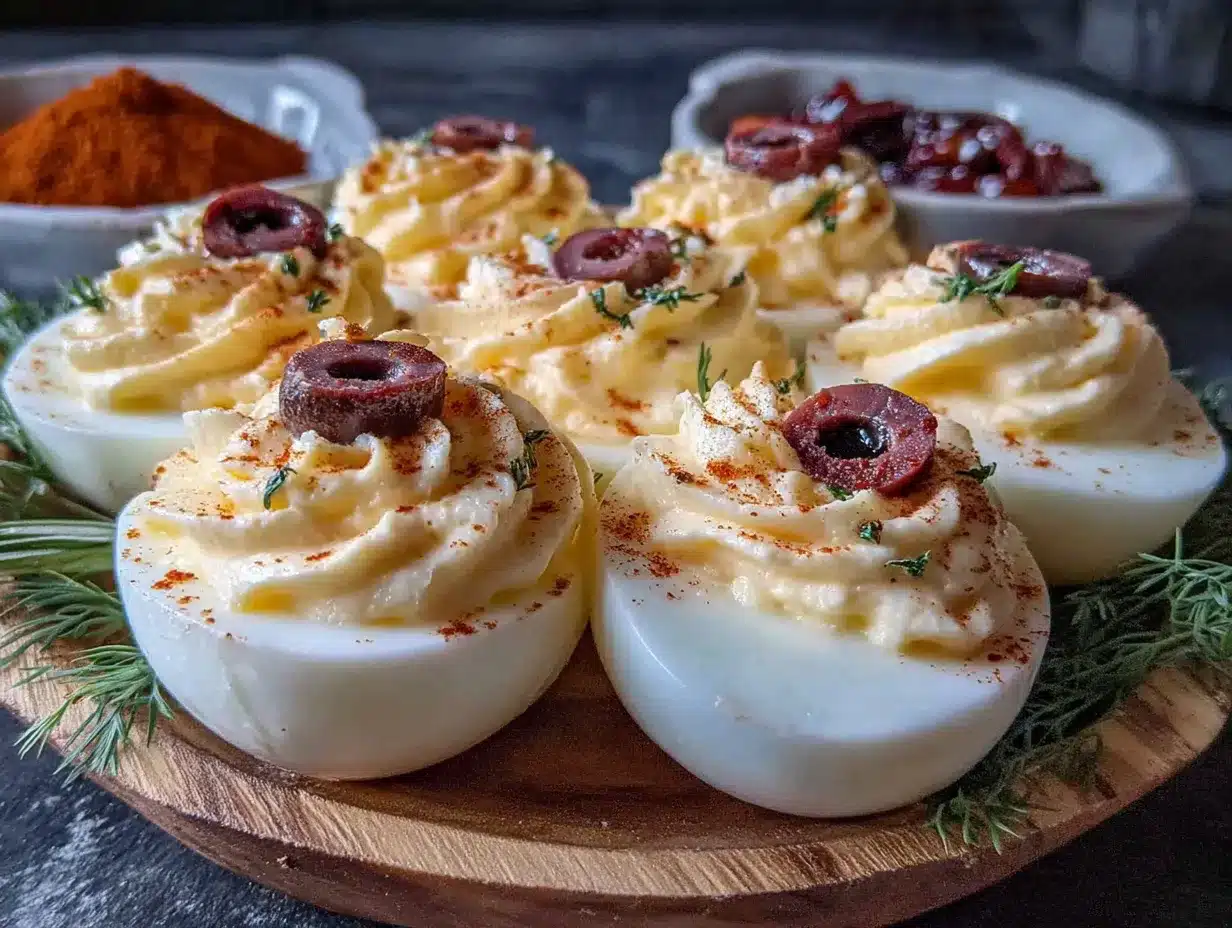
- Create the eyeballs. Slice your black olives into rounds about 1/4-inch thick. You’ll need one slice per egg half. Place an olive slice in the center of each filling mound, pressing down just slightly so it sticks. Then take your pimentos or roasted red peppers and cut them into tiny strips — about 1/2 inch long and 1/8 inch wide. Place one strip on each side of the olive to create the “bloodshot” effect. It looks disturbingly realistic, I promise.
- Final touch. Lightly sprinkle a tiny bit of paprika over the filling around the olive — not on the olive itself, just the exposed filling. This adds a subtle “bruised” look that makes the eyeballs even creepier. Serve immediately or refrigerate until you’re ready.
Cooking Tips & Techniques
Let me save you some of the headaches I’ve had along the way. First, the biggest mistake people make with deviled eggs is overcooking them. That greenish-gray ring around the yolk? That’s from cooking them too long or not cooling them fast enough. The 12-minute boil-and-rest method I shared above is foolproof, but if you’re nervous, use an instant-read thermometer — the yolks should reach 160°F internally.
Second, don’t overmix the filling. I know it’s tempting to keep stirring until it’s silky smooth, but overmixing can make it gummy. Mash it until it’s creamy and stop. If it’s too thick, add a tiny splash of pickle juice or vinegar. Too thin? Add another yolk or a bit more mayo. I once added too much mustard and ended up with filling that tasted like a hot dog stand. Not ideal for a Halloween party.
Third, timing is everything when you’re hosting. You can boil and peel the eggs up to two days ahead — just store the peeled eggs in a bowl of cold water in the fridge. You can also make the filling a day ahead and keep it in a piping bag in the fridge. Then all you have to do on party day is pipe, decorate, and serve. I’ve done this for multiple parties now, and it’s a lifesaver when you’re running around trying to get everything ready.
Fourth, if your olive slices keep sliding off the filling, you’re probably not pressing them in firmly enough. Give them a gentle push — the filling should hold them in place. If it’s still not working, let the filled eggs chill in the fridge for 15 minutes before adding the olives. The cold filling will be firmer and hold the olive better.
And finally, here’s a lesson I learned the hard way: don’t make these on a humid day. I know that sounds weird, but humidity can make the egg whites sweat, which makes the filling slide around and the olives fall off. If it’s a humid day, keep the eggs in the fridge until right before serving, and pat the egg whites dry with a paper towel before filling them.
Variations & Adaptations
One of the best things about this recipe is how easy it is to adapt. Here are a few variations I’ve tried and loved:
- Spicy Eyeballs : Add 1 teaspoon of sriracha or chipotle paste to the filling for a smoky, spicy kick. I made these for a friend’s Halloween party, and they were gone in minutes. The heat pairs surprisingly well with the briny olive.
- Veggie Eyeballs : For a vegetarian version (though eggs aren’t vegan, obviously), swap the mayo for a vegan alternative and use a tiny slice of cucumber instead of the olive for the “pupil.” It gives a fresher, crunchier texture that’s surprisingly good.
- Bloody Eyeballs : Instead of pimentos, use a tiny drizzle of sriracha or ketchup around the olive to create a more dramatic “bloodshot” look. This is definitely the goriest version, and kids absolutely love it.
- Guacamole Eyeballs : Swap the mayo-mustard filling for a simple guacamole (mashed avocado, lime juice, salt, and a tiny bit of garlic powder). Top with the olive slice and a dot of sour cream. These are a hit with anyone who’s not a fan of traditional deviled eggs.
- Smoky Paprika Eyeballs : Use smoked paprika instead of regular in the filling and for the final sprinkle. The smoky flavor adds a whole new dimension and makes the eggs taste almost like they’ve been grilled. I made these for a barbecue-themed Halloween party, and they were perfect.
For the gluten-free crowd, these are naturally gluten-free as long as your mustard and mayo don’t contain any hidden gluten. Most standard brands are fine, but always check the label if you’re serving someone with celiac disease. And if you’re watching your cholesterol, you can use a filling made with mashed avocado and a splash of lemon juice instead of the traditional mayo-yolk mixture. It’s lighter but still delicious.
Serving & Storage Suggestions
These monster eyeball deviled eggs are best served chilled, right out of the fridge. I like to arrange them on a dark platter — black or deep purple works beautifully — to make the white eggs and black olive “pupils” really pop. You can also arrange them on a bed of shredded lettuce or purple cabbage for extra color contrast.
For presentation, try placing them in a circle on a round platter, with a small bowl of extra olives or pimentos in the center. It looks like a creepy eye staring back at you from the table. I’ve also seen people arrange them on a skull-shaped platter for maximum Halloween effect. If you’re serving them at a potluck, bring them on a rimmed tray so they don’t slide around in the car.
As for what to serve alongside, these pair beautifully with other finger foods. I love serving them with a platter of spooky-shaped cheese crackers, a bowl of spicy pumpkin dip, and some creepy-crawly veggie sticks. For drinks, a crisp white wine or a dark beer complements the tangy, creamy filling perfectly. And if you’re feeling extra festive, a blood orange cocktail is the ideal Halloween pairing.
For storage, place any leftover deviled eggs in a single layer in an airtight container and refrigerate for up to 2 days. Don’t stack them — the filling will get squished and the olives will fall off. I’ve learned this the hard way. To reheat? Don’t. These are served cold, and reheating will ruin the texture. If they’ve been sitting out at room temperature for more than 2 hours, it’s safer to toss them. The flavors actually get better after a few hours in the fridge, so if you can make them the morning of your party, they’ll taste even better by evening.
Nutritional Information & Benefits
Here’s the nutritional breakdown for one monster eyeball deviled egg (based on 24 servings):
- Calories: 65
- Protein: 5g
- Fat: 4.5g
- Carbohydrates: 1g
- Fiber: 0g
- Sugar: 0.5g
- Sodium: 135mg
Eggs are a fantastic source of high-quality protein and contain all nine essential amino acids. They’re also rich in choline, which supports brain health, and lutein, which is good for your eyes — fitting, given the eyeball theme! The olives provide healthy monounsaturated fats and a touch of iron, while the paprika adds a small dose of antioxidants. This recipe is naturally low-carb and keto-friendly, making it a great option for guests with different dietary needs. Just be aware that it contains eggs, and the mayo typically contains eggs as well, so it’s not suitable for those with egg allergies. If you’re serving someone with a soy allergy, check your mayo label — some brands use soybean oil.
Conclusion
These monster eyeball deviled eggs have become my go-to Halloween contribution, and I honestly don’t see that changing anytime soon. They’re the perfect blend of nostalgic comfort and playful creativity — the kind of dish that makes people smile, take a picture, and then reach for seconds. Every time I make them, I think about Aunt Margie and her yellow kitchen, and I feel like I’ve finally found my own version of her magic. Not a copy, but an evolution. Something that’s mine, that carries her warmth forward in a new way.
I’d love for you to try these for your next Halloween gathering. Customize them however you like — swap the olives for something else, add more heat, or go full gory with extra “blood.” The beauty of this recipe is that it’s a canvas for your own creativity. And when you bring them to the party, watch people’s faces light up. That moment of delight? That’s what cooking is all about.
If you make these, I’d love to hear about it. Drop a comment below with your favorite variation, or tag me in your photos if you share them online. And if you’re looking for more spooky appetizer ideas, check out my mummy pigs in a blanket and spiderweb bruschetta — they’re perfect for rounding out your Halloween spread. Happy haunting, and happy cooking!
Frequently Asked Questions
How far in advance can I make these monster eyeball deviled eggs?
You can make them up to 24 hours ahead of time. Store them in an airtight container in the refrigerator, and add the olive “eyeballs” and pimento strips just before serving for the freshest look. The filling will stay creamy and delicious overnight.
Why did my egg yolks turn green?
That greenish ring around the yolk happens when eggs are overcooked or not cooled quickly enough. The 12-minute boil-and-rest method I shared prevents this, but if it happens anyway, don’t worry — the eggs are still safe to eat. The green is just a harmless chemical reaction between iron and sulfur in the egg.
Can I use medium eggs instead of large?
You can, but you’ll get smaller egg white halves and less room for the filling. If you use medium eggs, you might need to reduce the filling slightly or you’ll end up with overflow. I recommend sticking with large eggs for the best eyeball-to-egg ratio.
How do I keep the olive slices from falling off?
Press the olive slice gently but firmly into the filling. If the filling is too soft, chill the filled eggs in the fridge for 15-20 minutes before adding the olives. You can also use a tiny dab of filling on the back of the olive to help it stick better.
Can I freeze deviled eggs?
I don’t recommend freezing deviled eggs. The texture of both the egg whites and the filling will become watery and grainy after thawing. These are best made fresh or up to a day ahead and kept in the refrigerator.
Pin This Recipe!

Halloween Monster Eyeball Deviled Eggs: Easy & Spooky

These spooky monster eyeball deviled eggs are the perfect Halloween appetizer—creamy, tangy, and topped with olive ‘pupils’ and pimento ‘bloodshot’ veins. Easy to make in under 40 minutes, they’re a crowd-pleasing twist on a classic comfort food.
- Prep Time: 15 minutes
- Cook Time: 12 minutes
- Total Time: 40 minutes
- Yield: 24 deviled egg halves (12 servings of 2 halves each) 1x
- Category: Appetizer
- Cuisine: American
Ingredients
- 12 large eggs (room temperature preferred)
- 1/3 cup mayonnaise (Duke’s or Hellmann’s recommended)
- 1 tablespoon yellow mustard
- 1 teaspoon white vinegar
- 1/4 teaspoon salt (plus more for boiling water)
- 1/8 teaspoon black pepper (freshly ground preferred)
- 1/4 teaspoon paprika (smoked or regular)
- 1 jar large pitted black olives (about 24 slices)
- 1 jar pimentos or roasted red peppers (for bloodshot effect)
- 1 tablespoon pickle relish (optional, drained well)
- 1 teaspoon hot sauce (optional, such as Tabasco or Cholula)
Instructions
- Boil the eggs: Place 12 eggs in a single layer in a large pot. Cover with cold water by about an inch. Add a generous pinch of salt. Bring to a rolling boil over high heat, then cover, turn off heat, and let sit for exactly 12 minutes.
- Ice bath: While eggs sit, fill a large bowl with ice and cold water. Transfer eggs to ice bath using a slotted spoon. Let sit for at least 10 minutes. For easier peeling, crack shells slightly before adding to ice bath.
- Peel the eggs: Gently tap each egg on the counter to crack shell all over, then roll between palms. Start peeling from the wider end. Rinse peeled eggs under cold water to remove shell fragments.
- Slice and scoop: Slice each egg in half lengthwise. Gently pop out yolks into a medium mixing bowl. Arrange egg white halves on a serving platter, cut side up. If they wobble, slice a tiny sliver off the bottom to create a flat surface.
- Make the filling: Add mayonnaise, yellow mustard, white vinegar, salt, black pepper, and paprika to the bowl with yolks. Add pickle relish and/or hot sauce if using. Mash with a fork until completely smooth. Let sit for a minute, then mash again. Adjust seasoning to taste.
- Fill the egg whites: Spoon filling into a piping bag or zip-top bag with a tiny corner snipped off. Pipe filling into each egg white half, mounding slightly. You should get about 24 filled halves.
- Create the eyeballs: Slice black olives into rounds about 1/4-inch thick. Place one olive slice in the center of each filling mound, pressing gently. Cut pimentos or roasted red peppers into tiny strips (about 1/2 inch long and 1/8 inch wide). Place one strip on each side of the olive to create bloodshot effect.
- Final touch: Lightly sprinkle a tiny bit of paprika over the filling around the olive (not on the olive itself). Serve immediately or refrigerate until ready.
Notes
For easiest peeling, use eggs that are at least a week old. Boil and peel eggs up to 2 days ahead; store peeled eggs in cold water in the fridge. Filling can be made a day ahead and stored in a piping bag. On humid days, keep eggs in fridge until serving and pat egg whites dry before filling. To keep olives from sliding, press firmly into filling or chill filled eggs for 15 minutes before adding olives. Do not freeze deviled eggs.
Nutrition
- Serving Size: 2 deviled egg halves
- Calories: 130
- Sugar: 1
- Sodium: 270
- Fat: 9
- Saturated Fat: 2
- Carbohydrates: 2
- Protein: 10
Keywords: Halloween deviled eggs, monster eyeball deviled eggs, spooky appetizer, easy Halloween recipe, deviled eggs with olives, bloodshot deviled eggs, party appetizer, Halloween party food


