It was 10:47 PM on a random Wednesday in early December, and I had a very specific craving for something cool, creamy, and pepperminty. The problem? I didn’t have the three hours it would take to make a proper cheesecake with a water bath and a cooling curve, but I had a block of cream cheese, a sleeve of chocolate graham crackers, and a bag of crushed peppermint bark leftover from a gift basket I’d regifted to myself. And then the idea arrived — what if I just… didn’t follow the rules? What if I made a cheesecake that respected my limited attention span and didn’t require a single trip to the store?
Honestly, I was a little embarrassed by how excited I got. I mean, who gets this worked up over a shortcut dessert at nearly 11 PM on a weeknight? But let me tell you — sometimes the best recipes come from a place of “I want this now, and I’m not willing to wait.” Maybe you’ve been there, standing in front of your fridge at an unreasonable hour, convinced that only a specific treat will fix whatever’s wrong with the day. That was me, except I actually made it work.
The result was so good that I made it again the next day for a friend who stopped by, and she demanded the recipe before she even finished her first slice. That’s how this quick peppermint bark cheesecake became my go-to holiday dessert — no fuss, no water bath, no overnight chill. Just a buttery chocolate crust, a silky no-bake filling, and that satisfying crunch of peppermint on top. It’s the kind of recipe that feels like cheating but tastes like you spent hours. And honestly? That’s my favorite kind of recipe.
Why You’ll Love This Recipe
Let’s be real — the holidays are already chaotic enough. You don’t need a dessert that demands a culinary degree or a full afternoon of babysitting an oven. This quick peppermint bark cheesecake is here to save your sanity and your sweet tooth. I’ve tested this recipe at least seven times (yes, seven — I have a problem), and I can confidently say it’s foolproof.
- Quick & Easy: You can have this in the fridge chilling in under 20 minutes of active work. No baking, no water bath, no stress.
- Simple Ingredients: Cream cheese, heavy cream, vanilla, powdered sugar, and store-bought peppermint bark. That’s it. Your pantry probably already has most of it.
- Perfect for Holiday Gatherings: This is the dessert you bring to a party when you want to look like a hero without actually working like one.
- Crowd-Pleaser: I’ve served this to kids, grandparents, and that one friend who “doesn’t really like sweets” — every single person went back for seconds.
- Unbelievably Delicious: The texture is this dreamy cross between mousse and classic cheesecake, and the peppermint crunch on top is pure magic.
What makes this version different from every other no-bake cheesecake out there? It’s the texture. Instead of using gelatin or cornstarch, I whip the cream cheese with cold heavy cream until it’s light and airy — almost like a mousse. Then I fold in crushed peppermint bark so every bite has that little crunch. It’s not just another holiday dessert; it’s the one that’ll have people asking for the recipe before they finish their plate.
This is comfort food reimagined — faster, simpler, but with the same soul-soothing satisfaction. Perfect for impressing guests without the stress, or turning a simple Wednesday night into something special.
What Ingredients You Will Need
This recipe uses simple, honest ingredients to create something that feels way more indulgent than it actually is. Most of these are pantry staples during the holiday season, and if you’re missing something, the substitutions are easy.
For the Crust
- Chocolate graham crackers — 1 ½ cups crushed (about 8 full sheets). I use Nabisco Chocolate Grahams, but any brand works. Regular graham crackers work too if that’s what you have.
- Unsalted butter — 5 tablespoons, melted. Salted butter is fine, just skip the added salt in the crust.
- Granulated sugar — 2 tablespoons. This helps the crust hold together and adds a tiny bit of sweetness.
- Pinch of salt — just a tiny one, especially if using unsalted butter.
For the Cheesecake Filling
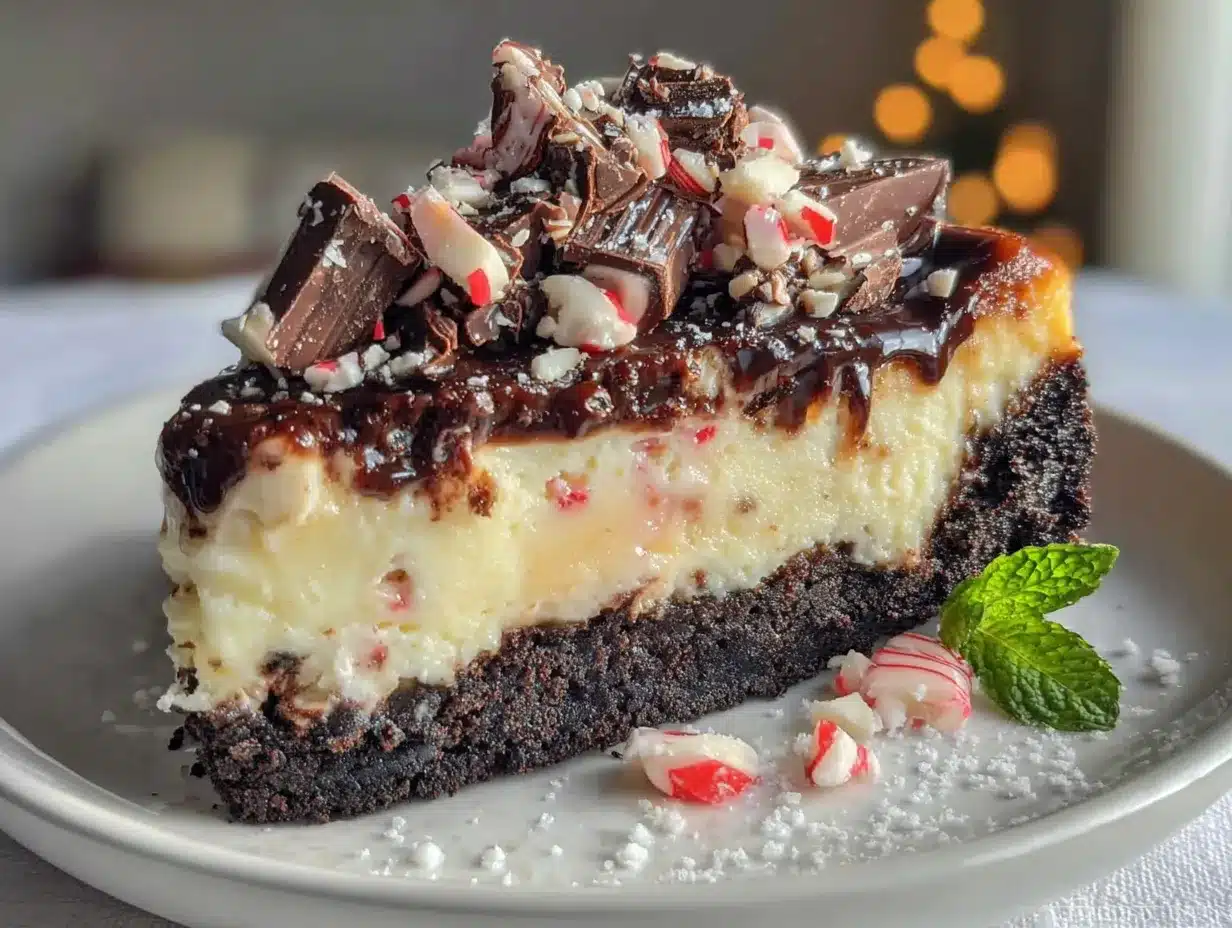
- Cream cheese — 16 ounces (two 8-ounce blocks), softened to room temperature. I recommend Philadelphia brand for the smoothest texture. Don’t use low-fat — it won’t set properly.
- Powdered sugar — 1 cup, sifted if you’re feeling fancy (but honestly, I never sift and it’s fine).
- Heavy cream — 1 cup, cold. This is key for that mousse-like texture. Whipping cream (36% milk fat) works best.
- Vanilla extract — 1 teaspoon. Pure vanilla is better, but imitation works in a pinch.
- Peppermint extract — ½ teaspoon. Be careful here — peppermint extract is strong. Start with ¼ teaspoon and taste if you’re nervous.
For the Topping
- Crushed peppermint bark — 1 cup (about 6 ounces). I use Ghirardelli Peppermint Bark, which is widely available. You can also use crushed candy canes mixed with white chocolate chips.
- Optional: Extra chocolate shavings or a drizzle of melted dark chocolate for presentation.
Ingredient tip: Make sure your cream cheese is truly at room temperature — leave it out for at least 30 minutes. Cold cream cheese will leave you with lumps, and nobody wants lumpy cheesecake. I learned this the hard way when I tried to rush it and ended up with a filling that looked like cottage cheese. Not cute.
Equipment Needed
You don’t need a fancy kitchen to make this work. Here’s what you’ll need:
- 9-inch springform pan — This is ideal for easy removal. If you don’t have one, a deep-dish pie plate works, but the slices won’t be as clean.
- Food processor or zip-top bag — For crushing the graham crackers. A rolling pin over a bag works great if you need to release some frustration.
- Electric hand mixer or stand mixer — A hand mixer is totally fine. I’ve made this with a whisk and some serious arm strength, but I don’t recommend it.
- Large mixing bowl — For the filling.
- Medium mixing bowl — For the whipped cream.
- Spatula — For folding and spreading.
- Measuring cups and spoons — Standard set.
- Plastic wrap or foil — For covering the pan while it chills.
Budget tip: If you don’t own a springform pan, you can line a regular 9-inch cake pan with parchment paper strips (like a sling) so you can lift the cheesecake out. It’s not as pretty, but it works.
Preparation Method
This is where the magic happens. Follow these steps, and you’ll have a dessert that looks like it took all day — but really, you’ll be done in about 20 minutes.
Step 1: Make the Crust (5 minutes)
Crush your chocolate graham crackers into fine crumbs. If using a food processor, pulse until you have uniform crumbs — about 10-12 pulses. If using a bag, place the crackers inside, seal it, and go to town with a rolling pin. I won’t judge you if you use a heavy skillet instead.
Pour the crumbs into a medium bowl. Add the melted butter, sugar, and salt. Stir with a fork until the mixture looks like wet sand — every crumb should be coated. Press this mixture firmly into the bottom of your springform pan. Use the bottom of a measuring cup to really pack it down. Pop it in the fridge while you make the filling.
Step 2: Whip the Cream (3 minutes)
In a medium bowl, pour the cold heavy cream. Using your hand mixer, beat on medium-high speed until stiff peaks form — about 2-3 minutes. You’ll know it’s ready when you lift the beaters and the cream holds its shape without drooping. Set this in the fridge for a minute while you work on the cream cheese.
Step 3: Make the Cheesecake Filling (5 minutes)
In a large bowl, beat the softened cream cheese with the hand mixer until it’s smooth and fluffy — about 1 minute. Scrape down the sides of the bowl with your spatula. Add the powdered sugar, vanilla extract, and peppermint extract. Beat again until everything is combined and smooth, about 30 seconds. Don’t overmix or the filling can get too thin.
Step 4: Fold It All Together (2 minutes)
Take your whipped cream out of the fridge. Add about half of it to the cream cheese mixture and fold gently with your spatula — just until combined. Add the remaining whipped cream and fold again. The goal is to keep the airiness, so be gentle. Once it’s uniform, fold in ½ cup of the crushed peppermint bark. This distributes the crunch throughout the filling.
Step 5: Assemble and Chill (5 minutes + 4 hours)
Take the crust out of the fridge. Spoon the filling onto the crust and spread it evenly with your spatula. Smooth the top as best you can — it doesn’t have to be perfect because the topping will cover it. Sprinkle the remaining ½ cup of crushed peppermint bark over the top. Press it in gently so it sticks.
Cover the pan with plastic wrap and refrigerate for at least 4 hours, but overnight is better. The longer it chills, the cleaner your slices will be. I know waiting is hard, but trust me — it’s worth it.
Cooking Tips & Techniques
I’ve made this quick peppermint bark cheesecake enough times to know exactly where things can go wrong. Here’s what I’ve learned:
Don’t skip softening the cream cheese. I know you’re in a hurry — I get it. But cold cream cheese will give you a lumpy filling that no amount of beating can fix. Microwave it for 10-15 seconds if you forgot to take it out, but watch it carefully. You want it soft, not melted.
Whip the cream to stiff peaks. I made the mistake of under-whipping once, and the filling never set properly. It was more like a pudding than a cheesecake. When you think it’s done, give it 10 more seconds. Stiff peaks mean the cream holds its shape when you lift the beaters.
Use a light hand when folding. This is not the time to be aggressive. Overmixing deflates the whipped cream, and you’ll end up with a dense, heavy cheesecake. Fold until you can’t see any white streaks, then stop.
Press the crust firmly. A loose crust will crumble when you slice the cheesecake. Use the bottom of a glass or a measuring cup to really pack those crumbs down. I press until the surface is smooth and even.
Chill overnight if you can. Four hours is the minimum, but 8-12 hours gives you the cleanest slices and the best texture. The flavors also meld together more — the peppermint gets a little more subtle and the crust softens just enough.
Variations & Adaptations
One of the best things about this recipe is how easy it is to change up. Here are some variations I’ve tried and loved:
Gluten-Free Version
Use gluten-free chocolate sandwich cookies (like Glutino or Kinnikinnick) instead of graham crackers. The texture is slightly different — a bit more crumbly — but the flavor is still amazing.
Dairy-Free Version
This one takes a little more work, but it’s doable. Use dairy-free cream cheese (Kite Hill or Tofutti work well) and coconut cream instead of heavy cream. Chill the coconut cream overnight first, then whip it just like regular cream. The flavor will be slightly different, but the texture holds up surprisingly well.
White Chocolate Peppermint Version
Melt 4 ounces of white chocolate and let it cool slightly. Fold it into the cream cheese mixture along with the whipped cream. This makes the filling extra rich and decadent — perfect for when you want to go all out.
Mint Chocolate Chip Version
Fold in ½ cup of mini chocolate chips along with the crushed peppermint bark. The extra chocolate chips give every bite a little burst of chocolate. I did this for a party once and it was the first thing to disappear.
Individual Mini Cheesecakes
Use a muffin tin lined with paper liners. Press the crust into the bottom of each liner, then spoon the filling on top. Chill for 3-4 hours, then peel off the liners. These are perfect for parties or portion control (if that’s your thing).
Serving & Storage Suggestions
Serving: Take the cheesecake out of the fridge about 10 minutes before serving. This takes the chill off and makes the texture even creamier. Run a butter knife around the edge of the pan before releasing the springform. Slice with a sharp knife, wiping it clean between cuts for the prettiest slices.
Presentation: I like to drizzle a little melted dark chocolate over the top right before serving, then add a few extra crushed candy canes for color. It looks festive and impressive with almost no extra effort.
Storage: Cover the cheesecake tightly with plastic wrap or foil and keep it in the fridge. It will stay fresh for up to 5 days — if it lasts that long. The crust might soften a little after day 3, but the flavor actually gets better.
Freezing: This cheesecake freezes beautifully. Wrap the whole cheesecake (or individual slices) in plastic wrap, then foil. Freeze for up to 3 months. Thaw in the fridge overnight before serving. I like to keep a few slices in the freezer for surprise guests or late-night cravings.
Reheating: Don’t. This is a cold dessert. But if you want the crust to be a little firmer, you can pop the whole pan in the freezer for 15 minutes before serving.
Nutritional Information & Benefits
Let’s be honest — this is a dessert, not a health food. But here’s the estimated nutritional breakdown per slice (based on 12 slices):
- Calories: ~380
- Fat: 26g
- Carbohydrates: 34g
- Protein: 5g
- Sugar: 24g
Health highlights: Cream cheese contains a good amount of vitamin A and calcium. Peppermint is known for its digestive benefits — so in a way, this is practically a health food, right? (I’m joking, mostly.)
Dietary considerations: This recipe contains dairy and gluten. See the variations section for dairy-free and gluten-free options. It can also be made sugar-free by using powdered erythritol or monk fruit sweetener in the filling.
My personal philosophy? Desserts like this are about joy, not nutrition. One slice of this cheesecake won’t derail your health goals, but it might just make your day a little brighter. And that’s worth something.
Conclusion
This quick peppermint bark cheesecake has become my secret weapon for holiday gatherings, last-minute dinner parties, and those nights when I just need something sweet. It’s proof that you don’t need complicated techniques or a kitchen full of fancy equipment to make something truly special. Sometimes the best recipes are the ones that work with your schedule, not against it.
I love this recipe because it reminds me that perfection isn’t the point. The slightly uneven crust, the tiny lumps in the filling that I didn’t quite smooth out, the way the peppermint bark crumbles across the top like a happy accident — that’s where the charm lives. And honestly, nobody has ever complained about a slightly imperfect slice of cheesecake.
Now I want to hear from you — have you tried this recipe? Did you add your own twist? Drop a comment below and let me know how it turned out. And if you loved it, share it with a friend who needs a little more peppermint in their life. Happy baking (or, you know, no-baking)!
Frequently Asked Questions
Can I use low-fat cream cheese?
I don’t recommend it. Low-fat cream cheese has a higher water content, which can make the filling runny and prevent it from setting properly. Stick with full-fat cream cheese for the best texture.
How long does this cheesecake need to chill?
At least 4 hours, but overnight is ideal. The longer it chills, the cleaner your slices will be. If you’re in a rush, you can freeze it for 2 hours, but the texture won’t be as creamy.
Can I use crushed candy canes instead of peppermint bark?
Absolutely! Crushed candy canes work great, but they can be a little sharp on the teeth. I like to mix them with some melted white chocolate or chocolate chips to soften the crunch. Use about ¾ cup of crushed candy canes.
How do I get clean slices?
Use a sharp knife and wipe it clean between each cut. You can also dip the knife in hot water and dry it before slicing — the heat helps the knife glide through the cheesecake without dragging the filling.
Can I make this ahead of time?
Yes! This is actually a great make-ahead dessert. You can prepare it up to 2 days in advance and keep it covered in the fridge. The flavors meld together beautifully, and it saves you precious time on the day of your event.
Pin This Recipe!
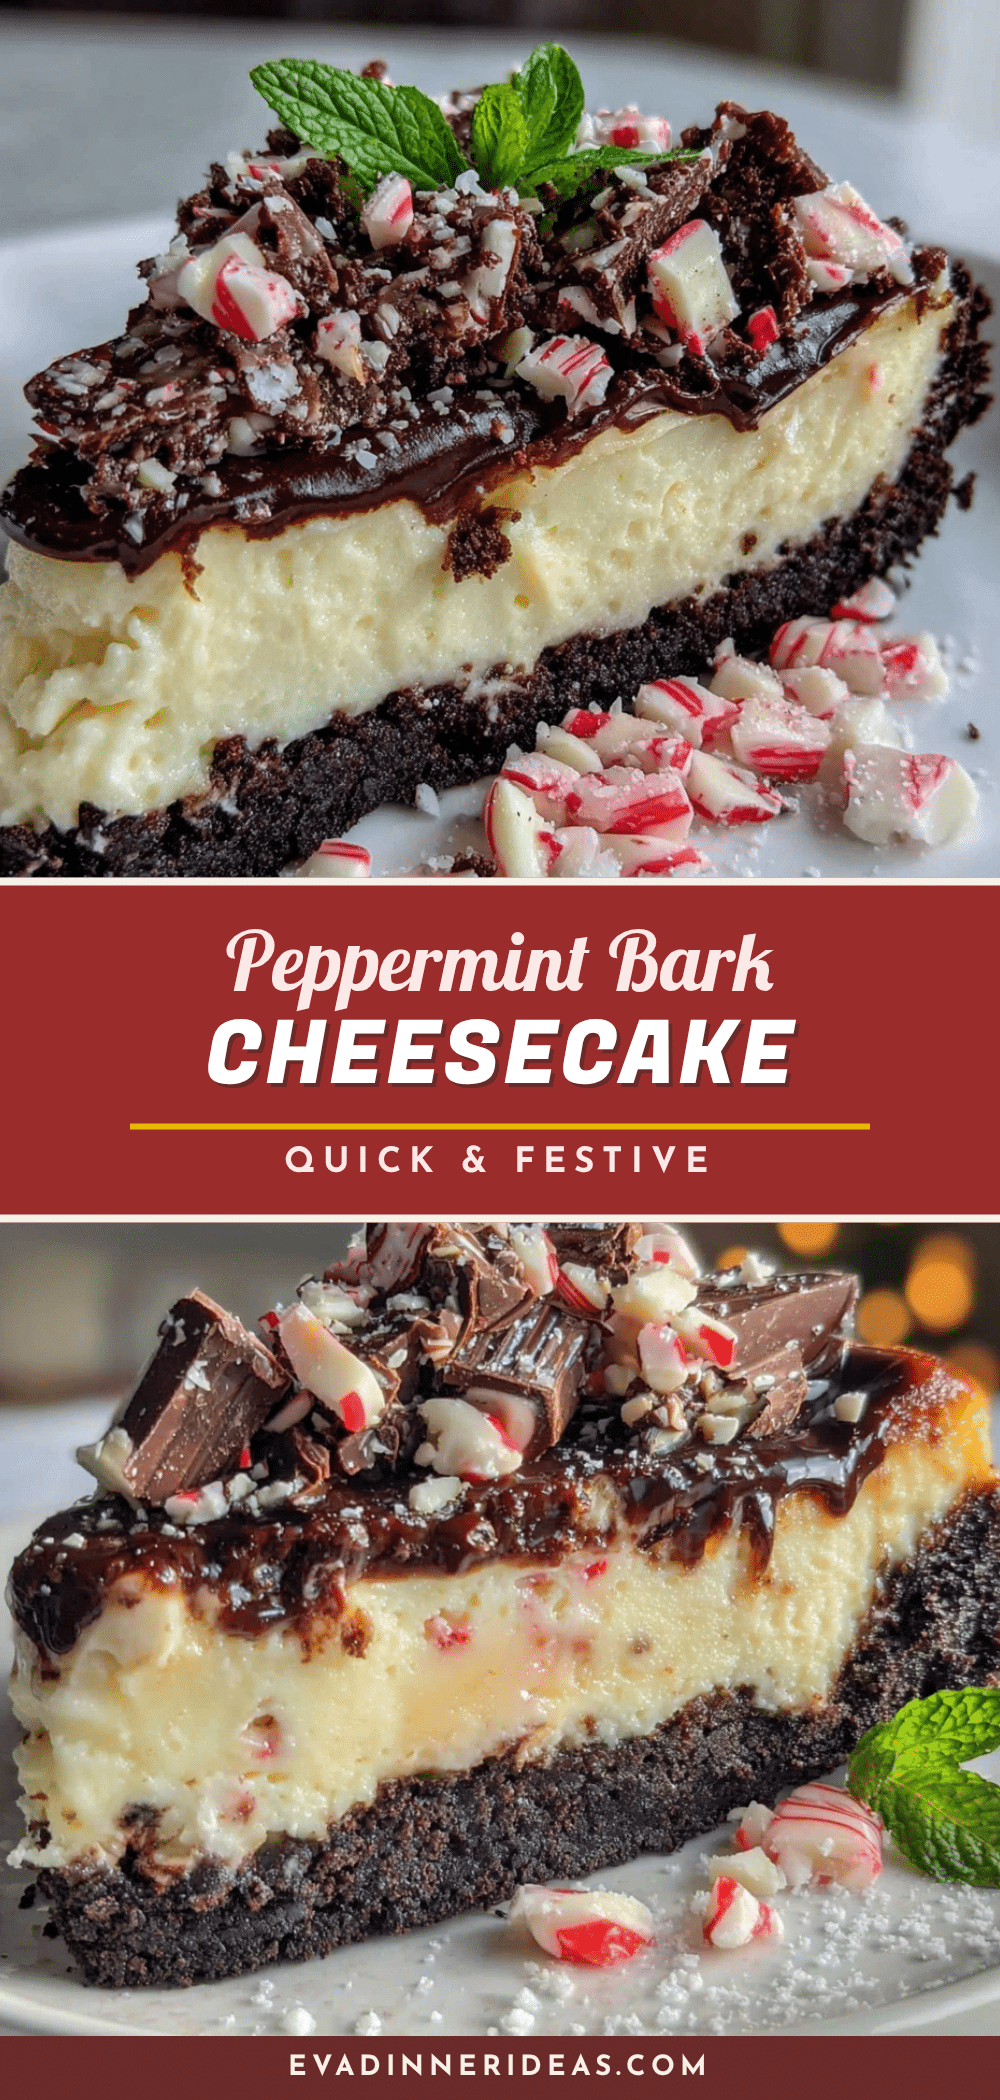
Easy Peppermint Bark Cheesecake – Best Quick Holiday Dessert
A quick and easy no-bake peppermint bark cheesecake with a buttery chocolate crust, silky mousse-like filling, and crunchy peppermint topping. Perfect for holiday gatherings or last-minute cravings.
- Prep Time: 20 minutes
- Cook Time: 0 minutes
- Total Time: 4 hours 20 minutes (includes chilling)
- Yield: 12 servings 1x
- Category: Dessert
- Cuisine: American
Ingredients
- 1 ½ cups crushed chocolate graham crackers (about 8 full sheets)
- 5 tablespoons unsalted butter, melted
- 2 tablespoons granulated sugar
- Pinch of salt
- 16 ounces cream cheese, softened to room temperature
- 1 cup powdered sugar
- 1 cup cold heavy cream
- 1 teaspoon vanilla extract
- ½ teaspoon peppermint extract
- 1 cup crushed peppermint bark (about 6 ounces), divided
Instructions
- Make the crust: Crush chocolate graham crackers into fine crumbs. In a medium bowl, combine crumbs with melted butter, sugar, and salt. Stir until mixture resembles wet sand. Press firmly into the bottom of a 9-inch springform pan. Refrigerate while making filling.
- Whip the cream: In a medium bowl, beat cold heavy cream with an electric mixer on medium-high speed until stiff peaks form, about 2-3 minutes. Set aside in the fridge.
- Make the filling: In a large bowl, beat softened cream cheese until smooth and fluffy, about 1 minute. Add powdered sugar, vanilla extract, and peppermint extract. Beat until combined and smooth, about 30 seconds.
- Fold together: Add half of the whipped cream to the cream cheese mixture and fold gently with a spatula until combined. Add remaining whipped cream and fold until uniform. Fold in ½ cup of crushed peppermint bark.
- Assemble: Remove crust from fridge. Spoon filling onto crust and spread evenly. Sprinkle remaining ½ cup crushed peppermint bark on top, pressing gently to adhere.
- Chill: Cover pan with plastic wrap and refrigerate for at least 4 hours, preferably overnight. Serve cold.
Notes
Make sure cream cheese is at room temperature to avoid lumps. Whip cream to stiff peaks for best texture. Chill overnight for cleanest slices. Can be frozen for up to 3 months.
Nutrition
- Serving Size: 1 slice
- Calories: 380
- Sugar: 24
- Sodium: 280
- Fat: 26
- Saturated Fat: 16
- Carbohydrates: 34
- Fiber: 1
- Protein: 5
Keywords: peppermint bark cheesecake, no-bake cheesecake, quick holiday dessert, easy cheesecake, peppermint dessert, Christmas dessert


