It was 11:47 PM on a Tuesday that had already gone sideways—the school play ran long, someone forgot their science project at home, and dinner had been a sad rotation of cereal and string cheese. I was standing in front of the open fridge, exhausted, when a very specific craving hit: that buttery, garlicky, one-pan chicken and rice my aunt used to make when we visited her farmhouse. The problem? I didn’t have the fancy bone-in chicken thighs she swore by, or the homemade stock simmered all afternoon. But I had boneless chicken breasts, a head of garlic that was starting to sprout, and a bag of jasmine rice that was about to become the hero of the night. Honestly, something about the late hour loosened the usual rules—I stopped worrying about doing it “right” and started doing what made sense. I grabbed a skillet, melted way more butter than I should admit, and just started cooking by instinct. Maybe you’ve been there, standing in your own kitchen at a ridiculous hour, making something that feels both desperate and brilliant at the same time. That night, that messy, improvised skillet dinner became the recipe I’ve now made more times than I can count. It’s the kind of meal that proves you don’t need perfect ingredients or hours of prep—you just need a little late-night courage and a pan that can handle everything.
Why You’ll Love This Recipe
Let me tell you why this one-pan garlic butter chicken and rice has become the most-requested dinner in my house. It’s not fancy, and that’s exactly the point.
- Quick & Easy: From fridge to table in about 45 minutes, with only 10 minutes of active prep. Perfect for those nights when you walk in the door at 6 PM and need dinner by 6:45.
- Simple Ingredients: No obscure spices or specialty items. You probably have garlic, butter, rice, and chicken in your kitchen right now. If not, a quick stop at any grocery store will cover everything.
- Perfect for Family Dinners: This is the meal that pleases everyone—the picky eater who just wants “plain chicken,” the spouse who craves comfort food, and the teenager who eats three servings. It’s a crowd-pleaser without the crowd-sized effort.
- Budget-Friendly: Chicken breasts or thighs, rice, and garlic butter are some of the most affordable ingredients you can buy. This whole meal costs less than takeout for two, and feeds a family of four with leftovers.
- Unbelievably Delicious: The magic happens when the rice absorbs all that garlic butter and chicken drippings. Each bite is tender, savory, and deeply satisfying. It’s the kind of meal that makes you close your eyes after the first forkful.
What makes this recipe different from every other chicken and rice recipe out there? It’s the technique. Instead of cooking the chicken separately and then mixing it with rice, we build layers of flavor in one single pan. The chicken gets a gorgeous golden sear, then the rice is toasted in that buttery fond before simmering in broth. The result is rice that tastes like it was cooked in chicken essence—because it was. I’ve tested this with different cuts of chicken, various rice types, and even swapped the butter for olive oil in a pinch. This version is the one that works every single time, no matter how tired or distracted you are.
What Ingredients You Will Need
This recipe relies on simple, everyday ingredients that work together to create something far greater than the sum of their parts. The beauty is in the basics—each component has a job, and they all do it beautifully.
- Chicken: 4 boneless, skinless chicken breasts (about 1.5 lbs or 680g total), or 6 boneless chicken thighs. I prefer thighs for extra juiciness, but breasts work wonderfully too. Pat them dry with paper towels before seasoning—this is non-negotiable for a good sear.
- Butter: 4 tablespoons (56g) unsalted butter, divided. I use salted butter in a pinch and just reduce the added salt slightly. Kerrygold or any European-style butter adds incredible richness.
- Garlic: 6 cloves, minced (about 2 tablespoons). Fresh garlic is essential here—don’t use the jarred stuff. The garlic flavor is the backbone of this dish.
- Rice: 1.5 cups (300g) long-grain white rice, such as jasmine or basmati. Rinse it in a fine-mesh strainer until the water runs clear. This removes excess starch and prevents gummy rice.
- Chicken Broth: 2.5 cups (590ml) low-sodium chicken broth. Homemade is lovely, but boxed broth works perfectly. Swanson or Kitchen Basics are my go-to brands.
- Onion: 1 medium yellow onion, finely diced (about 1 cup). The onion melts into the rice, adding sweetness and depth.
- Seasonings: 1 teaspoon salt (plus more for the chicken), 1/2 teaspoon black pepper, 1 teaspoon paprika, 1/2 teaspoon dried thyme, 1/4 teaspoon red pepper flakes (optional, for a little heat).
- Fresh Parsley: 2 tablespoons chopped, for garnish. Optional but highly recommended—it adds a fresh pop of color and brightness.
- Lemon: 1 lemon, cut into wedges, for serving. A squeeze of lemon right before eating cuts through the richness beautifully.
Substitution Notes: For a dairy-free version, substitute the butter with 4 tablespoons of olive oil or vegan butter. For a gluten-free meal, this recipe is naturally gluten-free as written—just double-check your broth label. If you want to use brown rice, increase the broth to 3 cups and the cooking time to about 45 minutes covered.
Equipment Needed
The beauty of this recipe is that it truly only needs one pan. Here’s what you’ll need:
- A large, deep skillet or Dutch oven: 12-inch (30cm) diameter with a tight-fitting lid is ideal. A heavy-bottomed pan distributes heat evenly and prevents burning. I use my trusty Lodge cast iron skillet, but a stainless steel or non-stick pan works fine too.
- A sharp knife and cutting board: For mincing garlic, dicing onion, and trimming chicken.
- A wooden spoon or silicone spatula: For stirring and scraping up the browned bits from the pan—that’s flavor gold.
- A fine-mesh strainer: For rinsing the rice. Don’t skip this step!
- Measuring cups and spoons: For accuracy, especially with the rice-to-liquid ratio.
- Paper towels: For patting the chicken dry. This is the single most important step for a good sear.
- Aluminum foil: To cover the pan if your lid doesn’t fit perfectly, or to rest the chicken while the rice cooks.
Budget-Friendly Tip: If you don’t own a Dutch oven, any large, deep skillet with a lid will work. No lid? Use a baking sheet or foil to cover the pan tightly.
Preparation Method
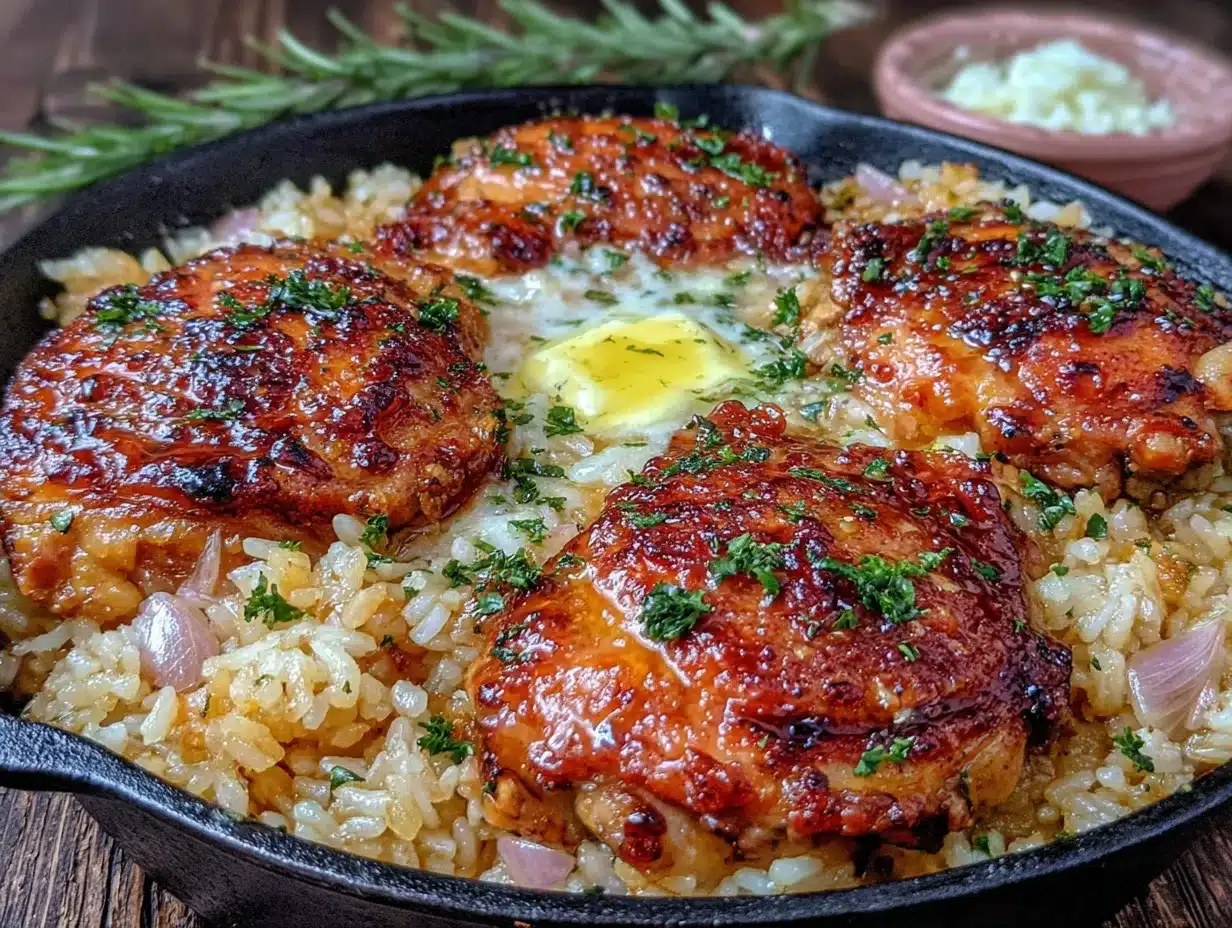
Let’s get cooking. I’ll walk you through every step so your first time feels like your tenth.
- Prep the chicken (5 minutes): Pat the chicken breasts dry with paper towels. Season both sides generously with salt, pepper, and paprika. Let them sit at room temperature for 10 minutes while you prep the other ingredients. This helps them cook more evenly.
- Heat the pan (2 minutes): Place your skillet over medium-high heat. Add 2 tablespoons of the butter. Let it melt and foam—when the foam subsides, the pan is hot enough. The butter should sizzle when you add the chicken.
- Sear the chicken (8-10 minutes): Carefully place the chicken in the hot skillet. Do not crowd the pan—cook in batches if needed. Let it cook undisturbed for 4-5 minutes until the underside is deep golden brown. Flip and cook another 4-5 minutes. The chicken should be cooked through (165°F / 74°C internal temperature). Remove the chicken to a plate and tent loosely with foil.
- Sauté the aromatics (3 minutes): Reduce the heat to medium. Add the remaining 2 tablespoons of butter. Toss in the diced onion and cook for 2 minutes, scraping up those browned bits from the bottom of the pan. Add the minced garlic and cook for 1 minute more, until fragrant. Don’t let the garlic burn—it turns bitter quickly.
- Toast the rice (2 minutes): Add the rinsed and drained rice to the pan. Stir constantly for 2 minutes, coating the grains in the buttery onion mixture. The rice will start to smell nutty and turn slightly translucent at the edges. This step is crucial for preventing mushy rice.
- Add liquid and seasonings (1 minute): Pour in the chicken broth, dried thyme, red pepper flakes (if using), and the remaining 1/2 teaspoon of salt. Stir everything together, scraping the bottom of the pan one last time to incorporate all the flavor.
- Simmer the rice (18-20 minutes): Bring the liquid to a boil, then reduce the heat to low. Cover the pan with a tight-fitting lid. Let it simmer gently for 18 minutes. Do not lift the lid during this time—you’ll let out the steam that’s cooking the rice.
- Rest and fluff (5 minutes): After 18 minutes, turn off the heat. Let the pan sit covered for 5 minutes. This allows the rice to absorb any remaining liquid and steam to perfection. Remove the lid and fluff the rice with a fork.
- Return the chicken (2 minutes): Place the seared chicken on top of the rice. Cover the pan again and let it sit for 2 minutes to warm the chicken through.
- Garnish and serve: Sprinkle with fresh parsley and serve with lemon wedges. Squeeze lemon over each serving right before eating.
Visual Cue: When the rice is done, it should be tender and fluffy, with all the liquid absorbed. If there’s still liquid in the pan, cook uncovered for 2-3 more minutes. If the rice seems dry, add 2 tablespoons of broth or water and cook covered for 2 more minutes.
Cooking Tips & Techniques
After making this dish more times than I can count, I’ve learned a few things the hard way. Let me save you from my mistakes.
The biggest mistake people make is not patting the chicken dry. I know it seems like an extra step, but wet chicken will steam instead of sear. You want that deep golden crust—it’s where the flavor lives. I once skipped this step when I was in a rush, and the chicken turned out pale and rubbery. Never again.
Don’t skip rinsing the rice. Unrinsed rice has excess starch that turns your fluffy pilaf into a sticky mess. Run it under cold water in a fine-mesh strainer until the water runs clear—about 30 seconds of rinsing.
Resist the urge to lift the lid. I know it’s tempting to peek, but every time you lift that lid, steam escapes and your cooking time becomes unpredictable. Set a timer and trust the process. If you’re nervous about burning, use a glass lid if you have one.
Let the rice rest. That 5-minute rest after cooking is not optional. It’s when the rice finishes absorbing liquid and the grains separate into perfect, fluffy individual pieces. Use this time to set the table or pour a glass of wine.
For consistently juicy chicken, use a meat thermometer. Insert it into the thickest part of the breast—165°F (74°C) is your target. Overcooked chicken is dry and sad, and this recipe deserves better.
Timing strategy: While the chicken sears, dice your onion and mince the garlic. While the rice simmers, chop the parsley and cut the lemon wedges. This way, everything flows without stress.
Variations & Adaptations
This recipe is incredibly flexible. Here are some ways I’ve adapted it for different moods and dietary needs.
Creamy Garlic Butter Chicken and Rice: After toasting the rice, stir in 1/2 cup (120ml) of heavy cream along with the broth. The result is an ultra-luxurious, risotto-like dish that feels like a special occasion. My family begs for this version on cold winter nights.
Vegetable-Packed Version: Add 1 cup of frozen peas and carrots during the last 5 minutes of rice cooking. Or stir in a handful of fresh spinach right before serving—it wilts into the rice beautifully. This is my go-to when I need to sneak extra veggies into my kids’ dinner.
Spicy Cajun Twist: Swap the paprika and thyme for 1 tablespoon of Cajun seasoning. Add 1/2 cup of diced bell pepper and 1 celery stalk (diced) along with the onion. This version has a smoky, spicy kick that my husband adores.
Dairy-Free Adaptation: Use 4 tablespoons of olive oil instead of butter. The flavor changes slightly, but it’s still delicious. Add a splash of nutritional yeast at the end for a cheesy note without dairy.
Rice Alternatives: I’ve made this with basmati, jasmine, and even short-grain sushi rice. Each works, but jasmine is my favorite for its floral aroma and fluffy texture. Brown rice works too—just increase the broth to 3 cups and simmer for 45 minutes.
Serving & Storage Suggestions
This dish is a complete meal on its own, but here’s how to make it even better.
Serving temperature: Serve hot, straight from the pan. The rice should be steaming and the chicken warm. That final squeeze of lemon is non-negotiable—it wakes up all the flavors.
What to serve with it: A simple green salad with lemon vinaigrette cuts through the richness perfectly. Steamed broccoli or roasted asparagus are excellent sides. For a truly no-effort meal, serve it with a side of crusty bread to soak up any buttery juices left in the pan.
Storage: Store leftovers in an airtight container in the refrigerator for up to 4 days. The flavors actually meld and deepen overnight—I often think it tastes even better the next day.
Reheating: The best way to reheat is in a skillet over medium-low heat with a splash of chicken broth or water. Cover and cook for 5-7 minutes, stirring occasionally. The microwave works too, but the rice tends to dry out. If microwaving, cover the bowl with a damp paper towel to add moisture.
Freezing: This dish freezes beautifully for up to 3 months. Let it cool completely, then transfer to a freezer-safe container. Thaw overnight in the refrigerator and reheat as directed above. I often double the recipe and freeze half for busy weeks.
Nutritional Information & Benefits
Here’s the nutritional breakdown for one serving (based on 6 servings):
- Calories: 485
- Protein: 38g
- Carbohydrates: 45g
- Fat: 16g
- Saturated Fat: 8g
- Fiber: 1g
- Sodium: 680mg
Health benefits: This meal is a solid source of lean protein from the chicken, which supports muscle health and keeps you full. The garlic provides allicin, a compound known for its immune-boosting and anti-inflammatory properties. Butter, while high in saturated fat, also contains vitamin A and butyrate, which supports gut health. The rice provides quick energy, making this a balanced meal for active families.
Dietary considerations: This recipe is naturally gluten-free and nut-free. It can be made dairy-free with olive oil. For lower sodium, use unsalted butter and low-sodium broth, and reduce the added salt to 1/2 teaspoon.
Conclusion
This one-pan garlic butter chicken and rice isn’t just a recipe—it’s a solution for those nights when you need dinner to work without working for it. It’s the meal that saved me on that late Tuesday night, and it’s been saving me ever since. The golden sear on the chicken, the garlicky rice that soaks up every drop of flavor, the way the whole house smells like comfort—this is what family dinner should feel like.
I want you to make this your own. Add more garlic if you’re brave. Throw in some mushrooms or bell peppers. Use thighs instead of breasts. The recipe is a starting point, not a rulebook. The only rule is that you use one pan, feed the people you love, and enjoy every bite.
When you make it, come back and tell me how it went. Did your kids ask for seconds? Did you add a secret ingredient? Did you, like me, find yourself standing in the kitchen at 11 PM, eating straight from the pan? I want to hear it all. Leave a comment below, share your photos, and let’s build a community of one-pan dinners that actually work.
Now go get that skillet hot. Dinner’s waiting.
Frequently Asked Questions
Can I use chicken thighs instead of breasts?
Absolutely. Boneless, skinless chicken thighs are actually my preference for this recipe—they’re more forgiving and stay juicier. Use 6 thighs instead of 4 breasts, and cook them for the same amount of time. Bone-in thighs work too, but will need an extra 5-7 minutes of cooking.
Why is my rice mushy or undercooked?
Mushy rice usually means too much liquid or the lid was lifted during cooking. Undercooked rice means not enough liquid or the heat was too low. For perfect rice, use the exact liquid ratio (2.5 cups broth to 1.5 cups rice), keep the lid on, and let it rest for 5 minutes after cooking. If it’s still crunchy after 18 minutes, add 2 tablespoons of broth and cook covered for 5 more minutes.
Can I make this in a slow cooker or Instant Pot?
Yes! For the Instant Pot, use the sauté function to sear the chicken and cook the aromatics, then add the rice and broth. Pressure cook on high for 4 minutes with natural release. For a slow cooker, sear the chicken first, then add all ingredients except the rice. Cook on low for 4 hours, then stir in the rice and cook on high for 1 more hour. Note that the texture will be different—more porridge-like than fluffy.
How do I prevent the chicken from drying out?
Three tips: First, don’t overcook it. Use a meat thermometer and remove the chicken at exactly 165°F (74°C). Second, let the chicken rest after searing—this redistributes the juices. Third, when you return the chicken to the pan at the end, only warm it for 2 minutes. Any longer and it will start to dry out.
Can I add vegetables to this dish?
Definitely. Frozen peas and carrots are my go-to—add them during the last 5 minutes of rice cooking. Fresh spinach stirred in at the end wilts beautifully. For heartier veggies like broccoli or green beans, blanch them first and add them when the rice is done. Mushrooms are fantastic—sauté them with the onions for extra earthy flavor.
Pin This Recipe!
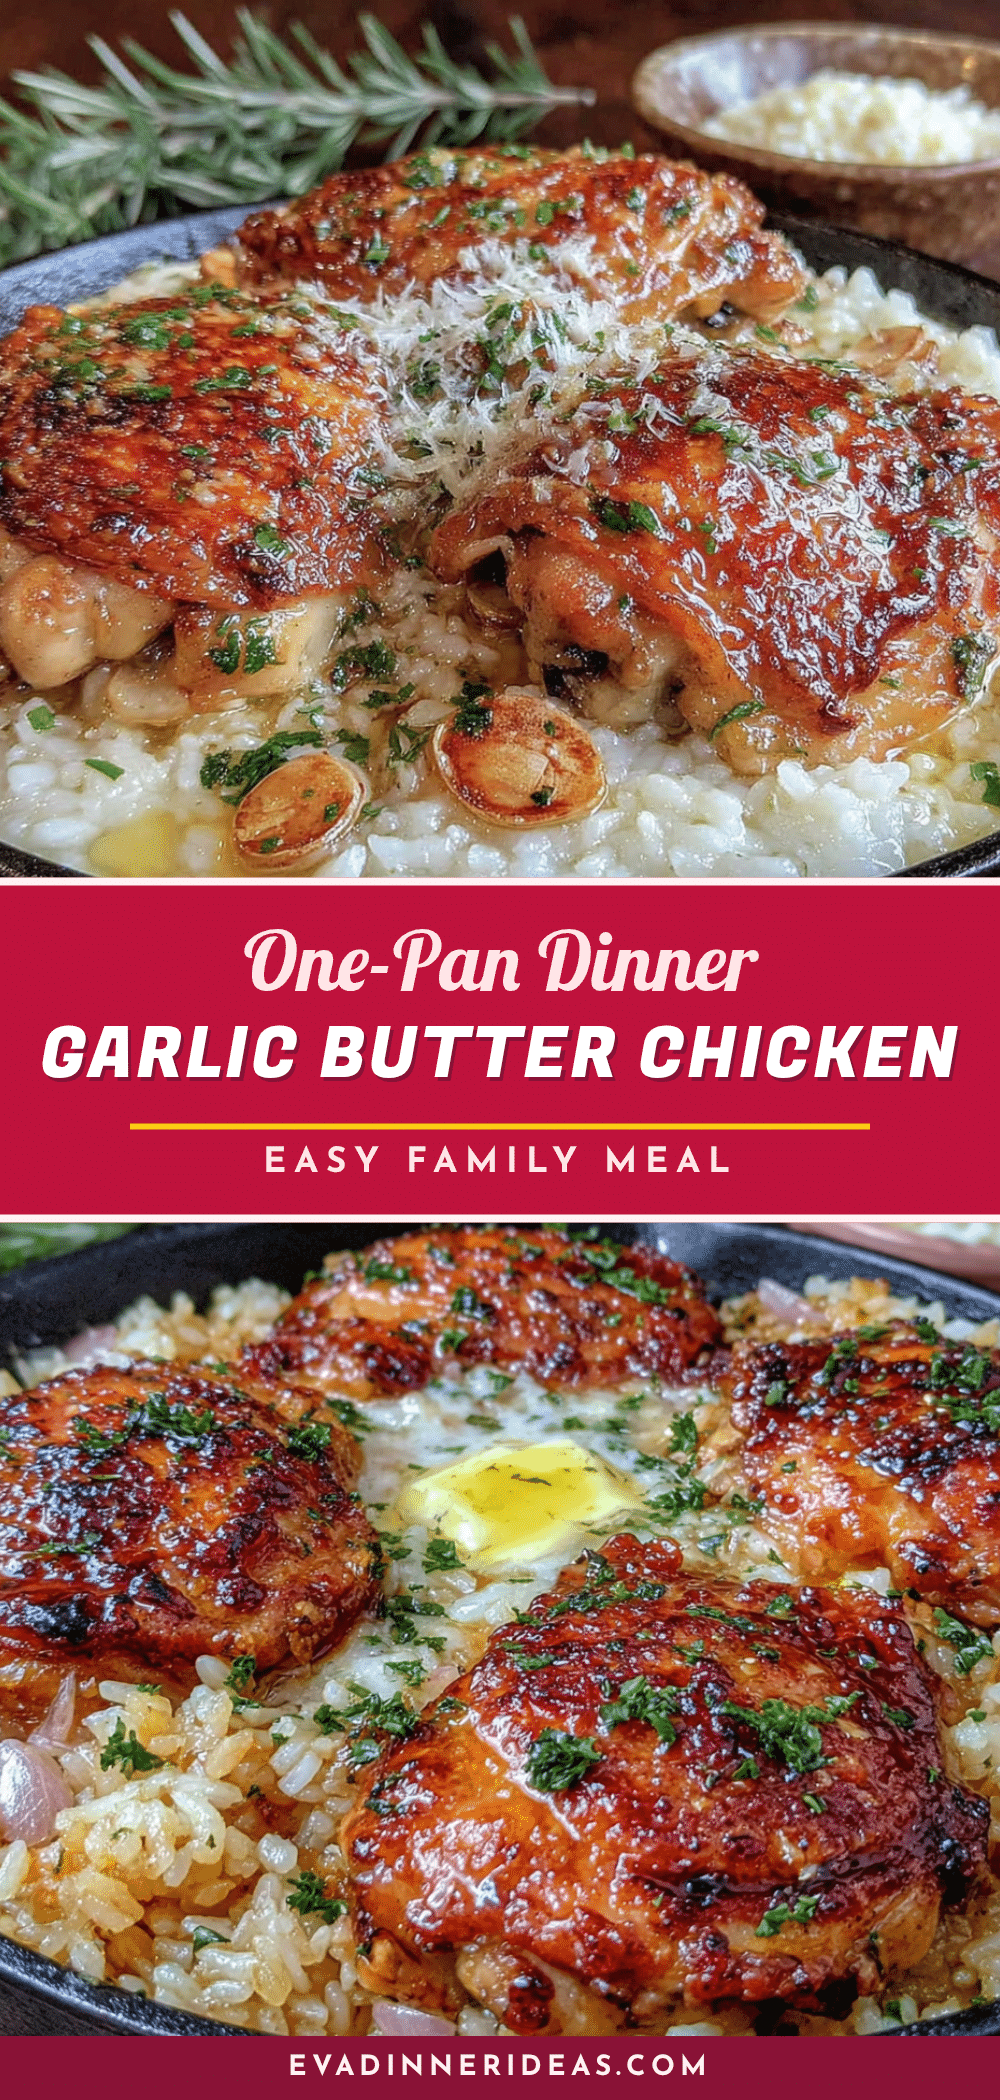
Easy One-Pan Garlic Butter Chicken and Rice: The Best Family Dinner

This one-pan garlic butter chicken and rice is a quick, easy, and budget-friendly family dinner that comes together in about 45 minutes. With simple ingredients like chicken, rice, and garlic butter, it delivers a deeply savory and satisfying meal that pleases everyone.
- Prep Time: 10 minutes
- Cook Time: 35 minutes
- Total Time: 45 minutes
- Yield: 6 servings 1x
- Category: Main Course
- Cuisine: American
Ingredients
- 4 boneless, skinless chicken breasts (about 1.5 lbs or 680g total), or 6 boneless chicken thighs
- 4 tablespoons (56g) unsalted butter, divided
- 6 cloves garlic, minced (about 2 tablespoons)
- 1.5 cups (300g) long-grain white rice, such as jasmine or basmati, rinsed
- 2.5 cups (590ml) low-sodium chicken broth
- 1 medium yellow onion, finely diced (about 1 cup)
- 1 teaspoon salt (plus more for the chicken)
- 1/2 teaspoon black pepper
- 1 teaspoon paprika
- 1/2 teaspoon dried thyme
- 1/4 teaspoon red pepper flakes (optional)
- 2 tablespoons fresh parsley, chopped (for garnish)
- 1 lemon, cut into wedges (for serving)
Instructions
- Prep the chicken: Pat the chicken breasts dry with paper towels. Season both sides generously with salt, pepper, and paprika. Let them sit at room temperature for 10 minutes.
- Heat the pan: Place your skillet over medium-high heat. Add 2 tablespoons of the butter. Let it melt and foam until the foam subsides.
- Sear the chicken: Carefully place the chicken in the hot skillet. Cook undisturbed for 4-5 minutes until deep golden brown. Flip and cook another 4-5 minutes until cooked through (165°F / 74°C internal temperature). Remove chicken to a plate and tent loosely with foil.
- Sauté the aromatics: Reduce heat to medium. Add remaining 2 tablespoons of butter. Add diced onion and cook for 2 minutes, scraping up browned bits. Add minced garlic and cook for 1 minute more until fragrant.
- Toast the rice: Add rinsed and drained rice to the pan. Stir constantly for 2 minutes until the rice smells nutty and turns slightly translucent.
- Add liquid and seasonings: Pour in chicken broth, dried thyme, red pepper flakes (if using), and remaining 1/2 teaspoon of salt. Stir to combine.
- Simmer the rice: Bring liquid to a boil, then reduce heat to low. Cover with a tight-fitting lid and simmer gently for 18 minutes. Do not lift the lid.
- Rest and fluff: After 18 minutes, turn off heat. Let pan sit covered for 5 minutes. Remove lid and fluff rice with a fork.
- Return the chicken: Place seared chicken on top of the rice. Cover and let sit for 2 minutes to warm through.
- Garnish and serve: Sprinkle with fresh parsley and serve with lemon wedges. Squeeze lemon over each serving before eating.
Notes
Pat chicken dry for best sear. Rinse rice to prevent gumminess. Do not lift lid while rice simmers. Let rice rest 5 minutes after cooking. For dairy-free, substitute butter with olive oil. For brown rice, use 3 cups broth and cook 45 minutes.
Nutrition
- Serving Size: 1 serving (based on
- Calories: 485
- Sodium: 680
- Fat: 16
- Saturated Fat: 8
- Carbohydrates: 45
- Fiber: 1
- Protein: 38
Keywords: one-pan chicken and rice, garlic butter chicken, easy family dinner, quick weeknight meal, budget-friendly dinner


