I was standing in line at the county dump, of all places, holding a broken toaster and a bag of expired oatmeal, when the woman in front of me turned around and started talking about scones. She was maybe seventy, wearing gardening gloves and a hat with a little feather, and she looked exactly like someone who had better things to do than chat with me about pastries. But there she was, describing a maple pumpkin scone so vividly that I forgot about the toaster entirely. She told me it wasn’t anything fancy—just a recipe her mother used to make for church potlucks—but the trick, she said, was browning the butter for the glaze. “Don’t skip that part,” she said, wagging a finger. “It’s the whole point.” I nodded like I understood, but honestly, I was still stuck on the part where a stranger at the dump was giving me life-changing baking advice.
I scribbled the recipe on the back of an old receipt while she talked, and let me tell you, my handwriting was a mess. I had flour on my jacket from a failed bread experiment the night before, and the guy behind me was honking because the line moved. But I got it down. Maple syrup, pumpkin puree, a whole stick of butter, and that brown butter glaze she wouldn’t shut up about. I went home, made a batch that same afternoon, and my kitchen smelled like autumn had exploded inside it. The scones came out tender and flaky—not too sweet, with that earthy pumpkin flavor and a maple kick that made you want to close your eyes. And the glaze? It was everything she promised. Nutty, rich, a little salty, and it dripped down the sides like something you’d pay twelve dollars for at a bakery.
I’ve made these scones for every gathering since. Thanksgiving brunch, book club, that one time my neighbor’s kid came over selling wrapping paper and I bribed him with a warm scone. They work every single time. Maybe you’ve been there—you find a recipe from a completely unexpected source, and it just sticks. That’s this one for me. A woman at the dump, a broken toaster, and the best scones I’ve ever made.
Why You’ll Love This Recipe
These maple pumpkin scones are the kind of thing you bring to a dinner party and watch disappear before the main course even hits the table. I’ve tested this recipe about seven times—yes, seven—to get the texture just right. Not too cakey, not too dry, with that perfect crumbly edge that holds up to a generous drizzle of brown butter glaze. Here’s what makes them special:
- Made for a Crowd: This recipe doubles beautifully, and the scones keep well for a day or two, which means you can bake them ahead and actually enjoy your own party.
- Simple Ingredients: You probably have most of this in your pantry right now—flour, sugar, baking powder, butter. The maple syrup and pumpkin puree are the only special buys, and they’re easy to find this time of year.
- Show-Stopping Glaze: The brown butter glaze is what sets these apart. It’s nutty, caramelized, and completely addictive. Your guests will ask for the recipe, guaranteed.
- No Fussy Techniques: No rolling, no cutting with fancy biscuit cutters. You just pat the dough into a circle, slice it like a pizza, and bake. That’s it.
- Perfect for Fall Gatherings: Whether it’s a Halloween brunch, a Friendsgiving spread, or just a cozy Saturday with coffee, these scones fit right in.
I’ve made a lot of scone recipes over the years—some too dense, some too sweet, some that crumble into dust the second you look at them. This one hits the sweet spot. The pumpkin keeps them moist, the maple adds warmth without being overpowering, and that brown butter glaze? It’s the kind of detail that makes people think you spent hours in the kitchen when really, you just browned some butter and whisked in powdered sugar. Let’s be honest—that’s the kind of cooking we all want to do.
What Ingredients You Will Need
This recipe uses simple, wholesome ingredients to deliver bold fall flavor and satisfying texture without the fuss. Most of these are pantry staples, and the few that aren’t are worth the trip to the store.
For the Scones
- All-purpose flour, 2 ½ cups (315g) – Spoon and level it for the best results. Too much flour makes scones dry.
- Granulated sugar, ⅓ cup (65g) – Just enough to sweeten without overpowering the pumpkin.
- Baking powder, 1 tablespoon – Fresh baking powder is key here. Check the date before you start.
- Pumpkin pie spice, 2 teaspoons – You can use store-bought or make your own with cinnamon, nutmeg, ginger, and cloves.
- Salt, ½ teaspoon – Balances the sweetness and brings out the maple flavor.
- Unsalted butter, 6 tablespoons (85g), cold and cubed – Cold butter is non-negotiable. It creates those flaky layers we all love.
- Pumpkin puree, ½ cup (120g) – Not pumpkin pie filling! Make sure it’s 100% pure pumpkin. I prefer Libby’s for consistent texture.
- Maple syrup, ¼ cup (60ml) – Real maple syrup, not pancake syrup. The flavor difference is huge.
- Heavy cream, ¼ cup (60ml) – Adds richness and helps bind the dough. You can use whole milk in a pinch.
- Vanilla extract, 1 teaspoon – Pure vanilla, if you have it.
- Egg, 1 large – Room temperature is best, but cold works too.
For the Brown Butter Glaze
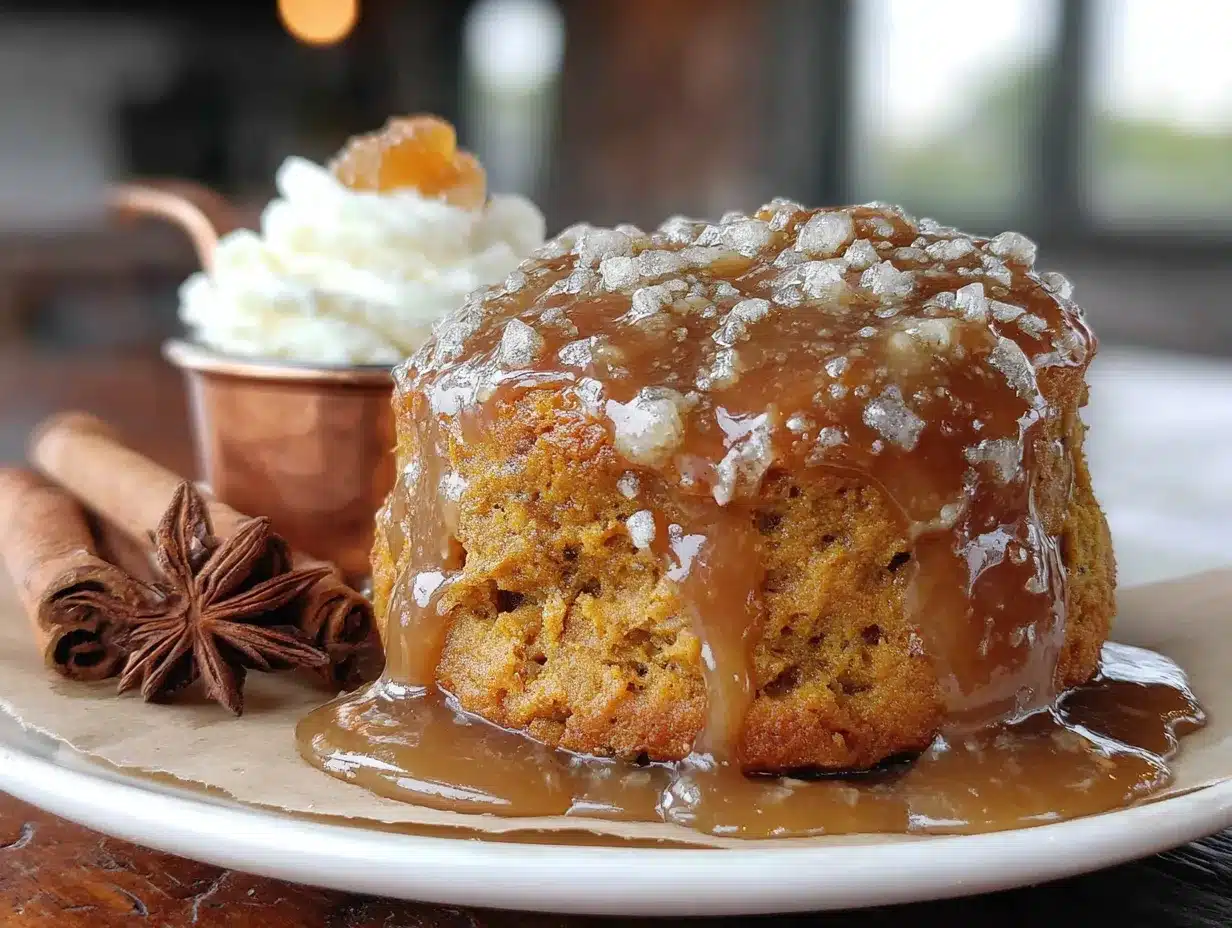
- Unsalted butter, 4 tablespoons (55g) – You’ll brown this until it smells nutty and turns golden brown.
- Powdered sugar, 1 ½ cups (180g) – Sift it if it’s lumpy. Nobody wants a lumpy glaze.
- Maple syrup, 2 tablespoons (30ml) – Adds extra maple flavor to the glaze.
- Heavy cream, 2–3 tablespoons (30–45ml) – Adjust for your desired consistency.
- Vanilla extract, ½ teaspoon – A little goes a long way.
- Pinch of salt – Flaky sea salt on top is optional but highly recommended.
One quick note on substitutions: If you’re dairy-free, you can use cold coconut oil instead of butter in the scones, and a dairy-free butter alternative for the glaze. The texture will be slightly different—less flaky, more tender—but still delicious. For a gluten-free version, use a 1:1 gluten-free flour blend that contains xanthan gum. I’ve tested it with King Arthur’s Measure for Measure, and it works great.
Equipment Needed
You don’t need a lot of fancy equipment for these scones, which is part of why I love them. Here’s what you’ll need:
- Large mixing bowl – For combining dry ingredients. Any bowl will do.
- Pastry cutter or two forks – To cut the cold butter into the flour. If you don’t have a pastry cutter, use your fingertips—just work quickly so the butter doesn’t warm up.
- Baking sheet – Line it with parchment paper for easy cleanup. I’ve used the same half-sheet pan for years, and it’s never let me down.
- Parchment paper – Keeps the scones from sticking and makes transfer a breeze.
- Small saucepan – For browning the butter. A light-colored pan helps you see the color change.
- Whisk – For the glaze. A fork works too, but a whisk is smoother.
- Bench scraper or sharp knife – To cut the dough into wedges. A bench scraper is my favorite tool for this.
- Cooling rack – Lets air circulate so the glaze sets properly. If you don’t have one, a wire rack from your microwave works in a pinch.
I bought my pastry cutter at a thrift store for a dollar, and it’s one of my most-used tools. Don’t feel like you need to spend a lot—just get the job done.
Preparation Method
- Preheat your oven to 400°F (200°C) and line a baking sheet with parchment paper. I always do this first so the oven is hot and ready when the scones are shaped.
- Mix the dry ingredients – In a large bowl, whisk together the flour, sugar, baking powder, pumpkin pie spice, and salt. Make sure the baking powder is evenly distributed—nobody wants a pocket of baking powder in their scone.
- Cut in the cold butter – Add the cold, cubed butter to the flour mixture. Use a pastry cutter or two forks to cut the butter into the flour until it resembles coarse meal with pea-sized butter pieces. Don’t overdo it—those little butter chunks create the flaky layers. I once got distracted and over-mixed, and the scones came out dense. Learn from my mistake.
- Combine the wet ingredients – In a separate small bowl, whisk together the pumpkin puree, maple syrup, heavy cream, vanilla extract, and egg until smooth. The mixture should be thick and orange, with a lovely maple aroma.
- Bring it together – Pour the wet ingredients into the dry ingredients and stir with a spatula until just combined. The dough will be sticky and a little shaggy—that’s exactly what you want. Don’t overmix, or the scones will be tough. I usually stop when I can still see a few streaks of flour.
- Shape the dough – Turn the dough out onto a lightly floured surface. Gently pat it into a ¾-inch thick circle, about 8 inches across. Use your hands—don’t use a rolling pin, which can overwork the dough. If the dough is too sticky, dust your hands with a little flour.
- Cut into wedges – Use a bench scraper or sharp knife to cut the circle into 8 equal wedges, like a pizza. Transfer the wedges to the prepared baking sheet, spacing them about 2 inches apart. They don’t spread much, but a little room helps them bake evenly.
- Bake – Bake for 14-18 minutes, until the scones are golden brown on the bottom and just barely firm to the touch. The tops should look dry and lightly cracked. My oven runs hot, so I check at 14 minutes and go from there.
- Cool – Let the scones cool on the baking sheet for 5 minutes, then transfer them to a wire rack to cool completely before glazing. I know it’s tempting to glaze them warm, but the glaze will just slide right off. Trust me on this one.
- Make the brown butter glaze – While the scones cool, melt the 4 tablespoons of butter in a small saucepan over medium heat. Swirl the pan occasionally as the butter melts, foams, and starts to turn golden brown. You’ll smell a nutty aroma—that’s your cue. Once the butter is amber-colored with brown specks at the bottom, remove it from the heat immediately. Don’t walk away from this step; brown butter can go from perfect to burnt in seconds.
- Finish the glaze – Pour the brown butter into a medium bowl. Add the powdered sugar, maple syrup, 2 tablespoons of heavy cream, vanilla extract, and a pinch of salt. Whisk until smooth. If the glaze is too thick, add another tablespoon of cream. If it’s too thin, add a little more powdered sugar. The consistency should be thick but pourable—think heavy cream.
- Glaze the scones – Once the scones are completely cool, drizzle the glaze over the tops. I like to use a spoon and let it drip naturally over the edges. For an extra touch, sprinkle a little flaky sea salt on top before the glaze sets. It sounds fancy, but it takes two seconds and makes a huge difference.
Cooking Tips & Techniques
I’ve made these scones enough times to know where things can go wrong. Here’s what I’ve learned the hard way so you don’t have to.
Keep everything cold. Cold butter is the secret to flaky scones. If your kitchen is warm, pop the butter in the freezer for 10 minutes before cutting it in. I’ve also chilled the shaped scones on the baking sheet for 15 minutes before baking—it helps them hold their shape and rise higher.
Don’t overmix the dough. This is the most common mistake I see. Mix until the dough just comes together, then stop. Overmixing develops gluten, which makes scones tough and dense. A few flour streaks are fine—they’ll disappear during baking.
Watch the brown butter like a hawk. I burned my first batch of brown butter because I looked away to answer a text. The butter goes from golden to burnt very quickly. Swirl the pan constantly, and as soon as you see amber color and smell that nutty aroma, pull it off the heat. Pour it into a cool bowl to stop the cooking process.
Let the scones cool completely before glazing. I know it’s hard to wait, but warm scones will absorb the glaze and turn soggy. Patience pays off here. If you’re short on time, you can pop them in the fridge for 10 minutes to speed things up.
Use a light-colored pan for browning butter. Dark pans make it hard to see the color change. I use a stainless steel saucepan, and it works perfectly. If all you have is dark nonstick, just be extra careful.
Variations & Adaptations
One of the best things about this recipe is how easy it is to adapt. Here are a few variations I’ve tried and loved:
- Maple Pecan Scones: Add ½ cup of chopped toasted pecans to the dry ingredients before mixing. The crunch is amazing against the tender scone. I did this for a fall brunch and they disappeared first.
- Chocolate Chip Pumpkin Scones: Fold in ½ cup of dark chocolate chips with the wet ingredients. The chocolate pairs beautifully with the maple and pumpkin. My kids went crazy for these.
- Dairy-Free Version: Use cold coconut oil instead of butter in the scones, and a dairy-free butter alternative for the glaze. The texture is a little more tender, but the flavor is still spot-on. I’ve used Miyoko’s vegan butter with great results.
- Gluten-Free Version: Substitute the all-purpose flour with a 1:1 gluten-free flour blend that contains xanthan gum. King Arthur’s Measure for Measure works best in my tests. The scones won’t rise quite as high, but they’re still delicious.
- Spiced Variation: Add ¼ teaspoon of ground cardamom or a pinch of black pepper to the dry ingredients. It adds a subtle warmth that’s unexpected and lovely. I tried this on a whim and now I do it every time.
Serving & Storage Suggestions
These scones are best served slightly warm or at room temperature, with the glaze fully set. I like to arrange them on a pretty platter for brunch or coffee hour—they look impressive without any extra effort.
For a full spread, pair them with a hot cup of coffee, chai latte, or spiced apple cider. They also go beautifully with a simple fruit salad or a savory egg dish like a frittata. If you’re hosting a fall gathering, set them out alongside a cheese board—the sweetness of the scones balances the saltiness of aged cheddar or gouda beautifully.
Storage: Store leftover scones in an airtight container at room temperature for up to 3 days. The glaze may soften slightly, but they’ll still taste great. I don’t recommend refrigerating them, as it dries them out.
Freezing: You can freeze the baked, unglazed scones for up to 3 months. Wrap them tightly in plastic wrap and then foil. When you’re ready to serve, thaw at room temperature and glaze fresh. The glaze doesn’t freeze well, so always add it after thawing.
Make-Ahead Tip: You can also freeze the shaped, unbaked scones. Place them on a baking sheet and freeze until solid, then transfer to a freezer bag. Bake from frozen, adding 2-3 minutes to the baking time. This is my go-to trick for hosting—I prep them a week ahead and bake them the morning of the party.
The flavors actually develop over time, so day-old scones can be even better than fresh. The maple and pumpkin settle into each other, and the glaze gets a little firmer. If you can resist eating them all on day one, you’re in for a treat on day two.
Nutritional Information & Benefits
These scones are a treat, so I won’t pretend they’re health food. But they do have some redeeming qualities worth mentioning.
One scone (with glaze) contains approximately 320 calories, 14g fat, 45g carbohydrates, and 4g protein. The pumpkin puree adds a good dose of vitamin A and fiber, while the maple syrup provides antioxidants and minerals like zinc and manganese. The brown butter adds a small amount of vitamin A and healthy fats.
If you’re watching your sugar intake, you can reduce the maple syrup in the scones to 3 tablespoons and cut the glaze in half. The scones will be less sweet but still flavorful. For a lower-fat version, substitute half the butter with Greek yogurt—the texture will be more cake-like, but it works.
These scones are vegetarian and can be made dairy-free and gluten-free with the substitutions listed above. They contain wheat, dairy, and eggs in their standard form, so keep that in mind for guests with allergies.
I personally love that these scones feel indulgent without being over-the-top. They’re the kind of treat that satisfies a craving without leaving you feeling heavy. And honestly, a little butter and sugar now and then is part of a balanced life.
Conclusion
These maple pumpkin scones with brown butter glaze have become my go-to for every fall gathering, and I don’t see that changing anytime soon. They’re simple enough for a weekday morning but impressive enough for a dinner party spread. The recipe came from a stranger at the dump, but it’s earned a permanent spot in my kitchen.
I hope you give them a try and make them your own. Maybe you’ll add extra spice, or swap in pecans, or double the glaze (I won’t judge). The best recipes are the ones you adapt to fit your life. So go ahead—make a mess, taste the dough, and drizzle that brown butter glaze with abandon. Your guests will thank you, and you’ll feel like a baking genius.
If you make these scones, I’d love to hear about it. Drop a comment below and tell me how they turned out, or share your own twist on the recipe. And if you’re looking for more fall baking ideas, check out my easy pumpkin bread recipe or these apple cider donut muffins—they’re both crowd-pleasers too. Happy baking!
Frequently Asked Questions
Can I use pumpkin pie filling instead of pumpkin puree?
No, don’t do that. Pumpkin pie filling is already sweetened and spiced, which will throw off the balance of this recipe. Stick with 100% pure pumpkin puree for the best results.
Why did my scones turn out dry?
Dry scones usually come from overmixing the dough or using too much flour. Make sure you spoon and level your flour, and stop mixing as soon as the dough comes together. Also, check that your pumpkin puree isn’t too thick—sometimes different brands have different moisture levels.
Can I make the glaze ahead of time?
You can, but it’s best fresh. The glaze will harden as it sits, so if you make it ahead, you’ll need to reheat it gently and add a splash of cream to thin it out. I prefer to make it while the scones are cooling—it only takes 5 minutes.
How do I know when the brown butter is done?
Watch for the butter to turn a golden amber color and smell nutty and toasty. You’ll see brown specks forming at the bottom of the pan. As soon as that happens, remove it from the heat. It happens fast, so don’t walk away.
Can I freeze the glazed scones?
I don’t recommend it. The glaze can become sticky and lose its texture during thawing. Instead, freeze the unglazed scones and add the glaze fresh after thawing. They’ll taste like you just baked them.
Pin This Recipe!
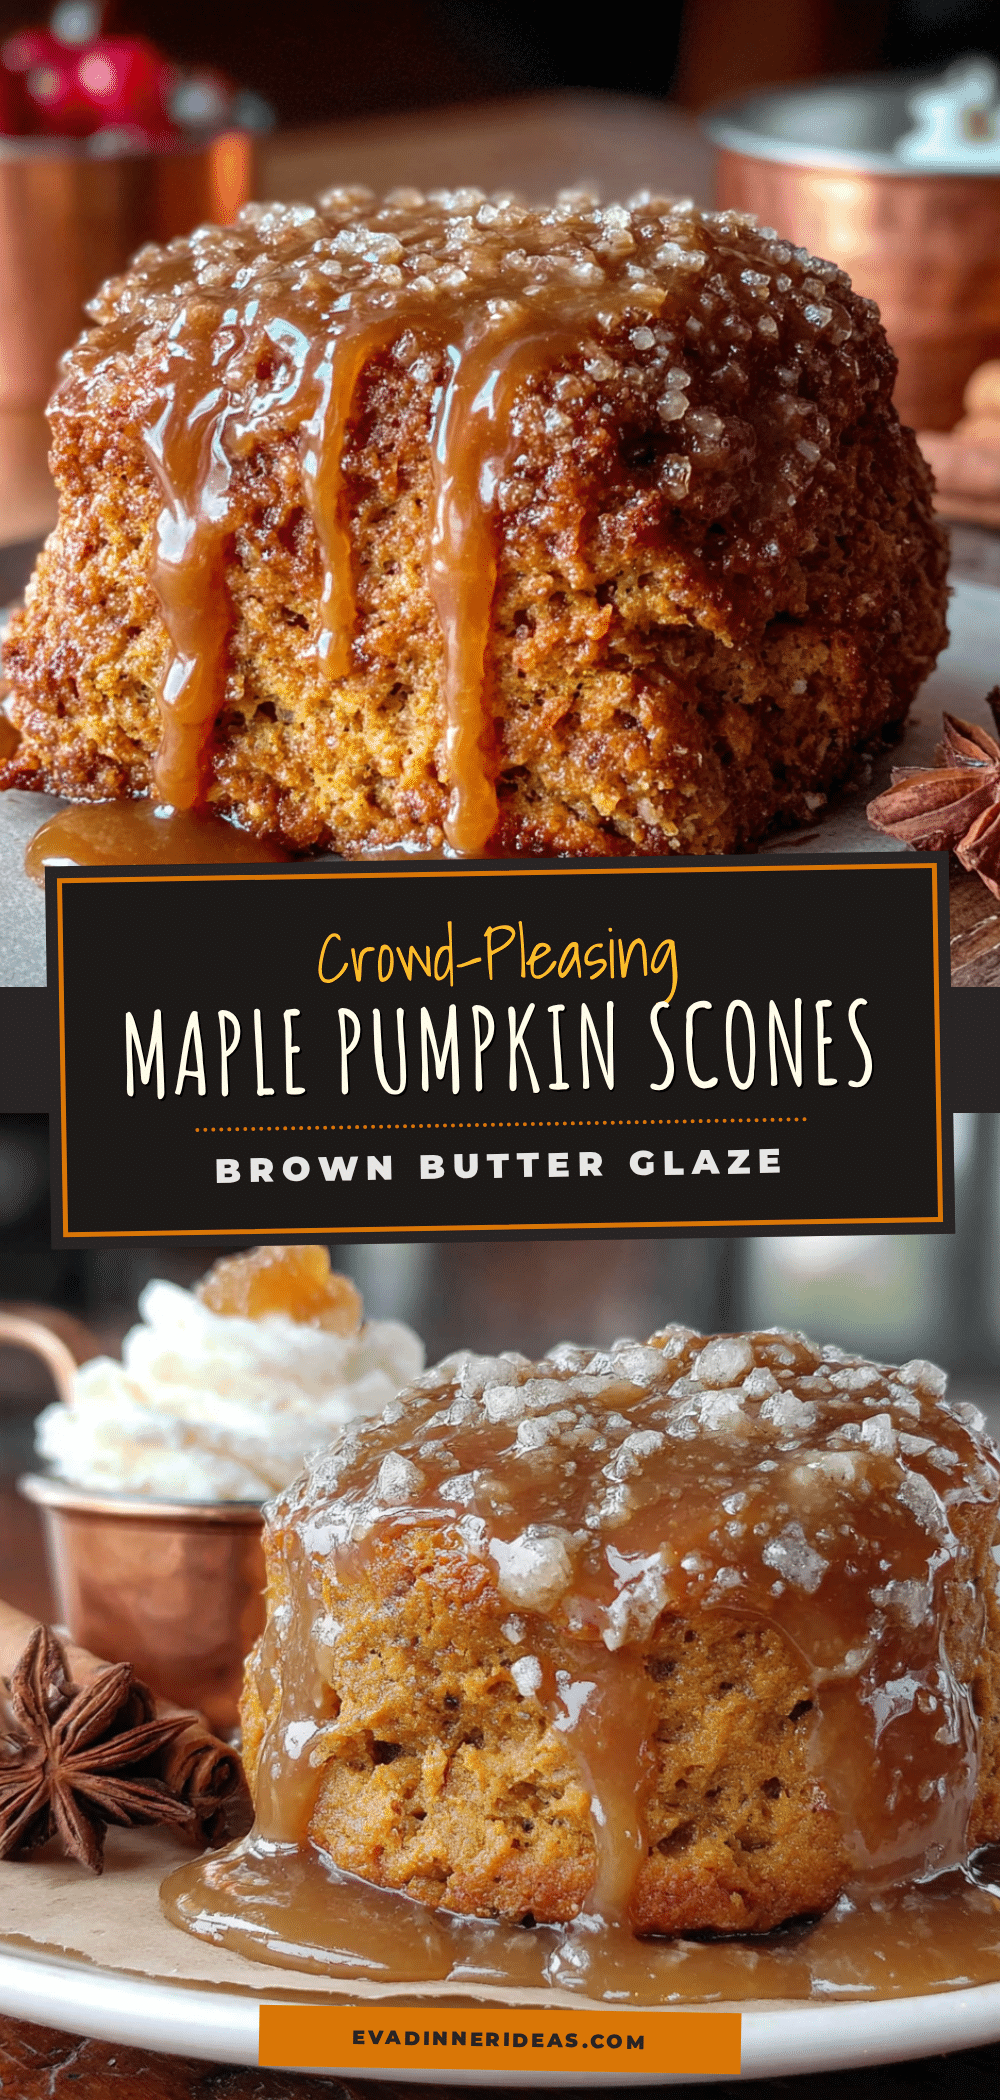
Easy Maple Pumpkin Scones with Brown Butter Glaze
Tender, flaky maple pumpkin scones topped with a nutty brown butter glaze. Perfect for fall gatherings, this easy recipe comes together with simple ingredients and no fussy techniques.
- Prep Time: 15 minutes
- Cook Time: 16 minutes
- Total Time: 31 minutes
- Yield: 8 servings 1x
- Category: Breakfast, Brunch, Dessert
- Cuisine: American
Ingredients
- 2 ½ cups (315g) all-purpose flour
- ⅓ cup (65g) granulated sugar
- 1 tablespoon baking powder
- 2 teaspoons pumpkin pie spice
- ½ teaspoon salt
- 6 tablespoons (85g) unsalted butter, cold and cubed
- ½ cup (120g) pumpkin puree (100% pure, not pie filling)
- ¼ cup (60ml) maple syrup (real maple syrup)
- ¼ cup (60ml) heavy cream
- 1 teaspoon vanilla extract
- 1 large egg
- 4 tablespoons (55g) unsalted butter (for glaze)
- 1 ½ cups (180g) powdered sugar
- 2 tablespoons (30ml) maple syrup (for glaze)
- 2–3 tablespoons (30–45ml) heavy cream (for glaze)
- ½ teaspoon vanilla extract (for glaze)
- Pinch of salt (for glaze)
- Flaky sea salt (optional, for topping)
Instructions
- Preheat your oven to 400°F (200°C) and line a baking sheet with parchment paper.
- In a large bowl, whisk together the flour, sugar, baking powder, pumpkin pie spice, and salt.
- Add the cold, cubed butter to the flour mixture. Use a pastry cutter or two forks to cut the butter into the flour until it resembles coarse meal with pea-sized butter pieces.
- In a separate small bowl, whisk together the pumpkin puree, maple syrup, heavy cream, vanilla extract, and egg until smooth.
- Pour the wet ingredients into the dry ingredients and stir with a spatula until just combined. The dough will be sticky and shaggy.
- Turn the dough out onto a lightly floured surface. Gently pat it into a ¾-inch thick circle, about 8 inches across.
- Use a bench scraper or sharp knife to cut the circle into 8 equal wedges. Transfer the wedges to the prepared baking sheet, spacing them about 2 inches apart.
- Bake for 14-18 minutes, until the scones are golden brown on the bottom and just barely firm to the touch.
- Let the scones cool on the baking sheet for 5 minutes, then transfer them to a wire rack to cool completely before glazing.
- While the scones cool, melt the 4 tablespoons of butter in a small saucepan over medium heat. Swirl the pan occasionally until the butter turns golden amber and smells nutty. Remove from heat immediately.
- Pour the brown butter into a medium bowl. Add the powdered sugar, maple syrup, 2 tablespoons of heavy cream, vanilla extract, and a pinch of salt. Whisk until smooth. Adjust consistency with additional cream or powdered sugar as needed.
- Once the scones are completely cool, drizzle the glaze over the tops. Sprinkle with flaky sea salt if desired.
Notes
Keep butter and ingredients cold for flaky scones. Do not overmix the dough. Watch brown butter carefully as it can burn quickly. Let scones cool completely before glazing. Scones can be frozen unglazed for up to 3 months.
Nutrition
- Serving Size: 1 scone
- Calories: 320
- Sugar: 22
- Sodium: 280
- Fat: 14
- Saturated Fat: 8
- Carbohydrates: 45
- Fiber: 2
- Protein: 4
Keywords: maple pumpkin scones, brown butter glaze, fall baking, pumpkin scones, easy scone recipe


