I was standing in the frozen foods aisle last Tuesday, staring at a box of hot dogs I had no intention of buying, when the smell of cheap hot dog water hit me — and suddenly I was seven years old at my aunt Rita’s kitchen table in her cramped duplex on Pine Street. The table had that sticky vinyl tablecloth she never changed, and there was a single bag of candy corn in the middle like it was a centerpiece. I remember the way her hands looked — always a little floury, even when she wasn’t baking — wrapping strips of dough around hot dogs like she was tucking us all into bed. She passed away a few years back, and I don’t think about her as often as I should, but that smell in the grocery aisle? It got me. I grabbed the hot dogs, the crescent rolls, and a bag of candy eyes, and I drove home with one goal: to get that exact feeling back, even if just for a minute. Maybe you’ve been there — chasing a taste you can’t quite describe but you’d know the second it hit your tongue.
These mummy hot dogs aren’t fancy. They’re not going to win any cooking competitions, and honestly, they’re not supposed to. They’re the kind of recipe that makes kids giggle and adults breathe a little easier because for once, dinner doesn’t have to be a production. I’ve made these three times in the last two weeks, and let me tell you — the first batch was a mess. I wrapped the dough too tight, the hot dogs split, and the “eyes” melted into a creepy puddle. But my kids didn’t care. They ate them anyway, and that’s when I knew this recipe was a keeper. It’s forgiving. It’s fun. And it’s the kind of thing that makes a regular Tuesday feel like a little celebration.
Why You’ll Love This Recipe
Let me be real with you for a second. I’ve tested this recipe more times than I care to admit, and I’ve learned a few things the hard way so you don’t have to. Here’s why this version is the one you’ll come back to:
- Quick & Easy : From fridge to table in under 25 minutes. Seriously. These are faster than ordering pizza, and you don’t have to tip anyone.
- Simple Ingredients : You need exactly four things — hot dogs, crescent dough, cheese slices, and candy eyes. That’s it. No special trips to a fancy grocery store.
- Perfect for Halloween : But honestly? My kids asked for these in March, and I said yes. They work for any night you want to make dinner feel a little silly and special.
- Crowd-Pleaser : I brought these to a neighborhood potluck last weekend, and the adults were sneaking them off the platter before the kids even got to the table. No judgment here.
- Unbelievably Fun : There’s something about food that looks like little monsters that makes everyone at the table smile. Even my teenager, who claims she’s “too old for this,” ate four.
What makes this recipe different from the dozens of other mummy hot dog recipes out there? It’s the little things I figured out through trial and error — like how to wrap the dough so it looks like actual bandages, not a tangled mess. I also figured out a trick to keep the candy eyes from sliding off, which I’ll share in the tips section. This isn’t just another version of a Halloween snack. It’s the version that works when you’re tired, when the kids are bouncing off the walls, and when you need dinner to be fun without being exhausting.
This recipe is the kind that makes you feel like a hero parent with zero effort. It’s comfort food that’s also a craft project — and honestly, that’s the best kind of dinner.
What Ingredients You Will Need
This recipe keeps things simple with everyday ingredients you probably already have in your kitchen. I’ve tested a few different brands and combinations, so I’ll share what works best based on my experience. No weird stuff here — just real food that comes together fast.
- Hot dogs (8 standard-size) : I prefer beef hot dogs for better flavor and texture, but turkey or chicken hot dogs work just fine. My personal go-to is Nathan’s or Hebrew National — they hold up well during baking and don’t split as easily as cheaper brands. If you’re feeding picky eaters, cut the hot dogs in half crosswise to make mini mummies. Just adjust your baking time down by about 2 minutes.
- Refrigerated crescent roll dough (1 can, 8-count) : Pillsbury is the standard here, and honestly, it works perfectly. Don’t bother with the generic store brand — the dough is thinner and tears more easily when you’re trying to wrap it. You want that flaky, buttery texture that only comes from the real deal. Let the dough sit at room temperature for about 5 minutes before you start — it’s much easier to work with when it’s not ice cold.
- Cheese slices (4 slices, cut in half) : I use mild cheddar because that’s what my kids like, but provolone or mozzarella work great too. The cheese goes under the dough wraps, so it melts into this gooey layer that holds everything together. For a fun twist, use string cheese cut into strips — it gives a different texture and the kids love pulling it apart.
- Candy eyes (16-24 small eyes) : Wilton brand candy eyes are my favorite because they’re flat on the bottom and stick better. The round ones from the baking aisle tend to roll off. You can also use black sesame seeds or small dots of mustard if you don’t have candy eyes on hand. I learned that the hard way when I realized I was out of eyes at 5:30 PM on a school night.
- Egg wash (1 large egg + 1 tablespoon water, beaten) : This is optional but highly recommended. It gives the dough that gorgeous golden-brown color that makes the mummies look like they just came out of a tomb. If you’re out of eggs, brush the dough with a little milk or melted butter instead.
Substitution notes for families on a budget : If crescent roll dough isn’t in your budget, you can use refrigerated pizza dough cut into thin strips. It won’t be as flaky, but it still tastes great. For a dairy-free version, skip the cheese and use dairy-free butter for the egg wash alternative. And if candy eyes are hard to find, just draw little faces on with mustard or ketchup — my kids actually prefer that because they get to “decorate” their own mummies.
Equipment Needed
You don’t need a fancy kitchen to pull these off. Here’s what you’ll actually use:
- Baking sheet (standard half-sheet size) : A rimmed baking sheet works best to catch any cheese drips. I use my old Nordic Ware sheet that’s seen better days, but anything with a rim will do.
- Parchment paper or silicone baking mat : Trust me on this one. The cheese can stick to bare metal, and nobody wants to scrape mummies off a baking sheet. Parchment paper is cheap and makes cleanup a breeze.
- Sharp knife or pizza cutter : You’ll be cutting the crescent dough into thin strips. A pizza cutter is faster and gives you straighter lines, but a regular knife works fine. I’ve used both, and I reach for the pizza cutter every time now.
- Pastry brush (optional but nice) : For applying the egg wash. If you don’t have one, use the back of a spoon or just your fingers — it’s not a fancy restaurant.
- Small bowl for egg wash : Any small bowl or ramekin works.
- Cooling rack : Not strictly necessary, but it helps the mummies stay crispy on the bottom instead of getting soggy from steam.
If you’re on a tight budget, skip the pastry brush and cooling rack. I made these for years with just a baking sheet and a butter knife, and they turned out great. The most important thing is having a good baking sheet — mine cost $12 at a discount store and has lasted five years.
Preparation Method
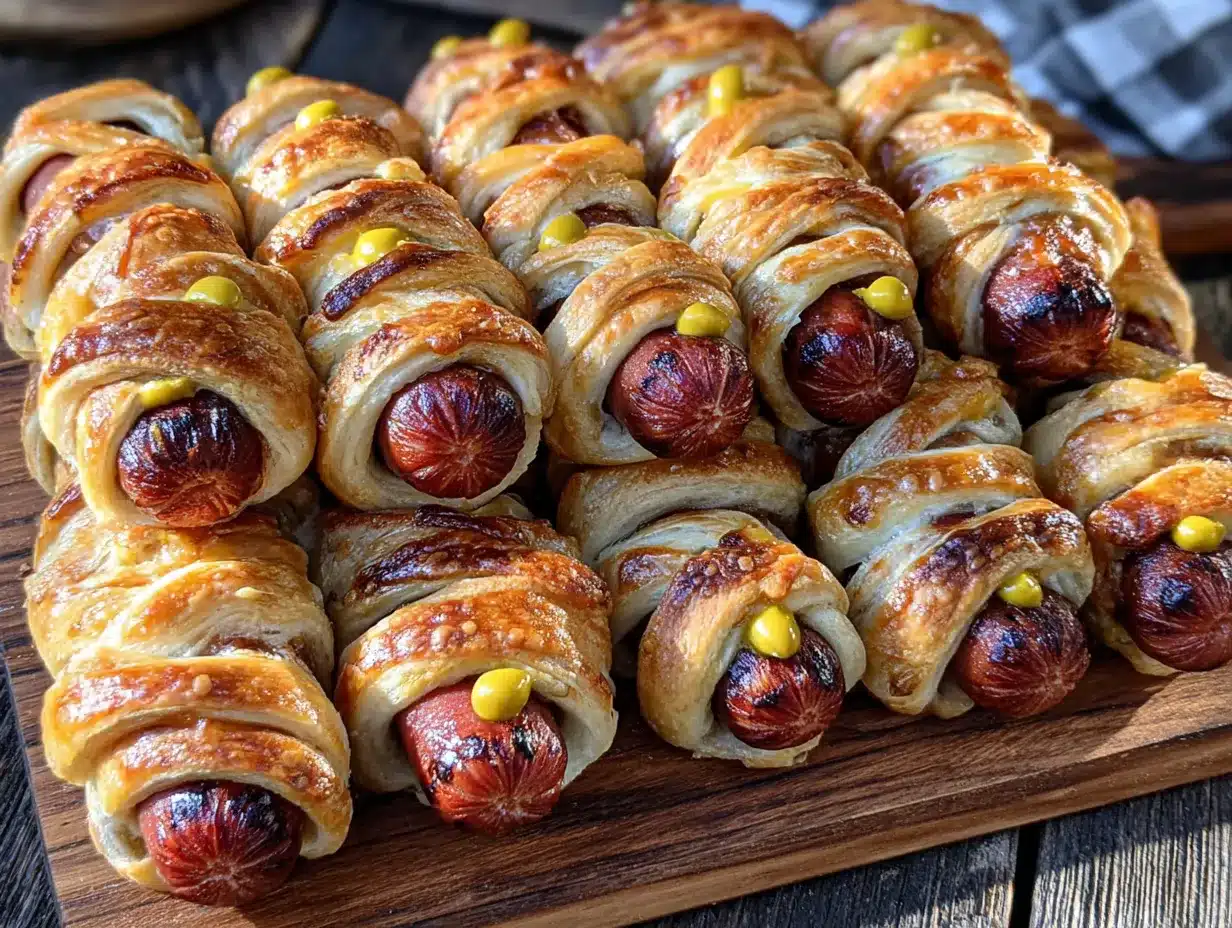
Alright, let’s get to the fun part. Here’s exactly how to make these mummy hot dogs, step by step. I’ll tell you what to look for at each stage so you know you’re on the right track.
Step 1: Preheat and prep
Preheat your oven to 375°F (190°C). Line a baking sheet with parchment paper or a silicone mat. While the oven is heating, take your crescent roll dough out of the fridge and let it sit on the counter for 5 minutes. This is important — cold dough cracks and tears when you try to cut it. I learned this the hard way when my first batch looked like a disaster zone.
Step 2: Cut the cheese (literally)
Take your 4 cheese slices and cut each one in half so you have 8 rectangular pieces. Set them aside. If you’re using string cheese, cut each stick into 4 thin strips lengthwise.
Step 3: Prepare the dough strips
Open the crescent roll can — and try not to jump when it pops, because it always gets me. Unroll the dough and separate it along the perforated lines into 8 triangles. Now, here’s the trick: use a pizza cutter or sharp knife to cut each triangle lengthwise into 3 thin strips. You’ll end up with 24 strips total. Don’t worry if they’re not perfectly even — mummies are supposed to look a little messy.
Step 4: Wrap the mummies
Take one hot dog and place half a cheese slice on top. Starting at one end, wrap a dough strip around the hot dog at a slight angle, leaving a small gap about a third of the way down for the “face.” Continue wrapping with 2 more strips, overlapping them slightly so it looks like bandages. The cheese should peek through in a few places — that’s the “mummy glow.” Repeat with the remaining hot dogs. You’ll use 3 strips per mummy, which means you’ll have exactly enough for 8 mummies.
Step 5: Add the egg wash
In a small bowl, beat the egg with 1 tablespoon of water. Brush the egg wash lightly over the dough strips. Don’t soak them — just a light coat. This is what gives them that gorgeous golden color. If you’re skipping the egg wash, brush with a little milk or melted butter instead.
Step 6: Bake
Place the mummies on the prepared baking sheet, spacing them about 2 inches apart. Bake for 12-15 minutes, or until the dough is golden brown and the hot dogs are heated through. The cheese will be bubbly and delicious. Let them cool on the baking sheet for 2 minutes before moving them to a cooling rack.
Step 7: Add the eyes
Here’s the part I messed up the first three times. Wait until the mummies have cooled for about 5 minutes — the dough needs to be warm but not hot. Press the candy eyes gently into the dough in the gap you left for the face. If the eyes won’t stick, dab a tiny bit of mustard or ketchup on the back as “glue.” I’ve started doing this every time, and I’ve never had an eye fall off since.
Step 8: Serve immediately
These are best eaten warm, while the cheese is still gooey and the dough is flaky. Arrange them on a platter with a side of ketchup or ranch dressing for dipping. Watch them disappear.
Cooking Tips & Techniques
I’ve made these mummy hot dogs more times than I can count, and I’ve collected a few tricks along the way. Let me save you some trouble.
The biggest mistake I made : I wrapped the dough too tight. I thought tighter meant neater, but what actually happens is the dough stretches thin and tears during baking. Leave a little slack — the dough needs room to puff up. Think of it like wrapping a gift: snug but not suffocating.
The candy eye problem : The first time I made these, I put the eyes on before baking. Big mistake. They melted into creepy white blobs that looked nothing like eyes. Always add them after baking. And if you’re serving these at a party, wait to add the eyes until just before serving so they stay put.
Timing strategy for busy nights : If you’re making these for a Halloween party or a busy weeknight, you can prep everything ahead of time. Wrap the mummies up to 4 hours in advance and keep them covered in the fridge. Add the egg wash and bake right before serving. I’ve done this for school parties, and it’s a lifesaver.
How to avoid soggy bottoms : Nobody wants a sad, soggy mummy. Make sure your baking sheet isn’t overcrowded — the mummies need space for air to circulate. And if you’re using parchment paper, that helps too. I also recommend letting them cool on a wire rack for a few minutes after baking so steam doesn’t get trapped underneath.
A trick for even baking : If your oven runs hot like mine, rotate the baking sheet halfway through. I always forget to do this, and the mummies on the back row come out darker than the front row. Set a timer for 7 minutes, rotate, and you’re golden.
Variations & Adaptations
One of the best things about this recipe is how easy it is to make it your own. Here are some variations I’ve tried and loved:
Spicy Mummy Dogs : Use spicy Italian sausages instead of hot dogs, and add a thin strip of jalapeño under the cheese. My husband loves these, and they’re great for adults who want a little heat.
Veggie Mummies : Swap the hot dogs for vegetarian sausages or even thick carrot sticks that have been parboiled for 5 minutes. The carrot version is surprisingly good — my vegetarian friend asked for the recipe. Use vegan cheese and skip the egg wash for a fully plant-based version.
Breakfast Mummies : Use breakfast sausages instead of hot dogs, and wrap them in crescent dough brushed with melted butter and a sprinkle of cinnamon sugar. Bake as directed, then drizzle with a simple powdered sugar glaze. My kids asked for these on a Saturday morning, and now they’re a weekend tradition.
Mini Mummy Bites : Cut the hot dogs into thirds and use smaller strips of dough. These are perfect for toddler hands or for serving at parties. Bake for 10-12 minutes instead of 12-15. I made these for a playdate, and the moms asked for the recipe before the kids did.
Gluten-Free Option : Use gluten-free crescent roll dough — there are a few brands available now, and they work surprisingly well. Just handle the dough gently because it’s more fragile. Bake for an extra 2 minutes if needed.
Serving & Storage Suggestions
These mummy hot dogs are best served warm, right out of the oven, when the dough is flaky and the cheese is still melty. Arrange them on a platter with the “faces” facing outward so everyone can see them. I like to serve them with a few dipping options — ketchup, mustard, ranch dressing, and maybe some warm queso for the adventurous eaters.
For a full Halloween spread, pair these with some spooky spider web dip and a bowl of pumpkin patch pudding cups for dessert. It makes for a themed meal that’s still easy on your grocery budget.
Storage instructions : If you have leftovers (which is rare in my house), let them cool completely, then store them in an airtight container in the fridge for up to 3 days. The dough will soften a bit, but they’re still tasty.
Reheating tips : The best way to reheat these is in the oven or air fryer. Pop them in a 350°F (175°C) oven for 5-7 minutes, or in an air fryer at 350°F for 3-4 minutes. The microwave works in a pinch, but the dough gets chewy instead of flaky. I’ve reheated them in a toaster oven with great results.
Freezer instructions : You can freeze the unbaked, wrapped mummies for up to 2 months. Place them on a baking sheet and freeze until solid, then transfer to a freezer bag. When you’re ready to bake, add 3-5 minutes to the baking time — no need to thaw first. I keep a batch in the freezer for last-minute school parties or when the kids have friends over unexpectedly.
The flavors actually develop a little overnight — the hot dog and cheese meld together, and the dough absorbs some of the savory goodness. My husband says he likes them even better the next day, reheated in the air fryer.
Nutritional Information & Benefits
Let’s be honest — these are a treat, not a health food. But here’s the breakdown if you’re curious:
Per serving (2 mummy hot dogs):
– Calories: approximately 380-420
– Protein: 14g
– Fat: 24g
– Carbohydrates: 28g
– Fiber: 1g
– Sugar: 6g
The hot dogs provide a decent amount of protein, which helps keep kids full. The crescent dough adds carbohydrates for quick energy — perfect for a night of trick-or-treating or a busy evening. The cheese offers calcium and a little extra protein.
If you’re watching sodium, use lower-sodium hot dogs and skip the extra salt in the egg wash. Turkey hot dogs are a good option for reducing both fat and calories. For a lighter version, use the mini mummy bites with smaller portions — kids are just as happy with two mini mummies as they are with one full-sized one.
These are not gluten-free in their standard form, but the gluten-free variation I mentioned earlier works well. They contain dairy from the cheese and egg wash, but both can be substituted as noted in the variations section.
From a wellness perspective, I think of these as a fun food — the kind that brings people together and makes memories. Not every meal needs to be a superfood powerhouse. Sometimes dinner is about laughter and messy fingers and the joy of eating something that looks like a little monster.
Conclusion
These mummy hot dogs have become a staple in my kitchen, and I think they deserve a spot in yours too. They’re quick, they’re budget-friendly, and they make everyone at the table smile — even the grown-ups who pretend they’re too cool for silly food. I’ve made them for Halloween parties, school lunches, and random Tuesday dinners, and they never disappoint.
What I love most about this recipe is how forgiving it is. If the dough tears, just patch it. If the eyes fall off, stick them back on with a dab of mustard. There’s no pressure here — just good food and good fun. I hope you make these your own, whether that means adding extra cheese, swapping in your kid’s favorite sausage, or letting the little ones decorate their own mummies with whatever condiments they can find.
If you try these, I’d love to hear about it. Drop a comment below and tell me how your family liked them — or better yet, share a photo of your mummy creations. Did your kids get creative with the decorations? Did you come up with a variation I haven’t tried? I read every comment, and your ideas often end up in my own kitchen.
Now go make some mummies. Your family is going to love them.
Frequently Asked Questions
Can I make these ahead of time for a party?
Absolutely. You can wrap the mummies up to 4 hours in advance and keep them covered in the fridge. Add the egg wash and bake right before serving. For longer storage, freeze the unbaked mummies for up to 2 months.
What if I can’t find candy eyes?
No problem! Use black sesame seeds, small dots of mustard or ketchup, or even tiny pieces of black olive. My kids actually prefer drawing faces on with mustard — they say it makes the mummies look “friendlier.”
Can I use puff pastry instead of crescent rolls?
Yes, but the texture will be different. Puff pastry is flakier and less tender. Cut it into thin strips and wrap the same way. Bake at 400°F (200°C) for about 15 minutes, or until golden and puffed.
My dough keeps tearing when I wrap. What am I doing wrong?
The dough is probably too cold. Let it sit at room temperature for 5-10 minutes before cutting and wrapping. Also, don’t stretch the dough — wrap it loosely so it has room to expand. If it still tears, just patch it with another small piece of dough. Mummies are supposed to look a little ragged anyway.
How do I keep the cheese from oozing out completely?
Place the cheese directly on the hot dog, not on top of the dough. The dough acts as a barrier that holds the cheese in place as it melts. Also, don’t overfill — half a slice per mummy is plenty. If you want extra cheesiness, use a thinner slice or shred the cheese instead.
Pin This Recipe!

Easy Kid-Friendly Mummy Hot Dogs Perfect for Halloween

These mummy hot dogs are a quick, fun, and forgiving recipe that turns a regular Tuesday into a little celebration. Made with just four simple ingredients, they’re perfect for Halloween or any night you want dinner to feel silly and special.
- Prep Time: 10 minutes
- Cook Time: 15 minutes
- Total Time: 25 minutes
- Yield: 4 servings (2 mummy hot dogs per serving) 1x
- Category: Main Course
- Cuisine: American
Ingredients
- 8 standard-size hot dogs (beef, turkey, or chicken)
- 1 can (8-count) refrigerated crescent roll dough (e.g., Pillsbury)
- 4 slices cheese (mild cheddar, provolone, or mozzarella), cut in half
- 16–24 small candy eyes (e.g., Wilton brand)
- 1 large egg + 1 tablespoon water, beaten (for egg wash, optional)
Instructions
- Preheat oven to 375°F (190°C). Line a baking sheet with parchment paper or a silicone mat. Let crescent roll dough sit at room temperature for 5 minutes.
- Cut each cheese slice in half to make 8 rectangular pieces. Set aside.
- Unroll crescent dough and separate into 8 triangles. Cut each triangle lengthwise into 3 thin strips (24 strips total).
- Place half a cheese slice on top of each hot dog. Starting at one end, wrap 3 dough strips around the hot dog at a slight angle, leaving a small gap about a third of the way down for the ‘face.’ Overlap strips slightly to look like bandages.
- In a small bowl, beat egg with 1 tablespoon water. Brush egg wash lightly over dough strips (or skip and brush with milk or melted butter).
- Place mummies on prepared baking sheet, spacing 2 inches apart. Bake for 12-15 minutes, until dough is golden brown and hot dogs are heated through. Let cool on baking sheet for 2 minutes, then transfer to a cooling rack.
- After mummies have cooled for about 5 minutes (warm but not hot), press candy eyes gently into the dough in the gap left for the face. If eyes won’t stick, dab a tiny bit of mustard or ketchup on the back as ‘glue.’
- Serve immediately while warm and gooey, with ketchup or ranch dressing for dipping.
Notes
Let crescent dough sit at room temperature for 5 minutes before cutting to prevent tearing. Wrap dough loosely to allow room for puffing. Add candy eyes after baking to prevent melting. For best results, serve immediately. Can be prepped up to 4 hours ahead and refrigerated unbaked. Freeze unbaked mummies for up to 2 months.
Nutrition
- Serving Size: 2 mummy hot dogs
- Calories: 400
- Sugar: 6
- Sodium: 800
- Fat: 24
- Saturated Fat: 8
- Carbohydrates: 28
- Fiber: 1
- Protein: 14
Keywords: mummy hot dogs, Halloween recipe, kid-friendly, easy dinner, crescent roll hot dogs, spooky snacks