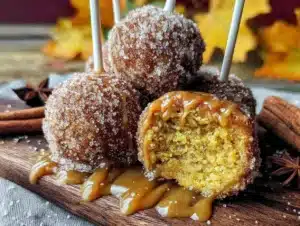
The woman at the community garden plot next to mine watched me trying to wrangle a tarp over a pile of leaves, and she didn’t say anything at first. Then she just shook her head with this knowing smile and walked over, grabbing the other corner without a word. We got it sorted in about thirty seconds flat. Her name was Rosa, and after that, we’d chat every Saturday morning while watering our vegetables. One October morning, I mentioned I had a bunch of pumpkins from my harvest and was running out of ideas—my kids were getting tired of the same old pumpkin bread and muffins. Rosa laughed and said, “You need to make them into something they can hold. Something that feels like a treat.” She told me about these little cake pops her granddaughter went crazy for, rolled in cinnamon sugar. She didn’t write down a recipe or anything—she just described the process as she pulled weeds, using her hands to show me how to shape them. I went home, adapted her idea to what I had in my pantry, and honest to goodness, my kids stood at the kitchen counter watching the first batch cool, asking every two minutes if they were ready yet. That was three years ago, and these Kid-Approved Cinnamon Sugar Pumpkin Cake Pops have been a staple every fall since. Maybe you’ve been there—staring at a pile of pumpkin puree and wondering how to make it exciting again. Well, let me tell you, this is the answer.
Why You’ll Love This Recipe
I have tested this recipe more times than I care to count, tweaking the moisture level, the spice blend, and the perfect way to get that cinnamon sugar coating to stick. What I ended up with is a recipe that feels like a win on every single level.
- Quick & Easy: From start to finish, you are looking at about 45 minutes. Most of that is hands-off chilling time, so you can tidy up the kitchen or help with homework while the pops set up in the fridge.
- Simple Ingredients: There is nothing fancy here. Canned pumpkin, basic baking staples, and a generous coating of cinnamon sugar. You probably have most of this in your pantry right now.
- Perfect for Family Fun: These are not just for Halloween parties or Thanksgiving dessert tables. They are brilliant for after-school snacks, weekend baking projects, or packing in lunchboxes for a special surprise.
- Crowd-Pleaser: I have brought these to playdates, potlucks, and family gatherings, and they disappear every single time. Kids love the pop-able size, and adults love the cozy pumpkin spice flavor.
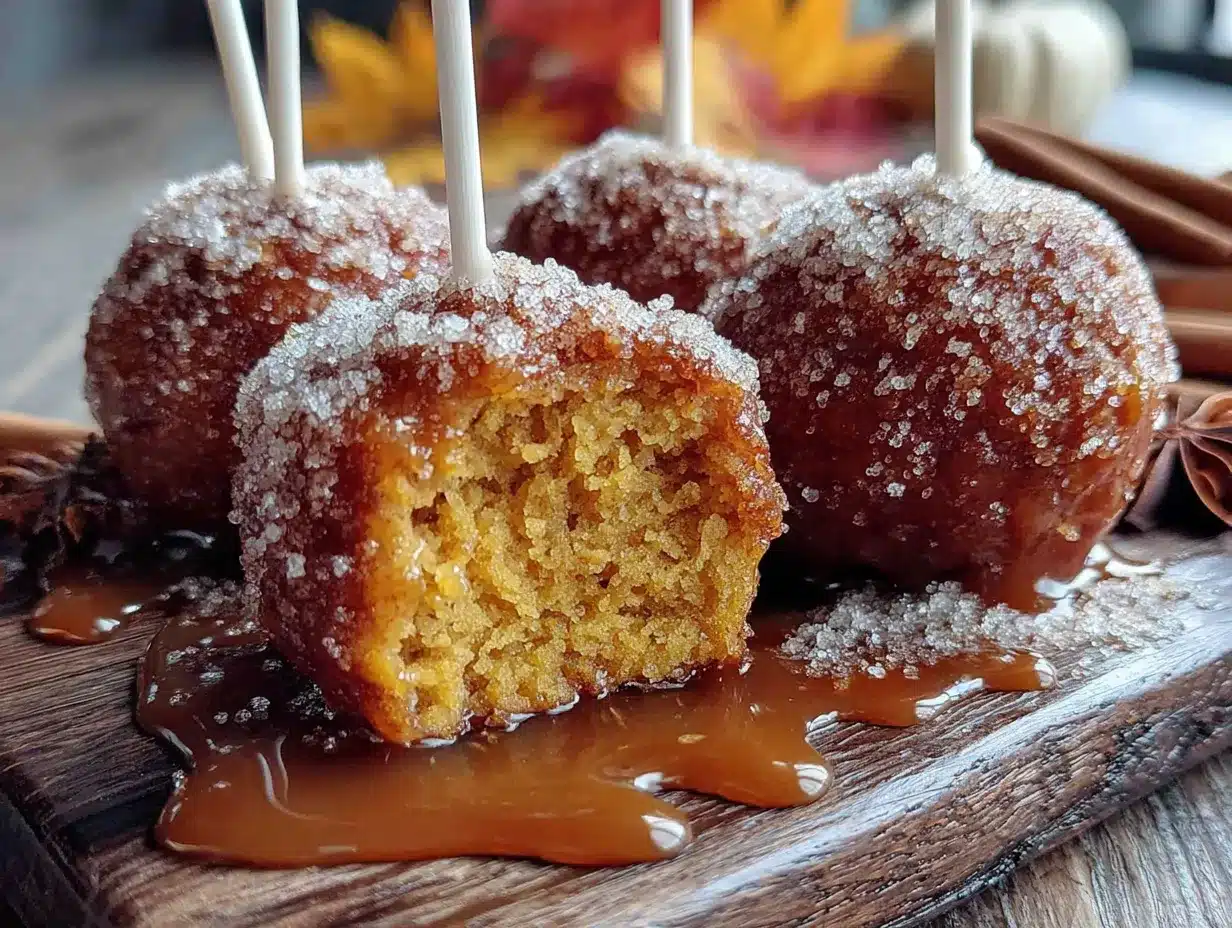
- Unbelievably Delicious: The texture is what gets me every time. Soft and cake-like on the inside with that crunchy, buttery, cinnamon-sugar shell on the outside. It is pure comfort food in a two-bite package.
What makes this recipe different from all the other pumpkin treats out there? It is the texture. So many cake pops turn out either too dense and heavy or they crumble apart when you try to dip them. This version uses a specific ratio of pumpkin to cake mix that creates a dough you can actually roll into perfect balls without any fuss. No sticky fingers, no crumbling disasters. Plus, rolling them in cinnamon sugar instead of a heavy frosting dip means they are less sweet and way more snackable. My kids can eat three of these without that sugar crash feeling. It is comfort food reimagined for real life—faster, simpler, and with the same soul-soothing satisfaction of a pumpkin spice latte, but in a form you can actually share with your family.
What Ingredients You Will Need
This recipe relies on a handful of simple, wholesome ingredients that work together to create that perfect cake pop texture without any complicated steps. Most of these are pantry staples, especially if you do any fall baking.
- 1 box (15.25 oz) yellow cake mix – I prefer using Duncan Hines or Betty Crocker for consistent results. The classic yellow cake mix provides a neutral, buttery base that lets the pumpkin shine.
- 1 cup (240g) canned pumpkin puree – Make sure you grab pure pumpkin puree, not pumpkin pie filling. The pie filling has added sugar and spices that will throw off the balance. Libby’s is my go-to brand.
- 1/3 cup (75g) unsalted butter, melted – Adds richness and helps bind the mixture. You can substitute with coconut oil for a dairy-free version, though the flavor will shift slightly.
- 1 large egg – Helps give the cake pops structure. For an egg-free version, you can use a flax egg (1 tablespoon ground flaxseed mixed with 3 tablespoons water, let sit for 5 minutes).
- 1 teaspoon pumpkin pie spice – You can use store-bought or make your own blend with cinnamon, nutmeg, ginger, and cloves. I actually prefer making my own because I like a heavier hand on the cinnamon.
- 1/2 teaspoon ground cinnamon – For an extra layer of warmth in the cake pop itself.
- 1/4 teaspoon salt – Balances the sweetness and enhances all the flavors.
- For the coating:
- 1/2 cup (100g) granulated sugar – Creates the crunchy exterior.
- 2 tablespoons ground cinnamon – The star of the coating. Fresh cinnamon makes a big difference here.
- 1/4 cup (55g) unsalted butter, melted – This is what helps the cinnamon sugar adhere to the cake pops. You will brush this on before rolling them in the coating.
A quick note on the pumpkin: if you have fresh pumpkin puree from roasting your own pumpkins, that works beautifully too. Just make sure you drain any excess liquid through a fine-mesh strainer or cheesecloth. Fresh pumpkin can be more watery than canned, and you want the dough to be firm enough to roll. I learned this the hard way after a batch that turned into sticky puddles on my baking sheet!
Equipment Needed
You do not need any fancy gadgets for this recipe, which is part of what makes it so approachable. Here is what you will need:
- Large mixing bowl – Any standard bowl will work. I use my favorite ceramic one that is wide enough to mix without flinging batter everywhere.
- Whisk and spatula – A whisk for the dry ingredients and a sturdy spatula for folding everything together.
- Baking sheet – A standard half-sheet pan lined with parchment paper or a silicone baking mat. The silicone mat is a game-changer for easy cleanup.
- Small cookie scoop (about 1 tablespoon size) – This is optional but highly recommended for getting uniform cake pop sizes. If you do not have one, you can use a tablespoon measure or just eyeball it with your hands.
- Lollipop sticks (optional) – These are traditional for cake pops, but honestly, my kids prefer eating them without sticks. They are easier to pack in lunchboxes that way. If you want the full cake pop experience, you can find these at any craft store or online.
- Pastry brush – For brushing the melted butter onto the baked cake pops before rolling them in cinnamon sugar. A silicone brush works great and is easy to clean.
- Shallow bowl – For the cinnamon sugar mixture. A wide, shallow bowl makes rolling easier.
If you do not have a pastry brush, you can use a clean, unused paintbrush from the hardware store—just make sure it is natural bristle and wash it thoroughly first. Or, you can simply dip the cake pops directly into the melted butter and let the excess drip off. It is a little messier but works just fine.
Preparation Method
- Preheat your oven to 350°F (175°C). Line a baking sheet with parchment paper or a silicone baking mat. This will prevent the cake pops from sticking and make cleanup a breeze.
- In your large mixing bowl, whisk together the yellow cake mix, pumpkin pie spice, ground cinnamon, and salt. Breaking up any clumps in the cake mix ensures everything blends evenly later. I like to use my fingers to gently press any stubborn lumps through the whisk.
- In a separate smaller bowl, combine the pumpkin puree, melted butter, and egg. Whisk until the mixture is smooth and fully combined. The pumpkin should be evenly incorporated into the butter and egg—look for a uniform orange color.
- Pour the wet ingredients into the dry ingredients. Use your spatula to fold everything together until just combined. Do not overmix! Overmixing can make the cake pops tough. You want a thick, slightly sticky dough that holds together when pressed. It should look like a soft cookie dough.
- Scoop out rounded tablespoons of the dough and roll them into smooth balls between your palms. If the dough feels too sticky to handle, lightly wet your hands with a little cold water. Place each ball on the prepared baking sheet, spacing them about 2 inches apart. You should get about 24 to 28 cake pops from this recipe.
- Bake for 10 to 12 minutes, or until the bottoms are lightly golden and the tops are set and slightly puffed. They will not spread much, but they should feel firm to the touch. Do not overbake, or they will dry out. The centers should still be soft and tender.
- Remove the baking sheet from the oven and let the cake pops cool on the sheet for 5 minutes. Then, transfer them to a wire rack to cool completely. This is a crucial step—if you try to coat them while they are still warm, the butter will soak in and the cinnamon sugar will not stick properly. Patience, my friend.
- While the cake pops are cooling, prepare the cinnamon sugar coating. In a shallow bowl, whisk together the granulated sugar and ground cinnamon until evenly combined. Melt the remaining 1/4 cup of butter in a small microwave-safe bowl or on the stovetop.
- Once the cake pops are completely cool, it is time for the fun part. Working with one cake pop at a time, use your pastry brush to coat it all over with the melted butter. You want a nice, even layer—not dripping, but thoroughly covered.
- Immediately roll the buttered cake pop in the cinnamon sugar mixture, turning it gently until every surface is coated. Place the coated cake pop back on the baking sheet or a clean plate. Repeat with the remaining cake pops.
- For the best texture, let the coated cake pops rest for about 10 minutes before serving. This allows the coating to set slightly, so it does not slide off when you pick them up. If you are using lollipop sticks, insert them into the cake pops before the coating sets completely.
Cooking Tips & Techniques
I have made this recipe more times than I can count, and I have definitely learned a few things the hard way. Here are my best tips to ensure your cake pops turn out perfect every time.
Do not skip the cooling step. I know it is tempting to rush ahead, especially when your kitchen smells like pumpkin spice heaven and the kids are hovering. But if you brush warm cake pops with butter, it just soaks right in, and the cinnamon sugar will slide off like a bad toupee. Let them cool completely—at least 30 minutes on a wire rack.
Watch your pumpkin moisture. Canned pumpkin brands can vary in water content. If your dough feels too wet and sticky—like it is clinging to your hands instead of forming a nice ball—add a tablespoon of cake mix at a time until it firms up. On the flip side, if the dough seems too dry and crumbly, add a teaspoon of milk or water until it comes together. This happened to me once when I used a different brand of cake mix, and a little extra moisture saved the batch.
Uniform sizing matters. Using a cookie scoop ensures all your cake pops bake evenly. If some are bigger than others, the smaller ones will dry out while the larger ones are still undercooked in the center. I learned this lesson when I made a batch where the sizes varied wildly—half were perfect, and the other half were either hockey pucks or gooey messes.
Roll them gently but firmly. When shaping the dough balls, apply enough pressure so they hold together without squishing them flat. Think of it like making meatballs—you want a smooth, crack-free surface. Cracks in the dough can cause the cake pops to break apart during the coating step.
Multitasking tip: While the cake pops are baking, I always set up my coating station. I melt the butter, mix the cinnamon sugar in a shallow bowl, and lay out my pastry brush. That way, when the cake pops are cool, I can work through the coating process in a smooth assembly line. It makes the whole thing feel much more manageable, especially with little helpers around.
Variations & Adaptations
One of the best things about this recipe is how easily it adapts to different tastes and dietary needs. Here are some variations I have tried and loved.
Gluten-Free Version: Simply swap the yellow cake mix for a gluten-free yellow cake mix. I have used King Arthur Measure for Measure blend with great results. The texture will be slightly more tender, but the flavor is spot on. Just make sure your pumpkin pie spice is also certified gluten-free if that is a concern.
Dairy-Free Adaptation: Replace the melted butter with a dairy-free alternative like melted coconut oil or vegan butter. I have used Earth Balance buttery sticks, and they work beautifully. The flavor is a little different—slightly coconutty if you use coconut oil—but still delicious. Use a dairy-free milk alternative if you need to adjust the moisture.
Spice It Up: If you want a more intense pumpkin spice flavor, add an extra 1/2 teaspoon of pumpkin pie spice to the dough and mix in 1/4 teaspoon of ground ginger. For a little warmth, a pinch of cayenne pepper in the cinnamon sugar coating is surprisingly good—it gives a subtle heat that balances the sweetness.
Chocolate Lover’s Twist: Add 1/4 cup of mini chocolate chips to the dough before rolling. The chocolate melts slightly during baking, creating little pockets of gooey goodness. You can also swap the cinnamon sugar coating for a simple chocolate glaze by melting 1 cup of chocolate chips with 1 tablespoon of coconut oil and dipping the cooled cake pops.
Pumpkin Spice Latte Version: For the grown-ups, add 1 tablespoon of instant espresso powder dissolved in 1 teaspoon of warm water to the wet ingredients. The coffee flavor deepens the pumpkin spice notes beautifully. My sister-in-law requests these every Thanksgiving now.
I have also tried making these with a spice cake mix instead of yellow cake mix, and honestly, it was a little too much spice for my taste. The yellow cake mix provides a neutral canvas that lets the pumpkin and cinnamon sugar shine without competing flavors.
Serving & Storage Suggestions
These cake pops are incredibly versatile when it comes to serving. They are delicious at room temperature, slightly warm from the oven (if you can resist the urge to coat them immediately), or even chilled straight from the fridge. The cinnamon sugar coating stays crunchy for about a day, then softens slightly into a lovely, almost caramelized layer.
Serving Ideas: Arrange them on a platter for a Halloween party, thread them onto lollipop sticks and display them in a mason jar filled with dried beans or rice, or simply pile them into a bowl for an after-school snack. They pair beautifully with a glass of cold milk, a warm mug of apple cider, or a hot cup of coffee for the adults. For a fun presentation, drizzle a little caramel sauce over the top and sprinkle with a pinch of flaky sea salt.
Storage Instructions: Store any leftover cake pops in an airtight container at room temperature for up to 3 days. If you need to keep them longer, pop them in the refrigerator for up to a week. The coating will soften in the fridge, but the flavor remains fantastic. Let them sit at room temperature for about 10 minutes before serving to take the chill off.
Freezing Instructions: These freeze beautifully! Place the cooled, uncoated cake pops in a single layer on a baking sheet and freeze for about an hour, until solid. Transfer them to a freezer-safe bag or container, separating layers with parchment paper. They will keep for up to 3 months. When you are ready to enjoy them, thaw them in the refrigerator overnight or at room temperature for a couple of hours, then proceed with the butter and cinnamon sugar coating. I often make a double batch and freeze half for a rainy day—it is like having a little secret stash of comfort waiting for you.
Reheating Tip: If you want to recapture that fresh-from-the-oven warmth, pop a few cake pops in a 300°F (150°C) oven for about 5 minutes. They will warm through without the coating getting too soft. Microwaving works in a pinch, but it tends to make the coating soggy, so I avoid it if possible.
Nutritional Information & Benefits
While these cake pops are definitely a treat, they do offer a few nutritional bright spots worth noting. Pumpkin is packed with vitamin A, fiber, and antioxidants—it is one of those ingredients that makes you feel slightly virtuous even when you are enjoying dessert. The cinnamon in the coating has anti-inflammatory properties and can help regulate blood sugar levels, which is a nice bonus.
Here is the estimated nutritional breakdown for one cake pop (based on a batch of 24):
- Calories: 145
- Total Fat: 7g
- Saturated Fat: 4g
- Carbohydrates: 20g
- Sugar: 12g
- Fiber: 1g
- Protein: 2g
- Vitamin A: 45% of the Daily Value
Please note that these values are estimates and will vary based on the specific brands and any substitutions you make. If you are watching your sugar intake, you can reduce the sugar in the coating to 1/4 cup without sacrificing too much crunch. For a lower-fat option, you can skip the butter coating and use a light spritz of cooking spray before rolling in cinnamon sugar—it is not quite as decadent, but it still gets the job done.
These cake pops are not gluten-free unless you use a gluten-free cake mix, and they contain dairy from the butter. As I mentioned earlier, both are easily adaptable. They are also nut-free, making them a safe option for school events or parties where allergies are a concern.
Conclusion
Honestly, I think these Kid-Approved Cinnamon Sugar Pumpkin Cake Pops have earned a permanent spot in my fall baking rotation. They are simple enough to whip up on a random Tuesday afternoon, yet special enough to bring to a holiday gathering and watch everyone’s faces light up. The combination of soft, spiced pumpkin cake with that crunchy, buttery cinnamon coating is just irresistible. My kids now request them by name, and I have lost count of how many times I have texted the recipe to friends who tried one and begged for the details.
I hope you give these a try—and I hope they become a tradition in your home, too. Maybe you will tweak the spice blend to your liking, or add chocolate chips, or serve them on sticks at your next Halloween party. That is the beauty of a good recipe: it is a starting point, not a rulebook. Make it your own, and do not forget to involve the little ones. Rolling the dough into balls and brushing on the butter is perfect for small hands, and the pride they feel when they see the finished plate is absolutely priceless.
If you do make these, I would love to hear how they turned out! Drop a comment below and let me know what variations you tried, or tag me in your photos on social media. Your feedback and creativity are what keep this community of home cooks thriving. Until next time, happy baking—and may your kitchen always smell like cinnamon and pumpkin spice.
Frequently Asked Questions
Can I use a different flavor of cake mix?
Absolutely! Spice cake mix works wonderfully for a deeper fall flavor, and white cake mix is a great neutral option. I would avoid chocolate cake mix, as it tends to overpower the delicate pumpkin taste. If you are feeling adventurous, a butter pecan cake mix adds a lovely nutty undertone.
Why did my cake pops turn out dry?
Dry cake pops usually come from overbaking or using too much cake mix relative to the pumpkin. Make sure you measure your pumpkin accurately and do not overmix the dough. If you notice the dough feels dry before baking, add a tablespoon of milk or water to bring it together. Also, keep a close eye on the oven—every oven runs a little differently, and 10 minutes is usually the sweet spot.
Can I make these ahead of time for a party?
Yes! In fact, I often make them a day ahead. Bake the cake pops, let them cool completely, and store them in an airtight container in the refrigerator. The next day, just brush them with butter and roll them in cinnamon sugar right before your event. The coating stays crunchiest when applied close to serving time.
How do I get the cinnamon sugar to stick better?
The key is making sure the cake pops are completely cool and that you use enough melted butter. Brush the butter on generously but not dripping—you want a thin, even layer. If the coating is still falling off, try letting the buttered cake pops sit for a minute before rolling them in the sugar. This gives the butter a chance to become slightly tacky.
Can I freeze the coated cake pops?
I do not recommend freezing them after they have been coated, as the cinnamon sugar will become soggy during thawing. Instead, freeze the uncoated cake pops and coat them fresh when you are ready to serve. It only takes a few extra minutes, and the texture is so much better.
Pin This Recipe!
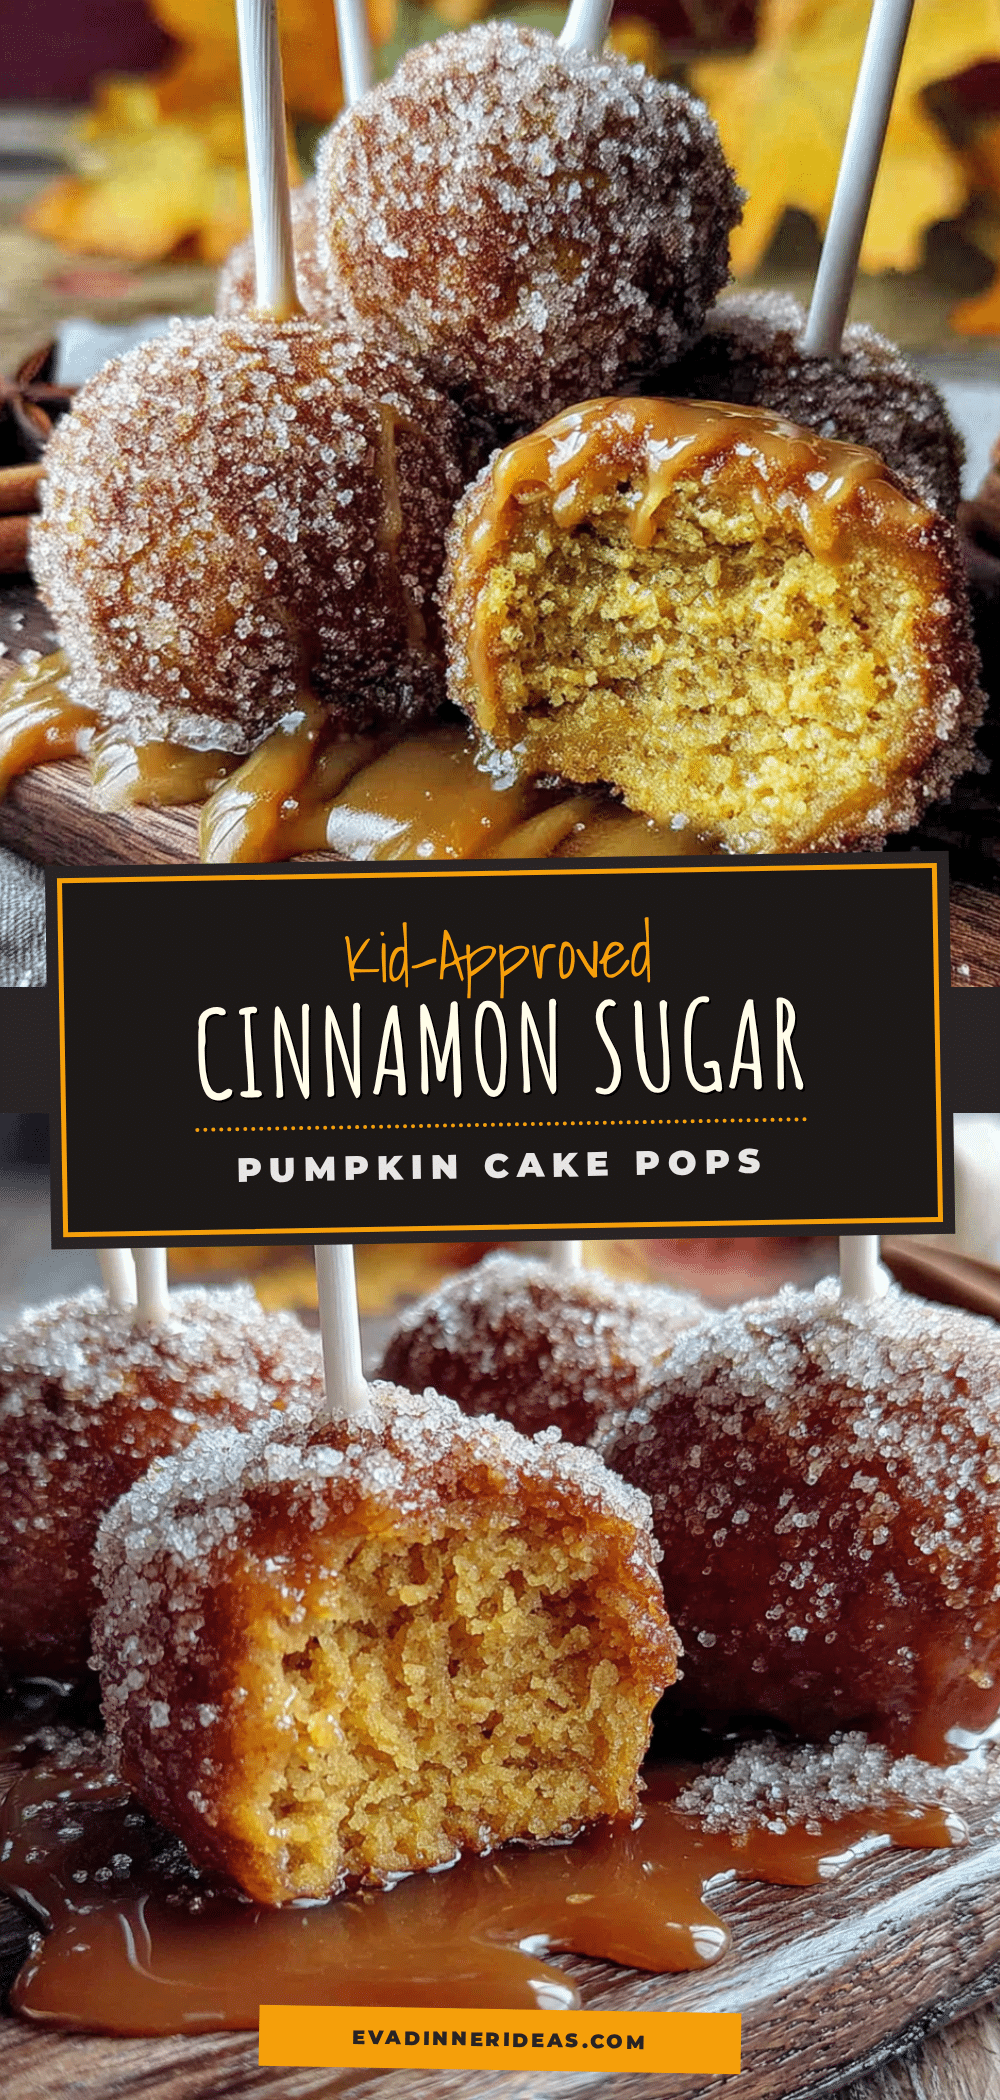
Easy Kid-Approved Cinnamon Sugar Pumpkin Cake Pops
Soft, spiced pumpkin cake rolled into bite-sized balls and coated in a crunchy, buttery cinnamon sugar shell. A quick and easy fall treat that kids and adults love.
- Prep Time: 15 minutes
- Cook Time: 12 minutes
- Total Time: 45 minutes
- Yield: 24 servings 1x
- Category: Dessert
- Cuisine: American
Ingredients
- 1 box (15.25 oz) yellow cake mix
- 1 cup (240g) canned pumpkin puree
- 1/3 cup (75g) unsalted butter, melted
- 1 large egg
- 1 teaspoon pumpkin pie spice
- 1/2 teaspoon ground cinnamon
- 1/4 teaspoon salt
- 1/2 cup (100g) granulated sugar
- 2 tablespoons ground cinnamon
- 1/4 cup (55g) unsalted butter, melted
Instructions
- Preheat your oven to 350°F (175°C). Line a baking sheet with parchment paper or a silicone baking mat.
- In a large mixing bowl, whisk together the yellow cake mix, pumpkin pie spice, ground cinnamon, and salt.
- In a separate smaller bowl, combine the pumpkin puree, melted butter, and egg. Whisk until smooth and fully combined.
- Pour the wet ingredients into the dry ingredients. Fold together with a spatula until just combined. Do not overmix. The dough should be thick and slightly sticky.
- Scoop out rounded tablespoons of the dough and roll into smooth balls. Place each ball on the prepared baking sheet, spacing them about 2 inches apart. You should get about 24 to 28 cake pops.
- Bake for 10 to 12 minutes, or until the bottoms are lightly golden and the tops are set and slightly puffed.
- Remove the baking sheet from the oven and let the cake pops cool on the sheet for 5 minutes. Then transfer them to a wire rack to cool completely.
- While the cake pops are cooling, prepare the cinnamon sugar coating. In a shallow bowl, whisk together the granulated sugar and ground cinnamon. Melt the remaining 1/4 cup of butter in a small microwave-safe bowl.
- Once the cake pops are completely cool, working one at a time, use a pastry brush to coat each cake pop all over with the melted butter.
- Immediately roll the buttered cake pop in the cinnamon sugar mixture until every surface is coated. Place the coated cake pop back on the baking sheet or a clean plate. Repeat with the remaining cake pops.
- Let the coated cake pops rest for about 10 minutes before serving to allow the coating to set.
Notes
Do not skip the cooling step; cake pops must be completely cool before coating. If dough is too wet, add a tablespoon of cake mix at a time. If too dry, add a teaspoon of milk or water. For uniform baking, use a cookie scoop. For best texture, let coated cake pops rest for 10 minutes before serving.
Nutrition
- Serving Size: 1 cake pop
- Calories: 145
- Sugar: 12
- Fat: 7
- Saturated Fat: 4
- Carbohydrates: 20
- Fiber: 1
- Protein: 2
Keywords: pumpkin cake pops, cinnamon sugar, fall dessert, kid-friendly, easy pumpkin recipe