My husband swore he hated cake pops. For years. “They’re just crumbs held together with frosting,” he’d say with a dismissive wave of his hand. “Too sweet. Too fussy. What’s the point?” I mean, he wasn’t wrong about the construction—that’s literally what they are. But then I found him standing in front of the open fridge last December, three of these little Christmas cake pops already gone from the plate I’d made “just for the kids.” Caught red-handed, or rather, white-drizzle-handed. “These are different,” he mumbled, mouth full. And honestly? He was right.
This recipe started as a mission to use up the half-eaten Christmas cake sitting in my pantry—you know, the one everyone nibbles at on Boxing Day and then ignores for a week. I had a neighbor named Claire who swore by a complicated method involving a candy melter and special molds. I tried her way once. Let’s just say it involved a lot of swearing and a very sticky stovetop. So I went back to basics: crumbled cake, a little frosting, and a whole lot of patience. The first batch I made, I forgot to chill the balls long enough before dipping. They slid right off the sticks into a puddle of white chocolate. A total mess. But the kids didn’t care—they ate the “failed” ones with spoons straight from the bowl. That’s when I knew I was onto something.
What makes these different isn’t some fancy technique. It’s that they actually taste like Christmas without being cloyingly sweet. The cake is the star, the frosting just holds it together, and that white chocolate drizzle? It’s the perfect finishing touch that makes them feel special without overwhelming your taste buds. Maybe you’ve been there—standing in the baking aisle, staring at a box of cake pop mix, wondering if it’s worth the effort. Let me tell you, it is. But not the boxed kind. The real, homemade, crumble-it-with-your-fingers kind that fills your kitchen with that warm, spicy Christmas smell. This recipe stayed with me because it turned a skeptic into a believer. And honestly, watching someone take back everything they said while reaching for a fourth one? That’s the best kind of Christmas magic.
Why You’ll Love This Recipe
I’ve tested this recipe more times than I care to count—through sticky-fingered toddler helpers, a melted chocolate disaster on a hot stovetop, and even a batch that somehow ended up tasting like cinnamon toast (long story involving a mix-up with the spice jars). So trust me when I say this version is the one. It’s been family-approved by my own kids, my picky neighbor, and even my husband’s coworkers who devoured an entire plate at the holiday party.
- Quick & Easy: From start to finish, you’re looking at about 45 minutes of active time. The hardest part is waiting for them to chill in the fridge!
- Simple Ingredients: No fancy candy melts or specialty stores. You probably have most of this in your pantry right now—cake mix, frosting, white chocolate chips.
- Perfect for Christmas Parties: These little guys disappear faster than cookies at a school bake sale. They’re portable, mess-free, and kids can help make them.
- Crowd-Pleaser: My daughter’s kindergarten class went absolutely wild for these. Even the teacher asked for the recipe.
- Unbelievably Delicious: The texture is soft and cake-like on the inside with that satisfying snap of white chocolate on the outside. It’s comfort food on a stick.
What sets this recipe apart from the dozens of others out there? It’s the ratio. I spent a whole weekend testing different amounts of frosting to cake, trying to find that sweet spot where the pops hold together without tasting like a sugar bomb. Most recipes use way too much frosting. Mine uses just enough to bind the crumbs, letting the cake flavor shine through. Plus, I’ve figured out a chilling hack that prevents those dreaded cake-pop-slide-off-the-stick disasters. No special equipment needed—just a little patience and a baking sheet.
This isn’t just another Christmas treat. It’s the kind that makes you close your eyes after the first bite, because it tastes exactly like the holidays should—warm, sweet, and full of happy chaos. Perfect for making with little helpers who “accidentally” eat more sprinkles than they put on the pops.
What Ingredients You Will Need
This recipe uses simple, pantry-friendly ingredients to create something that looks and tastes like you spent hours in the kitchen. The magic is in how they come together, not in fancy components.
- For the Cake Base:
- 1 box (15.25 oz) vanilla or yellow cake mix (I prefer Betty Crocker SuperMoist for the softest texture)
- 1 cup water
- 1/3 cup vegetable oil
- 3 large eggs, room temperature
- For the Binding:
- 1/2 cup cream cheese frosting, store-bought or homemade (I use Duncan Hines—it’s thick and holds well)
- 1 teaspoon vanilla extract
- 1/2 teaspoon ground cinnamon
- 1/4 teaspoon ground nutmeg (freshly grated if you have it, adds so much warmth)
- For the Coating:
- 12 oz white chocolate chips or melting wafers (Ghirardelli white chocolate chips melt like a dream)
- 1 tablespoon coconut oil or vegetable shortening (helps thin the chocolate for dipping)
- For Decoration:
- Christmas sprinkles (red, green, and white mix)
- Crushed candy canes (optional, for a peppermint twist)
- Gold or silver edible glitter (because Christmas deserves a little sparkle)
- For the Sticks:
- 20-24 lollipop sticks (I get mine at Michaels or on Amazon—they’re cheap and reusable if you wash them)
- 1 block of styrofoam or a cardboard box with holes poked in it (for drying the pops upright)
Ingredient Tips & Substitutions: If you’re gluten-free, use a GF cake mix—just follow the box instructions for baking. For a dairy-free version, swap the cream cheese frosting with a dairy-free alternative and use dairy-free white chocolate chips. I’ve tried this with chocolate cake mix too, and honestly? It’s amazing. Just skip the cinnamon and nutmeg and add a teaspoon of peppermint extract instead for a chocolate-mint vibe. For the white chocolate, avoid the “white baking chips” that are actually vanilla-flavored—they don’t melt as smoothly. Look for real white chocolate with cocoa butter listed in the ingredients.
Equipment Needed
You don’t need a professional bakery setup for these. Here’s what you’ll actually use:
- 9×13 inch baking pan (or two 8-inch rounds if that’s what you have)
- Large mixing bowl
- Electric hand mixer or stand mixer (or a strong arm and a whisk—I’ve done it both ways)
- Medium bowl for crumbling the cake
- Cookie scoop or melon baller (for uniform cake balls—trust me, it makes a difference)
- Baking sheet lined with parchment paper
- Lollipop sticks (20-24)
- Microwave-safe bowl for melting chocolate
- Spoon or small offset spatula for drizzling
If you don’t have a cookie scoop, just use your hands—lightly oil them so the mixture doesn’t stick. For the drying setup, I’ve used everything from a styrofoam block to an upside-down colander with holes. Last year, I literally poked holes in a cardboard box and it worked perfectly. Get creative!
Preparation Method
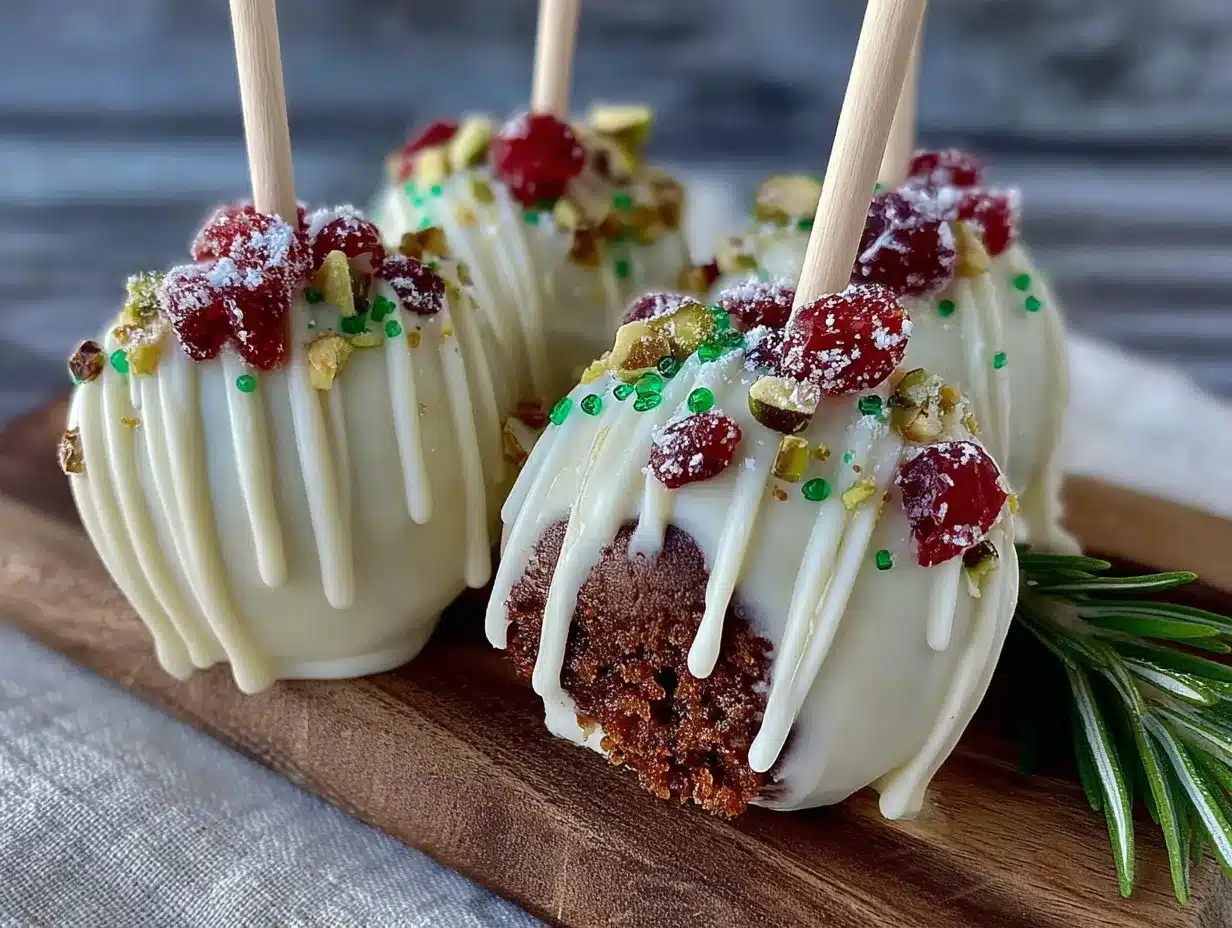
Step 1: Bake the Cake
Preheat your oven to 350°F (175°C). Grease your 9×13 pan with butter or cooking spray. In a large bowl, combine the cake mix, water, oil, and eggs. Beat on medium speed for 2 minutes until smooth and fluffy. Pour into the prepared pan and bake for 28-33 minutes, or until a toothpick inserted in the center comes out clean. Let the cake cool completely in the pan—this is crucial. Warm cake turns into mushy crumbs that won’t hold their shape.
Step 2: Crumble the Cake
Once the cake is completely cool (I usually let it sit for at least an hour), break it apart into a large bowl with your hands. You want fine, even crumbs—no big chunks. This is the most satisfying part, honestly. Let the kids help if they’re around. Just be prepared for a few “taste tests” along the way.
Step 3: Make the Binding Mixture
In a small bowl, stir together the cream cheese frosting, vanilla extract, cinnamon, and nutmeg. Add this to the cake crumbs and mix thoroughly with a spatula or your hands. The mixture should hold together when squeezed—like wet sand. If it’s too dry, add a tablespoon more frosting. Too wet? Add a few more cake crumbs. I’ve learned this through trial and error, and honestly, the texture is more forgiving than you’d think.
Step 4: Form the Cake Balls
Using your cookie scoop or hands, roll the mixture into 1-inch balls (about the size of a walnut). Place them on the parchment-lined baking sheet. You should get 20-24 balls depending on size. Pop the sheet into the refrigerator for at least 30 minutes—or the freezer for 15 if you’re in a hurry. This step is non-negotiable. Cold cake balls hold their shape when dipped.
Step 5: Insert the Sticks
While the balls are chilling, melt about 1/4 cup of your white chocolate chips in the microwave (30-second intervals, stirring in between). Dip the tip of each lollipop stick into the melted chocolate, then insert it about halfway into a cake ball. The chocolate acts like glue, holding the stick in place. Return the pops to the fridge for another 15 minutes to set.
Step 6: Melt the Coating
In a microwave-safe bowl, combine the remaining white chocolate chips and coconut oil. Microwave in 30-second bursts, stirring each time, until completely smooth. Don’t overheat or the chocolate will seize—ask me how I know. It should be thin enough to dip easily but not runny.
Step 7: Dip and Decorate
Hold a cake pop by the stick and dip it into the melted white chocolate, covering the entire ball. Let any excess drip off by gently tapping the stick against the edge of the bowl. Immediately sprinkle with your Christmas decorations before the chocolate sets. Place the pop upright in your styrofoam block or cardboard box to dry. Repeat with all pops.
Step 8: The Drizzle
Once all pops are dipped and the coating has set (about 20 minutes at room temperature), melt a small amount of additional white chocolate. Use a spoon to drizzle it back and forth over the pops. This gives them that gorgeous, professional look. Let set completely before serving.
Cooking Tips & Techniques
I’ve made every mistake in the book with these cake pops, so let me save you the trouble. The biggest issue people face is the cake balls falling off the sticks during dipping. The fix is simple: make sure your balls are thoroughly chilled and use the melted chocolate “glue” when inserting the sticks. I once skipped the glue step because I was in a hurry, and half my pops ended up floating in the chocolate bowl like sad little islands.
Another common mistake is using too much frosting. I know it’s tempting to add extra for flavor, but it makes the mixture too soft. Trust the ratio—1/2 cup is plenty. If you’re worried about flavor, add an extra splash of vanilla instead.
For the white chocolate coating, temperature is everything. If it’s too hot, it will melt the cake ball. If it’s too cool, it will be thick and clumpy. Aim for a consistency similar to warm honey. And please, please don’t use white chocolate chips that have been sitting in your pantry for two years—they won’t melt properly. Fresh chips make all the difference.
Multitasking is key here. While the cake is baking, I clean up the mixing bowls and set out my sprinkles. While the balls are chilling, I melt the chocolate and get my drying station ready. This way, the whole process feels manageable instead of chaotic. I learned this the hard way after a particularly disastrous Christmas Eve where I was dipping pops while simultaneously trying to wrap presents.
Variations & Adaptations
1. Chocolate Peppermint Cake Pops: Use a chocolate cake mix instead of vanilla. Omit the cinnamon and nutmeg from the binding mixture and add 1 teaspoon peppermint extract. Crush candy canes and roll the dipped pops in them for a festive crunch. My kids went absolutely nuts for this version last year.
2. Gingerbread Spice Cake Pops: Swap the vanilla cake mix for a spice cake mix. Add 1 tablespoon molasses to the binding mixture along with an extra 1/2 teaspoon ginger. Top with a drizzle of cream cheese frosting instead of white chocolate for a real gingerbread house vibe. This one’s my personal favorite for a cozy night in.
3. Vegan-Friendly Version: Use a vegan cake mix and follow the box instructions with plant-based milk and oil instead of eggs. Use vegan cream cheese frosting and dairy-free white chocolate chips. I tested this for a friend’s holiday party and honestly, no one could tell the difference. Just make sure your white chocolate is actually dairy-free—some brands sneak milk solids in there.
4. Gluten-Free Option: A gluten-free vanilla cake mix works perfectly here. I’ve tried three different brands and they all held up well. Just be extra careful with the chilling step, as GF cake tends to be a bit more delicate. Add an extra 10 minutes in the fridge to be safe.
Serving & Storage Suggestions
These cake pops are best served at room temperature—the coating stays snappy while the inside stays soft and cake-like. Arrange them on a festive platter or stand them upright in a mason jar filled with rice or beans for a cute presentation. I’ve also stuck them into a styrofoam cone covered in wrapping paper to make a “cake pop tree” centerpiece. It got almost as many compliments as the actual taste.
For drinks, they pair beautifully with hot cocoa, eggnog, or a simple glass of cold milk. Honestly, milk is the way to go—it balances the sweetness perfectly. If you’re serving adults, a peppermint mocha or spiced chai latte is a lovely match.
Storage: Store leftover cake pops in an airtight container in the refrigerator for up to 5 days. Let them sit at room temperature for 15 minutes before serving to take the chill off. You can also freeze them for up to 3 months—just wrap each pop individually in plastic wrap, then place in a freezer bag. Thaw in the fridge overnight. The flavor actually gets better after a day or two as the spices meld together.
One note: if you’re making these ahead for a party, I recommend dipping them no more than two days in advance. The white chocolate can develop condensation if stored too long in the fridge, which makes the sprinkles go soft. I learned this the hard way when I made a batch a full week ahead and ended up with sad, soggy sprinkles.
Nutritional Information & Benefits
Let’s be real—these are a treat, not a health food. But here’s the estimated breakdown per cake pop (based on 24 servings):
- Calories: 185
- Total Fat: 9g
- Saturated Fat: 4g
- Carbohydrates: 25g
- Sugar: 18g
- Protein: 2g
- Sodium: 150mg
That said, there are some redeeming qualities. The cinnamon and nutmeg in the binding mixture are packed with antioxidants and have anti-inflammatory properties. Cinnamon may also help regulate blood sugar levels—so in a roundabout way, these are practically health food, right? Okay, maybe not. But they’re made with real ingredients you can pronounce, and there’s something to be said for that. Plus, the portion control is built right in—one pop is satisfying without being over-the-top.
If you’re watching your sugar intake, you can cut the frosting in half and add a mashed banana for sweetness instead. I’ve tried it, and while the texture is a bit denser, the flavor is still lovely. For a lower-fat option, use a sugar-free cake mix and skip the white chocolate drizzle—just roll the pops in cocoa powder or crushed nuts instead.
Conclusion
These Christmas cake pops are proof that you don’t need fancy equipment or professional skills to create something truly special. They’re forgiving, adaptable, and—most importantly—absolutely delicious. Whether you’re making them with sticky-fingered kids on a snowy afternoon or whipping up a batch for a holiday party, they deliver every single time.
I love this recipe because it brings people together. There’s something about the process—crumbling the cake, rolling the balls, dipping and decorating—that feels like a shared experience. It’s messy, it’s fun, and it ends with a plate of beautiful little treats that make everyone smile. My husband, the former cake pop hater, now requests them every December. He even helps make them, though he still insists on eating more than his fair share.
So go ahead—give these a try. Customize them with your favorite sprinkles, experiment with different cake flavors, and don’t stress if a few turn out lopsided. That’s the charm of homemade. And when someone takes that first bite and their eyes light up? You’ll know it was worth every crumb.
I’d love to hear how yours turn out! Drop a comment below with your favorite variation, or tag me in your photos on social media. Happy baking, and merry Christmas!
Frequently Asked Questions
Why did my cake pops fall off the sticks?
This usually happens when the cake balls aren’t chilled enough before dipping, or you skipped the “glue” step of dipping the stick tip in melted chocolate before inserting. Make sure your balls are cold and use that chocolate glue—it really does make a difference.
Can I use store-bought cake instead of baking from a mix?
Absolutely! A store-bought vanilla or yellow cake works perfectly. Just crumble it up and proceed with the recipe. It might be slightly denser, but the flavor is still great. I’ve done this in a pinch and no one noticed.
How do I get the white chocolate coating smooth?
The key is adding a little coconut oil or shortening to thin the chocolate. Also, don’t overheat it—microwave in short bursts and stir frequently. If your chocolate seizes (gets clumpy and thick), you can try adding a teaspoon of warm water and stirring vigorously, but honestly, it’s better to start fresh.
Can I make these ahead of time for a party?
Yes! You can make the cake balls up to a week ahead and keep them in the fridge, then dip and decorate up to two days before serving. The flavor actually improves after a day or two as the spices meld together.
My kids have nut allergies—are these safe?
As written, this recipe is nut-free. Just double-check your cake mix and white chocolate labels to ensure they were processed in a nut-free facility. The sprinkles are also typically nut-free, but always read the labels to be safe.
Pin This Recipe!
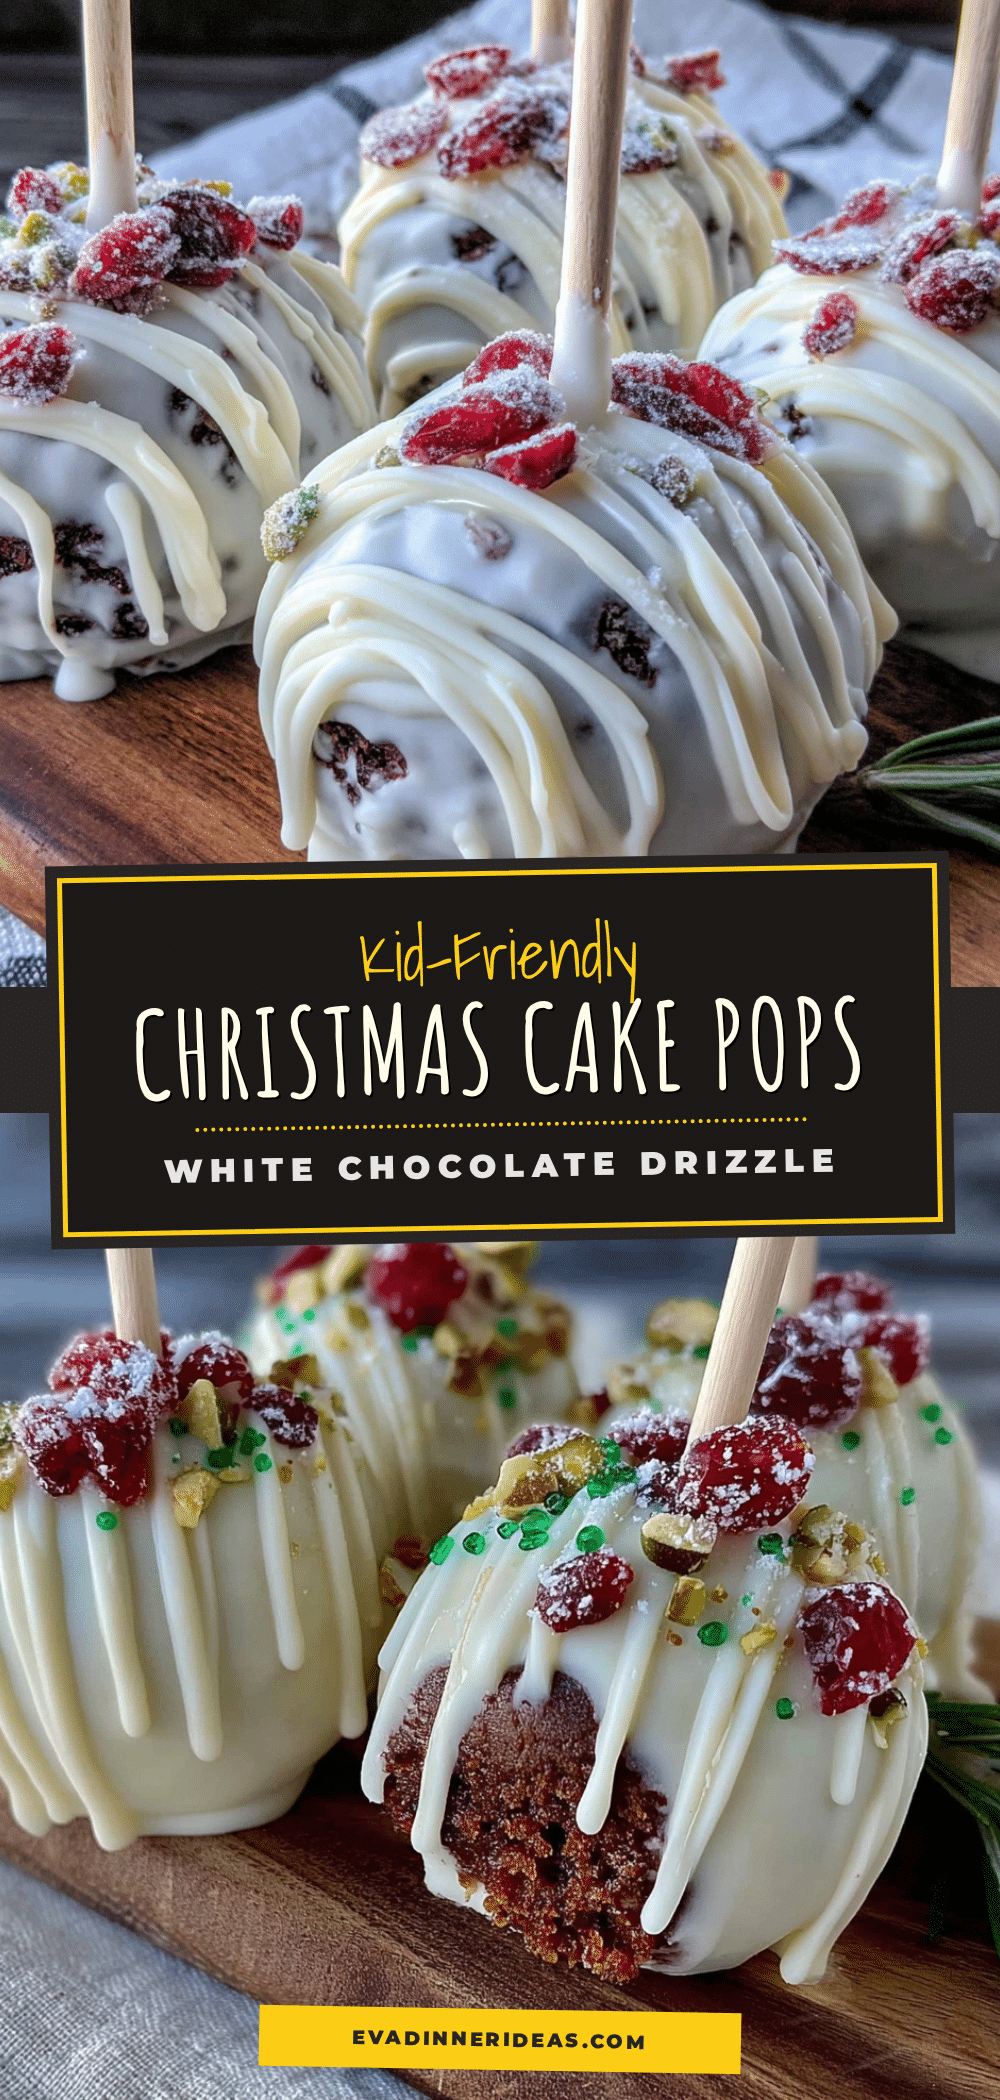
Easy Homemade Christmas Cake Pops for Kids with White Drizzle
These easy homemade Christmas cake pops are made with simple ingredients and a white chocolate drizzle. They’re perfect for holiday parties and are a crowd-pleaser that even skeptics will love.
- Prep Time: 45 minutes
- Cook Time: 30 minutes
- Total Time: 1 hour 15 minutes
- Yield: 20-24 servings 1x
- Category: Dessert
- Cuisine: American
Ingredients
- 1 box (15.25 oz) vanilla or yellow cake mix
- 1 cup water
- 1/3 cup vegetable oil
- 3 large eggs, room temperature
- 1/2 cup cream cheese frosting
- 1 teaspoon vanilla extract
- 1/2 teaspoon ground cinnamon
- 1/4 teaspoon ground nutmeg
- 12 oz white chocolate chips or melting wafers
- 1 tablespoon coconut oil or vegetable shortening
- Christmas sprinkles (red, green, and white mix)
- Crushed candy canes (optional)
- Gold or silver edible glitter (optional)
- 20–24 lollipop sticks
Instructions
- Preheat oven to 350°F (175°C). Grease a 9×13 inch baking pan.
- In a large bowl, combine cake mix, water, oil, and eggs. Beat on medium speed for 2 minutes until smooth.
- Pour batter into prepared pan and bake for 28-33 minutes, or until a toothpick inserted in the center comes out clean. Let cool completely.
- Crumble the cooled cake into fine crumbs in a large bowl.
- In a small bowl, stir together cream cheese frosting, vanilla extract, cinnamon, and nutmeg. Add to cake crumbs and mix thoroughly until mixture holds together when squeezed.
- Roll mixture into 1-inch balls and place on a parchment-lined baking sheet. Refrigerate for at least 30 minutes (or freeze for 15 minutes).
- Melt 1/4 cup white chocolate chips in the microwave in 30-second intervals. Dip the tip of each lollipop stick into the melted chocolate, then insert halfway into a cake ball. Return to fridge for 15 minutes.
- Melt remaining white chocolate chips with coconut oil in the microwave in 30-second bursts, stirring until smooth.
- Dip each cake pop into the melted white chocolate, covering completely. Let excess drip off, then immediately decorate with sprinkles. Place upright in a styrofoam block or cardboard box to dry.
- Once coating has set (about 20 minutes), melt additional white chocolate and drizzle over pops. Let set completely before serving.
Notes
Chill cake balls thoroughly before dipping to prevent them from falling off sticks. Use fresh white chocolate chips for smooth melting. For best results, dip pops no more than two days in advance to avoid condensation on sprinkles.
Nutrition
- Serving Size: 1 cake pop
- Calories: 185
- Sugar: 18
- Sodium: 150
- Fat: 9
- Saturated Fat: 4
- Carbohydrates: 25
- Protein: 2
Keywords: Christmas cake pops, easy cake pops, white chocolate drizzle, holiday treats, kids dessert


