I was standing in the baking aisle of our local grocery store last October, staring at a display of gummy worms, when the weirdest thing happened. A kid ran past me, his costume cape flying, and the whoosh of air carried that specific smell—chocolate pudding and crushed-up cookies, the same smell that used to fill my third-grade classroom every Halloween party. And just like that, I was eight years old again, sitting cross-legged on a linoleum floor, holding a clear plastic cup with layers of dark “dirt” and a gummy worm poking out the top. I remember thinking it was the coolest thing I’d ever eaten. Honestly? I still kind of think that.
That memory hit me so hard I almost laughed out loud. My cart was already half-full with stuff for a weeknight dinner I was already dreading, but I grabbed a box of instant pudding mix anyway. I mean, I’m a grown adult with a mortgage and a job that involves sharp knives and hot stoves. But there I was, practically giddy over the idea of making dirt cups. Let’s face it—some recipes don’t need to be fancy to be special. They just need to remind you of something good.
So last Friday night, after a long week of deadlines and school pickups and that one meeting that could’ve been an email, I made these Easy Halloween Dirt Cups with Gummy Worms with my kids. And you know what? It took maybe fifteen minutes. Fifteen minutes of crushing cookies, whisking pudding, and watching little fingers push gummy worms into “dirt” while someone inevitably ate more worms than they placed. The kitchen was a mess, the pudding was a little lumpy, and we ran out of whipped topping halfway through. But sitting there on the couch, spooning into that creamy, crunchy, silly little dessert, I felt like I’d grabbed hold of that third-grade feeling and brought it right into my living room. Maybe you’ve been there—chasing a taste that’s really just a memory you don’t want to let go of.
Why You’ll Love This Recipe
Look, I’ve tested a lot of Halloween desserts over the years. Some are complicated. Some require specialty pans or food coloring that stains your fingers for days. These dirt cups? They’re the opposite of all that. Here’s why this recipe works so well for busy people like us:
- Ready in 15 Minutes: No baking, no boiling, no waiting around. From start to spoon, you’re looking at about a quarter of an hour. That’s faster than ordering takeout.
- Simple Ingredients: You probably already have most of this stuff in your kitchen. I’m serious—pudding mix, milk, chocolate cookies, whipped topping, and gummy worms. That’s it.
- Perfect for Weeknights: Halloween falls on a school night more often than not. This is the kind of treat you can throw together after homework but before bedtime, no stress involved.
- Crowd-Pleaser: I’ve brought these to Halloween parties, classroom celebrations, and family gatherings. Every single time, they disappear first. Kids love them. Adults pretend they’re above it, then eat two.
- Unbelievably Delicious: There’s something about that combo—creamy chocolate pudding against crunchy cookie crumbs, with a chewy gummy worm surprise in the middle. It’s texture heaven, honestly.
What sets this version apart from the hundreds of dirt cup recipes out there? It’s the little things I’ve learned from making these way too many times. Like using chocolate sandwich cookies with the filling still in—don’t scrape it out, that extra sweetness matters. And letting the pudding set for just the right amount of time so it’s firm but still soft. I’ve also figured out the best way to layer so every spoonful gets dirt, pudding, and a worm. I mean, that’s the whole point, right?
This recipe isn’t just good—it’s the kind that makes you close your eyes after the first bite. It’s comfort food reimagined for a Tuesday night in October, with the same soul-soothing satisfaction as the version you remember from childhood, just faster and easier. Perfect for impressing your kids without spending hours in the kitchen, or turning a regular weeknight into something memorable.
What Ingredients You Will Need
This recipe uses simple, store-bought ingredients to deliver that nostalgic dirt cup experience without any fuss. Most of these are pantry staples you can grab on autopilot. Here’s what you’ll need:
For the Pudding Base
- 1 (3.9-ounce) box instant chocolate pudding mix (I prefer Jell-O brand for the smoothest texture, but any brand works fine)
- 2 cups cold whole milk (for the richest, creamiest pudding. You can use 2% or even oat milk in a pinch, but the texture won’t be quite as thick)
- 1 cup frozen whipped topping, thawed (like Cool Whip. This makes the pudding lighter and fluffier. Don’t skip it!)
For the Dirt Layer
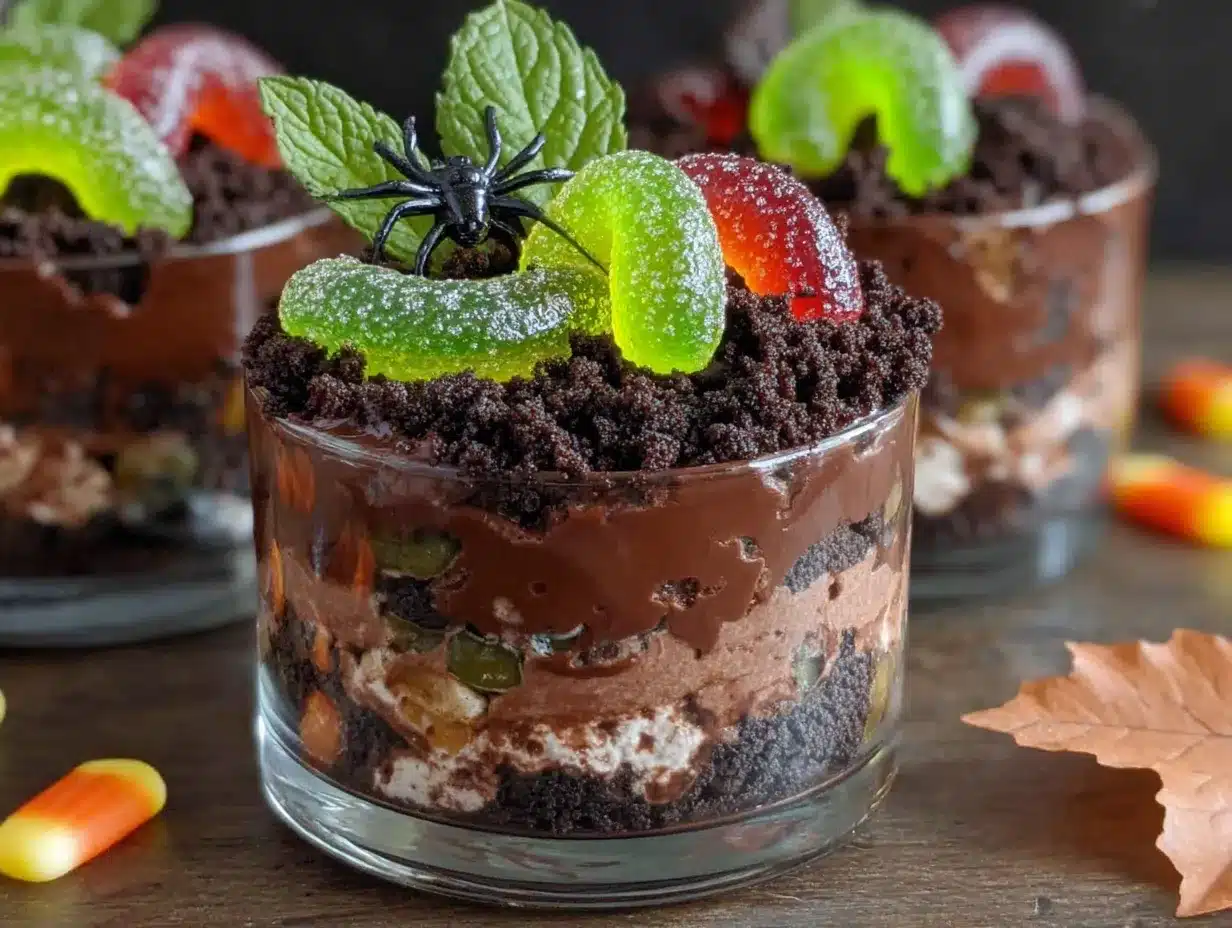
- 12 chocolate sandwich cookies (Oreos are the classic choice. Keep the cream filling inside—it adds sweetness and helps the crumbs stick together)
- 1 tablespoon unsalted butter, melted (optional, but it gives the “dirt” a slightly richer, more authentic texture)
For Decoration
- 12 gummy worms (the classic sour or regular kind. I like the Trolli brand for their bright colors and chewy texture)
- Optional: Additional whipped topping, candy pumpkins, or spooky sprinkles for extra flair
A quick note on ingredient selection: When you’re grabbing your pudding mix, look for the “instant” variety, not “cook and serve.” The instant kind sets up in the fridge without any stovetop work, which is the whole point of a quick recipe. For the cookies, I’ve tried this with off-brand chocolate sandwich cookies and honestly? They work fine. The flavor difference is minimal once everything’s mixed together. But if you’re feeling fancy, the name-brand Oreos do crush up a bit more evenly.
Substitution guidance: Need this to be gluten-free? Use gluten-free chocolate sandwich cookies and check your pudding mix label—most instant chocolate pudding is gluten-free, but double-check. For a dairy-free version, swap the milk for unsweetened almond or oat milk, use dairy-free whipped topping, and find dairy-free chocolate cookies. The texture will be slightly different, but the flavor still hits. And of course, if you’re serving a crowd that includes little kids, you might want to use the regular (non-sour) gummy worms—some sour coatings can be intense for young taste buds.
Equipment Needed
You don’t need much for this recipe, which is honestly my favorite thing about it. Here’s what you’ll pull out of your drawers and cabinets:
- 6 small clear cups or glasses (4-ounce to 6-ounce size works best. I use little plastic cups from the party supply aisle, but juice glasses or even small mason jars work great)
- Medium mixing bowl (for the pudding. Any bowl you’ve got will do)
- Whisk (for mixing the pudding. A fork works in a pinch, but you’ll get lumps)
- Ziploc bag or food processor (for crushing the cookies. A rolling pin and some elbow grease also works, and honestly? It’s kind of therapeutic)
- Measuring cups and spoons (for the milk and butter, if using)
- Spatula (for folding in the whipped topping. A rubber spatula is best, but a big spoon works too)
Personal note: I’ve made these dirt cups with everything from fancy ramekins to paper cups. The clear cups really do make a difference visually—you want to see those layers of pudding and dirt, and the worms peeking out. I grabbed a pack of 12 clear plastic cups at the dollar store for like two bucks, and I’ve been using them for years. They’re also dishwasher safe, which is a win.
Preparation Method
Alright, let’s get these dirt cups made. This is the fun part. I’ll walk you through every step, including the little tricks I’ve picked up along the way.
-
Make the pudding base. In your medium mixing bowl, combine the instant chocolate pudding mix and 2 cups of cold milk. Whisk vigorously for about 2 minutes, until the mixture starts to thicken. You’ll feel it getting heavier in the bowl. At this point, it’ll still be a bit loose—that’s normal. Let it sit for 5 minutes to fully set up. (Pro tip: Use really cold milk right out of the fridge. Warm milk won’t let the pudding set properly, and you’ll end up with soup. I learned this the hard way.)
-
Fold in the whipped topping. Once the pudding is thick and glossy, gently fold in the thawed whipped topping using your spatula. Don’t stir too aggressively—you want to keep the mixture light and airy. Just cut through the center and fold the edges in until you don’t see any white streaks anymore. This should take about 30 seconds. The result should be a mousse-like texture that’s fluffy but stable.
-
Crush the cookies. While the pudding is setting, it’s time to make your “dirt.” Place the chocolate sandwich cookies (filling and all) into a Ziploc bag. Seal it up, then use a rolling pin or the bottom of a heavy pan to crush them into fine crumbs. You want a mix of textures—some powdery crumb, some tiny chunks. If you’re using a food processor, just pulse 5-6 times until you get that same effect. Don’t overdo it, or you’ll end up with cookie paste. (If you’re using the melted butter, drizzle it into the bag or processor and mix it in now. It gives the crumbs a slightly sandy texture that feels more like real dirt.)
-
Layer the cups. Now for the assembly line. Spoon about 2 tablespoons of the pudding mixture into the bottom of each clear cup. Spread it evenly. Then add a layer of cookie crumbs—about 1 to 2 tablespoons, depending on your cup size. Repeat with another layer of pudding, then another layer of crumbs. The top layer should be crumbs, so it looks like a little cup of dirt. I usually do 3 layers total: pudding, crumbs, pudding, crumbs. It creates the best visual effect.
-
Add the worms. Here’s the moment everyone’s been waiting for. Take your gummy worms and gently push them into the top layer of cookie crumbs. I like to have some worms fully submerged except for their heads, and others crawling over the edge of the cup like they’re escaping. Get creative with it. If you want to add a dollop of whipped topping on top, now’s the time—just put it under the worm so it looks like a worm poking through dirt.
-
Chill and serve. Pop the cups into the refrigerator for at least 30 minutes before serving. This lets the pudding set up fully and the cookie crumbs soften just a tiny bit, which makes the texture perfect. If you’re serving them the same day, they’re good for up to 4 hours at room temperature, but the fridge keeps them fresher longer.
Sensory cues to watch for: When you’re whisking the pudding, you’ll feel it change from thin liquid to something with real body—like the difference between water and thin cream. The finished pudding should hold a soft peak when you lift the whisk. When you fold in the whipped topping, the mixture should look like chocolate mousse: smooth, shiny, and pillowy. And when you press a gummy worm into the cookie crumbs, you should feel a slight resistance, like pushing a stick into soft soil.
Cooking Tips & Techniques
Over the years, I’ve made these dirt cups probably a hundred times. For Halloween parties, for classroom treats, for lazy Sunday afternoons when the kids wanted something fun. And I’ve made every mistake in the book so you don’t have to. Here’s what I’ve learned:
Don’t over-whisk the pudding. I know it’s tempting to keep going until it’s perfectly smooth, but over-whisking can actually make the pudding grainy. Two minutes of steady whisking is plenty. If you see lumps, just let it sit for a few extra minutes—they’ll dissolve on their own.
Let the pudding set before layering. This is the most important tip I can give you. If you pour the pudding into cups right after whisking, it’s too thin and will soak into the cookie crumbs, turning everything into a muddy mess. Give it those 5 minutes to thicken up first. I set a timer on my phone so I don’t forget.
Crush the cookies in batches. If you’re making a double batch (which you probably will, because these disappear fast), don’t try to crush all the cookies at once. Do them in batches of 6-8 cookies so you get even crumbs. And watch out for un-crushed chunks—they’re a choking hazard for little kids.
Keep the worms separate until serving. If you’re making these a day ahead (which you absolutely can), store the gummy worms separately and add them just before serving. Otherwise, the worms absorb moisture from the pudding and get soft and weird. Nobody wants a soggy worm.
My biggest failure: The first time I made these, I used cook-and-serve pudding instead of instant. I stood at the stove stirring for 10 minutes, then had to wait for it to cool before adding the whipped topping. By the time I got everything together, the kids were bouncing off the walls. Learn from my mistake—instant pudding is non-negotiable for this recipe.
Variations & Adaptations
One of the best things about this recipe is how easy it is to change up. Here are some variations I’ve tried and loved:
Pumpkin Dirt Cups: Swap the chocolate pudding for vanilla or butterscotch, and mix in 1/2 cup of canned pumpkin puree and a teaspoon of pumpkin pie spice before folding in the whipped topping. Use crushed graham crackers instead of chocolate cookies for the “dirt.” Top with candy corn or little candy pumpkins. It tastes like fall in a cup.
Peppermint Dirt Cups: For a Christmas version, use chocolate pudding and crush up chocolate mint cookies (like Oreo Thins with mint filling). Add a drop of peppermint extract to the pudding mixture. Top with crushed candy canes instead of gummy worms. It’s festive and delicious.
Dairy-Free Dirt Cups: Use unsweetened almond or oat milk for the pudding, dairy-free whipped topping (So Delicious makes a good one), and dairy-free chocolate cookies. The texture is slightly less rich, but the flavor is still spot-on. My dairy-sensitive friends love this version.
Low-Sugar Dirt Cups: Use sugar-free instant pudding mix, unsweetened almond milk, and sugar-free chocolate cookies (or skip the cookies and use crushed nuts instead). Top with sugar-free gummy worms if you can find them. It’s a lighter option that still feels like a treat.
Spider Dirt Cups: Instead of gummy worms, use black licorice strings to make spider legs sticking out of the dirt. Add a chocolate-covered pretzel or a large chocolate chip for the spider body. It’s a fun variation for kids who are more into spiders than worms.
Serving & Storage Suggestions
These dirt cups are best served cold, straight from the fridge. The contrast between the cool, creamy pudding and the crunchy cookie crumbs is what makes them so satisfying. I like to set them out on a tray about 10 minutes before serving, just to take the chill off, but they’re fine right out of the fridge too.
Serving ideas: For a Halloween party, arrange the cups on a platter with some fake spiders or plastic bones scattered around. You can also add a little “graveyard” sign made from a pretzel stick and a piece of paper. For a classroom party, these are easy to transport—just put the lids on the cups and stack them in a cooler.
What to serve with them: These dirt cups are pretty rich on their own, so I usually serve them as the dessert after something savory. They pair perfectly with a bowl of chili or a plate of nachos for a Halloween dinner. For a drink, apple cider or hot chocolate is a natural fit.
Storage instructions: Store any leftover dirt cups in the refrigerator, covered with plastic wrap or their original lids. They’ll keep for up to 3 days. After that, the cookie crumbs start to get soggy and the gummy worms get weird. If you’re making them for a party, I recommend assembling them no more than 24 hours in advance and adding the worms right before serving.
Freezer notes: I don’t recommend freezing these. The pudding gets icy and the texture is off when thawed. If you need to prep ahead, make the pudding mixture and crush the cookies separately, then assemble the day of. That’s the best approach for busy weeknights.
Flavor development: Honestly, these taste best within the first 4-6 hours after assembly. The cookie crumbs are still crunchy, the pudding is perfectly set, and the worms are still chewy. After a day, the crumbs soften into something more like a cake-like layer. It’s still good, just different.
Nutritional Information & Benefits
Let’s be real—these dirt cups are a treat, not a health food. But here’s the breakdown per serving (one cup with about 2 tablespoons of cookie crumbs):
Estimated nutrition per serving: Approximately 280 calories, 9g fat, 45g carbohydrates, 3g protein, 30g sugar, and 1g fiber. These numbers vary based on the specific brands you use and how much cookie crumb you pile on.
Health highlights: The milk in the pudding provides calcium and vitamin D. The chocolate cookies contain a small amount of iron. And the gummy worms? Well, they’re mostly sugar, but they do make people smile, which has to count for something, right? If you’re looking for a slightly healthier version, use the low-sugar options I mentioned in the variations section.
Dietary considerations: This recipe contains dairy and gluten in its standard form. It also contains soy (often in the cookies and whipped topping). For allergen-friendly versions, see the substitutions above. And always check your ingredient labels—some pudding mixes contain traces of nuts or other allergens.
My personal take: I believe in balance. My kids eat vegetables and protein and whole grains all week long. On Halloween, they get dirt cups. And I don’t feel bad about it. Sometimes the best thing you can feed your family is a little bit of joy in a clear plastic cup.
Conclusion
Look, I know there are fancier Halloween desserts out there. I’ve seen the elaborate cake pops and the sculpted cupcakes and the sugar cookies with royal icing that look like works of art. But there’s something about these Easy Halloween Dirt Cups with Gummy Worms that just hits different. Maybe it’s the nostalgia factor. Maybe it’s how simple they are. Or maybe it’s the way my kids’ faces light up when they see those gummy worms poking through the “dirt.”
This recipe is worth trying because it works. It’s fast, it’s fun, and it delivers every single time. And honestly? You can customize it however you want. Use different pudding flavors. Try different cookies. Swap the worms for spiders or pumpkins or whatever feels right. The base recipe is just a starting point—make it yours.
I love this recipe because it reminds me that cooking doesn’t have to be complicated to be meaningful. Sometimes the best memories come from the simplest things—like a cup of chocolate pudding with a gummy worm sticking out of it. So go ahead, make these for your family. Make them for your coworkers. Make them just for yourself. And when you do, drop a comment below and let me know how they turned out. Did your kids love them? Did you add your own twist? I’d love to hear about it.
Now go crush some cookies. Your dirt cups are waiting.
Frequently Asked Questions
Can I use homemade pudding instead of instant?
You can, but it changes the recipe significantly. Homemade pudding needs to cool completely before you add the whipped topping, which adds at least an hour to the process. If you’re committed to homemade, make the pudding a day ahead and chill it overnight. Then proceed with the recipe as written. But for a quick weeknight treat, instant is really the way to go.
How far in advance can I make these?
You can assemble the full dirt cups up to 24 hours in advance, but wait to add the gummy worms until just before serving. The worms will absorb moisture from the pudding over time and lose their chewy texture. If you’re prepping even further ahead, make the pudding mixture and crush the cookies separately, then assemble the day of your event.
Can I use a different type of cookie for the dirt?
Absolutely. I’ve used chocolate wafer cookies, brownie crumbs, and even crushed graham crackers in a pinch. The key is to use a cookie that’s dark in color so it looks like dirt. Golden Oreos or vanilla wafers won’t give you that “dirt” look, but they’ll taste fine. For a gluten-free option, look for gluten-free chocolate sandwich cookies—they work beautifully.
How do I keep the cookie crumbs from getting soggy?
The trick is to let the pudding set up fully before you layer it. If the pudding is too thin, it’ll soak into the crumbs immediately. Also, try to serve the dirt cups within 4-6 hours of assembly for the crunchiest texture. If you’re making them ahead, store the cookie crumbs separately and add them as a top layer just before serving—the bottom layers will still soften, but the top will stay crunchy.
Can I make these without dairy?
Yes! Use unsweetened almond, oat, or coconut milk for the pudding. Look for a dairy-free whipped topping (many brands make one now). And check your chocolate cookies—some brands contain dairy, but there are plenty of vegan options available. The texture will be slightly different, but the flavor is still delicious. I’ve made dairy-free versions for friends with allergies, and they’ve always been a hit.
Pin This Recipe!
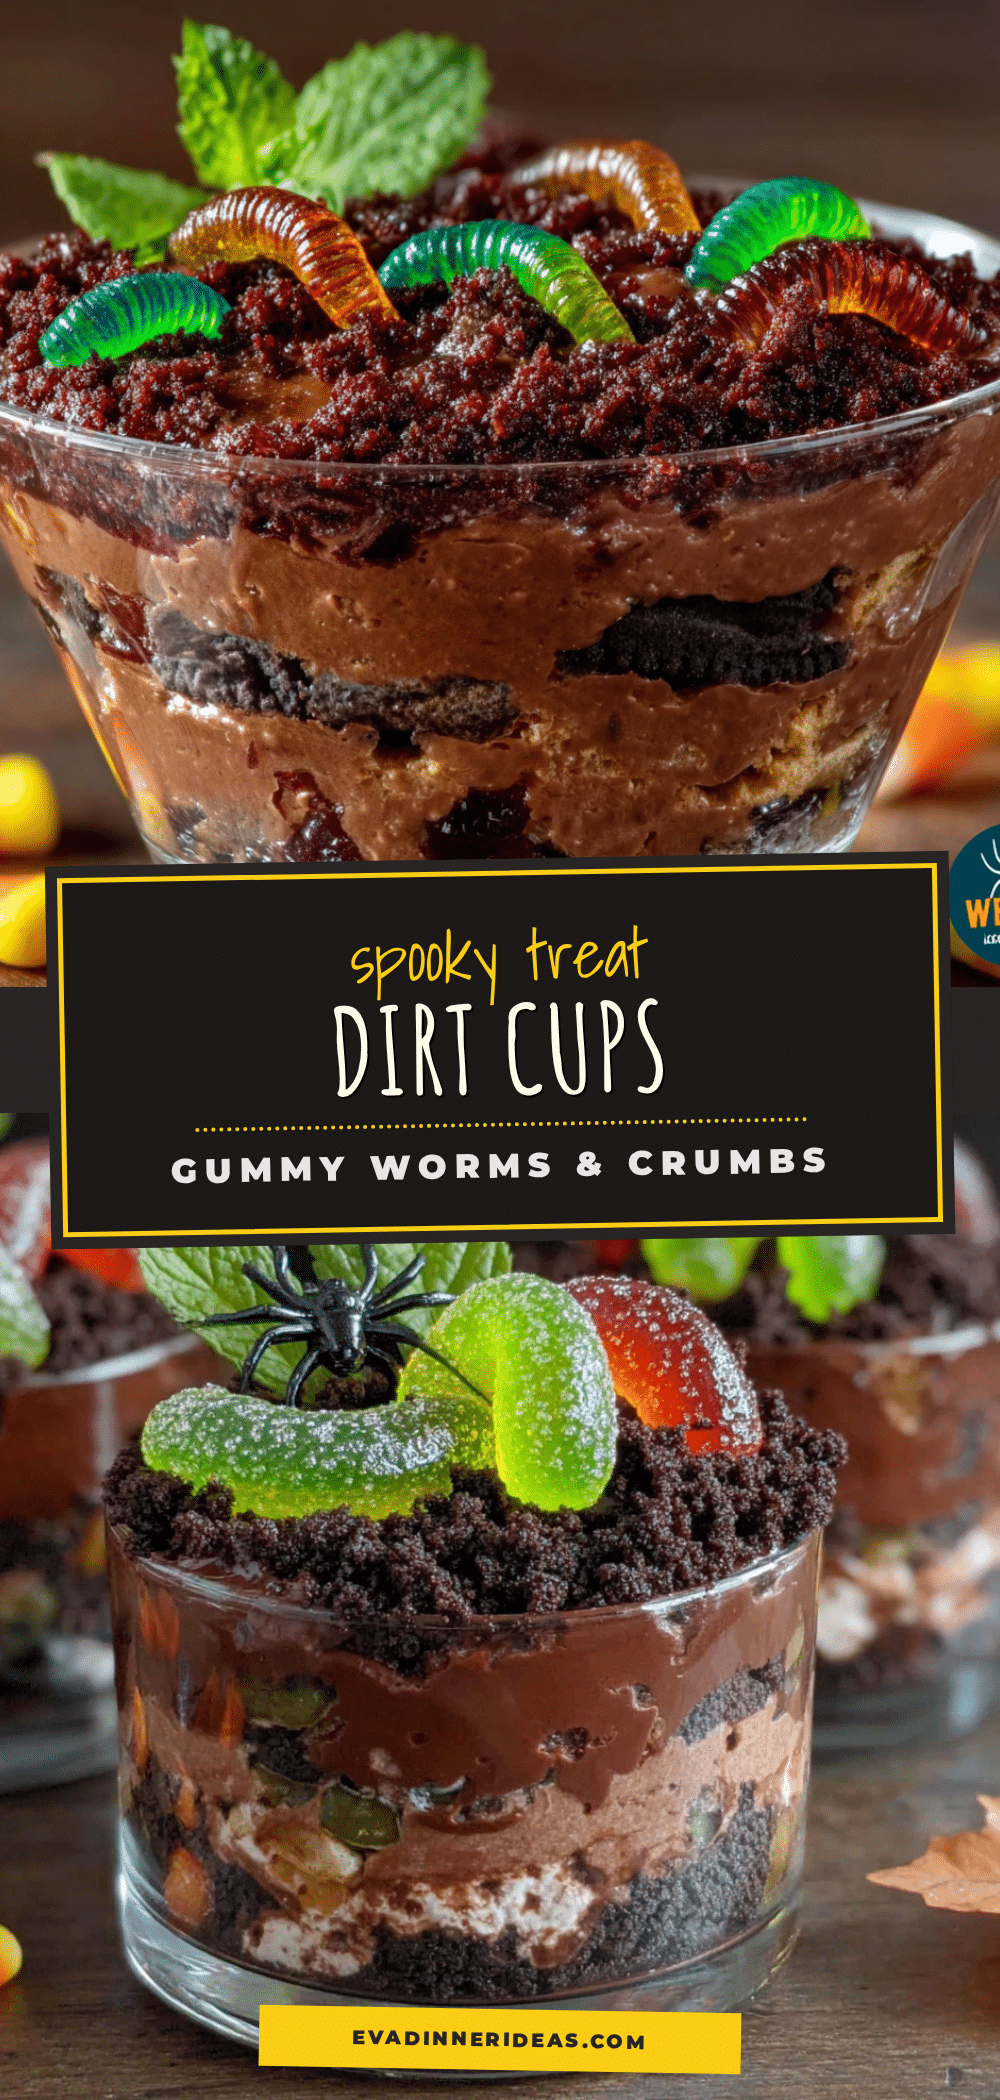
Easy Halloween Dirt Cups with Gummy Worms

These Easy Halloween Dirt Cups with Gummy Worms are a quick, no-bake dessert that brings back childhood memories. Ready in 15 minutes, they feature creamy chocolate pudding, crunchy cookie ‘dirt,’ and chewy gummy worms for a fun and festive treat.
- Prep Time: 15 minutes
- Cook Time: 0 minutes
- Total Time: 45 minutes
- Yield: 6 servings 1x
- Category: Dessert
- Cuisine: American
Ingredients
- 1 (3.9-ounce) box instant chocolate pudding mix
- 2 cups cold whole milk
- 1 cup frozen whipped topping, thawed
- 12 chocolate sandwich cookies (e.g., Oreos)
- 1 tablespoon unsalted butter, melted (optional)
- 12 gummy worms
- Optional: additional whipped topping, candy pumpkins, or spooky sprinkles
Instructions
- In a medium mixing bowl, combine the instant chocolate pudding mix and 2 cups of cold milk. Whisk vigorously for about 2 minutes until the mixture starts to thicken. Let it sit for 5 minutes to fully set up.
- Gently fold in the thawed whipped topping using a spatula until no white streaks remain and the mixture is light and airy.
- Place the chocolate sandwich cookies (filling and all) into a Ziploc bag. Seal and crush with a rolling pin or heavy pan into fine crumbs with some small chunks. If using melted butter, drizzle it in and mix. Alternatively, pulse in a food processor 5-6 times.
- Spoon about 2 tablespoons of the pudding mixture into the bottom of each clear cup. Add a layer of cookie crumbs (1-2 tablespoons). Repeat with another layer of pudding and another layer of crumbs, ending with crumbs on top. Typically 3 layers total: pudding, crumbs, pudding, crumbs.
- Gently push gummy worms into the top layer of cookie crumbs, with some fully submerged except heads and others crawling over the edge. Optionally add a dollop of whipped topping under a worm.
- Refrigerate for at least 30 minutes before serving to allow the pudding to set and the crumbs to soften slightly.
Notes
Use instant pudding, not cook-and-serve. Keep the cream filling in the cookies for extra sweetness. Let the pudding set for 5 minutes before layering to avoid soggy crumbs. Add gummy worms just before serving to keep them chewy. Store leftovers in the refrigerator for up to 3 days.
Nutrition
- Serving Size: 1 cup
- Calories: 280
- Sugar: 30
- Sodium: 320
- Fat: 9
- Saturated Fat: 5
- Carbohydrates: 45
- Fiber: 1
- Protein: 3
Keywords: Halloween dessert, dirt cups, gummy worms, no-bake, chocolate pudding, kid-friendly, easy dessert