The school Halloween party was in six hours, and I’d completely forgotten I was supposed to bring a dessert for the class. Six hours. That’s not a lot of time when you’re staring at an empty counter and a calendar that just betrayed you. Everyone else would be bringing elaborate homemade cakes shaped like pumpkins or those fancy witch-hat cookies that take three days to perfect. I had a package of Oreos, some instant pudding mix, and a bag of gummy worms left over from my own kids’ trick-or-treat stash. Honestly, I almost just bought a tray of store-bought cupcakes and called it a day.
But then I remembered these little cups of chocolate pudding with crushed cookies on top that my aunt used to make when we were kids. She called them “dirt cups” and they were always the first thing to disappear at family gatherings. I figured, why not dress them up for Halloween? Throw in some gummy worms, maybe a little tombstone made from a cookie. I mean, how hard could it be? The answer, let me tell you, was not hard at all. I threw everything together in about twenty minutes, feeling like a fraud the whole time while the other parents were probably piping buttercream rosettes.
That night, when I picked up my son, his teacher pulled me aside and asked for the recipe. She said the kids went absolutely wild for them, and a few parents even asked who catered the party. I just smiled and nodded, not mentioning that the whole thing came together during a frantic episode of Bluey and a near-meltdown over missing sprinkles. There’s something about these little cups of chocolate, cookie crumb “dirt,” and wiggly worms that just works. Maybe it’s the nostalgia, maybe it’s the sugar rush, or maybe it’s just that kids love anything that looks like a tiny graveyard they can eat. Whatever it is, this recipe has bailed me out more times than I can count, and it might just save your next party, too.
Why You’ll Love This Easy Graveyard Dirt Cups with Gummy Worms Recipe
Let’s be real for a second. Halloween is already stressful enough without adding complicated baking to the mix. You’ve got costumes to wrangle, decorations to hang, and probably a thousand other things on your to-do list. This recipe is your secret weapon for looking like a Pinterest superstar with minimal effort.
- Quick & Easy: These come together in under 30 minutes. No baking, no fuss, just simple assembly that even the kids can help with.
- Simple Ingredients: You probably already have most of these in your pantry. No trips to specialty baking stores for obscure ingredients.
- Perfect for Halloween Parties: Whether it’s a school party, a neighborhood gathering, or just a spooky movie night at home, these cups are always a hit.
- Crowd-Pleaser: I’ve yet to meet a kid (or adult, honestly) who can resist digging into a cup of chocolate pudding topped with cookie dirt and gummy worms.
- Unbelievably Delicious: The creamy pudding against the crunchy cookie crumbs is a texture dream. And the gummy worms? Pure childhood joy in every bite.
What makes this version different from the rest is the secret to the perfect “dirt.” I’ve tried just crushing Oreos and calling it a day, but it always felt a little one-note. My trick? I pulse the Oreos in a food processor until they’re a fine crumb, then I mix in a tiny pinch of salt. It sounds weird, but it cuts the sweetness and makes the “dirt” taste way more authentic. Plus, I use a combination of chocolate and vanilla pudding for a more complex flavor that feels less like a kids’ snack and more like a legit dessert. It’s comfort food reimagined—silly, spooky, and absolutely satisfying.
What Ingredients You Will Need
This recipe uses simple, wholesome ingredients to deliver bold flavor and satisfying texture without the fuss. Most of these are pantry staples, so you can whip these up anytime a Halloween craving hits.
For the Pudding Base
- 1 (3.9 oz) package instant chocolate pudding mix (I prefer Jell-O brand for consistency)
- 1 (3.4 oz) package instant vanilla pudding mix (adds a creamy depth)
- 4 cups cold whole milk (for the richest texture; 2% works too)
- 1 teaspoon vanilla extract (optional, but it rounds out the flavor)
For the “Dirt” Crust
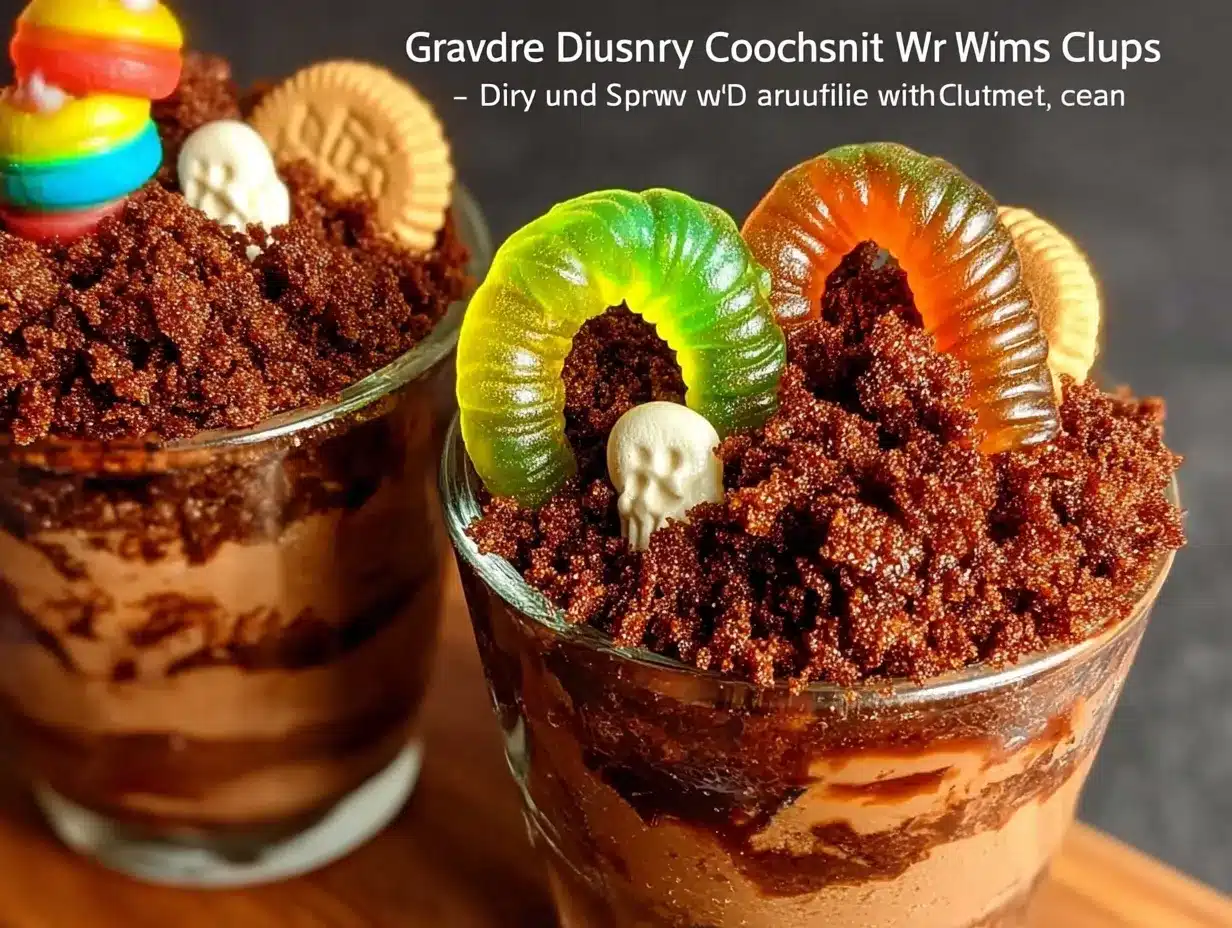
- 1 (14.3 oz) package Oreo cookies (about 36 cookies, regular or Double Stuf)
- Pinch of fine sea salt (trust me on this one)
For the Graveyard Decorations
- 1 bag gummy worms (about 8 oz, any brand is fine)
- Chocolate wafer cookies (for tombstones, 1 per cup)
- Black decorating gel (to write “RIP” on the tombstones)
- Optional: Candy pumpkins, skeleton bones, or edible eyes (for extra spooky flair)
Ingredient Selection Tips: For the pudding, look for the “instant” variety, not cook-and-serve, or you’ll be waiting forever for it to set. For the Oreos, I’ve tested this with generic chocolate sandwich cookies and they work fine, but the filling in Oreos helps create a more cohesive “dirt” texture. If you want a dairy-free version, use almond or oat milk and a plant-based pudding mix—just know the texture will be slightly less creamy.
Equipment Needed
You don’t need a fancy kitchen to pull this off. Here’s what you’ll need:
- Food processor or blender (for crushing Oreos into fine crumbs; a rolling pin and a zip-top bag work in a pinch)
- Large mixing bowl (for the pudding)
- Whisk (or a hand mixer for faster results)
- Medium bowl (for the crushed cookies)
- Small clear plastic cups (8-ounce size works perfectly; you can also use mason jars or small ramekins)
- Measuring cups and spoons
- Small spoon or piping bag (for layering the pudding and crumbs)
- Sharpie or edible marker (for decorating the tombstones)
I’ve made these with just a whisk and a rolling pin when my food processor was in the dishwasher, and it still worked great. The crumbs are just a little chunkier, which some people actually prefer. Don’t let a lack of fancy equipment stop you.
Preparation Method
- Make the pudding. In a large mixing bowl, combine the instant chocolate pudding mix, instant vanilla pudding mix, and 4 cups of cold whole milk. Whisk vigorously for about 2 minutes until the mixture starts to thicken. Add the vanilla extract and whisk again. The pudding will be quite thin at first, but don’t worry—it will set up in the fridge. Cover the bowl with plastic wrap and refrigerate for at least 10 minutes while you work on the other components.
- Crush the Oreos. Place the entire package of Oreos (filling and all) into your food processor. Pulse about 10-15 times until you have a fine, sandy crumb. You want it to look like dark, rich soil—no large chunks of cookie remaining. If you’re using a rolling pin method, place the cookies in a large zip-top bag, seal it, and crush them with the rolling pin until they’re as fine as you can get them. Transfer the crumbs to a medium bowl and stir in the pinch of sea salt.
- Prepare the tombstones. Take your chocolate wafer cookies and use the black decorating gel to write “RIP” on each one. You can also add little crosses or spooky designs if you’re feeling creative. Set them aside to let the gel dry while you assemble the cups.
- Layer the cups. Take your clear plastic cups and start with a base layer of crushed Oreo crumbs—about 2 tablespoons per cup. Press it down gently with the back of a spoon to create a firm foundation.
- Add the pudding. Spoon or pipe the chilled pudding over the cookie crust, filling each cup about two-thirds full. You want to leave room for the top layer of “dirt” and the decorations. Use the back of the spoon to smooth the top of the pudding.
- Create the graveyard scene. Sprinkle a generous layer of the remaining Oreo crumbs over the pudding, completely covering the surface. It should look like a tiny patch of freshly turned dirt. Gently press a few gummy worms into the “dirt” so they look like they’re crawling out of the ground. Place one decorated wafer cookie tombstone in each cup, standing upright or slightly tilted for a spooky effect.
- Chill and serve. Refrigerate the assembled cups for at least 30 minutes before serving. This allows the pudding to fully set and the flavors to meld together. The cups will keep in the fridge for up to 2 days, but the cookie crumbs will start to soften after 24 hours, so they’re best enjoyed the day you make them.
Pro Tip: If you want to get ahead, you can prepare the pudding and crush the Oreos up to 24 hours in advance. Just keep them separate and assemble the cups right before you’re ready to serve. This way, the “dirt” stays crunchy and the presentation is perfect.
Cooking Tips & Techniques
I’ve made these cups probably a dozen times, and I’ve learned a few things the hard way. Here are my best tips for guaranteed success.
Don’t overmix the pudding. I know it’s tempting to keep whisking until it’s perfectly smooth, but overmixing can make the pudding grainy and thin. Stop as soon as it starts to thicken, and let the fridge do the rest of the work.
Use cold milk straight from the fridge. Instant pudding relies on cold liquid to activate the thickening agents. If your milk is even slightly warm, the pudding won’t set properly and you’ll end up with a soupy mess. I learned this the hard way when I tried to speed things up with room-temperature milk.
Crush the Oreos in batches. If your food processor is small, don’t overload it. Work in two or three batches to ensure even crushing. Otherwise, you’ll end up with some cookies turned to dust and others still in large chunks.
Toast the cookie crumbs for extra flavor. If you have an extra 10 minutes, spread the crushed Oreos on a baking sheet and toast them in a 350°F oven for about 5 minutes. Let them cool completely before using. This deepens the chocolate flavor and adds a subtle smokiness that takes these cups to another level.
Use a piping bag for clean layers. If you want Instagram-worthy cups, transfer the pudding to a piping bag (or a zip-top bag with the corner snipped off) before layering. This gives you more control and prevents the pudding from smearing on the sides of the cup.
Variations & Adaptations
One of the best things about this recipe is how easy it is to customize. Here are a few variations I’ve tried and loved.
Gluten-Free Version
Swap the Oreos for a gluten-free chocolate sandwich cookie. Most brands work well, just check the package to make sure they’re certified gluten-free. The rest of the ingredients are naturally gluten-free, so this is an easy adaptation.
Dairy-Free Version
Use almond milk, oat milk, or coconut milk in place of the whole milk. Just make sure you choose a milk that’s thick and creamy, like oat or full-fat coconut. The pudding won’t be quite as rich, but it’s still delicious. You can also use a dairy-free pudding mix if you can find one.
Spooky Spider Cups
Instead of gummy worms, top each cup with a gummy spider or a chocolate spider decoration. You can also add edible eyes to the tombstones for an extra creepy touch. My kids love this version for their Halloween sleepovers.
Adult Version
Add a splash of Kahlúa or Baileys Irish Cream to the pudding mixture before chilling. About 2 tablespoons per batch is enough to give it a grown-up kick without overpowering the chocolate. Just be sure to label these cups clearly if kids are around.
Pumpkin Patch Dirt Cups
For a fall twist, replace the gummy worms with candy pumpkins and use orange decorating gel on the tombstones. You can also add a sprinkle of pumpkin pie spice to the “dirt” for a seasonal flavor boost.
Serving & Storage Suggestions
These cups are best served chilled, straight from the fridge. The contrast between the cold, creamy pudding and the crunchy cookie “dirt” is what makes them so satisfying. I like to serve them on a tray with a few extra gummy worms scattered around for a dramatic presentation.
Complementary Dishes: These dirt cups pair perfectly with other Halloween treats like pumpkin-shaped sugar cookies, caramel apples, or a warm mug of apple cider. If you’re hosting a party, consider setting up a “dirt cup bar” where guests can customize their own cups with different toppings and decorations.
Storage Instructions: Store assembled cups in the refrigerator, covered with plastic wrap or a lid, for up to 2 days. The cookie crumbs will start to soften after about 24 hours, so they’re best enjoyed fresh. If you need to make them ahead, keep the components separate and assemble them no more than 4 hours before serving.
Freezing: I don’t recommend freezing these cups, as the pudding will become watery and the texture will be off. Stick to the fridge for best results.
Nutritional Information & Benefits
While these cups are definitely a treat, there are a few bright spots in the nutritional profile. The whole milk provides calcium and vitamin D, and the cocoa in the Oreos contains antioxidants (I know, it’s a stretch, but every little bit counts). Plus, the portion-controlled cups make it easy to enjoy a small indulgence without going overboard.
| Nutrient | Per Serving (1 cup) |
|---|---|
| Calories | 320 |
| Total Fat | 14g |
| Saturated Fat | 6g |
| Carbohydrates | 47g |
| Sugar | 32g |
| Protein | 5g |
| Calcium | 150mg |
Dietary Considerations: This recipe contains dairy, gluten, and soy (from the Oreos). For a dairy-free version, use plant-based milk and pudding mix. For a gluten-free version, use certified gluten-free chocolate sandwich cookies.
Frequently Asked Questions
Can I use homemade pudding instead of instant?
Yes, you can use homemade chocolate and vanilla pudding if you prefer. Just make sure it’s fully cooled and thickened before layering. The texture will be even richer, but it will add about 20 minutes of stovetop time to the recipe.
How far in advance can I make these?
You can prepare the pudding and crush the Oreos up to 24 hours in advance. Store them separately in the fridge and assemble the cups no more than 4 hours before serving for the best texture.
Can I use a different type of cookie for the “dirt”?
Absolutely! Chocolate wafer cookies, chocolate graham crackers, or even chocolate cake crumbs work well. Just make sure they’re finely crushed to resemble dirt. If you use a lighter cookie, like vanilla wafers, the “dirt” will look more like sand, which could be fun for a beach-themed party.
What if I don’t have clear plastic cups?
You can use small mason jars, ramekins, or even paper cups. Just keep in mind that the visual effect of the layers is best seen through clear cups, so if you’re serving these at a party, clear is the way to go.
How do I keep the gummy worms from sinking into the pudding?
Wait until the pudding has fully set (about 30 minutes in the fridge) before adding the gummy worms. Press them gently into the top layer of “dirt” rather than pushing them all the way down into the pudding.
Conclusion
Look, I know Halloween can feel like a performance sometimes. Between the costumes and the decorations and the pressure to make everything perfect, it’s easy to forget that the whole point is to have fun. These Easy Graveyard Dirt Cups with Gummy Worms are my reminder to myself that simple is often better. They’re silly, they’re spooky, and they’re absolutely delicious in the most unpretentious way possible.
I hope you make these for your next Halloween party, or maybe just for a random Tuesday when you need a little bit of whimsy in your life. Don’t be afraid to get creative with the decorations—add skeleton bones, candy eyeballs, or even a tiny plastic spider or two. The best part about this recipe is that it’s a canvas for your own spooky imagination.
If you try this recipe, I’d love to hear about it. Drop a comment below and tell me how your graveyard turned out, or share a photo on Pinterest with your own twist. Happy Halloween, and happy eating!
Pin This Recipe!
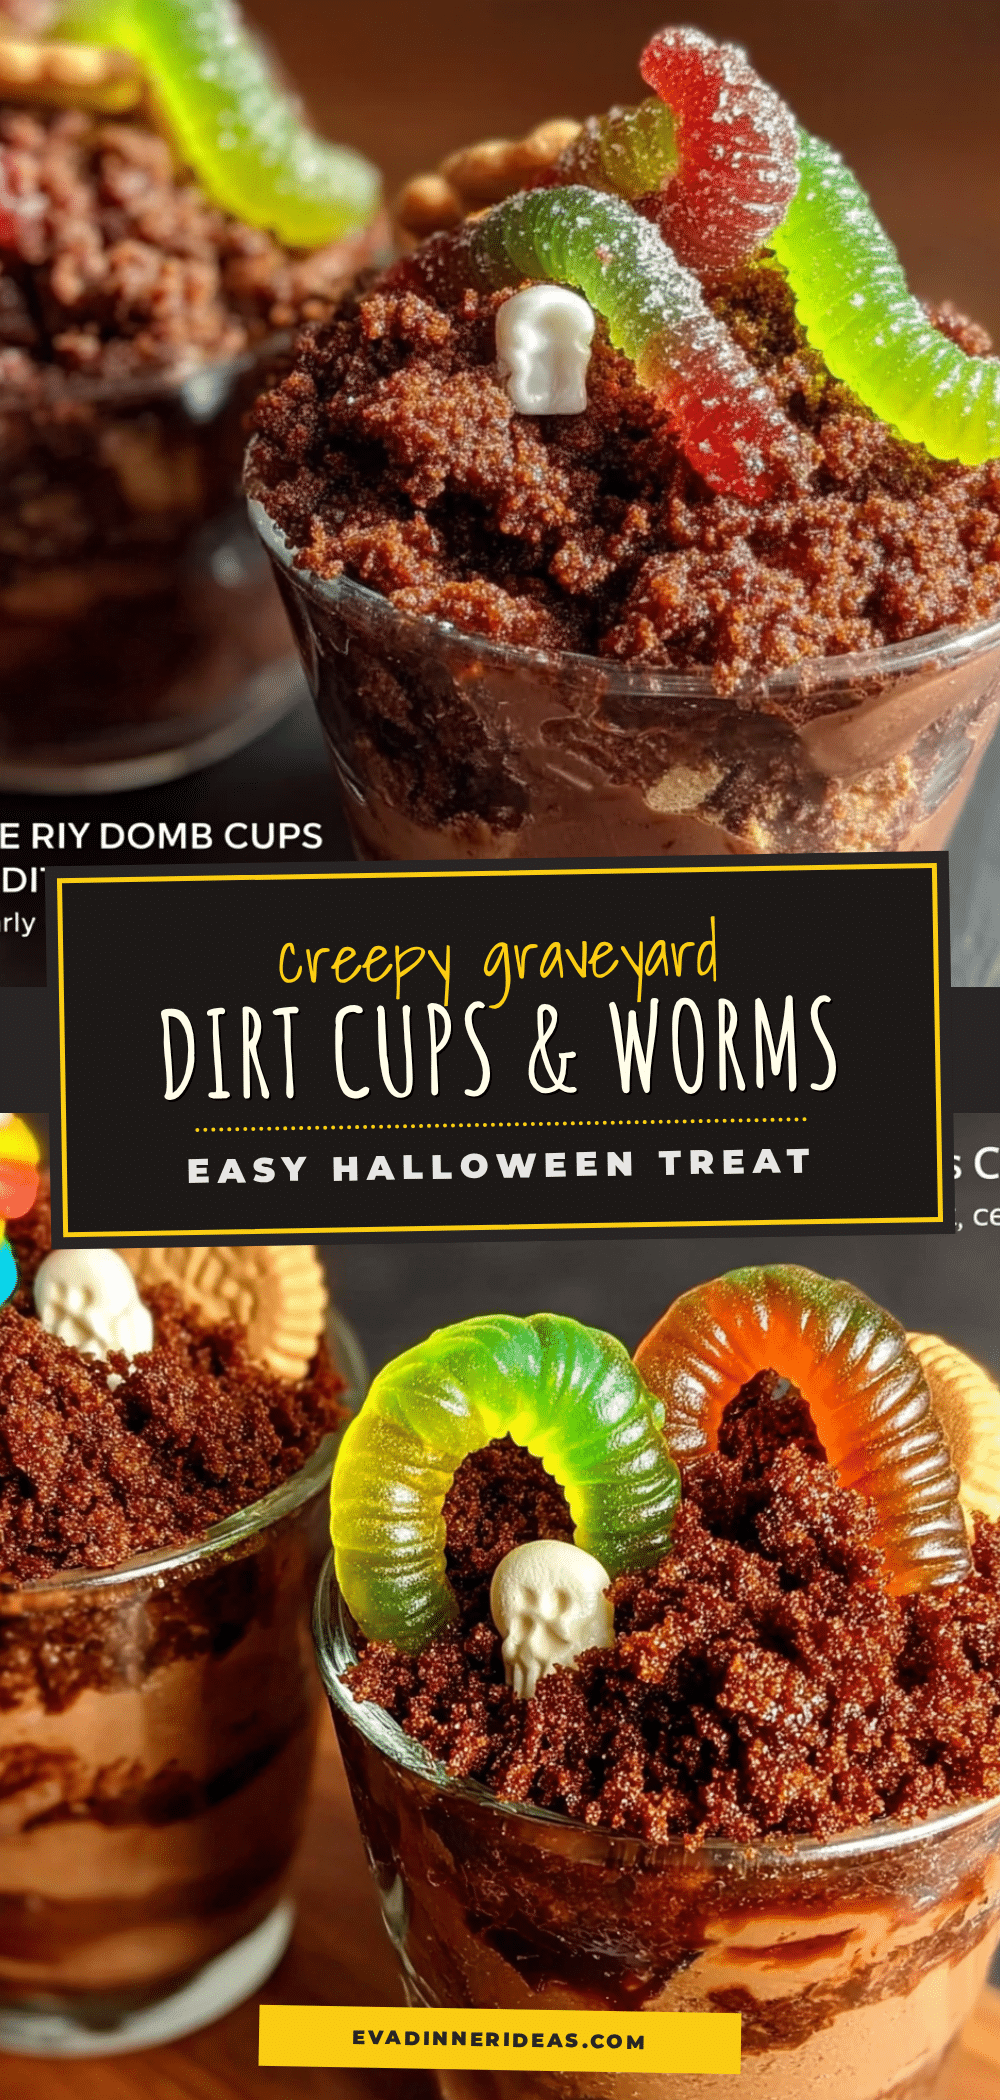
Easy Graveyard Dirt Cups with Gummy Worms (Best Halloween Dessert)
These no-bake Halloween dirt cups are made with creamy chocolate and vanilla pudding, crushed Oreo ‘dirt,’ and gummy worms crawling out of a tiny graveyard. They come together in under 30 minutes and are a guaranteed hit at any spooky celebration.
- Prep Time: 20 minutes
- Cook Time: 0 minutes
- Total Time: 30 minutes (plus 30 minutes chilling)
- Yield: 8 servings 1x
- Category: Dessert
- Cuisine: American
Ingredients
- 1 (3.9 oz) package instant chocolate pudding mix
- 1 (3.4 oz) package instant vanilla pudding mix
- 4 cups cold whole milk
- 1 teaspoon vanilla extract (optional)
- 1 (14.3 oz) package Oreo cookies (about 36 cookies)
- Pinch of fine sea salt
- 1 bag gummy worms (about 8 oz)
- Chocolate wafer cookies (for tombstones, 1 per cup)
- Black decorating gel
- Optional: Candy pumpkins, skeleton bones, or edible eyes
Instructions
- Make the pudding: In a large mixing bowl, combine the instant chocolate pudding mix, instant vanilla pudding mix, and 4 cups of cold whole milk. Whisk vigorously for about 2 minutes until the mixture starts to thicken. Add the vanilla extract and whisk again. Cover the bowl with plastic wrap and refrigerate for at least 10 minutes.
- Crush the Oreos: Place the entire package of Oreos (filling and all) into a food processor. Pulse about 10-15 times until you have a fine, sandy crumb. Transfer the crumbs to a medium bowl and stir in the pinch of sea salt.
- Prepare the tombstones: Take your chocolate wafer cookies and use the black decorating gel to write ‘RIP’ on each one. Set them aside to let the gel dry.
- Layer the cups: Take clear plastic cups and start with a base layer of crushed Oreo crumbs—about 2 tablespoons per cup. Press it down gently with the back of a spoon.
- Add the pudding: Spoon or pipe the chilled pudding over the cookie crust, filling each cup about two-thirds full. Smooth the top with the back of the spoon.
- Create the graveyard scene: Sprinkle a generous layer of the remaining Oreo crumbs over the pudding, completely covering the surface. Gently press a few gummy worms into the ‘dirt’ so they look like they’re crawling out. Place one decorated wafer cookie tombstone in each cup.
- Chill and serve: Refrigerate the assembled cups for at least 30 minutes before serving. The cups will keep in the fridge for up to 2 days, but are best enjoyed the day they are made.
Notes
For best results, use cold milk straight from the fridge. Don’t overmix the pudding. Crush Oreos in batches if your food processor is small. For extra flavor, toast the cookie crumbs at 350°F for 5 minutes. Use a piping bag for clean layers. Assemble cups no more than 4 hours before serving for crunchiest ‘dirt.’
Nutrition
- Serving Size: 1 cup
- Calories: 320
- Sugar: 32
- Sodium: 380
- Fat: 14
- Saturated Fat: 6
- Carbohydrates: 47
- Fiber: 1
- Protein: 5
Keywords: Halloween dessert, dirt cups, gummy worms, no-bake dessert, easy Halloween recipe, graveyard cups, chocolate pudding, Oreo dirt, kids Halloween treat