My brother-in-law claimed he didn’t do “cute food.” For years. The man would side-eye a deviled egg platter and mutter something about form over function. Then I brought this pumpkin patch fruit tray to our family’s fall gathering last October. I set it down next to the cheese board, grabbed a glass of cider, and waited. About twelve minutes later, I found him standing alone in the kitchen, dipping a pear slice into the honey yogurt dip with the kind of focus usually reserved for assembling IKEA furniture. He didn’t even look up when I walked in. He just pointed at the tray with his spoon and said, “This doesn’t count as cute. This is art.” And honestly? I let him have that one.
I’ve never been the person who makes themed food for every holiday. It always felt like a lot of pressure, you know? Cutting things into shapes, arranging them just so, worrying about whether the whole thing will fall apart before anyone sees it. But this tray changed my mind. It’s not fussy. It doesn’t require special molds or artistic talent. It’s just fruit, arranged to look like a little pumpkin patch, with a dip so good that people forget they’re eating healthy. I’ve made it for three different gatherings now, and every single time, someone asks for the recipe before they’ve finished their first plate. Let me tell you, there’s something deeply satisfying about watching a room full of people go quiet over a vegetable platter.
Why You’ll Love This Recipe
Look, I’ve tested a lot of fruit trays over the years. Some were gorgeous but took forever to assemble. Others were quick but looked like someone just dumped a bag of apples on a board. This one hits the sweet spot. It’s impressive enough for a dinner party but simple enough that you won’t be sweating in the kitchen while your guests arrive.
- Stunning Presentation : The pumpkin patch design turns ordinary fruit into a conversation starter. People will literally stop mid-sentence to look at it.
- Make-Ahead Friendly : You can prep everything the night before and assemble in under ten minutes. Perfect for hosts who want to actually enjoy their own party.
- Naturally Crowd-Pleasing : It works for kids, adults, picky eaters, and anyone watching their sugar intake. The honey yogurt dip satisfies the sweet tooth without being over the top.
- Simple Ingredients : No weird specialty items. You’ll find everything at your regular grocery store, probably in the produce section you already walk past.
- Endlessly Customizable : Swap fruits based on what’s in season or what your family actually eats. I’ve made versions with pears, apples, grapes, and even dragon fruit when I was feeling fancy.
What makes this recipe different from the dozens of fruit trays you’ve seen online? It’s the dip, honestly. Most fruit dips are either too sweet or too plain. This honey yogurt version is tangy, creamy, and just sweet enough to make the fruit taste like a treat. I spent three rounds of testing to get the yogurt-to-honey ratio exactly right. Not too runny, not too thick. It clings to the fruit without dripping everywhere, which is exactly what you want when people are standing around holding plates and napkins.
This is the kind of recipe that makes you look like a hero host without actually working that hard. You bring this tray out, and suddenly everyone thinks you spent hours in the kitchen. Let them think that. You and I will know the truth.
What Ingredients You Will Need
This recipe uses simple, wholesome ingredients that come together to create something that looks way more complicated than it actually is. Most of these are pantry staples or regular produce items you probably grab every week anyway.
For the Pumpkin Patch Fruit Tray:
- 1 large seedless watermelon (about 8-10 pounds) – Look for one that’s oval-shaped, not perfectly round. The oval shape makes the pumpkin look more realistic. I like getting mine from the farmers market when they’re in season, but grocery store watermelons work fine too.
- 2 medium navel oranges – These will become the pumpkin stems. You want oranges with the stem still attached if possible, but any navel orange will do.
- 1 cup green grapes – For the pumpkin vines and leaves. Seedless grapes are easiest, and the green color pops nicely against the orange and red.
- 2 cups fresh strawberries – Hulled and halved. These add color and variety. I prefer local strawberries when they’re available, but any fresh ones work.
- 2 cups fresh blueberries – They look like little gems scattered around the pumpkin patch. Wild blueberries are smaller and sweeter, but regular ones are fine.
- 2 cups fresh pineapple chunks – Adds tropical sweetness and a different texture. Fresh pineapple is best, but canned chunks (drained well) work in a pinch.
- 2 cups cubed mango – The golden color fits the fall theme beautifully. Frozen mango that’s been thawed and drained works if fresh isn’t available.
- Fresh mint leaves – Optional, but they add a beautiful green accent and a hint of freshness. I grab a handful from my garden, but store-bought mint works too.
- 1 large wooden cutting board or platter – At least 16 inches wide. The more surface area, the better your pumpkin patch will look.
For the Honey Yogurt Dip:
- 1 cup plain Greek yogurt (full-fat or 2%) – Full-fat gives the creamiest texture, but 2% works well too. I avoid nonfat here because it can be too thin. Fage or Chobani are my go-to brands for thickness.
- 3 tablespoons honey – Local honey adds a lovely floral note, but any honey works. If your honey is crystallized, warm it gently before mixing.
- 1 teaspoon vanilla extract – Pure vanilla extract makes a difference here. The artificial stuff has a chemical aftertaste that doesn’t play well with the honey.
- 1/4 teaspoon ground cinnamon – Just a pinch. It adds warmth without overpowering the fruit. I’ve tried it with nutmeg too, but cinnamon is the winner.
- Pinch of sea salt – Sounds weird, I know, but it balances the sweetness and makes the flavors pop. Trust me on this one.
Substitution Notes: If you’re dairy-free, use a thick coconut yogurt instead of Greek yogurt. The dip will be slightly thinner but still delicious. For a vegan version, swap honey with maple syrup or agave. The flavor changes a bit, but it’s still lovely. If you can’t find seedless watermelon, just pick out the seeds as you cut the pumpkin shape. It takes an extra few minutes but isn’t a dealbreaker.
Equipment Needed
You don’t need a fancy kitchen to pull this off. Most of these tools you probably already own. The one specialty item is a melon baller, but even that is optional if you’re creative with a knife.
- Large cutting board or serving platter – At least 16 inches wide. I use a wooden board that I got from a local craft fair, but any large flat surface works. A baking sheet lined with parchment paper can work in a pinch.
- Sharp chef’s knife – You’ll be cutting through watermelon rind, so a dull knife is a recipe for frustration. I learned this the hard way after nearly slicing my finger open on a slippery melon.
- Melon baller – This makes the pumpkin shape so much easier. I have a stainless steel one that cost about eight dollars and it’s lasted years. If you don’t have one, you can cut the watermelon into wedges and carve them into pumpkin shapes with a paring knife.
- Paring knife – For detail work on the pumpkin stems and any decorative cuts. A small, sharp knife is your best friend here.
- Small mixing bowl – For the honey yogurt dip. Any bowl works, but a wide, shallow bowl makes dipping easier for guests.
- Whisk or fork – For mixing the dip ingredients until smooth. A fork works fine if you’re in a hurry.
- Paper towels – For drying the fruit after washing. Wet fruit makes the dip slide off and creates a soggy mess on your board.
- Toothpicks or small skewers – For attaching the orange stems to the watermelon pumpkins. Regular toothpicks work perfectly.
Budget-friendly tip: If you don’t have a melon baller, use a small cookie scoop or even a teaspoon to scoop the watermelon. The shapes won’t be as uniform, but they’ll still look like little pumpkins. I’ve done it both ways, and honestly, the uneven ones have more character.
Preparation Method
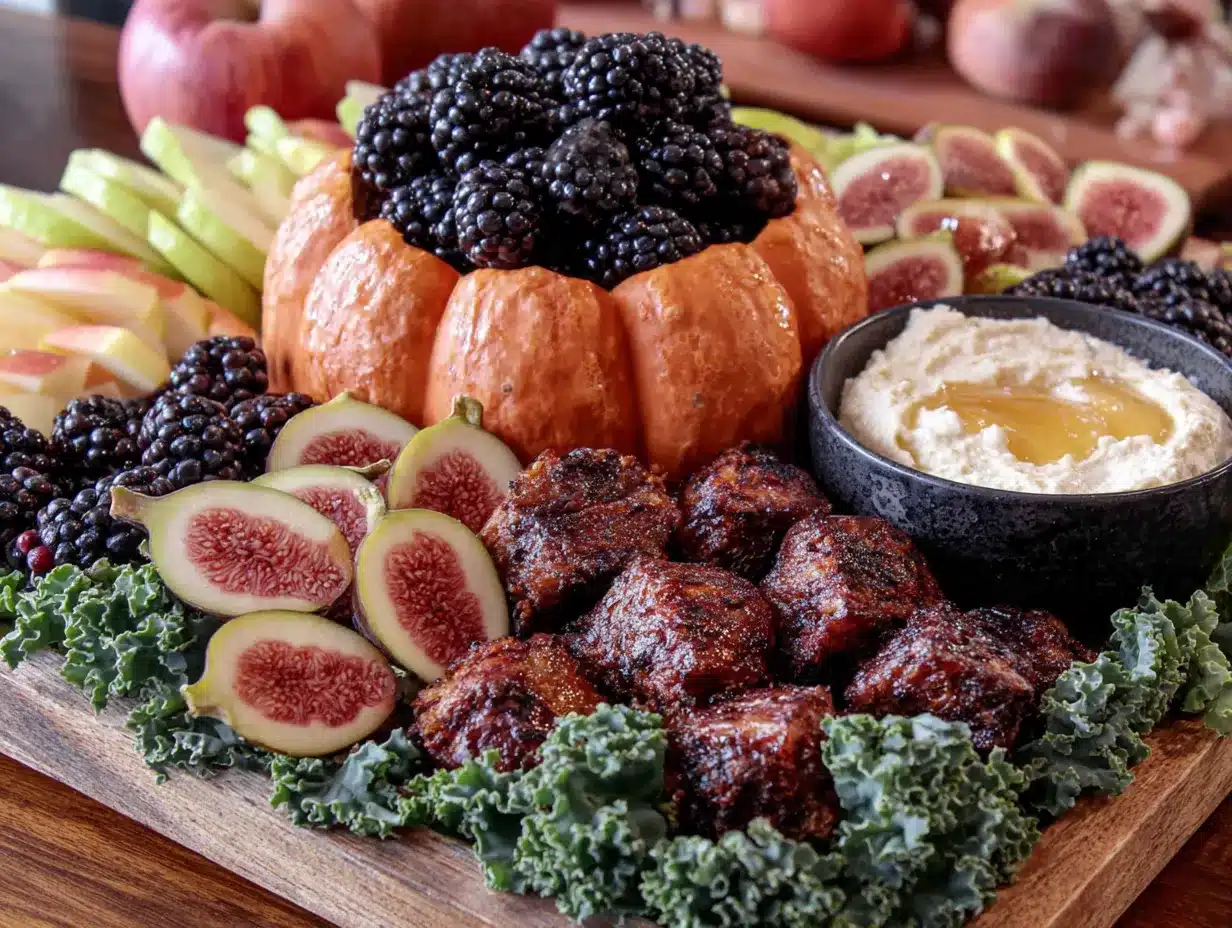
This recipe comes together in about 30 minutes of active prep time, plus a little extra for chilling. I’ve broken it down into simple steps so you can work through it without stress.
Step 1: Make the Honey Yogurt Dip
In your small mixing bowl, combine 1 cup plain Greek yogurt, 3 tablespoons honey, 1 teaspoon vanilla extract, 1/4 teaspoon ground cinnamon, and a pinch of sea salt. Whisk until smooth and well combined. Taste it and adjust the honey if you want it sweeter. I like it on the tangier side, but my sister prefers it sweeter, so I usually add an extra tablespoon of honey when I’m making it for her. Cover the bowl with plastic wrap and refrigerate for at least 30 minutes. This resting time lets the flavors meld together and thickens the dip slightly.
Step 2: Prepare the Watermelon Pumpkins
Cut your watermelon in half crosswise (not lengthwise). You’ll only need one half for this recipe, but you can use the other half for snacking or another dish. Place the cut side down on your cutting board. Using your melon baller, scoop out round balls of watermelon from the rind. You want balls that are roughly the same size, about 1 to 1.5 inches in diameter. Aim for about 20 to 25 balls total. As you scoop, place the watermelon balls on a paper towel-lined plate to absorb excess moisture. This step is crucial — wet watermelon balls won’t hold their shape well and will make your tray watery.
Step 3: Create the Pumpkin Stems
Take your navel oranges and cut them into thin slices, about 1/4 inch thick. From each slice, cut a small triangle or rectangle shape that looks like a pumpkin stem. You want them to be about 1 inch long and 1/2 inch wide. If your oranges have the little navel bump, try to include that in the stem piece — it adds a cute natural detail. You’ll need one stem for each watermelon pumpkin ball, so aim for about 20 to 25 stem pieces.
Step 4: Assemble the Pumpkins
Take one watermelon ball and one orange stem piece. Using a toothpick, gently press the stem into the top center of the watermelon ball. The toothpick should go about halfway into the watermelon ball, leaving the orange stem sticking up. Repeat this for all the watermelon balls. This is the most time-consuming part, but it goes quickly once you get into a rhythm. I usually do this while watching a show or listening to a podcast.
Step 5: Prepare the Remaining Fruit
Wash and dry all your fruit thoroughly. Hull the strawberries and cut them in half. If your strawberries are large, quarter them so they’re bite-sized. Cut the pineapple into small chunks, about 1 inch each. Cube the mango into similar-sized pieces. Leave the green grapes whole. Arrange all the prepared fruit on a clean plate or in separate bowls so they’re ready to go.
Step 6: Arrange the Pumpkin Patch
Take your large cutting board or platter. Start by placing the watermelon pumpkins in a cluster in the center of the board. Arrange them in a rough circle or oval shape, leaving small gaps between them. This creates the look of a pumpkin patch. Scatter the green grapes around and between the pumpkins to mimic vines and leaves. Then arrange the strawberries, blueberries, pineapple chunks, and mango cubes around the edges of the board. Try to create visual variety by alternating colors. Place the bowl of honey yogurt dip in the center of the board or off to one side, depending on your board size. Garnish with fresh mint leaves if you’re using them.
Step 7: Chill and Serve
Once assembled, refrigerate the tray for about 15 to 20 minutes before serving. This helps everything firm up and keeps the fruit cold and crisp. When you’re ready to serve, bring it out and watch people’s faces light up. The tray looks best within the first hour of assembly, but it’ll hold up for about 2 hours at room temperature before the fruit starts to soften.
Cooking Tips & Techniques
I’ve made this tray about six times now, and I’ve learned a few things the hard way so you don’t have to.
Dry Your Fruit Thoroughly
This is the number one mistake I see people make. Wet fruit creates a watery mess on your board, and the dip slides right off. After washing your fruit, lay it out on paper towels and pat it dry. For the watermelon balls, let them sit on paper towels for at least 5 minutes before assembling. I once skipped this step and ended up with a sad, watery puddle under my pumpkins. Not cute.
Use a Sharp Melon Baller
A dull melon baller will crush the watermelon instead of scooping it cleanly. If your melon baller is old or cheap, consider buying a new one. They’re inexpensive and make a huge difference. Alternatively, use a small cookie scoop or even a teaspoon. The shapes won’t be as round, but they’ll still work.
Don’t Overcrowd the Board
You want the fruit to look abundant but not cramped. Leave a little space between the pumpkins so they stand out. If you crowd everything together, it looks messy instead of intentional. I usually leave about 1/2 inch between each pumpkin and scatter the smaller fruits in the gaps.
Keep the Dip Separate Until Serving
If you’re making this ahead of time, store the dip in a separate container and add it to the board just before serving. The dip can make the fruit soggy if it sits too long. I’ve made the mistake of pouring the dip over the fruit an hour before guests arrived, and the strawberries turned into sad, mushy lumps.
Timing Is Everything
You can prep all the fruit the night before and store it in separate airtight containers in the fridge. Assemble the tray about 30 minutes before guests arrive. This way, the fruit stays fresh and the presentation looks flawless. I’ve done this for three parties now, and it’s saved me so much stress on the day of.
Variations & Adaptations
This recipe is endlessly adaptable. Here are some variations I’ve tried and loved.
Fall Harvest Version
Swap the pineapple and mango for seasonal fall fruits like sliced pears, apples, and figs. The apples add a nice crunch, and the figs bring a beautiful deep purple color. I made this version for Thanksgiving last year, and it was a hit. Just brush the apple and pear slices with a little lemon juice to prevent browning.
Tropical Island Version
Use all tropical fruits: mango, papaya, kiwi, dragon fruit, and star fruit. The colors are stunning together, and the flavors transport you somewhere warm. I made this for a summer barbecue, and it disappeared in 20 minutes.
Berry Lover’s Version
Skip the watermelon and use a mix of strawberries, blueberries, raspberries, and blackberries. Arrange them in a rainbow pattern on the board. This version is lower in sugar and perfect for anyone watching their carb intake. I’ve served this at brunch, and it pairs beautifully with mimosas.
Dairy-Free Dip Option
Use coconut yogurt instead of Greek yogurt. The coconut flavor pairs surprisingly well with the honey and cinnamon. I’ve tested this with So Delicious coconut yogurt, and it turned out creamy and delicious. Just make sure to whisk it well, as coconut yogurt can be a bit grainy straight out of the container.
Spiced Dip Variation
Add 1/4 teaspoon of pumpkin pie spice or ginger to the honey yogurt dip. The warm spices complement the fruit beautifully and make the dip feel even more fall-appropriate. I tried this on a whim one afternoon, and now I can’t go back to the plain version.
Serving & Storage Suggestions
This tray is best served chilled, straight from the fridge. The cold fruit contrasts beautifully with the creamy dip, and the textures are at their peak. I like to serve it as an appetizer or a light dessert option at gatherings. It works especially well alongside a cheese board or charcuterie platter.
What to Serve Alongside: This tray pairs beautifully with sparkling water, mimosas, or a crisp white wine like Sauvignon Blanc. For a non-alcoholic option, try a sparkling apple cider. If you’re serving it as part of a larger spread, it goes well with savory items like cheese straws, nuts, or a simple green salad.
Storage Instructions: Store any leftover fruit in an airtight container in the refrigerator for up to 2 days. The watermelon pumpkins will soften over time, so they’re best eaten within 24 hours. The honey yogurt dip can be stored separately for up to 5 days. Give it a good stir before serving again.
Reheating Note: You don’t need to reheat anything here. The fruit and dip are served cold. If you’ve refrigerated the dip and it’s too thick, let it sit at room temperature for 10 minutes before stirring and serving.
Flavor Development: The honey yogurt dip actually gets better after a day in the fridge. The flavors meld together and become more complex. I’ve made the dip two days ahead of time for parties, and it’s always been delicious.
Nutritional Information & Benefits
This recipe is naturally healthy, which makes it a guilt-free addition to any gathering. Here’s a rough breakdown per serving (about 1 cup of fruit plus 2 tablespoons of dip):
- Calories: 180-220
- Protein: 6-8 grams (thanks to the Greek yogurt)
- Carbohydrates: 35-40 grams (mostly from natural fruit sugars)
- Fiber: 3-5 grams
- Sugar: 25-30 grams (natural, not added)
- Fat: 2-4 grams (from the yogurt)
Health Benefits: Watermelon is packed with lycopene, an antioxidant that supports heart health. Greek yogurt provides probiotics and protein, which aid digestion and keep you full. Berries are loaded with vitamin C and antioxidants. Honey offers natural antibacterial properties and a touch of sweetness without refined sugar.
Dietary Considerations: This recipe is naturally gluten-free and vegetarian. For a vegan version, use coconut yogurt and maple syrup. It’s also relatively low in fat and contains no processed ingredients. If you’re watching your sugar intake, you can reduce the honey in the dip or skip it altogether.
Allergen Note: This recipe contains dairy (Greek yogurt). For a dairy-free version, use coconut yogurt. It’s free from nuts, eggs, soy, and gluten, making it suitable for most common dietary restrictions.
Conclusion
Honestly, this pumpkin patch fruit tray has become my go-to for every fall gathering. It’s the kind of recipe that makes you look like you put in way more effort than you actually did, and there’s something deeply satisfying about that. The watermelon pumpkins are adorable without being fussy, the honey yogurt dip is addictive without being heavy, and the whole thing comes together in under an hour.
I love this recipe because it brings people together. There’s something about the playful presentation that makes everyone smile, even the people who claim they don’t do “cute food.” (Yes, I’m looking at you, brother-in-law.) It’s a conversation starter, a crowd-pleaser, and a genuinely healthy option all rolled into one.
I’d love to hear how yours turns out. Did you add your own twist? Swap out any fruits? Let me know in the comments below. And if you’re looking for more fall entertaining ideas, check out my fall charcuterie board and easy apple crisp recipe. Happy hosting, friends. You’ve got this.
Frequently Asked Questions
Can I make this fruit tray the night before?
Yes, you can prep all the fruit the night before and store it in separate airtight containers in the fridge. Assemble the tray about 30 minutes before serving for the best presentation. The watermelon pumpkins will soften slightly overnight, so they’re best assembled the day of.
How do I keep the watermelon pumpkins from getting watery?
Pat the watermelon balls dry with paper towels before assembling. Let them sit on paper towels for at least 5 minutes to absorb excess moisture. Also, make sure your cutting board is completely dry before arranging the fruit.
Can I use a different fruit for the pumpkins?
Absolutely. Cantaloupe or honeydew melon work well as substitutes. The color won’t be as vibrant as watermelon, but the shape will still look like little pumpkins. You can also use large strawberries or apple slices cut into pumpkin shapes with a small cookie cutter.
How long does the honey yogurt dip last?
The dip can be stored in an airtight container in the refrigerator for up to 5 days. Give it a good stir before serving, as it may separate slightly. If it becomes too thick, let it sit at room temperature for 10 minutes before stirring.
What if I don’t have a melon baller?
No problem. Use a small cookie scoop, a teaspoon, or even a paring knife to cut the watermelon into small pumpkin shapes. The shapes won’t be perfectly round, but they’ll still look cute and taste just as good. I’ve done it both ways, and the uneven ones have more character anyway.
Pin This Recipe!
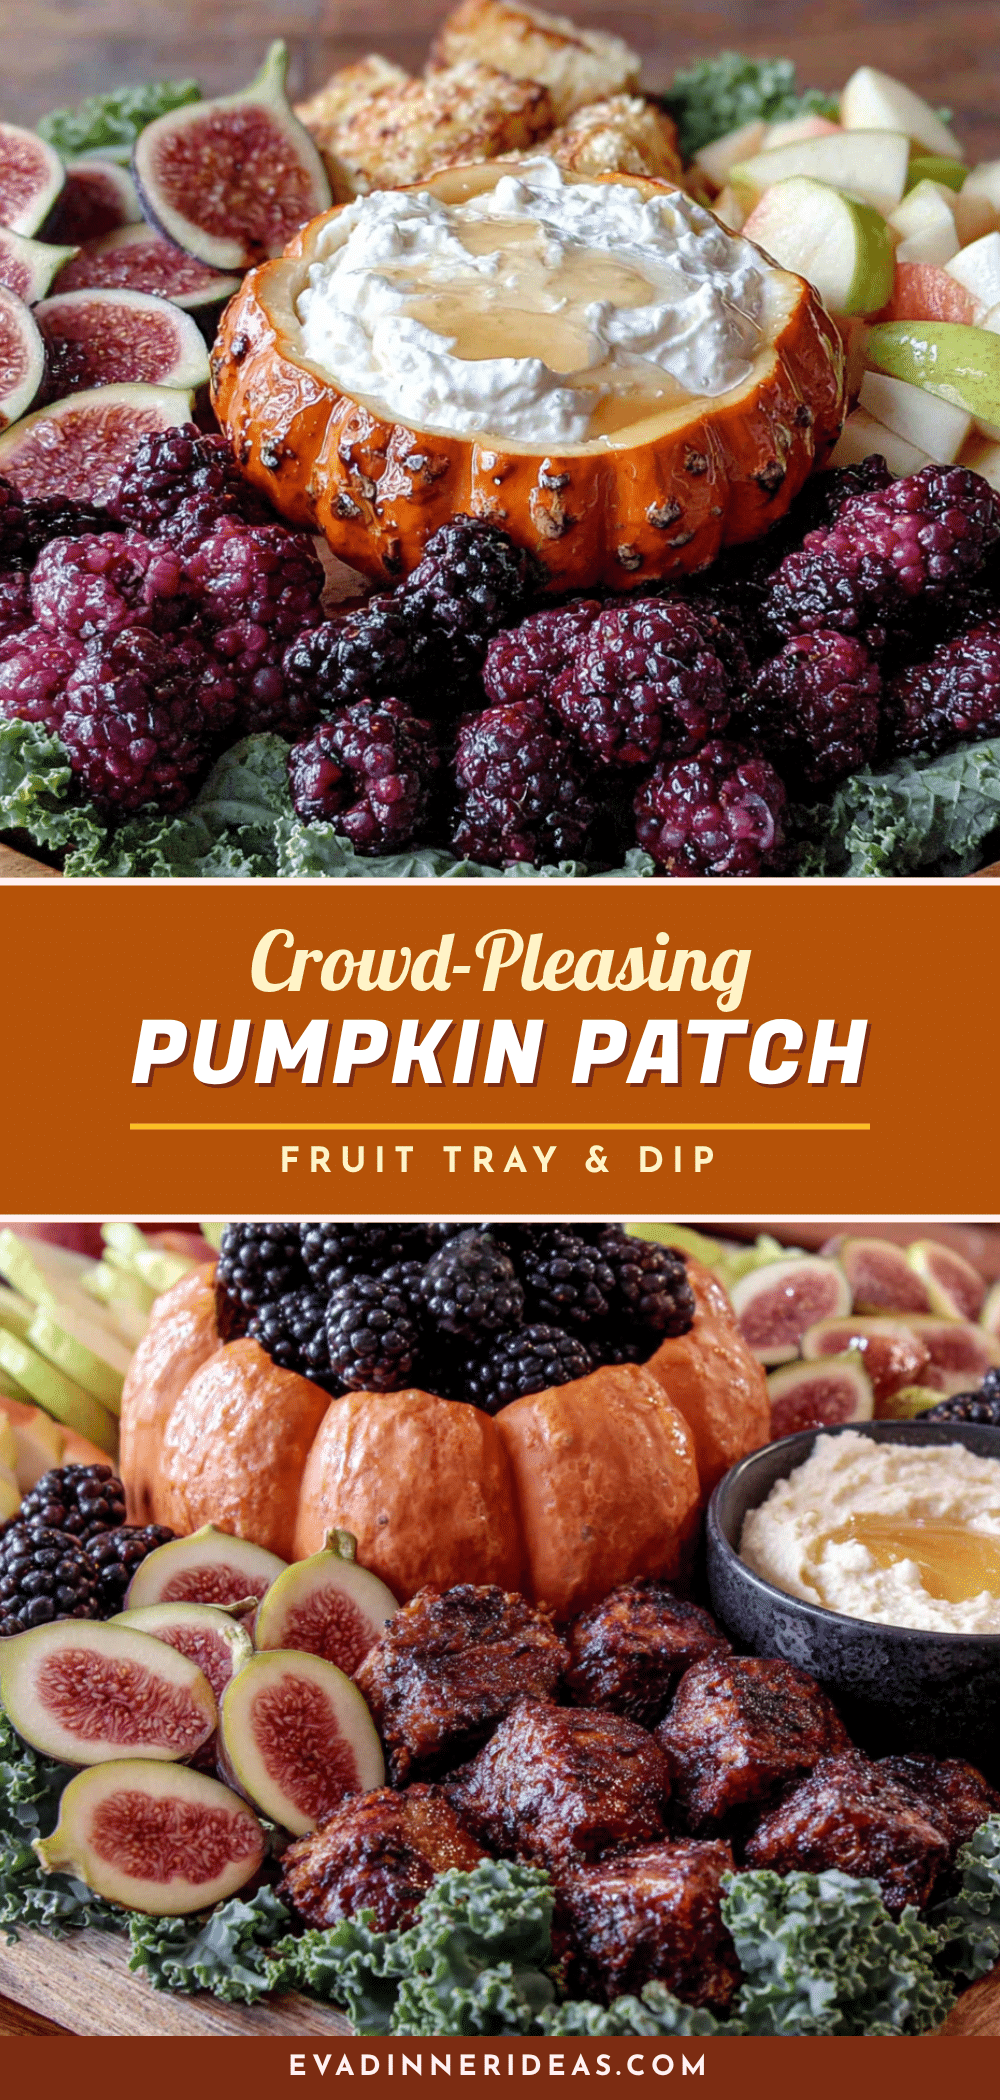
Crowd-Pleasing Pumpkin Patch Fruit Tray with Easy Honey Dip
A stunning fruit tray arranged to look like a pumpkin patch, featuring watermelon pumpkins and a creamy honey yogurt dip. Perfect for fall gatherings, this make-ahead appetizer is both healthy and impressive.
- Prep Time: 30 minutes
- Cook Time: 0 minutes
- Total Time: 30 minutes
- Yield: 8 servings 1x
- Category: Appetizer
- Cuisine: American
Ingredients
- 1 large seedless watermelon (about 8–10 pounds)
- 2 medium navel oranges
- 1 cup green grapes
- 2 cups fresh strawberries, hulled and halved
- 2 cups fresh blueberries
- 2 cups fresh pineapple chunks
- 2 cups cubed mango
- Fresh mint leaves (optional)
- 1 cup plain Greek yogurt (full-fat or 2%)
- 3 tablespoons honey
- 1 teaspoon vanilla extract
- 1/4 teaspoon ground cinnamon
- Pinch of sea salt
Instructions
- Make the Honey Yogurt Dip: In a small mixing bowl, combine 1 cup plain Greek yogurt, 3 tablespoons honey, 1 teaspoon vanilla extract, 1/4 teaspoon ground cinnamon, and a pinch of sea salt. Whisk until smooth. Cover and refrigerate for at least 30 minutes.
- Prepare the Watermelon Pumpkins: Cut the watermelon in half crosswise. Using a melon baller, scoop out round balls (about 1 to 1.5 inches in diameter) from one half. Aim for 20-25 balls. Place on a paper towel-lined plate to absorb excess moisture.
- Create the Pumpkin Stems: Cut the navel oranges into thin slices (about 1/4 inch thick). From each slice, cut small triangle or rectangle shapes (about 1 inch long and 1/2 inch wide) to resemble pumpkin stems. You’ll need one stem per watermelon ball.
- Assemble the Pumpkins: Using a toothpick, gently press one orange stem piece into the top center of each watermelon ball. The toothpick should go about halfway into the watermelon ball, leaving the stem sticking up.
- Prepare the Remaining Fruit: Wash and dry all fruit thoroughly. Hull and halve strawberries. Cut pineapple into small chunks (about 1 inch). Cube mango into similar-sized pieces. Leave green grapes whole.
- Arrange the Pumpkin Patch: On a large cutting board or platter (at least 16 inches wide), place the watermelon pumpkins in a cluster in the center. Scatter green grapes around and between them. Arrange strawberries, blueberries, pineapple chunks, and mango cubes around the edges. Place the bowl of honey yogurt dip in the center or off to one side. Garnish with fresh mint leaves if desired.
- Chill and Serve: Refrigerate the tray for 15-20 minutes before serving. Serve chilled.
Notes
Dry fruit thoroughly to prevent a watery mess. Use a sharp melon baller for clean scoops. Don’t overcrowd the board. Keep dip separate until serving to avoid soggy fruit. Prep fruit the night before and assemble 30 minutes before guests arrive.
Nutrition
- Serving Size: 1 cup of fruit plus
- Calories: 200
- Sugar: 28
- Sodium: 50
- Fat: 3
- Saturated Fat: 1.5
- Carbohydrates: 38
- Fiber: 4
- Protein: 7
Keywords: pumpkin patch fruit tray, honey yogurt dip, fall fruit platter, healthy appetizer, watermelon pumpkins, fruit tray, party appetizer