I was digging through my attic last Tuesday, hunting for a box labeled “winter boots,” when a plastic jack-o-lantern bucket caught the light from the dusty window. And suddenly I was seven years old, sitting cross-legged on my neighbor Mrs. Gable’s linoleum kitchen floor, watching her wrap white chocolate around a cluster of crispy corn treats. She wasn’t my grandmother—she was just the lady next door who let me come over after school. I can still hear the crinkle of the wax paper and the way she’d hum off-key while she worked. That memory hit me like a warm wave, and I stood there in the attic, holding that dusty bucket, realizing I had never actually tried to make those popcorn hands myself.
Honestly, I almost put the bucket back. But something made me carry it downstairs, set it on my kitchen counter, and start pulling ingredients from the pantry. Mrs. Gable moved away when I was twelve, and I never got her recipe. So this was my attempt—my own clumsy, delicious attempt—to recreate that feeling of sitting on her floor, watching her magic happen. Let me tell you, the first batch was a mess. The white chocolate seized up, the popcorn went everywhere, and I had to scrape melted marshmallow off my ceiling fan. But by the third try, something clicked. The texture was right, the crunch was perfect, and that familiar sweetness filled my kitchen.
Maybe you’ve been there—chasing a taste from your past that you can almost but not quite remember. These cozy white chocolate Halloween popcorn hands are my way of holding onto that moment. They’re sticky, crunchy, sweet, and just a little bit spooky. Perfect for a quiet October evening when you need something warm and familiar. And honestly? They taste even better than I remembered.
Why You’ll Love This Recipe
This isn’t your average Halloween treat. I’ve tested this recipe about six times now, and let me tell you—it’s the kind of snack that makes people stop mid-conversation and just stare at their hand. There’s something about eating a buttery, white-chocolate-covered popcorn cluster shaped like a little hand that feels both silly and deeply satisfying.
- Quick & Easy: From start to finish, you’re looking at about 25 minutes. No baking, no complicated steps, just melting, mixing, and shaping. Perfect for a last-minute Halloween party or a cozy night in.
- Simple Ingredients: You probably already have popcorn, butter, and marshmallows in your pantry. The white chocolate and candy corn are the only special buys—and they’re everywhere this time of year.
- Perfect for Halloween: These little hands are the star of any spooky snack table. Kids love them, adults sneak them, and they photograph beautifully for your Instagram stories.
- Crowd-Pleaser: I brought a batch to my book club last week, and they vanished in under ten minutes. Even my friend Sarah, who “doesn’t do sweets,” ate three.
- Unbelievably Delicious: The combination of salty popcorn, sweet white chocolate, and chewy marshmallow is pure comfort. It’s like a rice krispie treat, but better. Way better.
What makes this recipe different from the rest? It’s the texture. Most popcorn hands are either too hard or too sticky. I spent a whole afternoon figuring out the perfect ratio of marshmallow to white chocolate so you get that soft crunch that doesn’t shatter when you bite into it. Plus, I add a pinch of flaky sea salt on top—trust me on this one. It cuts the sweetness and makes the whole thing taste like a fancy bakery treat, not a kid’s craft project.
This is the kind of recipe that makes you feel like a kitchen wizard without actually having to do much work. It’s comfort food with a spooky twist—cozy, nostalgic, and just a little bit magical.
What Ingredients You Will Need
This recipe uses simple, pantry-friendly ingredients to create something that looks impressive but comes together with almost no effort. Here’s what you’ll need to gather before you start:
For the Popcorn Base
- 10 cups popped popcorn (about 1/2 cup unpopped kernels, or one standard bag of plain microwave popcorn) — I prefer Orville Redenbacher’s for its fluffy texture, but any brand works. Just avoid buttered or flavored varieties.
- 3 tablespoons unsalted butter — Adds richness and helps the marshmallow coating stay soft. Use salted butter if that’s all you have, just skip the extra salt later.
- 1 (10 oz) bag mini marshmallows — These melt down into that sticky, gooey coating that holds everything together. Jet-Puffed works great, but any brand is fine.
- 1/4 teaspoon vanilla extract — A little goes a long way. It rounds out the sweetness and makes everything taste more homemade.
- Pinch of salt — Balances the sugar. Trust me, you need this.
For the White Chocolate Coating
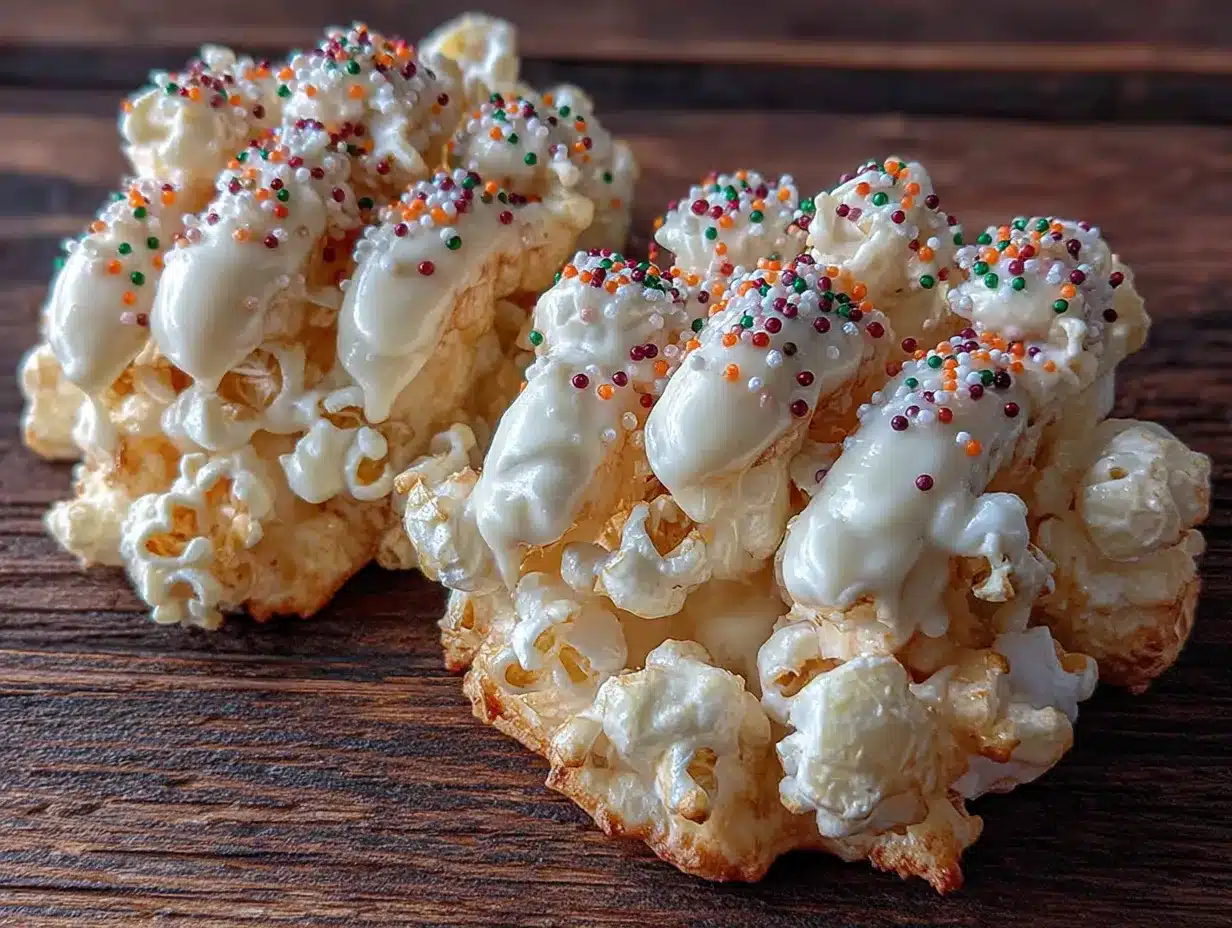
- 1 cup white chocolate melting wafers or white chocolate chips — I recommend Ghirardelli melting wafers for the smoothest finish. If using chips, look for real white chocolate (cocoa butter listed), not white “baking chips” which don’t melt as well.
- 1 teaspoon coconut oil or vegetable shortening — This thins the chocolate so it drizzles beautifully instead of clumping. Optional, but highly recommended.
For Decoration
- Candy corn or candy pumpkins — These become the “fingernails” on your popcorn hands. Use orange, white, or a mix for a spooky look.
- Flaky sea salt (optional but amazing) — A light sprinkle on top adds that salty-sweet contrast that makes these irresistible.
- Orange and black sprinkles (optional) — For extra Halloween flair. Because why not?
Substitution Notes
If you’re dairy-free, use a vegan butter substitute and dairy-free white chocolate (like Enjoy Life brand). The marshmallows are already gelatin-based, but if you’re vegan, look for Dandies brand—they melt beautifully. For a gluten-free option, this recipe is naturally gluten-free as long as your popcorn and marshmallows are certified gluten-free (most are, but double-check labels).
Equipment Needed
You don’t need fancy tools for this recipe, which is part of the charm. Here’s what I used:
- Large mixing bowl — You’ll need something big enough to toss the popcorn without spilling it everywhere. I use my grandmother’s old ceramic bowl, but a stainless steel one works fine.
- Medium saucepan — For melting the butter and marshmallows. Non-stick is easiest for cleanup.
- Rubber spatula — For stirring the marshmallow mixture and folding it into the popcorn. A wooden spoon works too, but the spatula makes it easier to scrape every last bit.
- Parchment paper or silicone baking mat — Essential for letting the popcorn hands set without sticking. Parchment paper is cheap and disposable; silicone mats are reusable and eco-friendly.
- Disposable food-safe gloves — This is not optional, I promise. The marshmallow mixture is incredibly sticky, and you will end up with popcorn glued to your fingers if you don’t wear gloves. I learned this the hard way.
- Baking sheet — To hold the parchment paper and give you a flat surface for shaping the hands.
- Small microwave-safe bowl — For melting the white chocolate. A glass measuring cup works great because it has a spout for drizzling.
If you don’t have a microwave, you can melt the white chocolate in a heatproof bowl set over a pot of simmering water (double boiler method). Just be careful not to let any water get into the chocolate, or it will seize up into a grainy mess.
Preparation Method
Alright, let’s make some magic. This process is straightforward, but I’ve included every little detail I wish someone had told me before my first attempt. Follow these steps, and you’ll have beautiful popcorn hands in about 25 minutes.
- Pop your popcorn. If you’re using kernels on the stovetop, heat 2 tablespoons of coconut oil in a large pot over medium-high heat, add 1/2 cup kernels, cover, and shake occasionally until popping slows. If using microwave popcorn, pop one standard bag according to package directions. Remove any unpopped kernels—you don’t want anyone cracking a tooth on your beautiful hands. Pour the popped popcorn into your large mixing bowl and set aside.
- Make the marshmallow coating. In a medium saucepan over low heat, melt the 3 tablespoons of butter. Once it’s fully melted, add the entire bag of mini marshmallows. Stir constantly with your rubber spatula until the marshmallows are completely melted and smooth. This takes about 4-5 minutes. Remove from heat and stir in the vanilla extract and a pinch of salt. The mixture should be thick, glossy, and stretchy—like warm caramel.
- Combine the popcorn and marshmallow. Pour the hot marshmallow mixture over the popcorn. Using your rubber spatula, gently fold everything together until every kernel is coated. Work quickly here—the marshmallow starts to set as it cools. Don’t worry if it looks uneven at first; keep folding gently until it’s all covered. You’ll see some sticky clumps forming, and that’s exactly what you want.
- Prepare your shaping station. Line a baking sheet with parchment paper or a silicone mat. Put on your disposable gloves. Lightly grease your gloves with a tiny bit of butter or cooking spray—this will save your sanity. I forgot to do this on my first try and ended up with popcorn stuck to my fingers for twenty minutes.
- Shape the popcorn hands. Grab a handful of the coated popcorn mixture (about 1/3 cup worth) and gently squeeze it into a rough hand shape. Start by forming a rounded palm, then pinch out five little fingers. Don’t worry about perfection—popcorn hands are supposed to look a little lumpy and creepy. That’s the whole point! Place each shaped hand on the prepared baking sheet. Repeat until all the mixture is used up. You should get about 8-10 hands, depending on size.
- Melt the white chocolate. Place the white chocolate wafers or chips in a small microwave-safe bowl. Add the coconut oil or shortening. Microwave in 30-second intervals, stirring between each, until completely smooth. This usually takes about 1-2 minutes total. Be careful not to overheat—white chocolate burns easily and turns grainy. If it looks thick, add another tiny splash of coconut oil.
- Decorate the hands. Using a small spoon or a piping bag (or just a zip-top bag with a tiny corner snipped off), drizzle the melted white chocolate over each popcorn hand. Go for a messy, zigzag pattern—it looks more Halloween-y that way. While the chocolate is still wet, press 5 candy corn pieces onto each hand to create fingernails. If you’re using sprinkles or flaky sea salt, sprinkle them on now before the chocolate sets.
- Let them set. Place the baking sheet in the refrigerator for about 10-15 minutes, or until the white chocolate is firm and the popcorn hands hold their shape. If you’re in a hurry, you can leave them at room temperature for about 30 minutes, but the fridge is faster and gives a cleaner finish.
- Serve and enjoy. Once set, gently peel the popcorn hands off the parchment paper. They should lift off easily. Arrange them on a platter and watch everyone’s face light up when they see them. These are best enjoyed the same day, but they’ll keep for a day or two in an airtight container.
Cooking Tips & Techniques
I messed up this recipe about three times before I got it right. Here’s everything I learned so you don’t have to repeat my mistakes:
Don’t overwork the popcorn mixture. When you’re folding the marshmallow into the popcorn, stop as soon as everything looks coated. Overmixing crushes the popcorn and makes the hands dense instead of light and crunchy. You want them to feel airy, not like a hockey puck.
Work in small batches if you’re slow. The marshmallow mixture starts to set after about 5 minutes, especially if your kitchen is cool. If you’re a slow shaper (like me), keep the saucepan on the stove over the lowest heat possible, or set the bowl over a pot of warm water. This keeps the coating pliable while you work.
Grease your gloves twice. I cannot stress this enough. Butter your gloves, shape a few hands, then butter them again. The marshmallow is sneaky—it will find any dry spot and stick to it. My second batch had one hand that looked like a claw because I got distracted and the popcorn glued itself to my palm.
Use a light hand when shaping. You’re not making a fist—you’re making a relaxed, slightly creepy hand. Gently squeeze the mixture just enough to hold together. If you press too hard, the fingers will be dense and the palm will be tough. Think of it like making a snowball, but gentler.
White chocolate is temperamental. If it seizes up (turns grainy and thick), you got water in it. This can happen from steam, a wet spoon, or even humidity. To fix it, add 1 teaspoon of coconut oil at a time and stir vigorously. If it’s beyond saving, just start over with fresh chocolate. It’s frustrating, but it happens to everyone. My second batch of white chocolate seized because I sneezed near the bowl. Seriously.
Timing is everything. Pop the hands in the fridge for exactly 10-15 minutes. Any longer, and the popcorn can absorb moisture from the fridge and get chewy. Any shorter, and the chocolate won’t be set. Set a timer—I learned this one the hard way when I forgot about a batch and came back to soggy fingers.
Variations & Adaptations
One of the best things about this recipe is how easy it is to customize. Here are a few variations I’ve tried that turned out surprisingly well:
Spicy-Sweet Popcorn Hands: Add 1/2 teaspoon of cayenne pepper or chili powder to the marshmallow mixture before pouring it over the popcorn. The heat cuts through the sweetness and gives the hands a grown-up kick. I made these for a Halloween party last year, and they were the first thing to disappear. Just be careful not to add too much—you want a tingle, not a fire alarm.
Dark Chocolate Drizzle: Swap the white chocolate for dark chocolate (at least 60% cacao) for a richer, less sweet version. The bitterness of the dark chocolate pairs beautifully with the salty popcorn. Use the same melting method, and add a drizzle of white chocolate on top for contrast. It looks stunning and tastes even better.
Peanut Butter Popcorn Hands: Stir 2 tablespoons of creamy peanut butter into the marshmallow mixture after it’s melted. This adds a nutty, savory depth that makes the hands taste like a candy bar. If you’re allergic to peanuts, use sunflower seed butter instead—it works just as well. I tried this on a whim one rainy afternoon, and now it’s my go-to version.
Vegan & Dairy-Free Version: Use vegan butter, dairy-free white chocolate (like Enjoy Life brand), and Dandies vegan marshmallows. The texture is slightly different—a bit chewier—but still delicious. I made these for a friend with dairy allergies, and she ate four before I could stop her.
Cookie Monster Hands: After drizzling the white chocolate, crush up some chocolate sandwich cookies (like Oreos) and press the crumbs into the wet chocolate. The dark crumbs against the white chocolate look like dirt or monster fur—perfect for a spooky effect. My nephew’s face when he saw these was absolutely priceless.
Cereal Swap: Replace half the popcorn with Cocoa Puffs or Fruity Pebbles for a colorful, kid-friendly twist. The cereal adds a fun crunch and a pop of color. Just be aware that cereal gets soggy faster than popcorn, so these are best eaten within a few hours of making them.
Serving & Storage Suggestions
These popcorn hands are best served at room temperature, straight off the parchment paper. The texture is perfect—crispy on the outside, slightly chewy on the inside, with that satisfying crunch when you bite into a finger. Arrange them on a large platter or wooden board, maybe with some extra candy corn scattered around for color. They look amazing next to a bowl of caramel apples or a pitcher of spiced cider.
For a Halloween party, set them out on a cake stand at eye level. People love grabbing them and pretending to eat their own hand—it’s goofy and fun, and it always gets a laugh. If you’re serving them to kids, cut them into smaller pieces so little hands can hold them easily.
Storage: Store any leftovers in an airtight container at room temperature for up to 2 days. Do NOT refrigerate them after they’ve set—the fridge will make the popcorn chewy and the white chocolate will develop a weird, sweaty texture. If you live in a humid climate, add a silica gel packet (the kind that comes in shoe boxes) to the container to keep the popcorn crisp. I learned this trick from a baker friend, and it works like magic.
Freezing: You can freeze the undecorated popcorn hands for up to 1 month. Place them in a single layer on a baking sheet, freeze until solid, then transfer to a freezer-safe bag. When you’re ready to serve, thaw them at room temperature for about 15 minutes, then drizzle with fresh white chocolate and decorate. The texture won’t be quite as good as fresh, but it’s a great make-ahead option for busy Halloween weeks.
Reheating: If your popcorn hands have gone a bit soft (it happens), pop them in a 300°F oven for 3-4 minutes, then let them cool completely. This will re-crisp the popcorn without melting the white chocolate too much. Just keep an eye on them—they can go from crispy to burnt in about 30 seconds.
Flavor development: Honestly, these taste best the day you make them. The popcorn stays crunchy, the marshmallow is perfectly chewy, and the white chocolate is snappy. By day two, the popcorn starts to soften slightly, but they’re still delicious. I’ve never had a batch last longer than 24 hours in my house anyway.
Nutritional Information & Benefits
Let’s be real—this is a treat, not a health food. But that doesn’t mean it can’t have some redeeming qualities. Here’s the estimated nutritional breakdown for one popcorn hand (based on 8 servings):
| Nutrient | Amount per Serving |
|---|---|
| Calories | 245 |
| Total Fat | 11g |
| Saturated Fat | 6g |
| Carbohydrates | 36g |
| Sugar | 22g |
| Fiber | 1g |
| Protein | 2g |
| Sodium | 85mg |
Popcorn itself is a whole grain, which means it contains fiber and antioxidants called polyphenols. It’s actually one of the healthier snack bases you can use—it’s low in calories when air-popped and provides a satisfying crunch that helps with portion control. The white chocolate adds calcium (from the milk solids), and the butter provides a small amount of vitamin A.
Dietary Considerations: This recipe contains dairy (butter, white chocolate) and may contain traces of gluten depending on your popcorn brand. It’s not suitable for vegans unless you use the substitutions listed above. The marshmallows contain gelatin, so this is not vegetarian-friendly without a swap. If you’re watching your sugar intake, you can reduce the white chocolate drizzle or use a sugar-free white chocolate alternative—but honestly, this is a Halloween treat. Sometimes you just need to enjoy the moment.
My personal take? I don’t make these every day, but when I do, I savor every bite. Life is short, and sometimes you need a popcorn hand to remind you that joy can be simple, silly, and delicious.
Conclusion
These cozy white chocolate Halloween popcorn hands are more than just a snack—they’re a little piece of nostalgia that you can hold in your own hand. They’re the recipe I was chasing that dusty afternoon in my attic, and now they’re a tradition I look forward to every October. There’s something deeply satisfying about shaping popcorn into tiny fingers, drizzling them with white chocolate, and watching people’s faces light up when they see them.
I hope you give this recipe a try, and I hope you make it your own. Add a little extra salt, swap in dark chocolate, or go wild with sprinkles—whatever feels right to you. The beauty of this recipe is that it’s forgiving. Even a “messy” batch tastes amazing, and honestly, the imperfect ones are the most charming.
If you make these, I’d love to hear about it. Drop a comment below and tell me how yours turned out—did you add any fun twists? Did your kids help shape the hands? Did you eat three before they even set? (No judgment here—I definitely did.) Share a photo on Pinterest or Instagram and tag me so I can see your creations. Happy Halloween, and happy snacking!
Frequently Asked Questions
Can I use microwave popcorn for this recipe?
Absolutely! Just make sure you buy plain or lightly salted microwave popcorn. Avoid heavily buttered or flavored varieties—they’ll throw off the sweetness and make the hands greasy. Pop one standard bag, remove any unpopped kernels, and you’re good to go.
Why did my white chocolate seize up?
White chocolate is sensitive to moisture. If even a drop of water gets into the bowl, the chocolate will turn grainy and thick. This can happen from steam, a wet spoon, or high humidity. To prevent it, make sure your bowl and utensils are completely dry, and avoid melting chocolate over a double boiler if your kitchen is steamy. If it does seize, try adding 1 teaspoon of coconut oil at a time and stirring vigorously—sometimes it can be saved.
How do I keep the popcorn hands from falling apart?
The key is the marshmallow-to-popcorn ratio. Use the full 10-ounce bag of marshmallows for 10 cups of popcorn. If the mixture seems too dry, add a tablespoon of melted butter and stir again. Also, don’t be afraid to squeeze the hands firmly when shaping—just not so hard that you crush the popcorn. The refrigerator setting step is crucial too; it helps everything firm up and hold together.
Can I make these ahead of time for a party?
You can make the undecorated popcorn hands up to 2 days in advance. Store them in an airtight container at room temperature, then drizzle with white chocolate and decorate the day of your party. The white chocolate will look fresher and shinier if you add it right before serving. If you’re in a humid climate, add a silica gel packet to the container to keep the popcorn crisp.
My popcorn hands turned out chewy instead of crunchy. What went wrong?
This usually happens when the marshmallow mixture is overcooked or when the hands are stored in the refrigerator too long. Cook the marshmallows just until melted—don’t let them bubble or brown. And once the white chocolate is set (about 10-15 minutes in the fridge), transfer the hands to room temperature storage immediately. If they’re already chewy, try popping them in a 300°F oven for 3-4 minutes to re-crisp them, then let them cool completely before serving.
Pin This Recipe!
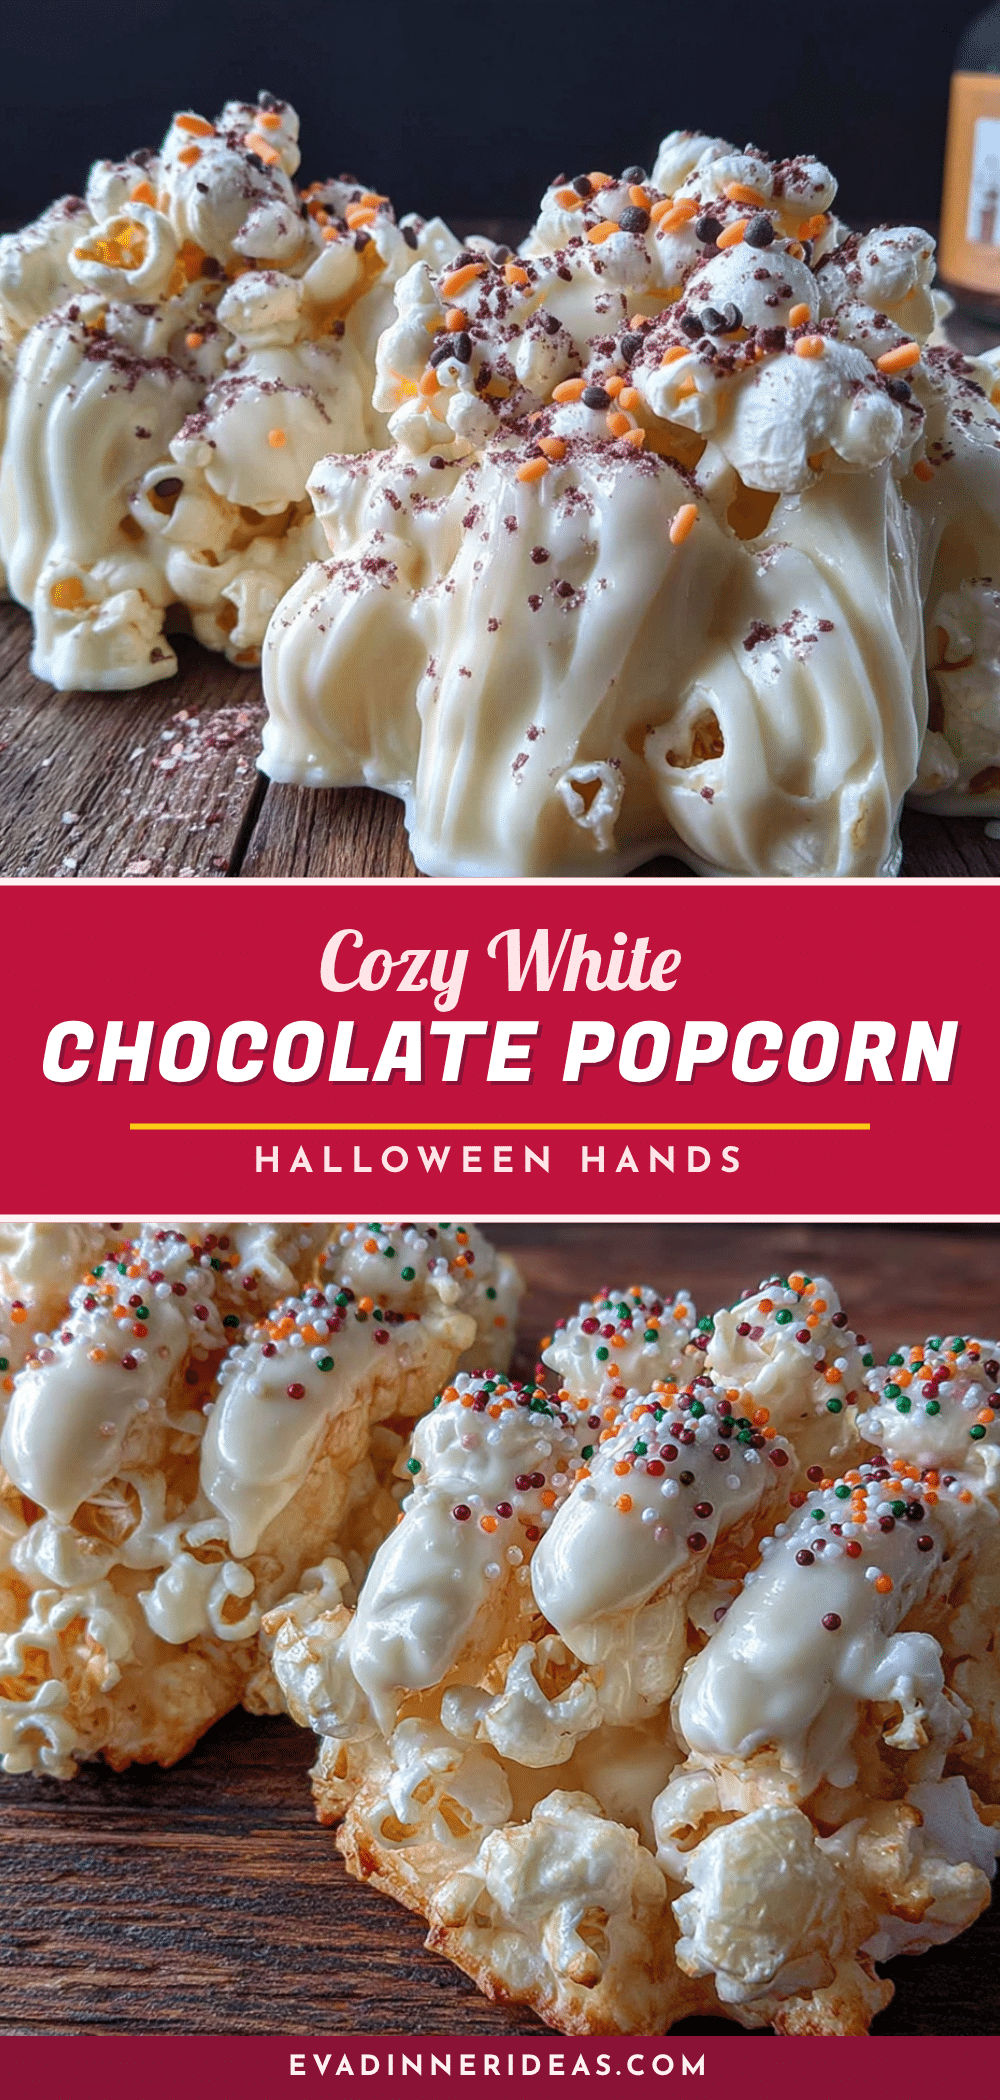
Cozy White Chocolate Halloween Popcorn Hands – Easy Treat
These sticky, crunchy, sweet, and spooky popcorn hands are a nostalgic Halloween treat made with white chocolate, marshmallows, and candy corn. Quick and easy to make in about 25 minutes, they’re perfect for parties or a cozy October evening.
- Prep Time: 15 minutes
- Cook Time: 10 minutes
- Total Time: 25 minutes
- Yield: 8-10 servings 1x
- Category: Dessert
- Cuisine: American
Ingredients
- 10 cups popped popcorn (about 1/2 cup unpopped kernels or one standard bag of plain microwave popcorn)
- 3 tablespoons unsalted butter
- 1 (10 oz) bag mini marshmallows
- 1/4 teaspoon vanilla extract
- Pinch of salt
- 1 cup white chocolate melting wafers or white chocolate chips
- 1 teaspoon coconut oil or vegetable shortening
- Candy corn or candy pumpkins (for fingernails)
- Flaky sea salt (optional)
- Orange and black sprinkles (optional)
Instructions
- Pop your popcorn. If using kernels on the stovetop, heat 2 tablespoons of coconut oil in a large pot over medium-high heat, add 1/2 cup kernels, cover, and shake occasionally until popping slows. If using microwave popcorn, pop one standard bag according to package directions. Remove any unpopped kernels. Pour the popped popcorn into a large mixing bowl and set aside.
- Make the marshmallow coating. In a medium saucepan over low heat, melt the 3 tablespoons of butter. Once fully melted, add the entire bag of mini marshmallows. Stir constantly with a rubber spatula until the marshmallows are completely melted and smooth (about 4-5 minutes). Remove from heat and stir in the vanilla extract and a pinch of salt.
- Combine the popcorn and marshmallow. Pour the hot marshmallow mixture over the popcorn. Using a rubber spatula, gently fold everything together until every kernel is coated. Work quickly as the marshmallow starts to set as it cools.
- Prepare your shaping station. Line a baking sheet with parchment paper or a silicone mat. Put on disposable gloves and lightly grease them with a tiny bit of butter or cooking spray.
- Shape the popcorn hands. Grab a handful of the coated popcorn mixture (about 1/3 cup worth) and gently squeeze it into a rough hand shape: form a rounded palm, then pinch out five little fingers. Place each shaped hand on the prepared baking sheet. Repeat until all the mixture is used up (about 8-10 hands).
- Melt the white chocolate. Place the white chocolate wafers or chips in a small microwave-safe bowl. Add the coconut oil or shortening. Microwave in 30-second intervals, stirring between each, until completely smooth (about 1-2 minutes total). Be careful not to overheat.
- Decorate the hands. Using a small spoon or a piping bag, drizzle the melted white chocolate over each popcorn hand in a messy zigzag pattern. While the chocolate is still wet, press 5 candy corn pieces onto each hand to create fingernails. If using sprinkles or flaky sea salt, sprinkle them on now before the chocolate sets.
- Let them set. Place the baking sheet in the refrigerator for about 10-15 minutes, or until the white chocolate is firm and the popcorn hands hold their shape. Alternatively, leave at room temperature for about 30 minutes.
- Serve and enjoy. Once set, gently peel the popcorn hands off the parchment paper. Arrange on a platter and serve. Best enjoyed the same day, but can be stored in an airtight container for up to 2 days.
Notes
Don’t overwork the popcorn mixture to keep it light and crunchy. Grease your gloves twice to prevent sticking. White chocolate is sensitive to moisture; ensure all utensils are dry. For best texture, refrigerate for exactly 10-15 minutes to set, then store at room temperature. If popcorn hands become chewy, re-crisp in a 300°F oven for 3-4 minutes.
Nutrition
- Serving Size: 1 popcorn hand
- Calories: 245
- Sugar: 22
- Sodium: 85
- Fat: 11
- Saturated Fat: 6
- Carbohydrates: 36
- Fiber: 1
- Protein: 2
Keywords: Halloween popcorn hands, white chocolate popcorn, spooky treats, easy Halloween recipe, popcorn hands, marshmallow popcorn, candy corn popcorn


