It was 11:47 PM on a rainy Tuesday in October, and I had a very specific craving for something warm, salty-sweet, and deeply autumnal. I didn’t have the maple syrup my usual roasted squash recipe calls for, but I had a sad-looking acorn squash rolling around in the crisper drawer, a stick of butter that was begging to be browned, and this wild idea that maybe, just maybe, honey and brown butter were meant to be together. Honestly, I was half-asleep and operating on pure instinct — the kind of cooking logic that only kicks in when you’re too tired to overthink things.
The rain was tapping against the kitchen window, and I had my favorite podcast playing low in the background. I remember pulling out that acorn squash and thinking, “Okay, what if I just… went for it?” I mean, I’ve roasted squash a hundred times, but never at nearly midnight, and never with this particular combination. The butter started sizzling in the pan, and that nutty, toasty aroma hit me — and let me tell you, it was like the universe was telling me I was onto something. I forgot to preheat the oven properly (classic late-night move), so I just threw the squash in anyway and hoped for the best.
Maybe you’ve been there — that moment when a kitchen experiment feels less like cooking and more like a tiny act of rebellion against the normal rules. This recipe is the result of that weird, wonderful night. It’s the kind of dish that makes you close your eyes after the first bite, and it’s been on repeat in my kitchen ever since. Something about the odd hours loosened the usual rules, and I’m so glad it did.
Why You’ll Love This Recipe
This isn’t just another roasted squash recipe — trust me, I’ve tested about a dozen versions over the years. This one is special because it hits that perfect sweet-savory balance without being fussy or complicated. Here’s why it’s become my go-to fall side dish:
- Quick & Easy : Comes together in about 45 minutes, with only 10 minutes of active prep. Perfect for those “I need something impressive but I’m exhausted” weeknights.
- Simple Ingredients : You probably already have butter, honey, and salt in your kitchen. The squash is the only thing you might need to grab at the store.
- Perfect for Fall Gatherings : Great for Thanksgiving, Friendsgiving, or just a cozy Sunday dinner when the weather turns chilly.
- Crowd-Pleaser : I’ve served this to picky eaters, vegetable skeptics, and hardcore foodies — and every single person has asked for the recipe.
- Unbelievably Delicious : The brown butter adds this deep, nutty complexity that regular melted butter just can’t touch. Paired with the honey’s floral sweetness and the squash’s natural earthiness? It’s next-level comfort food.
What makes this recipe different from the rest is the technique. Most recipes just drizzle butter and honey over the squash and call it a day. But browning the butter first — letting it foam and turn golden and develop those little brown specks — transforms the entire dish. It’s not just another version; it’s your best version. The kind that makes you feel like a kitchen genius with minimal effort.
This recipe is comfort food reimagined — healthier than you’d expect, but with the same soul-soothing satisfaction as your favorite cozy meal. Perfect for impressing guests without stress, or turning a simple Tuesday night into something memorable.
What Ingredients You Will Need
This recipe uses simple, wholesome ingredients to deliver bold flavor and satisfying texture without the fuss. Most of these are pantry staples, which makes this dish perfect for those spontaneous cravings.
For the Roasted Squash
- 1 medium acorn squash (about 1.5 to 2 pounds) — Look for one that feels heavy for its size and has a deep green color with some orange patches. That orange means it’s perfectly ripe and sweet.
- 3 tablespoons unsalted butter — I recommend Kerrygold or another high-quality European-style butter for the best browning. The higher fat content gives you a richer flavor.
- 2 tablespoons honey — Local honey is ideal if you can find it. The flavor varies by region, and I love how different honeys bring their own personality to the dish. (adds floral sweetness)
- ½ teaspoon sea salt — Flaky sea salt like Maldon is perfect for finishing. Regular kosher salt works fine too.
- ¼ teaspoon black pepper — Freshly ground, please. It makes a difference.
- ¼ teaspoon cinnamon — Optional, but I love the warmth it adds. (use pumpkin pie spice if you’re feeling extra festive)
- Pinch of cayenne pepper — Trust me on this one. Just a tiny pinch adds a subtle warmth that makes the sweetness pop. (adds a secret kick)
For Garnish (Optional but Recommended)
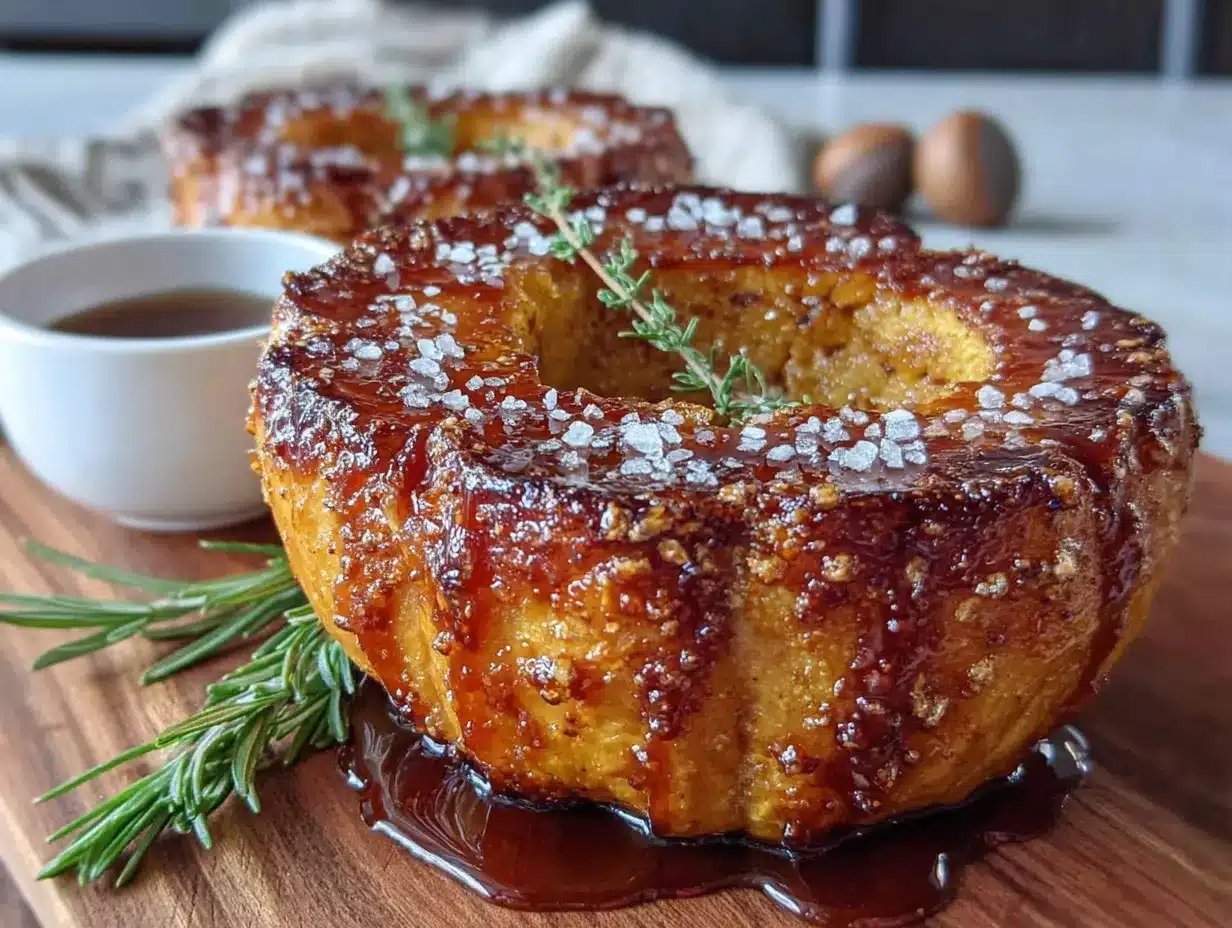
- Fresh thyme sprigs — The earthiness cuts through the richness beautifully.
- Flaky sea salt — For that final sprinkle before serving.
- Extra drizzle of honey — Because why not?
- Crumbled feta or goat cheese — Adds a tangy contrast if you’re feeling fancy. (I use this when serving for company)
- Toasted pepitas — For crunch and a pop of green.
Ingredient selection tip: When choosing acorn squash, avoid any with soft spots or cracks. The stem should be intact and dry. If you’re buying ahead of time, squash stores well in a cool, dark place for up to a month. For the honey, I’ve found that wildflower honey gives the most complex flavor, but clover honey works beautifully too.
Substitution guidance: Use coconut oil or ghee instead of butter for a dairy-free version. Maple syrup can replace honey if that’s what you have on hand — just reduce the amount slightly since maple syrup is thinner. For a sugar-free option, try monk fruit honey or a few drops of liquid stevia mixed with a tablespoon of water.
Equipment Needed
You don’t need much for this recipe, which is part of its beauty. Here’s what you’ll want to have ready:
- Sharp chef’s knife — Acorn squash is tough. A dull knife is dangerous here. I use my trusty 8-inch Wüsthof, and it makes quick work of the squash.
- Large baking sheet — Rimmed is best to catch any honey-butter drips. Half-sheet pans are perfect.
- Parchment paper or silicone baking mat — Makes cleanup a breeze. Trust me, caramelized honey can be a nightmare to scrub off.
- Small saucepan — For browning the butter. Light-colored pans are ideal so you can see the butter change color.
- Mixing bowl — For tossing the squash with the brown butter mixture.
- Measuring spoons — For the honey, salt, and spices.
- Pastry brush — Optional, but helpful for getting that brown butter into every nook and cranny of the squash.
If you don’t have a pastry brush, just use a spoon to drizzle. I’ve done it both ways, and honestly, the spoon method works just fine — it’s a little messier, but we’re not running a Michelin-star kitchen here. For the baking sheet, any sturdy pan will work. Just avoid nonstick pans with dark coatings, as they can cause the honey to burn before the squash is tender.
Preparation Method
- Preheat your oven to 400°F (200°C). Line a large baking sheet with parchment paper. This is one of those steps you don’t want to skip — the parchment saves you from a sticky cleanup situation later.
- Prep the squash. Using a sharp chef’s knife, carefully cut the acorn squash in half from stem to tip. Scoop out the seeds and stringy pulp with a spoon. You can save the seeds to roast later if you’re feeling ambitious — I like to toss them with salt and cayenne and bake them alongside the squash. Cut each half into 1-inch thick slices or wedges. The slices should be roughly uniform in size so they cook evenly. (Be careful here — acorn squash is dense and can be tricky to cut. If you’re struggling, microwave the whole squash for 2 minutes to soften it slightly.)
- Brown the butter. Place the 3 tablespoons of butter in a small saucepan over medium heat. Let it melt completely, then continue cooking, swirling the pan occasionally. The butter will foam up, then the foam will subside, and you’ll start to see brown specks forming at the bottom. This takes about 4-5 minutes. The moment it smells nutty and toasty and turns a golden amber color, remove it from the heat immediately. (Don’t walk away during this step — burnt butter happens fast and there’s no coming back from it. I learned this the hard way on a particularly distracted Tuesday night.)
- Make the glaze. Add the honey, sea salt, black pepper, cinnamon (if using), and cayenne pepper to the warm brown butter. Whisk until everything is combined and the salt is dissolved. The mixture should be glossy and smell absolutely incredible. Taste it — you want a balance of salty, sweet, and warm spices. Adjust the salt or honey to your preference.
- Coat the squash. Place the squash slices in a large mixing bowl. Pour the brown butter mixture over them and toss gently with your hands or a spatula until every piece is evenly coated. Make sure to get the glaze into the ridges of the squash — those are the best parts.
- Arrange and roast. Place the coated squash slices in a single layer on the prepared baking sheet. Make sure they’re not overlapping, or they’ll steam instead of caramelizing. Reserve any extra glaze left in the bowl — you’ll use it later. Roast for 20 minutes, then flip each piece with tongs and brush or drizzle with the reserved glaze. Roast for another 15-20 minutes, until the squash is tender when pierced with a fork and the edges are caramelized and golden brown.
- Finish and serve. Remove from the oven and let cool for 2-3 minutes on the baking sheet. Transfer to a serving platter, garnish with fresh thyme, a sprinkle of flaky sea salt, and any other toppings you like. Drizzle with a little extra honey if you’re feeling indulgent. Serve warm.
Sensory cue: The squash should be fork-tender but still hold its shape — you’re not making squash soup here. The edges should have those gorgeous caramelized spots where the honey has concentrated and the brown butter has done its magic. The smell? It’s like autumn distilled into a single dish.
Cooking Tips & Techniques
After making this recipe about a dozen times (and messing it up at least twice), I’ve gathered some hard-won wisdom. Here are the things I wish someone had told me:
Don’t overcrowd the pan. I know it’s tempting to cram everything onto one sheet pan to save on dishes, but overcrowding leads to steamed, soggy squash. Give those slices room to breathe. If you need to use two pans, do it. The caramelization is worth the extra dish.
Watch the butter like a hawk. Brown butter can go from perfect to burnt in about 30 seconds. I’ve ruined more than a few batches by getting distracted by my phone or the dog. Set a timer for 3 minutes, then watch it like you’re babysitting a toddler. When the foam subsides and you see those brown specks, pull it off the heat immediately.
Season in layers. Don’t just dump all the salt into the glaze. Save a pinch of flaky salt for the end. That final sprinkle adds texture and a burst of salty flavor that makes the sweetness pop. It’s a small detail that makes a big difference.
Embrace the caramelization. If some of the honey drips onto the parchment and turns into little caramelized puddles, that’s not a mistake — that’s a feature. Those crispy bits of caramelized honey-butter are the cook’s reward. Just don’t let them burn. If your oven runs hot, check the squash at the 30-minute mark.
Let it rest. I know you want to eat this immediately, and I don’t blame you. But letting the squash rest for 2-3 minutes after roasting allows the glaze to set slightly, so it’s not quite as messy to eat. It also lets the flavors meld together. Patience, my friend.
Double the batch. Seriously. This squash disappears fast. I’ve never had leftovers when serving it to guests, and even when I make it just for myself, I find myself eating “just one more piece” until the whole pan is gone.
Variations & Adaptations
One of the best things about this recipe is how adaptable it is. Here are some variations I’ve tried and loved:
Savory Herb Version: Skip the cinnamon and cayenne. Add 2 minced garlic cloves to the brown butter as it cooks (remove them before they burn), and toss the finished squash with fresh rosemary and sage. This version pairs beautifully with roasted chicken or pork. I made this for a dinner party last month, and my friend Sarah — who claims to hate squash — asked for seconds.
Spicy Maple Version: Swap the honey for maple syrup and add an extra pinch of cayenne plus some red pepper flakes. The heat builds slowly and keeps you coming back for more. This is my go-to for fall tailgates and game day gatherings.
Vegan Version: Use coconut oil or a high-quality vegan butter for browning. Agave nectar or date syrup works in place of honey. The texture will be slightly different — coconut oil doesn’t brown quite the same way — but it’s still delicious. I tested this for a vegan friend’s birthday dinner, and it held up beautifully.
Cheesy Version: After roasting, sprinkle the warm squash with crumbled feta, goat cheese, or shaved Parmesan. The salty, tangy cheese against the sweet, nutty squash is a match made in heaven. I add pomegranate seeds in winter for a pop of color and tartness.
Sheet Pan Meal: Turn this into a complete dinner by adding chicken thighs or brussels sprouts to the pan. Toss the chicken with the same brown butter mixture and roast everything together. The chicken drippings mix with the glaze to create an incredible pan sauce. Just make sure the chicken reaches 165°F internally before serving.
Different Squash: This recipe works beautifully with butternut squash, delicata squash (no need to peel!), or even pumpkin. Adjust cooking times based on the thickness of your slices. Delicata cooks faster, while butternut might need an extra 5-10 minutes.
Serving & Storage Suggestions
This dish is incredibly versatile when it comes to serving. Here’s how I like to enjoy it:
Serving temperature: Serve warm, straight from the oven. The brown butter glaze is at its best when it’s still glossy and the squash is tender. That said, it’s also delicious at room temperature — I’ve been known to eat cold leftovers straight from the fridge at 2 AM, and I regret nothing.
Presentation: Arrange the squash slices on a rustic wooden board or a white platter to make the golden-brown color pop. Garnish with fresh thyme sprigs, a sprinkle of flaky salt, and maybe some toasted pepitas for crunch. If you’re serving this for a holiday, add pomegranate seeds or dried cranberries for a festive touch.
What to serve with it: This squash is the perfect side dish for roasted chicken, turkey, pork chops, or even a simple seared steak. It also pairs beautifully with grain bowls — try it over farro or quinoa with arugula and a lemon vinaigrette. For a vegetarian main, serve it alongside creamy polenta or stuffed into a baked sweet potato.
Storage: Store leftovers in an airtight container in the refrigerator for up to 4 days. The squash will soften slightly as it sits, but the flavor actually gets better — the brown butter and honey have time to really soak in. I like to make a double batch on Sunday and use it throughout the week.
Reheating: The best way to reheat is in a 350°F oven for about 10 minutes, which helps restore some of the caramelization. You can also reheat in a skillet over medium heat for 3-4 minutes per side. The microwave works in a pinch, but the squash will be softer and lose some of that lovely caramelized edge.
Freezing: I don’t recommend freezing this dish — the texture of the squash becomes watery and the glaze doesn’t hold up well. If you absolutely must freeze it, do so before adding the glaze, then thaw and roast with fresh brown butter.
Nutritional Information & Benefits
Here’s the approximate nutritional breakdown for one serving (about ⅓ of the recipe, assuming 3 servings total):
| Nutrient | Amount |
|---|---|
| Calories | 210 |
| Total Fat | 12g |
| Saturated Fat | 7g |
| Carbohydrates | 28g |
| Fiber | 4g |
| Sugar | 14g |
| Protein | 2g |
| Vitamin A | 45% DV |
| Vitamin C | 30% DV |
| Potassium | 15% DV |
Acorn squash is a nutritional powerhouse. It’s packed with vitamin A (great for eye health and immune function), vitamin C, and potassium. The fiber content helps keep you full and supports digestive health. Plus, the natural sweetness means you don’t need to add much sugar to make it taste amazing.
From a wellness perspective, I love that this dish feels indulgent but is actually quite reasonable. The brown butter adds richness, but a little goes a long way. If you’re watching your sugar intake, you can reduce the honey to 1 tablespoon without sacrificing too much flavor. For a lower-calorie version, use cooking spray instead of butter — but honestly, life is short, and brown butter is worth the calories.
Dietary considerations: This recipe is naturally gluten-free and nut-free. For dairy-free, use coconut oil or vegan butter. For low-carb or keto, reduce the honey to 1 teaspoon and use a sugar-free maple syrup alternative.
Potential allergens: Dairy (butter), honey (some people have pollen allergies that react to honey).
Conclusion
This cozy brown butter roasted acorn squash with honey has become my secret weapon for fall cooking. It’s the dish I bring to Friendsgiving when I want to impress without stress. It’s the side I make on rainy Tuesday nights when I need something warm and comforting. And it’s the recipe I keep coming back to because it works every single time.
The beauty of this dish is how forgiving it is. You can adjust the spices, swap the honey for maple syrup, add cheese or skip it — and it still turns out delicious. It’s the kind of recipe that builds your confidence in the kitchen, because it proves that simple ingredients, treated with a little care, can create something truly special.
I’d love to hear how yours turns out! Did you try any of the variations? Did you add your own twist? Drop a comment below and let me know — I read every single one, and your feedback helps me create better recipes for all of us. And if you loved this recipe, share it with a friend who needs a little more cozy in their life. Happy cooking!
Frequently Asked Questions
Can I use butternut squash instead of acorn squash?
Absolutely! Butternut squash works beautifully in this recipe. The main difference is that butternut squash is denser and slightly sweeter. You’ll want to peel it first and cut it into 1-inch cubes or wedges. Increase the roasting time by about 5-10 minutes, since butternut takes a bit longer to become tender.
Do I have to peel the acorn squash?
Nope! The skin of acorn squash is completely edible once cooked. It becomes tender and slightly chewy, and it holds the brown butter glaze beautifully. Plus, leaving the skin on saves you a ton of prep time. Just make sure to wash the squash well before cutting.
Can I make this recipe ahead of time?
You can prep the squash (cut and seed it) up to 2 days in advance and store it in the fridge. The brown butter can be made ahead and stored in the fridge for up to a week — just reheat it gently before using. However, I recommend roasting the squash just before serving for the best texture and caramelization.
How do I prevent the honey from burning in the oven?
Honey can burn if your oven runs hot or if the squash is too close to the heating element. Keep an eye on it after the 30-minute mark. If the edges are browning too quickly, tent the pan loosely with foil for the last 10 minutes of roasting. Also, make sure your honey is fresh — crystallized honey burns more easily.
Is this recipe suitable for meal prep?
Yes, with a few caveats. The squash will soften as it sits in the fridge, so it won’t have the same crispy edges on day 3. But the flavor actually improves as the brown butter and honey soak in. I like to make a batch on Sunday and use it in grain bowls or salads throughout the week. Just reheat gently in the oven or a skillet to revive some of the texture.
Pin This Recipe!
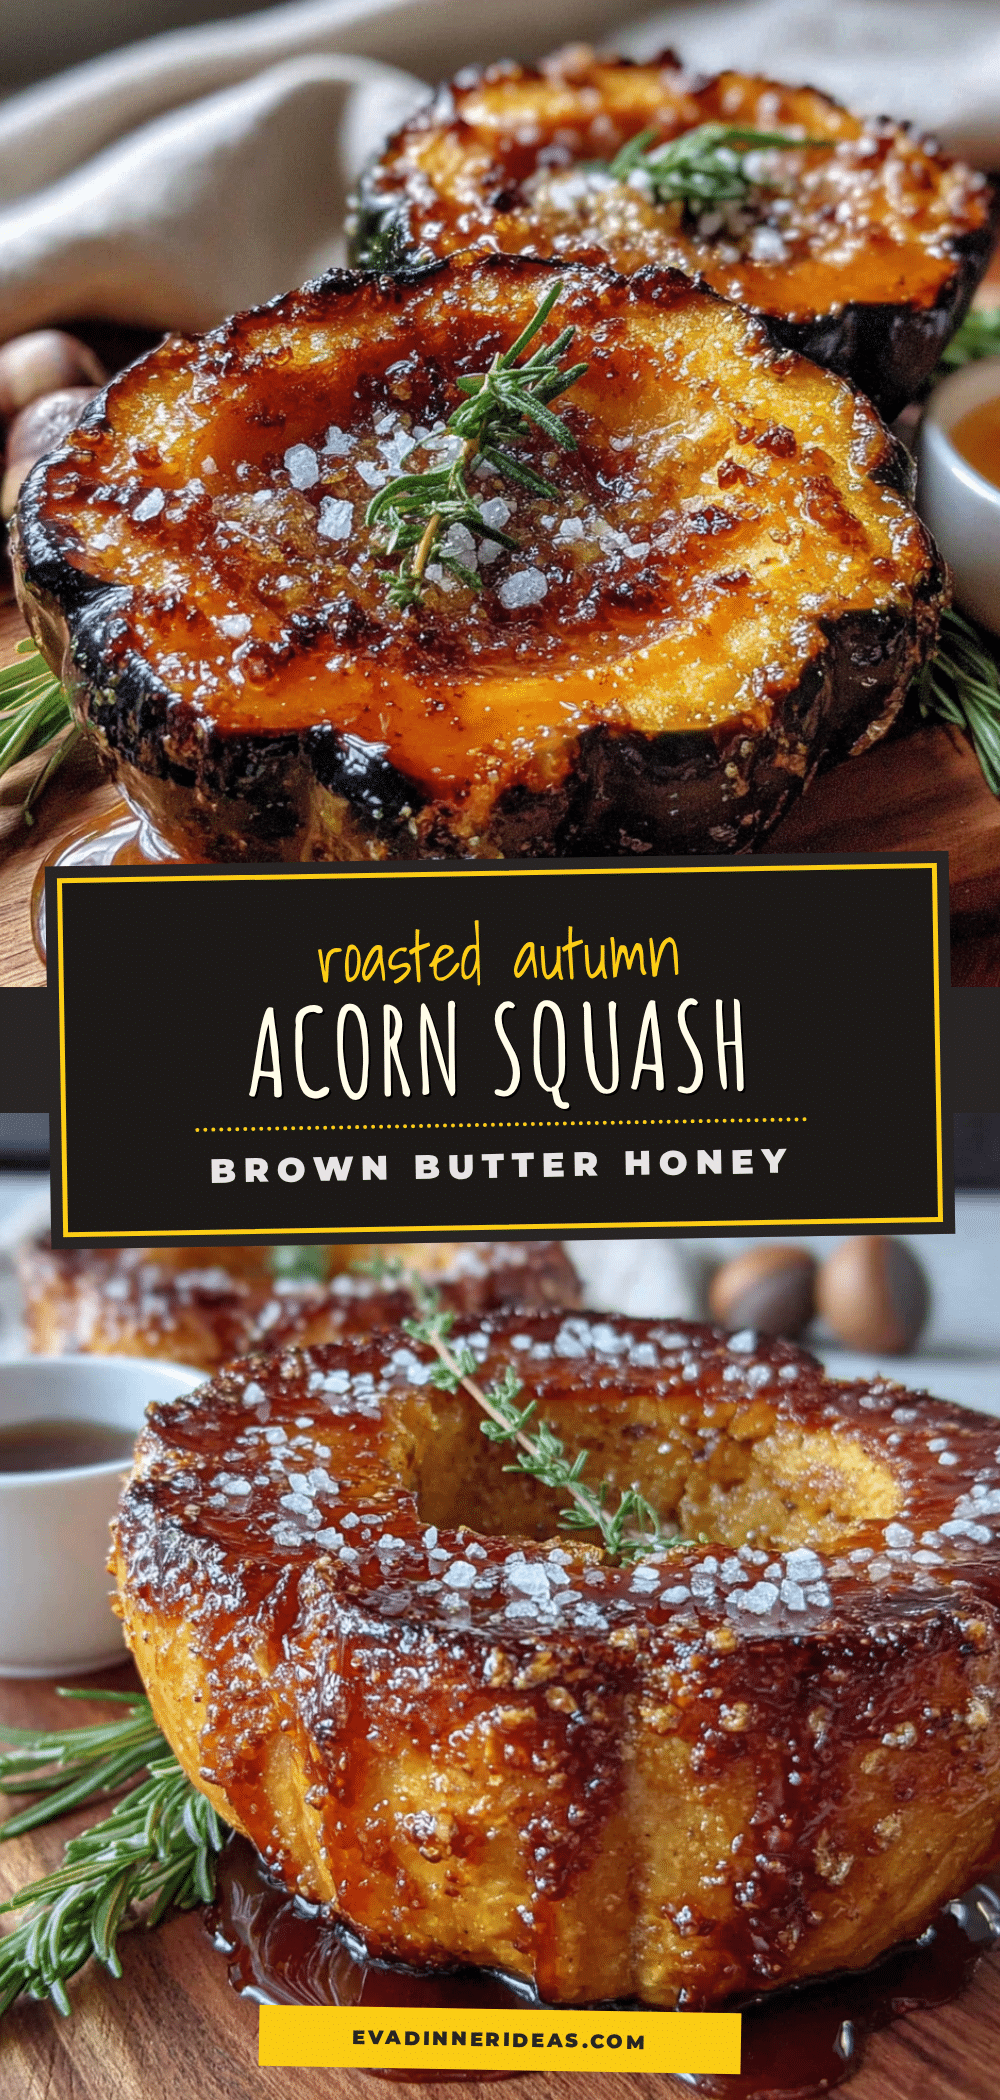
Cozy Brown Butter Roasted Acorn Squash with Honey
This roasted acorn squash recipe features a nutty brown butter and honey glaze, creating a perfect sweet-savory balance. It’s an easy, impressive fall side dish that comes together in about 45 minutes with minimal prep.
- Prep Time: 10 minutes
- Cook Time: 35 minutes
- Total Time: 45 minutes
- Yield: 3 servings 1x
- Category: Side Dish
- Cuisine: American
Ingredients
- 1 medium acorn squash (about 1.5 to 2 pounds)
- 3 tablespoons unsalted butter
- 2 tablespoons honey
- ½ teaspoon sea salt
- ¼ teaspoon black pepper, freshly ground
- ¼ teaspoon cinnamon (optional)
- Pinch of cayenne pepper
- Fresh thyme sprigs (for garnish, optional)
- Flaky sea salt (for garnish, optional)
- Extra drizzle of honey (for garnish, optional)
- Crumbled feta or goat cheese (for garnish, optional)
- Toasted pepitas (for garnish, optional)
Instructions
- Preheat your oven to 400°F (200°C). Line a large baking sheet with parchment paper.
- Using a sharp chef’s knife, carefully cut the acorn squash in half from stem to tip. Scoop out the seeds and stringy pulp with a spoon. Cut each half into 1-inch thick slices or wedges.
- Place the 3 tablespoons of butter in a small saucepan over medium heat. Let it melt completely, then continue cooking, swirling the pan occasionally, until the butter foams, the foam subsides, and brown specks form at the bottom (about 4-5 minutes). Remove from heat immediately when it smells nutty and turns golden amber.
- Add the honey, sea salt, black pepper, cinnamon (if using), and cayenne pepper to the warm brown butter. Whisk until combined and the salt is dissolved.
- Place the squash slices in a large mixing bowl. Pour the brown butter mixture over them and toss gently until every piece is evenly coated.
- Arrange the coated squash slices in a single layer on the prepared baking sheet. Reserve any extra glaze. Roast for 20 minutes, then flip each piece and brush or drizzle with the reserved glaze. Roast for another 15-20 minutes, until the squash is tender and the edges are caramelized.
- Remove from the oven and let cool for 2-3 minutes. Transfer to a serving platter, garnish with fresh thyme, flaky sea salt, and any other desired toppings. Serve warm.
Notes
Don’t overcrowd the pan to ensure caramelization. Watch the butter closely to prevent burning. Season in layers by saving some flaky salt for the end. Let the squash rest for 2-3 minutes after roasting to allow the glaze to set. Double the batch if serving guests.
Nutrition
- Serving Size: 1/3 of recipe
- Calories: 210
- Sugar: 14
- Sodium: 300
- Fat: 12
- Saturated Fat: 7
- Carbohydrates: 28
- Fiber: 4
- Protein: 2
Keywords: roasted acorn squash, brown butter, honey, fall side dish, easy, vegetarian, gluten-free


