The church bake sale was in twelve hours and I’d completely forgotten. Not just forgotten — I’d blocked it out entirely. My neighbor Carol had texted the reminder at 9 PM, and there I was, staring into my pantry like it held the secrets to the universe. Everyone else would be bringing those fancy layered cakes and perfectly piped cookies that looked like they belonged in a bakery window. I had a bag of apples that were starting to look sad, some butter, and a half-empty bag of flour. Honestly, I almost just brought a store-bought pie and called it a day.
But then I remembered these apple pie bars my aunt used to make — except hers were always a little dry, if I’m being honest. I figured I could fix that. I wanted something with that buttery shortbread crust, a soft apple filling that actually tasted like fall, and a drizzle of something decadent on top. The salted caramel was a last-minute decision, made with ingredients I definitely had to dig for. I burned the first batch of caramel, obviously. There was a moment where I considered just throwing the whole thing out and starting over with a boxed mix.
Maybe you’ve been there — that panic of needing to bring something to an event and realizing you have almost nothing to work with. But here’s the thing: those apple pie bars ended up being the first thing to sell out at the bake sale. Carol told me later that two people got into a polite disagreement over the last piece. And honestly, that’s why I keep making them. Not for the drama, but because this recipe proved that you don’t need fancy ingredients or hours of prep to make something that feels like a hug on a plate. It’s become my go-to for lazy Sunday afternoons, cold evenings, and any day that just needs a little fixing.
Why You’ll Love This Recipe
These cozy apple pie bars are the kind of dessert that makes you close your eyes after the first bite. I’ve tested this recipe more times than I can count — tweaking the crust, adjusting the apple ratio, and perfecting that salted caramel so it’s not too sweet or too salty. It’s been family-approved, neighbor-tested, and bake-sale-verified. Here’s why I think you’ll fall for it too:
- Quick & Easy: Comes together in under an hour, with only 15 minutes of active prep. Perfect for those last-minute cravings or unexpected guests.
- Simple Ingredients: No fancy grocery trips needed. You probably have most of this in your kitchen right now — apples, butter, flour, sugar, and a few pantry staples.
- Perfect for Cozy Evenings: Great for chilly nights, holiday gatherings, or when you just need something warm and comforting after a rough day.
- Crowd-Pleaser: I’ve brought these to potlucks, office parties, and family dinners — they always disappear first. Kids and adults both go crazy for them.
- Unbelievably Delicious: The buttery shortbread crust, soft spiced apple filling, and that salted caramel drizzle create a texture and flavor combo that’s next-level comfort food.
What makes these bars different from every other apple dessert out there? It’s the crust-to-filling ratio. Most apple bars have way too much filling and a soggy bottom. I spent three batches getting that shortbread just right — firm enough to hold up, but tender enough to melt in your mouth. The caramel is the real star, though. It’s made from scratch with just four ingredients, and the pinch of flaky salt on top takes everything to another dimension. This isn’t just another apple bar recipe — it’s the one you’ll keep coming back to.
There’s something about the combination of warm apples and caramel that feels like a hug for your soul. It’s comfort food at its finest — simple, honest, and deeply satisfying. Perfect for impressing guests without any stress, or turning an ordinary Tuesday night into something memorable.
What Ingredients You Will Need
This recipe uses simple, wholesome ingredients to deliver bold flavor and satisfying texture without the fuss. Most of these are pantry staples, so you might not even need a trip to the store. I’ve included a few notes on what to look for and what you can swap if needed.
For the Shortbread Crust
- 1 ½ cups all-purpose flour (spooned and leveled — don’t scoop straight from the bag or it’ll be too dense)
- ½ cup unsalted butter, cold and cubed (I use Kerrygold for the best flavor, but any good-quality butter works)
- ¼ cup granulated sugar
- ¼ teaspoon salt
- 1 teaspoon vanilla extract
- 2 tablespoons cold water (add more if needed, a teaspoon at a time)
For the Apple Filling
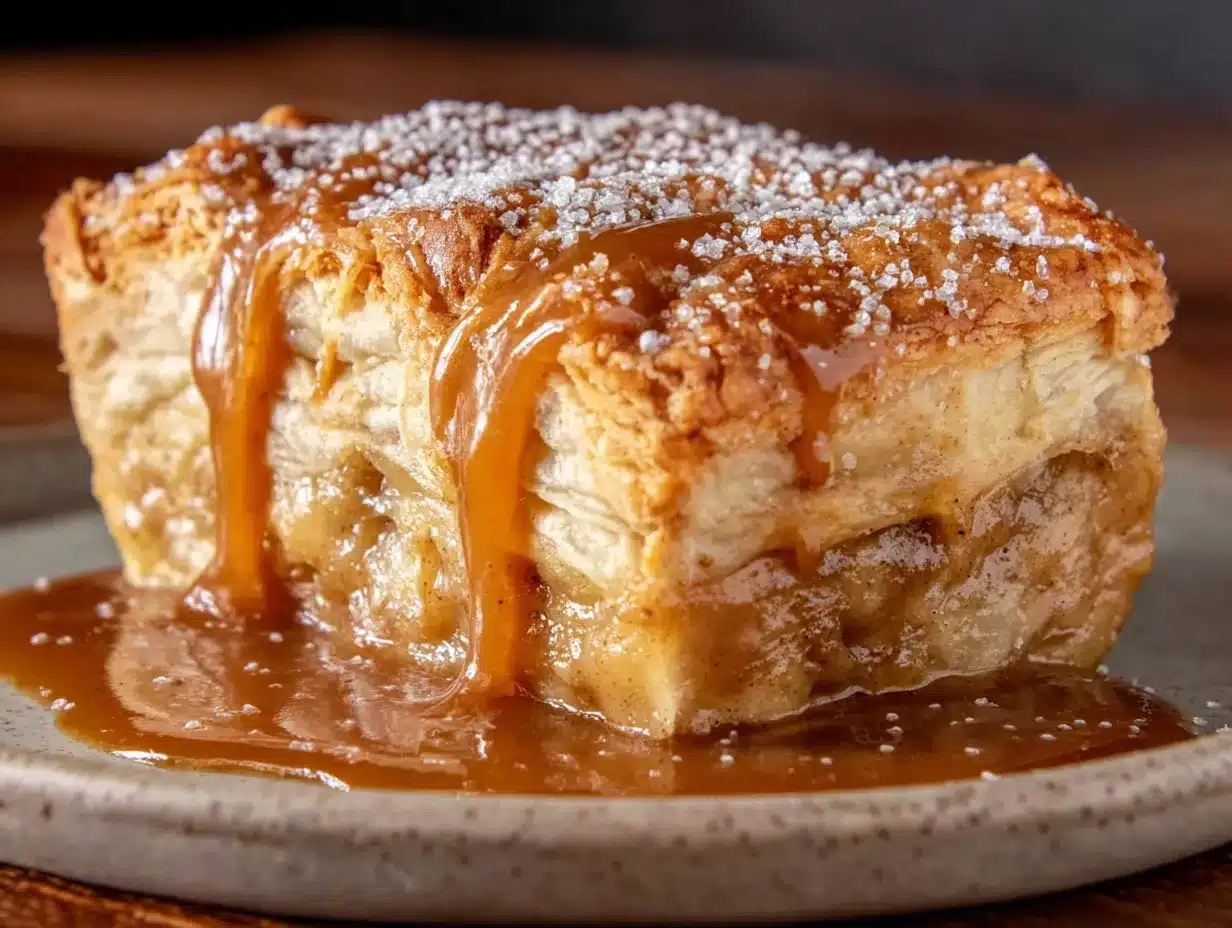
- 4 medium apples, peeled, cored, and thinly sliced (I recommend Honeycrisp or Granny Smith — Honeycrisp for sweetness, Granny Smith for tartness. A mix of both is perfect)
- ¼ cup granulated sugar
- 2 tablespoons brown sugar, packed (adds a deeper, molasses-like sweetness)
- 1 tablespoon all-purpose flour (helps thicken the filling)
- 1 teaspoon ground cinnamon
- ¼ teaspoon ground nutmeg (freshly grated if you have it — it makes a difference)
- ⅛ teaspoon ground cloves (optional, but adds that classic apple pie spice warmth)
- 1 tablespoon lemon juice (prevents browning and brightens the flavor)
For the Salted Caramel Drizzle
- ½ cup granulated sugar
- 3 tablespoons unsalted butter, cut into pieces
- ¼ cup heavy cream (room temperature is best — cold cream can cause the caramel to seize)
- ½ teaspoon flaky sea salt (plus more for sprinkling on top)
- ½ teaspoon vanilla extract
Ingredient Tips: For the apples, look for firm ones without any soft spots. If you’re using a sweeter variety like Fuji or Gala, you might want to reduce the granulated sugar by a tablespoon. For the caramel, don’t skip the heavy cream — half-and-half or milk won’t give you that thick, luscious texture. I’ve tried using coconut cream for a dairy-free version, and it works, but the flavor is slightly different. If you’re gluten-free, swap the all-purpose flour in both the crust and filling with a good 1:1 gluten-free baking blend.
Equipment Needed
You don’t need a professional kitchen to make these bars. Here’s what I use every time:
- 8×8-inch baking pan (a 9×9 works too, but the bars will be slightly thinner — adjust baking time by a few minutes)
- Parchment paper (for easy lifting — don’t skip this or you’ll be chiseling bars out of the pan)
- Food processor or pastry cutter (for the crust. A fork works in a pinch, but a food processor makes it so much faster)
- Large mixing bowls (one for the crust, one for the filling)
- Small saucepan (for the caramel — light-colored metal is best so you can see the color change)
- Sharp knife and cutting board (for slicing apples)
- Measuring cups and spoons
- Rubber spatula
- Wire rack (for cooling)
If you don’t have a food processor, you can cut the cold butter into the flour using a pastry cutter or even two forks. It’ll take a few extra minutes, but it works. For the caramel, a silicone spatula is your best friend — it scrapes every last bit out of the pan. And honestly, I’ve made these bars with a cheap baking pan from the dollar store, and they turned out great. Don’t overthink the equipment.
Preparation Method
Let’s get baking! I’ve broken this down into clear steps with time estimates and some notes from my own trial-and-error experiences.
Step 1: Preheat and Prep the Pan
Preheat your oven to 350°F (175°C). Line your 8×8-inch baking pan with parchment paper, leaving a 2-inch overhang on two opposite sides. This creates handles for lifting the bars out later. Lightly grease the parchment with butter or non-stick spray. Trust me on this — the first time I made these, I forgot the parchment and spent 20 minutes trying to pry them out. Not fun.
Step 2: Make the Shortbread Crust
In a food processor, combine the flour, sugar, and salt. Pulse a few times to mix. Add the cold, cubed butter and vanilla extract. Pulse until the mixture looks like coarse sand with a few pea-sized butter pieces remaining. Drizzle in the cold water, one tablespoon at a time, and pulse until the dough just starts to come together. It should hold together when you squeeze it in your hand, but not be sticky.
Press the dough evenly into the prepared pan. Use the bottom of a measuring cup or a glass to smooth it out — your fingers work too, but the cup gives you a more even surface. Prick the crust all over with a fork (this prevents it from bubbling up). Bake for 15-18 minutes, until the edges are just starting to turn golden. The center will still look pale — that’s okay. Set it aside to cool slightly while you make the filling.
Step 3: Prepare the Apple Filling
In a large bowl, toss the sliced apples with lemon juice first (this prevents browning). Then add the granulated sugar, brown sugar, flour, cinnamon, nutmeg, and cloves. Mix well until every apple slice is coated. Let it sit for 5 minutes — this helps the apples release some of their juices, which will create a natural syrup as they bake.
Arrange the apple slices evenly over the pre-baked crust. Try to get them in a single, slightly overlapping layer. Don’t just dump them in — take an extra minute to spread them out. I learned this the hard way when I ended up with a giant apple mound in the center and bare edges. Pour any remaining juices from the bowl over the top.
Step 4: Bake the Bars
Bake for 30-35 minutes, until the apples are tender and the edges are bubbly. The filling should be set and not watery when you gently shake the pan. If the top is browning too quickly, tent the pan loosely with foil for the last 10 minutes. Let the bars cool in the pan on a wire rack for at least 20 minutes before adding the caramel — warm apples + hot caramel = a sticky mess.
Step 5: Make the Salted Caramel
While the bars are cooling, make the caramel. In a small saucepan over medium heat, spread the sugar in an even layer. Watch it carefully — don’t stir, just swirl the pan occasionally. The sugar will start to melt around the edges first. Keep swirling until it turns a deep amber color, like the color of a penny. This takes about 5-7 minutes. Don’t walk away! I’ve burned more sugar than I care to admit.
Once the sugar is melted and amber, remove the pan from heat and immediately add the butter. It will bubble up violently — that’s normal. Whisk until the butter is fully melted. Slowly pour in the heavy cream while whisking constantly. The mixture will bubble up again. Keep whisking until smooth. Stir in the flaky sea salt and vanilla extract. Let the caramel cool for 5 minutes — it will thicken as it cools.
Step 6: Assemble and Serve
Drizzle the warm caramel over the cooled apple bars. Use a spoon or a squeeze bottle for a more controlled drizzle. Sprinkle a little extra flaky sea salt on top. Let the bars set for at least 15 minutes before slicing. Lift them out using the parchment handles, and cut into 9 or 16 squares, depending on how generous you’re feeling. A sharp knife wiped clean between cuts gives you the neatest edges.
Cooking Tips & Techniques
I’ve made these bars at least a dozen times, and I’ve picked up a few tricks along the way. Here’s what I wish someone had told me:
Don’t overwork the crust. The first time I made these, I pulsed the food processor until the dough formed a ball. Big mistake. The crust came out tough and dense. You want it to just barely hold together — those small butter pieces are what create that tender, flaky texture. Less is more here.
Slice your apples evenly. I know it’s tedious, but uniform slices ensure they cook at the same rate. I aim for about ¼-inch thick. If some slices are paper-thin and others are chunky, you’ll end up with mushy spots and crunchy spots in the same pan. Not the end of the world, but not ideal.
Watch your caramel like a hawk. Caramel goes from perfect to burnt in about 30 seconds. I always keep a bowl of cold water nearby — if I’m unsure about the color, I drop a tiny bit of the sugar into the water. If it forms a firm ball, it’s ready. Also, use a light-colored saucepan so you can actually see the color change. I learned that one after a few too many dark, bitter batches.
Let the bars cool completely before slicing. I know it’s tempting to cut into them while they’re warm, but they’ll fall apart. The filling needs time to set. If you’re in a rush, pop them in the fridge for 30 minutes. I’ve definitely done this when I needed to bring them somewhere quickly.
Multitasking tip: While the crust is baking, prep the apples. While the bars are baking, make the caramel. This way, everything comes together without any downtime. I usually clean as I go too — it makes the post-baking cleanup so much less painful.
Variations & Adaptations
One of the things I love about this recipe is how flexible it is. Here are a few variations I’ve tried and loved:
Gluten-Free Version: Swap the all-purpose flour in both the crust and filling with a 1:1 gluten-free baking blend. I’ve used Bob’s Red Mill and King Arthur brands with great results. The crust might be slightly more crumbly, so press it firmly into the pan. No one will notice the difference.
Vegan/Dairy-Free Option: Use cold vegan butter (I like Miyoko’s) in the crust and substitute the heavy cream with full-fat coconut cream for the caramel. The caramel won’t be quite as thick, but it’s still delicious. Skip the butter in the caramel and use coconut oil instead — though the flavor will be slightly different.
Spiced Apple Cider Version: Replace the lemon juice with apple cider and add ¼ teaspoon of cardamom to the spice mix. It gives the bars a cozy, mulled cider flavor that’s perfect for fall. I made this version for a Halloween party and it was a hit.
Nutty Crunch: Sprinkle ½ cup of chopped pecans or walnuts over the apples before baking. The nuts toast in the oven and add a wonderful crunch against the soft apples. I’ve also tried adding them to the crust — just pulse ¼ cup of finely chopped nuts into the flour mixture.
Caramel Apple Cheesecake Bars: For an indulgent twist, spread a layer of cheesecake filling (8 oz cream cheese, ¼ cup sugar, 1 egg, ½ teaspoon vanilla) over the pre-baked crust before adding the apples. Bake for an extra 5-10 minutes. It’s over-the-top, but sometimes you need that.
Serving & Storage Suggestions
These bars are best served slightly warm — that’s when the caramel is still a little gooey and the apples are tender. I like to reheat individual slices in the microwave for about 15 seconds before serving. For presentation, place a bar on a small plate, drizzle a little extra caramel on top, and add a small scoop of vanilla ice cream or a dollop of whipped cream. The cold creaminess against the warm spiced apples is pure magic.
They pair beautifully with a cup of hot coffee, a chai latte, or a glass of cold milk. For a cozy dessert spread, serve them alongside a warm apple cider or a cinnamon-spiced tea. I’ve also brought these to brunch and they fit right in next to the muffins and scones.
Storage: Keep leftover bars in an airtight container in the refrigerator for up to 5 days. The caramel will harden slightly when cold, but a quick reheat softens it right up. To freeze, wrap individual bars tightly in plastic wrap, then place them in a freezer-safe bag. They’ll keep for up to 3 months. Thaw in the refrigerator overnight and reheat in the microwave or a 300°F oven for 10 minutes.
A note on flavor development: These bars actually taste even better the next day. The apples continue to soften and absorb the spices, and the crust gets a little more tender. I’ve been known to make them a day ahead on purpose.
Nutritional Information & Benefits
Here’s an estimated nutritional breakdown per bar (based on 9 servings):
| Nutrient | Amount per Serving |
|---|---|
| Calories | 320 |
| Total Fat | 16g |
| Saturated Fat | 10g |
| Cholesterol | 45mg |
| Sodium | 180mg |
| Total Carbohydrates | 44g |
| Dietary Fiber | 3g |
| Sugars | 28g |
| Protein | 3g |
These bars are a treat, but they’re not without some redeeming qualities. Apples are packed with fiber and vitamin C, and cinnamon has anti-inflammatory properties. The oats in the crust (if you add them) provide some whole grains. That said, this is definitely a dessert — I don’t pretend it’s health food. I like to balance it out by enjoying a smaller portion with a cup of tea. It’s all about moderation, right?
Dietary Considerations: This recipe contains gluten, dairy, and eggs (in the crust). For allergen-friendly options, see the variations section above. Not suitable for low-carb or keto diets due to the sugar and flour content.
Conclusion
These cozy apple pie bars with salted caramel drizzle are everything I want in a fall dessert — simple, comforting, and absolutely delicious. They came out of a moment of panic and turned into a recipe I genuinely treasure. The buttery crust, the soft spiced apples, and that glossy caramel with just a hint of salt — it’s a combination that never gets old.
I hope you give these a try, whether you’re bringing them to a gathering or just treating yourself on a quiet evening. Don’t be afraid to make them your own — swap the apples, adjust the spices, or go wild with the toppings. That’s the beauty of a good recipe: it’s a starting point, not a rulebook.
If you make these, I’d love to hear how they turned out. Drop a comment below and let me know if you tried any variations, or just tell me about the look on someone’s face when they took that first bite. And if you have a similar story of a recipe that saved you in a pinch, I’m all ears. Happy baking, friends!
Frequently Asked Questions
Can I use pre-made caramel sauce instead of making my own?
Yes, you can! Store-bought caramel sauce works in a pinch. Just warm it up slightly and add a pinch of flaky sea salt to get that salted caramel flavor. Homemade is better, but I won’t judge you for taking a shortcut — I’ve done it plenty of times.
What are the best apples for this recipe?
I recommend Honeycrisp, Granny Smith, or a mix of both. Honeycrisp adds natural sweetness, while Granny Smith gives a nice tartness that balances the caramel. Avoid Red Delicious — they get mushy and don’t hold their shape well.
Can I make these bars ahead of time?
Absolutely! These bars actually taste better the next day. Make them a day ahead, store them in the refrigerator, and add the caramel drizzle just before serving. The flavors meld together beautifully overnight.
How do I prevent the crust from getting soggy?
Pre-baking the crust for 15-18 minutes is key. Also, make sure your apples aren’t too watery — let them sit with the sugar and spices for a few minutes, but don’t let them sit for too long or they’ll release too much liquid. The flour in the filling also helps absorb excess moisture.
Can I freeze these bars?
Yes! Freeze the bars without the caramel drizzle. Wrap individual bars tightly in plastic wrap, then place them in a freezer-safe bag. They’ll keep for up to 3 months. Thaw in the refrigerator, reheat gently, and add fresh caramel before serving.
Pin This Recipe!
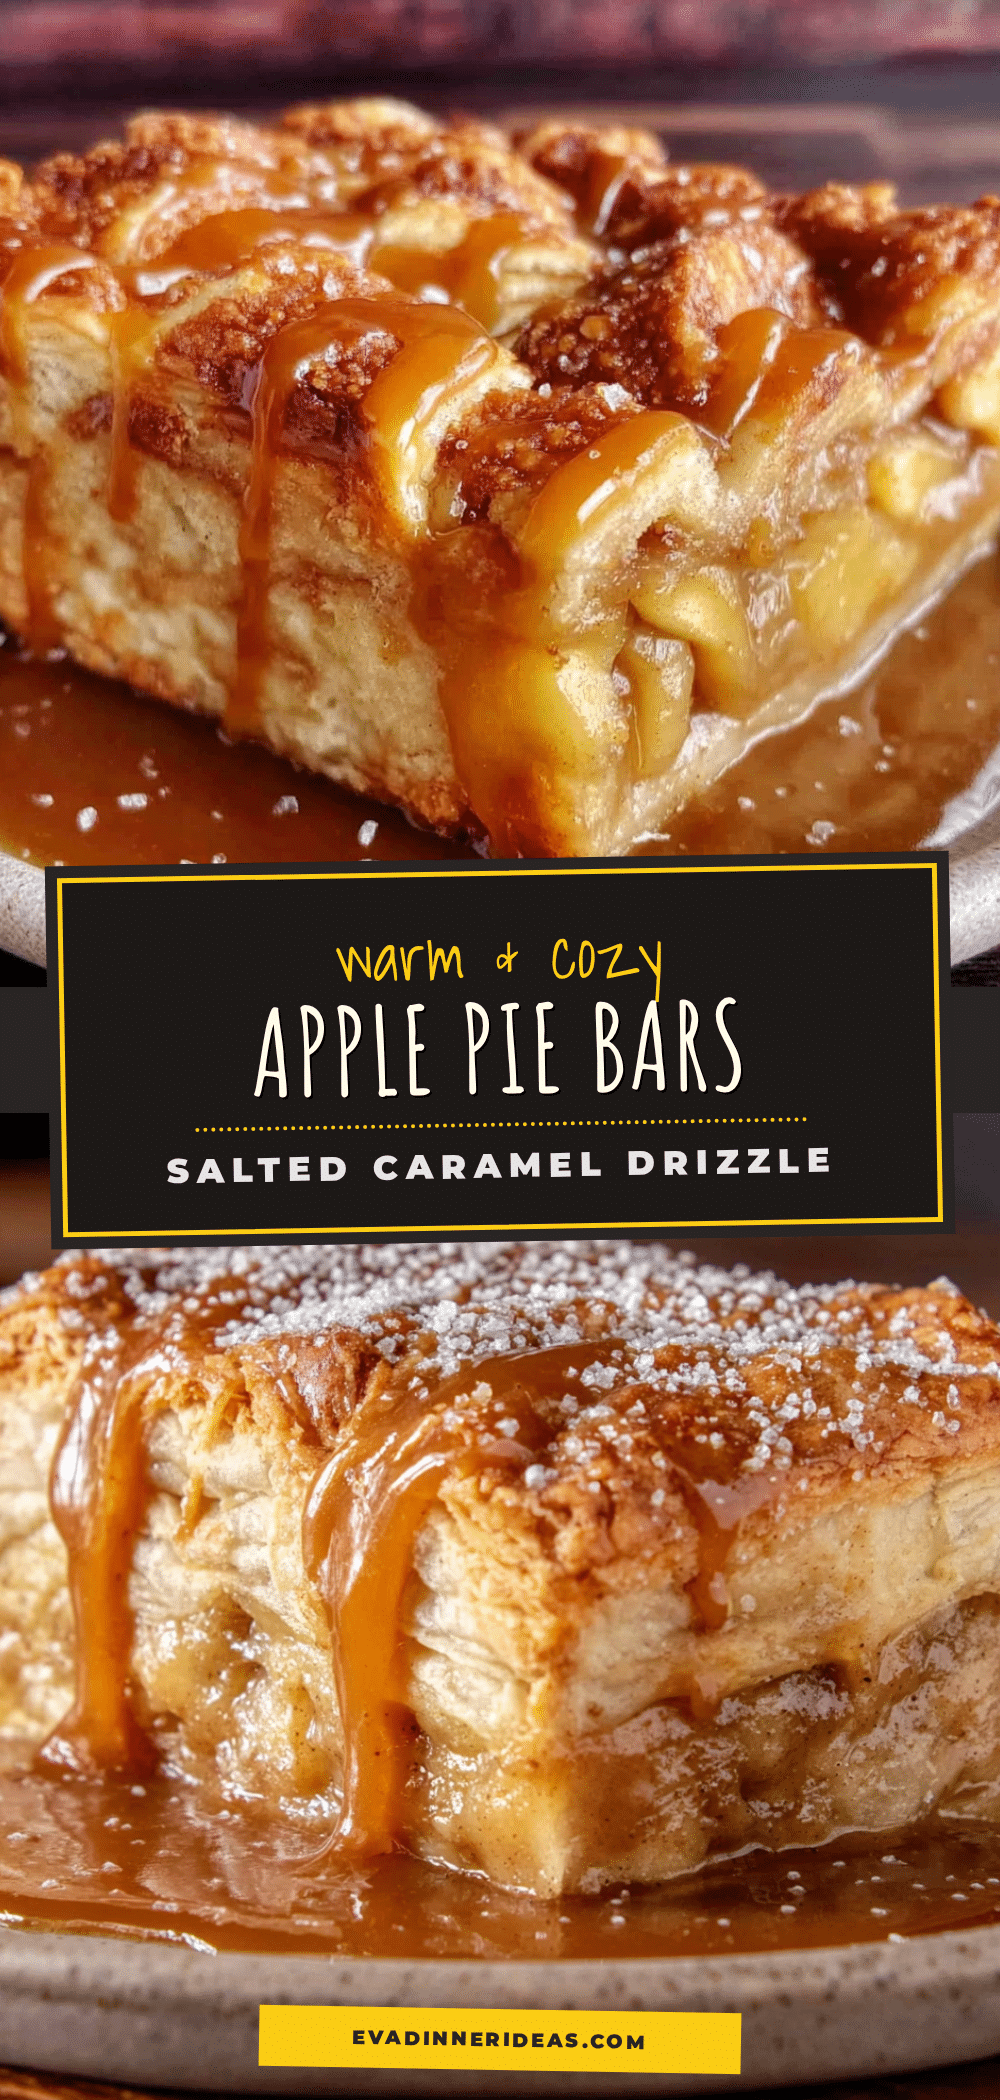
Cozy Apple Pie Bars with Salted Caramel Drizzle
These buttery shortbread apple pie bars with a soft spiced apple filling and homemade salted caramel drizzle are the perfect easy dessert for cozy evenings, bake sales, or last-minute gatherings.
- Prep Time: 15 minutes
- Cook Time: 45 minutes
- Total Time: 1 hour
- Yield: 9 servings 1x
- Category: Dessert
- Cuisine: American
Ingredients
- 1 ½ cups all-purpose flour (spooned and leveled)
- ½ cup unsalted butter, cold and cubed
- ¼ cup granulated sugar
- ¼ teaspoon salt
- 1 teaspoon vanilla extract
- 2 tablespoons cold water (add more if needed, a teaspoon at a time)
- 4 medium apples, peeled, cored, and thinly sliced (Honeycrisp or Granny Smith recommended)
- ¼ cup granulated sugar
- 2 tablespoons brown sugar, packed
- 1 tablespoon all-purpose flour
- 1 teaspoon ground cinnamon
- ¼ teaspoon ground nutmeg
- ⅛ teaspoon ground cloves (optional)
- 1 tablespoon lemon juice
- ½ cup granulated sugar (for caramel)
- 3 tablespoons unsalted butter, cut into pieces (for caramel)
- ¼ cup heavy cream, room temperature (for caramel)
- ½ teaspoon flaky sea salt (for caramel, plus more for sprinkling)
- ½ teaspoon vanilla extract (for caramel)
Instructions
- Preheat oven to 350°F (175°C). Line an 8×8-inch baking pan with parchment paper, leaving a 2-inch overhang on two opposite sides. Lightly grease the parchment with butter or non-stick spray.
- Make the shortbread crust: In a food processor, combine 1 ½ cups flour, ¼ cup sugar, and ¼ teaspoon salt. Pulse to mix. Add ½ cup cold cubed butter and 1 teaspoon vanilla extract. Pulse until mixture resembles coarse sand with a few pea-sized butter pieces. Drizzle in 2 tablespoons cold water, one tablespoon at a time, pulsing until dough just starts to come together.
- Press dough evenly into prepared pan. Prick all over with a fork. Bake for 15-18 minutes, until edges are just golden. Set aside to cool slightly.
- Prepare apple filling: In a large bowl, toss sliced apples with 1 tablespoon lemon juice. Add ¼ cup granulated sugar, 2 tablespoons brown sugar, 1 tablespoon flour, 1 teaspoon cinnamon, ¼ teaspoon nutmeg, and ⅛ teaspoon cloves. Mix well. Let sit for 5 minutes.
- Arrange apple slices evenly over pre-baked crust in a single, slightly overlapping layer. Pour any remaining juices over the top.
- Bake for 30-35 minutes, until apples are tender and edges are bubbly. If top browns too quickly, tent with foil for last 10 minutes. Cool in pan on a wire rack for at least 20 minutes.
- Make salted caramel: In a small saucepan over medium heat, spread ½ cup sugar in an even layer. Swirl pan occasionally until sugar melts and turns deep amber (5-7 minutes). Remove from heat, immediately add 3 tablespoons butter (it will bubble). Whisk until melted. Slowly pour in ¼ cup heavy cream while whisking constantly. Stir in ½ teaspoon flaky sea salt and ½ teaspoon vanilla extract. Let cool for 5 minutes.
- Drizzle warm caramel over cooled bars. Sprinkle extra flaky sea salt on top. Let set for at least 15 minutes. Lift bars out using parchment handles, cut into 9 or 16 squares.
Notes
Pre-bake the crust to prevent sogginess. Slice apples evenly for uniform cooking. Watch caramel closely to avoid burning. Let bars cool completely before slicing for clean edges. Bars taste even better the next day.
Nutrition
- Serving Size: 1 bar
- Calories: 320
- Sugar: 28
- Sodium: 180
- Fat: 16
- Saturated Fat: 10
- Carbohydrates: 44
- Fiber: 3
- Protein: 3
Keywords: apple pie bars, salted caramel, easy dessert, fall dessert, bake sale recipe, shortbread crust


