It was 11:47 PM on a random Wednesday, and I had this insane craving for cheesecake. Not just any cheesecake — I wanted that rich, creamy, melt-in-your-mouth kind. But here’s the thing: it was late, I was tired, and there was no way I was turning on the oven. I didn’t have cream cheese at room temperature, I didn’t have a springform pan, and honestly, I didn’t have the patience for a water bath. But I did have a block of cold cream cheese, some heavy cream I’d bought for another recipe, a sad-looking carton of strawberries, and a half-eaten chocolate bar in the pantry. That’s when the idea hit me — what if I just… didn’t bake it? What if I layered it all in a cup and called it dessert?
So I grabbed my whisk, a couple of ramekins, and started experimenting right there in my pajamas. The kitchen was quiet except for the hum of the fridge, and I’ll be honest — I made a mess. A little bit of chocolate got on the counter, I forgot to soften the cream cheese at first, and I may have licked the spoon more times than I’d care to admit. But when I took that first bite? Let me tell you — it was one of those moments where you just stop and stare at your creation. The creamy cheesecake layer, the rich chocolate, the burst of fresh strawberry — it all worked. And I hadn’t even broken a sweat.
That late-night experiment turned into my go-to dessert for every gathering. These no-bake chocolate strawberry cheesecake cups are the kind of thing you make when you want to impress people without actually trying that hard. They look fancy, they taste indulgent, and they come together in minutes. Maybe you’ve been there — staring into your fridge at 11 PM, wondering what magic you can create with what’s left. Trust me, this is the magic you’ve been looking for.
Why You’ll Love This Recipe
I’ve tested this recipe more times than I can count — for family dinners, friend get-togethers, and even a few times just for myself on a Friday night. And every single time, it delivers. Here’s why these no-bake chocolate strawberry cheesecake cups are about to become your new favorite dessert:
- No Oven Required: Summer heat, broken oven, or just lazy vibes — it doesn’t matter. You don’t need to turn on anything except maybe the mixer.
- Simple Ingredients: You probably already have most of this in your kitchen. No weird specialty items, no expensive extracts.
- Perfect for Hosting: When you’re having people over, the last thing you want is to be stuck in the kitchen. These come together in 20 minutes and chill while you get ready.
- Crowd-Pleaser: I’ve served these at potlucks, birthday parties, and casual dinners. They disappear every time. Kids love them, adults love them — it’s universal.
- Make-Ahead Friendly: You can prep these a day or two before your party. One less thing to worry about when guests arrive.
What makes these different from other no-bake cheesecake recipes? It’s the texture. Most no-bake cheesecakes turn out either too dense or too runny. I spent a good bit of time figuring out the perfect ratio of cream cheese to heavy cream, and the result is a filling that’s light, airy, and incredibly creamy — but still holds its shape beautifully when you scoop into it. Plus, the layers of chocolate and strawberry aren’t just for show. They add real flavor that complements the cheesecake without overpowering it.
This is the kind of dessert that makes you close your eyes after the first bite. It’s comfort food reimagined — easier, faster, but with the same soul-soothing satisfaction. Perfect for impressing your guests without any stress.
What Ingredients You Will Need
This recipe uses simple, wholesome ingredients to deliver that rich, decadent flavor without any fuss. Most of these are pantry staples or easy to find at any grocery store. Here’s what you’ll need:
For the Chocolate Crust
- 1 ½ cups chocolate graham cracker crumbs (about 10-12 crackers, crushed)
- ¼ cup unsalted butter, melted (I prefer Kerrygold for its rich flavor)
- 2 tablespoons granulated sugar
- Pinch of salt
For the No-Bake Cheesecake Filling
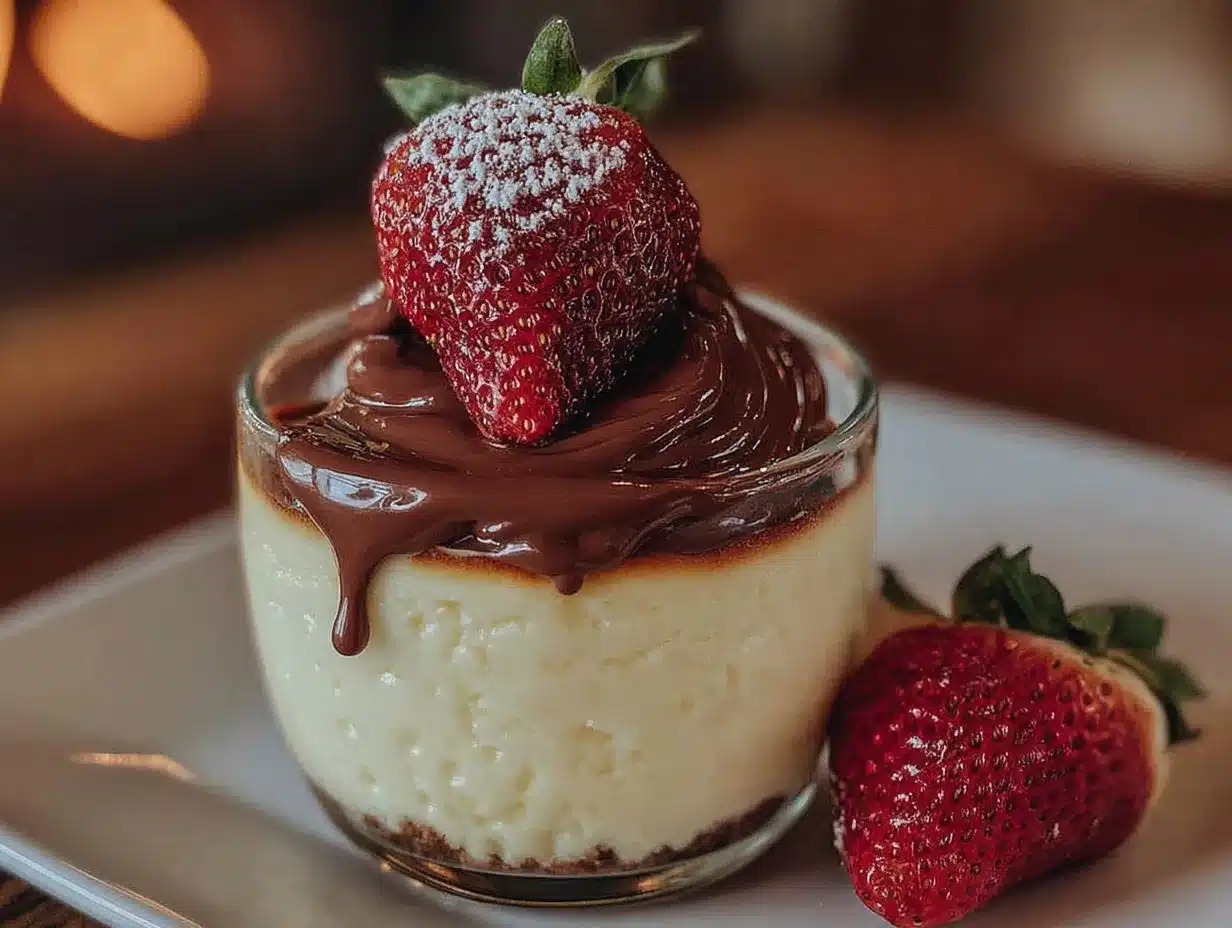
- 16 oz (450g) full-fat cream cheese, softened to room temperature (this is crucial — don’t skip it)
- ½ cup granulated sugar
- 1 teaspoon vanilla extract
- 1 cup heavy whipping cream, cold
- ¼ cup powdered sugar
For the Strawberry Layer
- 1 ½ cups fresh strawberries, hulled and diced small
- 2 tablespoons strawberry jam or preserves (adds sweetness and helps thicken)
- 1 teaspoon lemon juice (brightens the flavor)
For the Chocolate Layer
- 4 oz (115g) semi-sweet chocolate, chopped (I use Ghirardelli or Lindt)
- ½ cup heavy cream
For Topping (optional but recommended)
- Fresh strawberry slices
- Chocolate shavings or curls
- Whipped cream
Ingredient Tips: For the cream cheese, make sure it’s the full-fat block style, not the spreadable kind in a tub. The spreadable stuff has too much air and water, which will make your filling runny. Let it sit on the counter for at least 30 minutes before you start mixing. For the strawberries, fresh is best here — frozen ones release too much water and can make the layer soggy. If strawberries aren’t in season, you can use thawed frozen berries but drain them really well first. I also recommend using a good quality chocolate for the ganache layer. It makes a real difference in flavor.
Substitution Guidance: Need this gluten-free? Use gluten-free chocolate cookies for the crust. Dairy-free? Use dairy-free cream cheese and coconut cream instead of heavy cream. The texture will be a bit different, but still delicious. You can also swap the strawberries for raspberries, blueberries, or even sliced bananas.
Equipment Needed
One of the best things about this recipe is that you don’t need any fancy equipment. Here’s what you’ll need:
- 8-10 small cups or ramekins: I use 6 oz glass cups so you can see the beautiful layers. Mason jars work great too — they’re perfect for parties.
- Electric hand mixer or stand mixer: You can whisk by hand, but your arm will get tired. A mixer makes the filling light and fluffy in minutes.
- Mixing bowls: You’ll need at least two medium bowls and one small bowl.
- Measuring cups and spoons: For accuracy.
- Spatula: For scraping every last bit of that cheesecake filling.
- Small saucepan: For making the chocolate ganache.
- Ziploc bag or rolling pin: For crushing the graham crackers if you don’t have a food processor.
If you don’t have a food processor, no worries. Just put the graham crackers in a ziploc bag and smash them with a rolling pin. It’s oddly satisfying and works just as well. For the cups, I’ve used everything from fancy stemless wine glasses to simple plastic cups for picnics. The recipe is forgiving that way.
Preparation Method
Okay, let’s get to the fun part. Here’s how to make these no-bake chocolate strawberry cheesecake cups step by step. Trust me, it’s easier than you think.
Step 1: Make the Chocolate Crust
In a medium bowl, combine the chocolate graham cracker crumbs, sugar, and salt. Pour in the melted butter and stir with a fork until everything is evenly moistened. It should look like wet sand. Divide the mixture evenly among your cups — about 2 tablespoons per cup. Press it down firmly using the back of a spoon or the bottom of a small glass. You want it compact so it holds together when you eat it. Pop these in the fridge while you make the filling.
Step 2: Prepare the Strawberry Layer
In a small bowl, combine the diced strawberries, strawberry jam, and lemon juice. Stir gently to coat the berries. Let this sit for about 10 minutes — the sugar in the jam will draw out some juice and create a nice syrupy mixture. Set aside. If your strawberries are on the tart side, add a teaspoon more of sugar.
Step 3: Make the Chocolate Ganache
Place the chopped chocolate in a heatproof bowl. Heat the ½ cup heavy cream in a small saucepan over medium heat until it just starts to simmer — tiny bubbles around the edges, not boiling. Pour the hot cream over the chocolate and let it sit for 2 minutes without stirring. Then gently whisk until smooth and glossy. Set aside to cool slightly while you make the cheesecake filling.
Step 4: Make the No-Bake Cheesecake Filling
In a large mixing bowl, beat the softened cream cheese with the granulated sugar and vanilla extract until smooth and creamy — about 2 minutes on medium speed. Scrape down the sides and bottom of the bowl. In a separate bowl, whip the cold heavy cream and powdered sugar together until stiff peaks form. You’re looking for the cream to hold its shape when you lift the beaters. Gently fold the whipped cream into the cream cheese mixture in three additions. Use a spatula and fold gently — you want to keep all that air you whipped in. The final mixture should be light, fluffy, and smooth.
Step 5: Layer Everything Together
Take your cups out of the fridge. Start with a layer of the cheesecake filling — about 2 tablespoons per cup, spread evenly over the crust. Next, add a layer of the strawberry mixture — about 1 tablespoon per cup. Then add another layer of cheesecake filling. Finally, spoon the chocolate ganache over the top, spreading it gently to the edges. You want it to drip down the sides a little for that beautiful effect.
Step 6: Chill and Set
Cover each cup with plastic wrap or a lid and refrigerate for at least 4 hours, but overnight is better. The filling needs time to firm up. I know it’s hard to wait, but trust me — it’s worth it. When you’re ready to serve, top with fresh strawberry slices, chocolate shavings, and a dollop of whipped cream if you’re feeling extra.
Sensory Cues: When you fold the whipped cream into the cream cheese, you’re looking for a mixture that’s thick enough to hold a spoon upright. The ganache should be pourable but not runny — think thick chocolate sauce. When you press the crust, it should feel compact but not rock hard.
Cooking Tips & Techniques
I’ve made this recipe more times than I can count, and I’ve learned a few things along the way. Here are my best tips for perfect no-bake chocolate strawberry cheesecake cups every time:
Room Temperature Cream Cheese is Non-Negotiable: I learned this the hard way. Cold cream cheese creates lumps that no amount of mixing can fix. Leave it on the counter for 30-45 minutes before you start. If you forget, cut it into small cubes and microwave for 10-second intervals until soft but not warm.
Don’t Overmix the Filling: Once you add the whipped cream to the cream cheese, fold gently. Overmixing will deflate all that air and leave you with a dense, heavy filling. Stop as soon as you don’t see any white streaks.
Chill Your Bowl for Whipped Cream: Pop your mixing bowl and beaters in the freezer for 10 minutes before whipping the cream. It helps the cream whip up faster and hold its shape better.
Make Extra Ganache: I always make a little more than I need because someone will inevitably want to lick the bowl. Plus, it’s great drizzled over ice cream the next day.
Timing is Everything: If you’re making these for a party, prep everything the day before. The flavors meld together overnight and the texture is even better. Just add the fresh toppings right before serving.
I once tried to rush the chilling process and put them in the freezer for an hour instead of the fridge. The texture was icy and weird — not my finest moment. Lesson learned: patience is key with no-bake desserts.
Variations & Adaptations
One of the best things about this recipe is how easy it is to customize. Here are some of my favorite variations:
Berry Medley Version
Swap the strawberries for a mix of raspberries, blueberries, and blackberries. Use mixed berry jam instead of strawberry. It’s bright, tangy, and gorgeous with the chocolate.
Vegan & Dairy-Free Option
Use dairy-free cream cheese (I like Miyoko’s or Kite Hill) and coconut cream instead of heavy cream. For the crust, use vegan butter and dark chocolate that’s dairy-free. The texture is slightly different but still incredibly creamy and delicious.
Peanut Butter Chocolate Dream
Add a layer of peanut butter between the crust and cheesecake filling. Mix ½ cup creamy peanut butter with 2 tablespoons powdered sugar and spread it over the crust. It’s dangerous how good this is.
Mint Chocolate Delight
Add ½ teaspoon peppermint extract to the cheesecake filling and use chocolate mint cookies for the crust. Top with crushed peppermint candies for a holiday twist.
I once made a version with caramelized bananas instead of strawberries, and it was ridiculous. Just slice bananas, sauté them in butter and brown sugar for 2 minutes, let them cool, and layer them in. If you try it, let me know how it goes.
Serving & Storage Suggestions
These no-bake chocolate strawberry cheesecake cups are best served cold, straight from the fridge. The texture is perfect — creamy, firm, and not too soft. Here’s how to serve and store them:
Serving Temperature: Take them out of the fridge about 10 minutes before serving. This takes the chill off just enough for the flavors to really shine. If you serve them straight from the fridge, they’re still delicious, just a bit firmer.
Presentation Tips: For parties, I like to use clear glass cups or mason jars so you can see all the beautiful layers. Top each cup with a fresh strawberry fan, a few chocolate shavings, and a tiny mint leaf. It looks like something from a fancy bakery.
What to Serve Alongside: These are rich, so I usually serve them with something light on the side. Fresh berries, a simple fruit salad, or even just a cup of strong coffee or espresso. For a dinner party, they pair beautifully with a dessert wine like Moscato or a dark red like Port.
Storage Instructions: Cover each cup tightly with plastic wrap or a lid and store in the refrigerator for up to 4 days. Do not freeze — the texture will become grainy and watery when thawed. If you’re making them for a party, you can prep everything up to 2 days in advance. Just add the fresh toppings right before serving.
Reheating: You don’t need to reheat these, but if you want the ganache to be a bit more fluid, let them sit at room temperature for 15 minutes before serving. The flavors actually get better after a day or two in the fridge — the strawberry and chocolate meld together beautifully.
Nutritional Information & Benefits
Here’s the estimated nutritional information for one serving (based on 8 servings):
| Nutrient | Amount per Serving |
|---|---|
| Calories | 385 |
| Total Fat | 28g |
| Saturated Fat | 16g |
| Cholesterol | 85mg |
| Sodium | 220mg |
| Total Carbohydrates | 32g |
| Dietary Fiber | 2g |
| Sugars | 22g |
| Protein | 6g |
While this is definitely a treat, there are some redeeming qualities. Strawberries are packed with vitamin C and antioxidants. Dark chocolate contains flavonoids that are good for heart health. And the cream cheese provides calcium and protein. Is it health food? No. But it’s made with real ingredients, and sometimes that’s what matters most.
If you’re watching your sugar intake, you can reduce the sugar in the cheesecake filling to ⅓ cup and use sugar-free jam. For a lower-fat version, use reduced-fat cream cheese and skip the whipped cream topping. The texture won’t be as luxurious, but it’ll still hit the spot.
Frequently Asked Questions
Can I use frozen strawberries instead of fresh?
You can, but you’ll need to thaw them first and drain off the excess liquid really well. Frozen strawberries release a lot of water when they thaw, which can make your cheesecake cups watery. If you’re in a pinch, thaw them in the fridge overnight, then pat them dry with paper towels before using.
How long do these cheesecake cups need to set?
At least 4 hours in the refrigerator, but overnight is best. The longer they chill, the firmer and more stable the filling becomes. If you’re in a hurry, you can speed things up by chilling them for 2 hours, then freezing for 30 minutes. Just don’t forget about them in the freezer!
Can I make these in a large dish instead of individual cups?
Absolutely. Use an 8×8 inch dish or a 9-inch pie plate. Layer everything the same way — crust, cheesecake, strawberries, more cheesecake, ganache. You’ll need to chill it for at least 6 hours before slicing. For clean slices, use a sharp knife dipped in hot water and wiped dry between cuts.
Why did my cheesecake filling turn out runny?
This usually happens for one of three reasons: the cream cheese wasn’t softened enough, the heavy cream wasn’t whipped to stiff peaks, or the mixture was overmixed. Make sure your cream cheese is at room temperature, whip the cream until it holds its shape, and fold gently. Also, check that you’re using full-fat cream cheese — the low-fat version has more water content.
Can I use a different type of chocolate for the ganache?
Yes! Milk chocolate will give you a sweeter, creamier ganache. Dark chocolate (60-70% cacao) will be richer and less sweet. White chocolate works too, but it’s much sweeter and can be finicky — use good quality white chocolate and be careful not to overheat it. For a fun twist, try using chocolate with orange or mint flavor.
Conclusion
These no-bake chocolate strawberry cheesecake cups are everything I want in a dessert — easy, impressive, and absolutely delicious. They’ve saved me more times than I can count, from last-minute dinner parties to lazy Sunday cravings. The fact that they come together in 20 minutes with no oven required? That’s just the cherry on top.
I really hope you give these a try. Whether you’re hosting a fancy dinner or just treating yourself on a Tuesday night, they deliver every single time. Feel free to experiment with the layers — swap in your favorite berries, try a different crust, or add a sprinkle of sea salt on top. That’s the beauty of a simple recipe like this: it’s a canvas for your own creativity.
When you make them, I’d love to hear how it goes. Drop a comment below, tag me in your photos, or share your own twist on the recipe. Happy no-baking, friends!
Pin This Recipe!
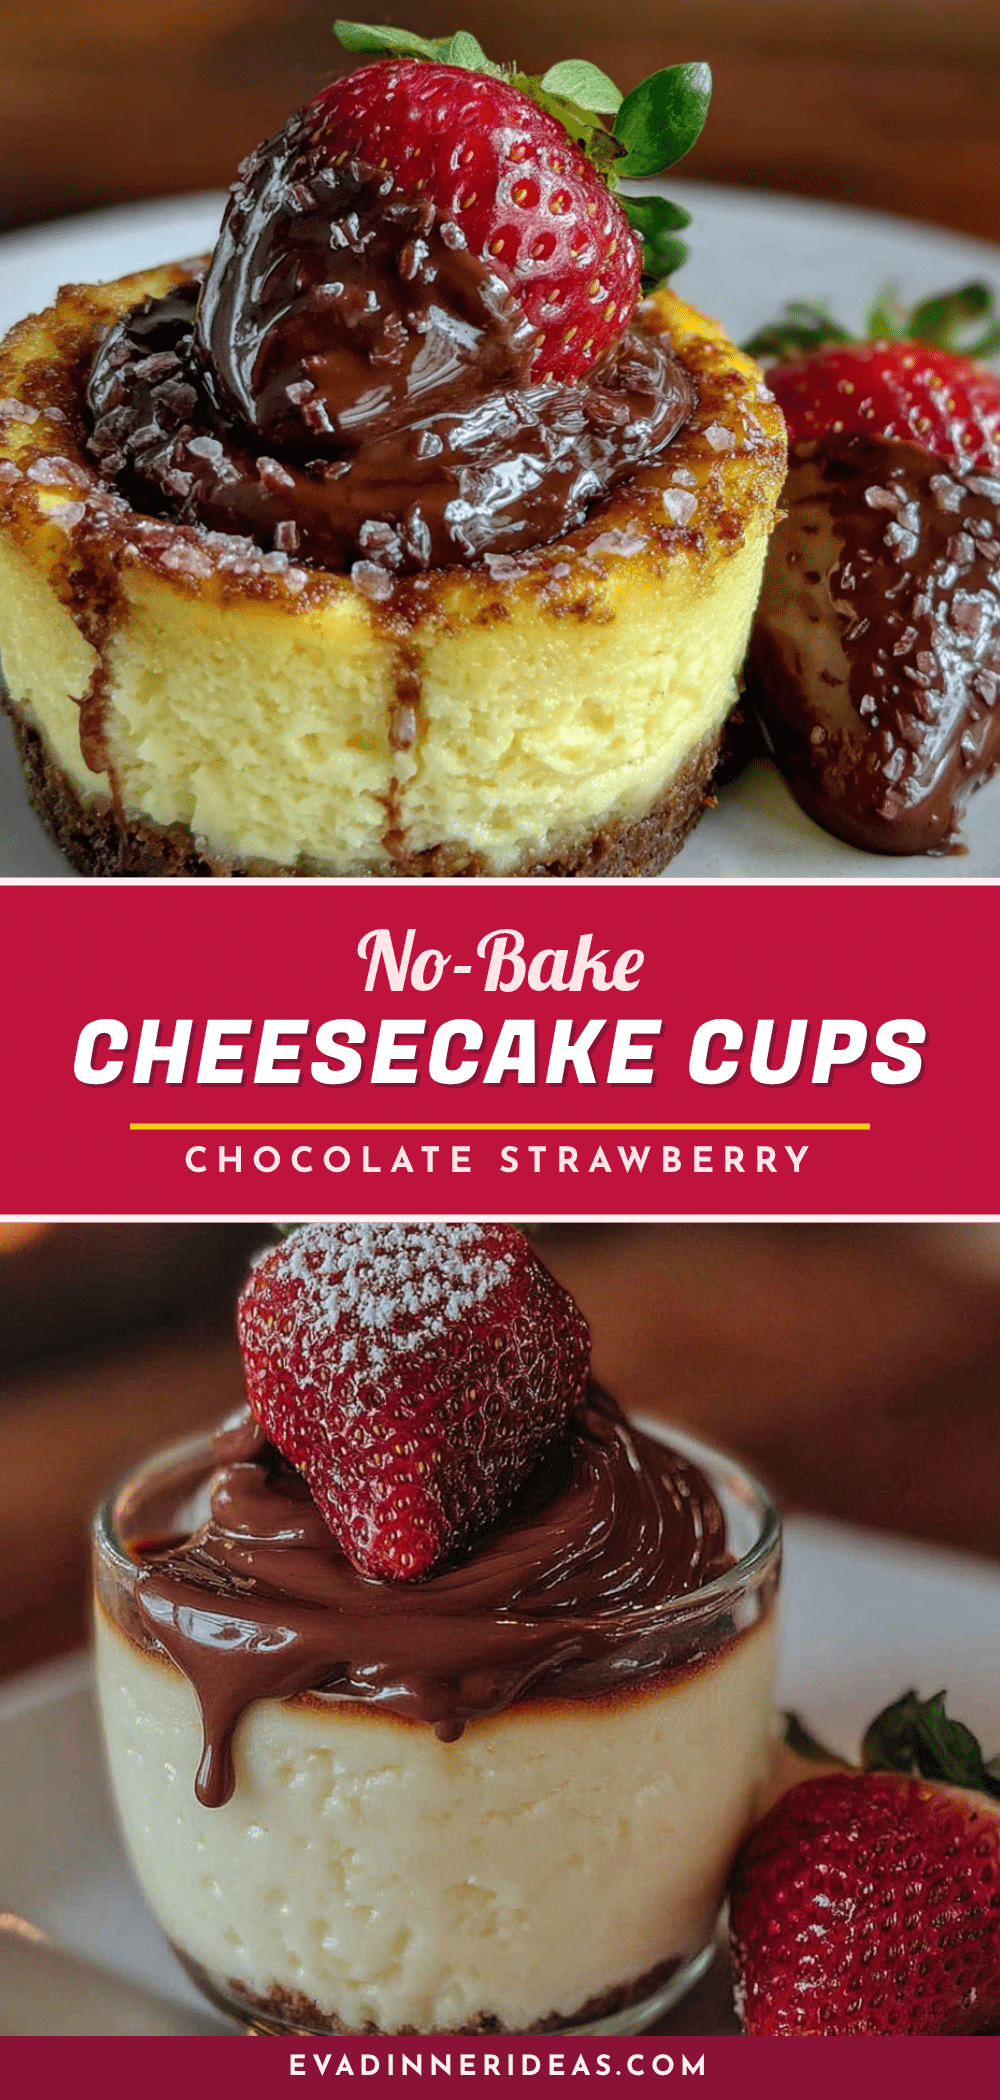
Best No-Bake Chocolate Strawberry Cheesecake Cups (Easy Recipe)
These no-bake chocolate strawberry cheesecake cups are the perfect easy dessert for any occasion. With a chocolate graham cracker crust, creamy no-bake cheesecake filling, fresh strawberry layer, and rich chocolate ganache, they come together in minutes with no oven required.
- Prep Time: 20 minutes
- Cook Time: 0 minutes
- Total Time: 4 hours 20 minutes (includes chilling time)
- Yield: 8-10 servings 1x
- Category: Dessert
- Cuisine: American
Ingredients
- 1 ½ cups chocolate graham cracker crumbs (about 10–12 crackers, crushed)
- ¼ cup unsalted butter, melted
- 2 tablespoons granulated sugar
- Pinch of salt
- 16 oz (450g) full-fat cream cheese, softened to room temperature
- ½ cup granulated sugar
- 1 teaspoon vanilla extract
- 1 cup heavy whipping cream, cold
- ¼ cup powdered sugar
- 1 ½ cups fresh strawberries, hulled and diced small
- 2 tablespoons strawberry jam or preserves
- 1 teaspoon lemon juice
- 4 oz (115g) semi-sweet chocolate, chopped
- ½ cup heavy cream
- Fresh strawberry slices (for topping, optional)
- Chocolate shavings or curls (for topping, optional)
- Whipped cream (for topping, optional)
Instructions
- Make the chocolate crust: In a medium bowl, combine chocolate graham cracker crumbs, sugar, and salt. Pour in melted butter and stir with a fork until evenly moistened (like wet sand). Divide mixture evenly among 8-10 cups (about 2 tablespoons per cup). Press down firmly using the back of a spoon or bottom of a small glass. Place cups in the fridge while you make the filling.
- Prepare the strawberry layer: In a small bowl, combine diced strawberries, strawberry jam, and lemon juice. Stir gently to coat. Let sit for about 10 minutes to create a syrupy mixture. Set aside.
- Make the chocolate ganache: Place chopped chocolate in a heatproof bowl. Heat ½ cup heavy cream in a small saucepan over medium heat until it just starts to simmer (tiny bubbles around edges). Pour hot cream over chocolate and let sit for 2 minutes without stirring. Then gently whisk until smooth and glossy. Set aside to cool slightly.
- Make the no-bake cheesecake filling: In a large mixing bowl, beat softened cream cheese with granulated sugar and vanilla extract until smooth and creamy (about 2 minutes on medium speed). Scrape down sides and bottom of bowl. In a separate bowl, whip cold heavy cream and powdered sugar together until stiff peaks form. Gently fold whipped cream into cream cheese mixture in three additions using a spatula, folding gently until no white streaks remain. The mixture should be light, fluffy, and smoo…
- Layer everything together: Take cups out of the fridge. Start with a layer of cheesecake filling (about 2 tablespoons per cup), spread evenly over crust. Add a layer of strawberry mixture (about 1 tablespoon per cup). Add another layer of cheesecake filling. Finally, spoon chocolate ganache over the top, spreading gently to the edges so it drips down the sides slightly.
- Chill and set: Cover each cup with plastic wrap or a lid and refrigerate for at least 4 hours, but overnight is better. When ready to serve, top with fresh strawberry slices, chocolate shavings, and a dollop of whipped cream if desired.
Notes
Room temperature cream cheese is non-negotiable for a smooth filling. Leave it on the counter for 30-45 minutes before starting. For best results, chill the cups overnight. Do not freeze as texture will become grainy. For gluten-free, use gluten-free chocolate cookies for the crust. For dairy-free, use dairy-free cream cheese and coconut cream instead of heavy cream. Store covered in refrigerator for up to 4 days.
Nutrition
- Serving Size: 1 cheesecake cup
- Calories: 385
- Sugar: 22
- Sodium: 220
- Fat: 28
- Saturated Fat: 16
- Carbohydrates: 32
- Fiber: 2
- Protein: 6
Keywords: no-bake cheesecake, chocolate strawberry cheesecake, easy dessert, no-bake dessert, cheesecake cups, individual desserts, party dessert


