My neighbor, Mrs. Kowalski, watched me one November afternoon as I wrestled with a massive turkey, a bag of stuffing mix, and a toddler who was determined to crawl into the oven. She didn’t say anything at first. She just stood at the chain-link fence between our yards, shaking her head with this knowing little smile. Then she walked over, picked up my son, and said, “You are making this too hard. Come over tomorrow. I will show you something that actually works for little ones.”
I showed up the next day feeling a bit defeated, honestly. Thanksgiving with a two-year-old felt more like a wrestling match than a holiday. Mrs. Kowalski, who had raised four kids and now had a small army of grandkids, pulled out a mixing bowl and started talking about stuffing. But not the kind that gets crammed inside a bird. No, she made these perfect little bite-size balls — golden, crispy on the outside, soft and herby on the inside. She called them “hand food for small people.”
I watched her work, and I mean really watched. She didn’t measure anything precisely. She used her hands. She let me taste the mixture raw (yes, before the egg went in) and asked if it needed more sage. She told me about the time she forgot the butter entirely and used bacon grease instead — which, let me tell you, was apparently a family legend. The whole thing took maybe twenty minutes of active work, and the rest was just oven time while her grandkids played in the yard.
That day changed how I approached holiday cooking. Maybe you have been there — trying to make everything perfect while a tiny human is pulling on your pant leg. These stuffing balls became our family’s solution. They are everything a parent needs: easy to grab, impossible to spill, and actually delicious. I have made them for three Thanksgivings now, and honestly, they are the first thing to disappear from the table every single time.
Why You’ll Love This Recipe
Let me tell you why these little guys have become a staple in my kitchen. They solve so many problems at once, and honestly, that is the kind of recipe we all need in our back pocket.
- Kid-Approved and Parent-Saved: These are literally designed for small hands. No forks required, no messy plates, no “I don’t like this” drama. My kids grab them off the tray like they are snacks, not realizing they are eating stuffing.
- Budget-Friendly Ingredients: Everything on the list is affordable and easy to find. Sausage, bread cubes, some herbs, an egg or two. No fancy trips to specialty stores, no expensive ingredients that get used once and forgotten.
- Make-Ahead Magic: You can prep these the night before and just pop them in the oven when you are ready. For busy holidays, this is a game-changer. I have even frozen them raw and baked them straight from the freezer with great results.
- Perfect for Picky Eaters: The texture is soft but not mushy, the flavor is savory without being overwhelming, and the shape is fun. I have yet to meet a kid who turns these down.
- Reheats Like a Dream: Leftovers? Yes, please. These warm up in minutes and taste almost as good as fresh. They are perfect for lunch the next day or for packing in school lunches.
What makes this recipe different from all the other stuffing recipes out there? It is the ratio. Most stuffing recipes are too wet or too dry, and they fall apart when you try to shape them. I have tested this dozens of times to get the perfect balance — enough moisture to hold together, but not so much that they turn into dense little rocks. The sausage adds fat and flavor that keeps them tender, and the herbs are measured so they taste like Thanksgiving without being overpowering.
This isn’t just another version of stuffing. It is the version that works for real families on real budgets with real picky eaters. And honestly? It is the kind of recipe that makes you close your eyes after the first bite because it tastes exactly like comfort should.
What Ingredients You Will Need
This recipe uses simple, honest ingredients that come together to create something genuinely special. Most of these are probably already in your pantry or fridge, which is exactly how I like to cook.
For the Stuffing Balls
- 1 pound ground pork sausage (mild or breakfast style — I prefer Johnsonville or Jimmy Dean for consistent flavor; avoid spicy varieties unless your kids handle heat well)
- 4 cups dry bread cubes (store-bought stuffing mix works perfectly here; I use Pepperidge Farm herb-seasoned cubes for extra flavor)
- 1 medium yellow onion, finely diced (about 1 cup — dice them small so kids don’t notice big chunks)
- 2 celery stalks, finely diced (about 1/2 cup — adds that classic stuffing crunch without being obvious)
- 3 cloves garlic, minced (or 1 teaspoon garlic powder if you are in a rush)
- 2 large eggs, lightly beaten (acts as the binder — crucial for keeping the balls together)
- 1/2 cup unsalted butter, melted (adds richness and helps with browning; salted butter works too, just reduce added salt)
- 1 1/2 cups chicken broth (low-sodium is best so you can control the salt; vegetable broth works for a lighter flavor)
- 2 teaspoons dried sage (the backbone of any good stuffing — do not skip this)
- 1 teaspoon dried thyme (adds earthiness without being overpowering)
- 1/2 teaspoon dried rosemary, crushed (just a hint — too much can be piney and strong for kids)
- 1/2 teaspoon salt (adjust based on your sausage and broth — taste the mixture before baking)
- 1/4 teaspoon black pepper (go easy if your kids are sensitive to spice)
- 2 tablespoons fresh parsley, chopped (optional but nice for color and freshness)
Ingredient Tips from My Kitchen
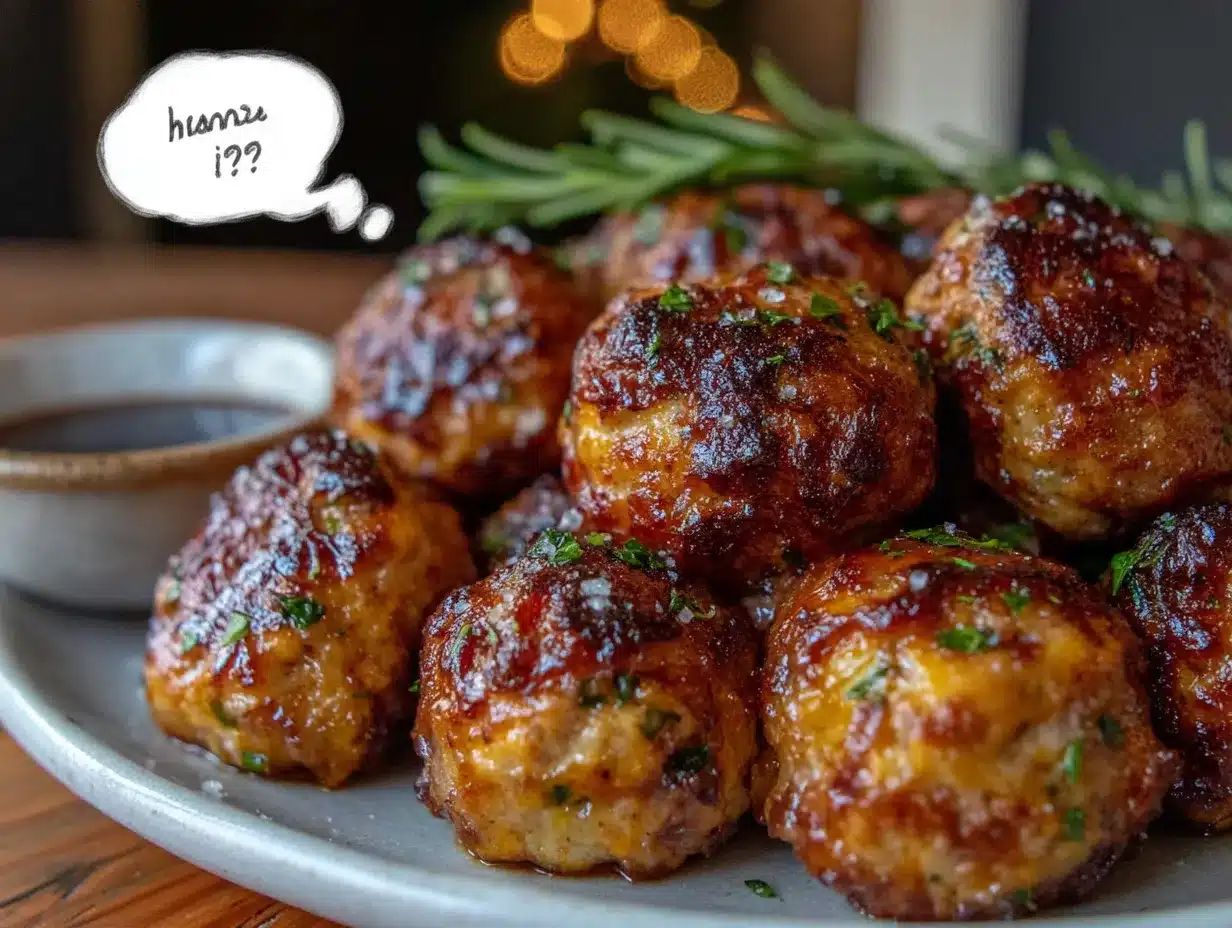
I have learned a few things the hard way. Once I used hot Italian sausage because it was on sale, and my three-year-old cried after one bite. Stick with mild or breakfast sausage — it has the right balance of savory and sweet without any heat. If you want to use turkey sausage for a lighter option, go ahead, but add an extra tablespoon of butter to compensate for the lower fat content.
The bread cubes matter more than you think. If you use fresh bread, toast it first or let it sit out overnight. Stale, dry bread absorbs the broth without turning into paste. Wet bread makes dense, heavy stuffing balls. Dry bread makes light, fluffy ones. Trust me on this one.
For the herbs, dried works beautifully here. Fresh herbs are lovely if you have them, but dried sage and thyme are more concentrated and consistent. I buy my dried herbs from the bulk section at the grocery store — they are cheaper and I can get exactly what I need.
Equipment Needed
You do not need a fancy kitchen for this recipe. Here is what you will need:
- Large mixing bowl (big enough to get your hands in there — I use my grandmother’s old ceramic bowl, but any large bowl works)
- Baking sheet (a standard half-sheet pan is perfect; line it with parchment paper for easy cleanup)
- Parchment paper (non-negotiable in my kitchen — prevents sticking and makes cleanup a breeze)
- Chef’s knife and cutting board (for dicing the onion and celery)
- Measuring cups and spoons (I have a set of magnetic ones that stick to my fridge — so handy)
- Cookie scoop or small ice cream scoop (optional but brilliant for getting uniform-sized balls; I use a #40 scoop which gives about 2 tablespoons per ball)
- Spatula (for transferring the baked balls to a serving platter)
If you do not have a cookie scoop, just use your hands. Wet your hands slightly with cold water before rolling — it keeps the mixture from sticking to your fingers. A friend of mine uses a melon baller and says it works perfectly. Honestly, I have made these with just my hands and a spoon more times than I can count, and they turn out great every time.
Preparation Method
Let me walk you through this step by step. I have made these so many times that I could do it in my sleep, but I remember how intimidating new recipes can feel. Take your time, and do not stress — this is supposed to be fun.
- Preheat your oven to 375°F (190°C). Line a baking sheet with parchment paper and set it aside. Getting the oven hot before you start mixing saves time later.
- Cook the sausage. In a large skillet over medium heat, cook the ground sausage, breaking it up with a spatula as it browns. This takes about 5-7 minutes. You want it fully cooked and crumbly, not pink in the middle. Drain off any excess fat, but leave a little in the pan for flavor. Let the sausage cool for a few minutes — you do not want it hot when you add the eggs, or they will scramble.
- Sauté the vegetables. In the same skillet (with the leftover sausage fat), add the diced onion and celery. Cook over medium heat for 4-5 minutes until they are soft and translucent. The onion should look glassy, not brown. Add the minced garlic and cook for another 30 seconds until fragrant. Remove from heat and let cool slightly.
- Combine the dry ingredients. In your large mixing bowl, add the dry bread cubes, dried sage, dried thyme, crushed rosemary, salt, and pepper. Toss everything together with your hands or a spoon so the herbs are evenly distributed. This step is important — you do not want one stuffing ball to be loaded with sage while another has none.
- Add the wet ingredients. Pour the melted butter and chicken broth over the bread cubes. Toss gently to coat. The bread should be moist but not soggy. If it looks dry, add another tablespoon of broth. If it looks soupy, add a handful more bread cubes. You are looking for the texture of wet sand — it should hold together when squeezed.
- Mix in the sausage and vegetables. Add the cooked sausage, sautéed onion and celery, and beaten eggs. Use your hands to mix everything together — honestly, hands work best here. Squeeze the mixture gently as you mix to help it bind. Taste a tiny bit (without the egg if you are worried about raw egg) and adjust seasoning if needed.
- Shape the balls. Using your cookie scoop or your hands, form the mixture into 1.5-inch balls (about 2 tablespoons each). Place them on the prepared baking sheet, spacing them about 1 inch apart. They will not spread much, so you can fit them fairly close together. Wet your hands slightly if the mixture sticks to your fingers.
- Bake. Place the baking sheet in the preheated oven and bake for 18-22 minutes, or until the stuffing balls are golden brown and crispy on the outside. Halfway through baking, rotate the pan for even browning. You will know they are done when the edges look crispy and the centers feel firm when lightly pressed.
- Rest and serve. Let the stuffing balls rest on the baking sheet for 5 minutes before transferring them to a serving platter. This helps them set and makes them easier to handle. Serve warm or at room temperature.
One thing I learned the hard way: do not overcrowd the pan. The first time I made these, I crammed them all onto one sheet, and they steamed instead of crisping. They were still tasty, but they lacked that beautiful golden crust. Give them breathing room, and you will be rewarded with perfect little crispy balls.
Cooking Tips & Techniques
I have made every mistake in the book with this recipe, so let me save you some trouble. Here is what I have learned:
Moisture is everything. If your mixture feels too dry, add broth one tablespoon at a time until it holds together. If it feels too wet, add more bread cubes. The perfect texture is like damp sand — it should clump when squeezed but not release liquid. I once added too much broth and ended up with stuffing pancakes instead of balls. They tasted fine, but they were flat and sad-looking.
Temperature matters. Cold ingredients do not mix as well. Let your eggs come to room temperature before adding them. If you forget (which I do constantly), put them in a bowl of warm water for 5 minutes. Same with the broth — warm it slightly so it absorbs into the bread evenly instead of creating cold pockets.
Use your hands. I know it is messy, but your hands are the best tool for mixing stuffing. A spoon does not distribute the sausage and herbs evenly. Plus, you can feel the texture and know exactly when it is right. Keep a bowl of water nearby to rinse off between steps.
Make them uniform. Consistent size means consistent cooking. If some balls are bigger than others, the small ones will burn while the big ones stay undercooked. A cookie scoop is worth the investment here. I use a #40 scoop, and it gives me exactly 24 balls every time.
Do not skip the rest. Letting them sit for 5 minutes after baking is not just for show. It allows the internal temperature to even out and the structure to set. If you serve them immediately, they might fall apart. Patience pays off.
Variations & Adaptations
One of the best things about this recipe is how flexible it is. Here are some ways I have adapted it over the years:
Gluten-Free Version: Swap the regular bread cubes for gluten-free bread cubes or crushed gluten-free crackers. I have used Schar brand bread with great results. Toast the cubes in the oven first to dry them out, since gluten-free bread tends to be softer and more absorbent.
Vegetarian Option: Omit the sausage and add an extra cup of finely chopped mushrooms (cremini or button work best) sautéed with the onions and celery. Add 1/4 cup of nutritional yeast for a savory, cheesy flavor that mimics the umami of sausage. My vegetarian sister-in-law loves this version.
Cheesy Addition: Stir in 1/2 cup of shredded Parmesan or sharp cheddar cheese with the bread cubes. The cheese adds richness and helps bind the balls together. My kids go crazy for this version — they call them “cheesy stuffing bites.”
Herb Variations: Not a fan of sage? Use 1 teaspoon of dried marjoram or 2 teaspoons of fresh chopped rosemary instead. I made a version with fresh dill and lemon zest last spring, and it was surprisingly bright and fresh — perfect for Easter dinner.
Air Fryer Method: Preheat your air fryer to 375°F (190°C). Arrange the stuffing balls in a single layer in the basket (work in batches if needed). Cook for 10-12 minutes, shaking the basket halfway through, until golden and crispy. This method is faster and gives an even crispier exterior. I use this on busy weeknights when I do not want to heat up the whole oven.
Serving & Storage Suggestions
These stuffing balls are incredibly versatile when it comes to serving. Here is how I handle them:
Serving Temperature: They are delicious warm, straight from the oven, but also surprisingly good at room temperature. For holiday buffets, I often set them out on a platter and let people grab them as they walk by. They hold up well for hours without getting soggy.
Presentation Ideas: Arrange them on a wooden board with small bowls of gravy and cranberry sauce for dipping. Kids love the dip-and-eat aspect. For a fancier look, sprinkle fresh parsley or chives over the top just before serving. I sometimes serve them on a bed of arugula for color contrast.
What to Serve With: These pair beautifully with roasted turkey or chicken, but they are also great alongside a simple green salad or roasted vegetables. For a quick weeknight meal, I serve them with a side of applesauce — the sweet-tart flavor complements the savory stuffing perfectly.
Storage: Store leftover stuffing balls in an airtight container in the refrigerator for up to 4 days. Layer them with parchment paper between each layer to prevent sticking. They actually taste better the next day as the flavors meld together.
Freezing: These freeze beautifully. Place the baked and cooled stuffing balls on a baking sheet in a single layer and freeze for 1-2 hours until solid. Transfer to a freezer-safe bag or container. They will keep for up to 3 months. To reheat, bake from frozen at 350°F (175°C) for 15-20 minutes, or microwave for 1-2 minutes per serving.
Reheating Tips: For the crispiest results, reheat in the oven or air fryer rather than the microwave. If using the microwave, place them on a paper towel-lined plate and heat in 30-second intervals. They will be softer but still delicious.
Nutritional Information & Benefits
Here is the estimated nutritional breakdown for one stuffing ball (based on 24 servings):
| Nutrient | Amount Per Serving |
|---|---|
| Calories | 145 |
| Total Fat | 9g |
| Saturated Fat | 4g |
| Cholesterol | 35mg |
| Sodium | 320mg |
| Total Carbohydrates | 12g |
| Dietary Fiber | 1g |
| Sugars | 2g |
| Protein | 6g |
These stuffing balls offer some surprising nutritional benefits. The sausage provides protein and iron, which is great for growing kids. The celery and onion add fiber and antioxidants. The herbs — sage, thyme, and rosemary — are packed with anti-inflammatory compounds. And because they are baked instead of fried, they are lower in fat than many other holiday appetizers.
If you are watching your sodium, use low-sodium broth and sausage, and reduce the added salt. You can also swap the pork sausage for turkey sausage to lower the fat content. For a dairy-free version, use olive oil instead of butter — it works beautifully and adds a different flavor dimension.
One thing I appreciate about this recipe is that it feels indulgent without being over-the-top. You get the comfort of traditional stuffing with a lighter, more manageable format. It is the kind of food that makes you feel good about feeding your family.
Conclusion
These kid-friendly sausage and herb stuffing balls have become more than just a recipe in my house. They are a solution to the holiday chaos, a way to include everyone at the table, and honestly, a reminder that cooking does not have to be complicated to be good. Mrs. Kowalski taught me that lesson in her messy, happy kitchen, and I have been passing it on ever since.
I hope you give these a try, whether for Thanksgiving, Christmas, or just a random Tuesday when you need something comforting. Customize them however you like — add more herbs, swap the sausage, make them gluten-free. The recipe is forgiving, and your family will love them no matter what.
When you make them, I would love to hear how they turned out. Leave a comment below and let me know if your kids approved, or if you came up with a fun variation I should try. Tag me in your photos on social media — I love seeing these little golden balls on your tables. Happy cooking, friends!
Frequently Asked Questions
Can I make these stuffing balls ahead of time?
Absolutely. You can assemble the balls, place them on the baking sheet, and refrigerate them covered for up to 24 hours before baking. You can also freeze them unbaked on the sheet, then transfer to a freezer bag. Bake from frozen, adding 5-7 minutes to the cooking time.
Why did my stuffing balls fall apart?
This usually happens when the mixture is too dry or not enough binder was used. Make sure your bread cubes are well-moistened with broth and that the eggs are fully incorporated. If the mixture feels crumbly, add another tablespoon of broth or an extra egg. Also, let them rest after baking to set properly.
Can I use fresh herbs instead of dried?
Yes, but you will need to adjust the amounts. Use three times the amount of fresh herbs as dried. For example, use 2 tablespoons of fresh sage instead of 2 teaspoons dried. Fresh herbs have a milder flavor and more moisture, so you may need to reduce the broth slightly.
How do I make these dairy-free?
Simply swap the butter for olive oil or a dairy-free butter alternative. Use a 1:1 substitution. The texture will be slightly different — a bit less rich — but they will still be delicious. I have used Earth Balance with great results.
Can I make these in a mini muffin tin?
Yes! Grease the tin well and press the mixture into each cup. Bake at 375°F (190°C) for 15-18 minutes. They will come out as perfect little muffin-shaped stuffing bites. Let them cool in the tin for 5 minutes before removing. This method gives you a crispy exterior all around.
Pin This Recipe!

Best Kid-Friendly Sausage & Herb Stuffing Balls Recipe

These bite-sized stuffing balls are golden, crispy on the outside, soft and herby on the inside—perfect for small hands and picky eaters. Made with simple, budget-friendly ingredients, they are a make-ahead holiday lifesaver that reheats beautifully.
- Prep Time: 20 minutes
- Cook Time: 22 minutes
- Total Time: 42 minutes
- Yield: 24 servings 1x
- Category: Side Dish
- Cuisine: American
Ingredients
- 1 pound ground pork sausage (mild or breakfast style)
- 4 cups dry bread cubes (store-bought stuffing mix works perfectly)
- 1 medium yellow onion, finely diced (about 1 cup)
- 2 celery stalks, finely diced (about 1/2 cup)
- 3 cloves garlic, minced (or 1 teaspoon garlic powder)
- 2 large eggs, lightly beaten
- 1/2 cup unsalted butter, melted
- 1 1/2 cups chicken broth (low-sodium preferred)
- 2 teaspoons dried sage
- 1 teaspoon dried thyme
- 1/2 teaspoon dried rosemary, crushed
- 1/2 teaspoon salt
- 1/4 teaspoon black pepper
- 2 tablespoons fresh parsley, chopped (optional)
Instructions
- Preheat your oven to 375°F (190°C). Line a baking sheet with parchment paper and set aside.
- Cook the sausage: In a large skillet over medium heat, cook the ground sausage, breaking it up with a spatula, until fully cooked and crumbly (5-7 minutes). Drain off excess fat, leaving a little for flavor. Let cool for a few minutes.
- Sauté the vegetables: In the same skillet, add the diced onion and celery. Cook over medium heat for 4-5 minutes until soft and translucent. Add the minced garlic and cook for 30 seconds until fragrant. Remove from heat and let cool slightly.
- Combine the dry ingredients: In a large mixing bowl, add the dry bread cubes, dried sage, dried thyme, crushed rosemary, salt, and pepper. Toss to evenly distribute the herbs.
- Add the wet ingredients: Pour the melted butter and chicken broth over the bread cubes. Toss gently to coat. The bread should be moist but not soggy—like wet sand that holds together when squeezed.
- Mix in the sausage and vegetables: Add the cooked sausage, sautéed onion and celery, and beaten eggs. Use your hands to mix everything together, squeezing gently to help it bind. Taste a tiny bit (without egg if concerned) and adjust seasoning if needed.
- Shape the balls: Using a cookie scoop or your hands, form the mixture into 1.5-inch balls (about 2 tablespoons each). Place them on the prepared baking sheet, spacing about 1 inch apart. Wet your hands slightly if the mixture sticks.
- Bake: Place the baking sheet in the preheated oven and bake for 18-22 minutes, or until golden brown and crispy on the outside. Rotate the pan halfway through for even browning.
- Rest and serve: Let the stuffing balls rest on the baking sheet for 5 minutes before transferring to a serving platter. Serve warm or at room temperature.
Notes
For uniform balls, use a #40 cookie scoop (about 2 tablespoons each). If the mixture feels too dry, add broth 1 tablespoon at a time; if too wet, add more bread cubes. Let the eggs and broth come to room temperature for better mixing. Do not overcrowd the pan—give the balls breathing room for a crispy crust. Let them rest 5 minutes after baking to set.
Nutrition
- Serving Size: 1 stuffing ball
- Calories: 145
- Sugar: 2
- Sodium: 320
- Fat: 9
- Saturated Fat: 4
- Carbohydrates: 12
- Fiber: 1
- Protein: 6
Keywords: stuffing balls, kid-friendly stuffing, sausage stuffing, Thanksgiving side dish, easy stuffing recipe, make-ahead stuffing, holiday appetizer


