The Panic Before the Party
The Day of the Dead potluck at my apartment complex was in six hours, and I’d completely forgotten. Everyone else would be bringing their abuela’s mole, their tia’s tamales, or at the very least, a store-bought sugar skull that looked like a museum piece. I had a bag of flour, a stick of butter that was slightly too soft, and a knot in my stomach the size of a small pumpkin. My neighbor, Ricardo, had texted the group chat a photo of his three-day mole rojo simmering away. I almost called in sick. But then I remembered the pan de muerto my friend Elena had made last year — that soft, orange-kissed bread, dusted with sugar, that everyone fought over. I didn’t have her recipe, but I had a general idea, a prayer, and absolutely nothing to lose. I mean, honestly, what was the worst that could happen? A dense, sad bread? That was still better than showing up empty-handed. So I rolled up my sleeves, cranked up the Latin music, and started mixing. And let me tell you, when I walked into that potluck with a slightly lopsided but beautifully fragrant loaf, the reaction was something else. It wasn’t the showstopper I’d planned — it was the underdog that stole the whole show. That’s how this bread became my go-to for hosting, and maybe it’ll become yours too.
Why You’ll Love This Recipe
This isn’t just another sweet bread recipe. This is the one that makes you look like you spent all day in the kitchen, even if you were frantically cleaning the bathroom an hour before guests arrived. As someone who’s tested this recipe through three failed batches (one was so dry it could have been a doorstop), I can tell you — this version is bulletproof.
- Deceptively Simple : The dough comes together in about 20 minutes of active work. The yeast does the heavy lifting while you set up your ofrenda or prep the sangria.
- Pantry-Friendly Ingredients : No trips to a specialty market. Flour, butter, eggs, sugar, orange zest — you probably have most of this right now.
- Perfect for Hosting : This bread is a conversation starter. Guests will ask for the recipe before they even finish their first slice.
- Crowd-Pleasing Flavor : It’s not too sweet, not too bready — it’s that perfect middle ground that works for breakfast, dessert, or with a cup of coffee after dinner.
- Visually Stunning : Those bone-shaped decorations on top? They look incredibly impressive, but they’re actually just rolled dough. Your guests don’t need to know that.
What makes this recipe different from the dozens of others out there is the technique. I’ve dialed in the hydration level so the dough is soft but not sticky, and I’ve added a touch of orange blossom water that makes the whole kitchen smell like a Mexican bakery. This isn’t just another version — it’s the version that makes you close your eyes after the first bite. It’s comfort food with a cultural soul, and it’s perfect for impressing a crowd without breaking a sweat.
What Ingredients You Will Need
This recipe uses simple, honest ingredients that come together to create something truly special. Most of these are pantry staples, which is exactly what you want when you’re hosting and have a hundred other things on your mind.
For the Dough
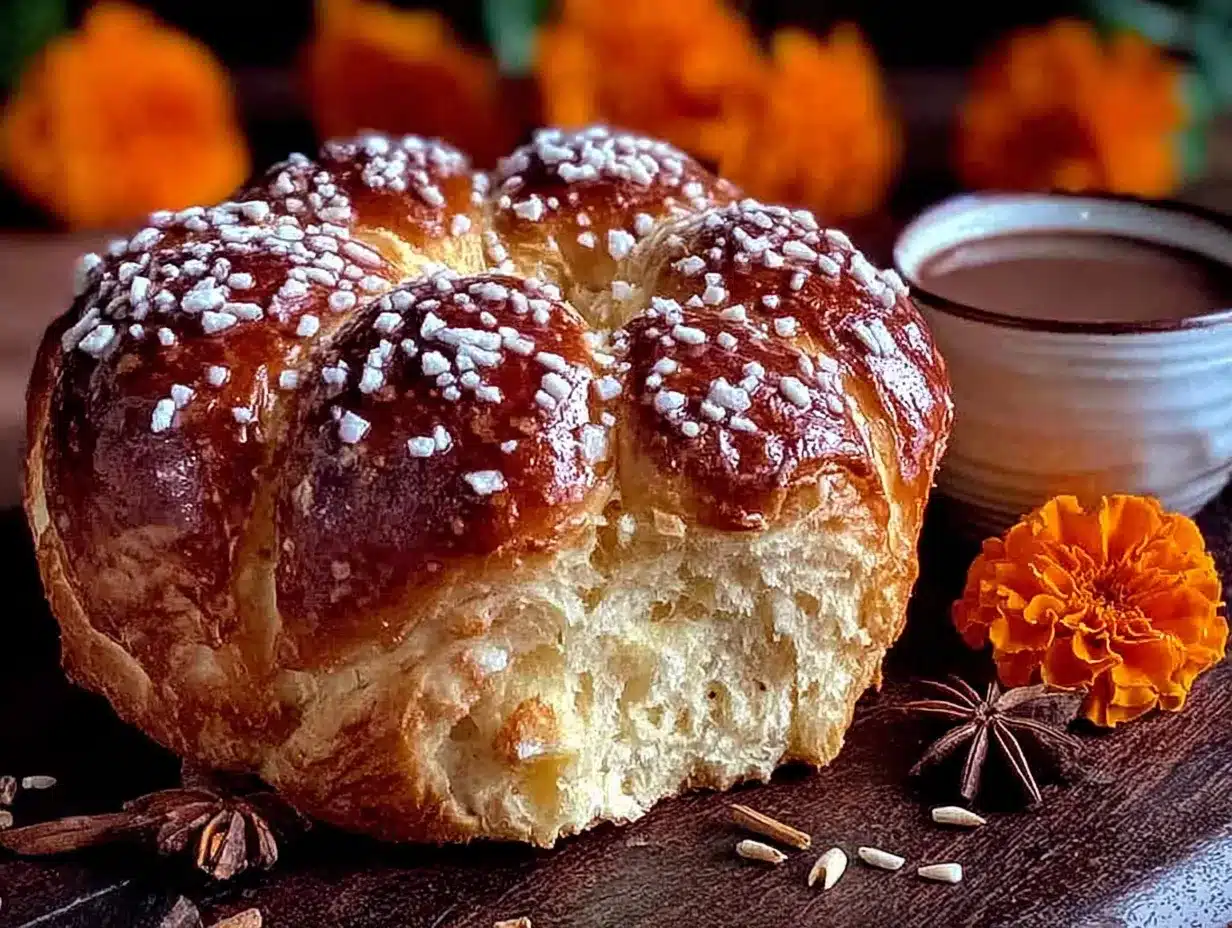
- 4 cups all-purpose flour (500g) — I recommend Gold Medal or King Arthur for consistent results. Don’t use bread flour here; it makes the bread too chewy.
- 1/2 cup granulated sugar (100g) — Regular white sugar works perfectly. The sugar does more than sweeten; it helps the yeast activate and gives the crust that golden color.
- 1 packet active dry yeast (2 1/4 teaspoons) — I use Fleischmann’s. Make sure it’s not expired, or your bread won’t rise. Trust me on this one.
- 1/2 teaspoon salt — Fine sea salt is best. It balances the sweetness and strengthens the gluten structure.
- 3 large eggs, room temperature — Cold eggs will shock the yeast. Leave them out for 30 minutes before you start.
- 1/2 cup unsalted butter (113g), softened — Let it sit out for at least an hour. You want it soft enough to leave a fingerprint when you press it.
- 1/2 cup warm milk (120ml) — Whole milk gives the richest flavor, but 2% works fine. Warm it to about 110°F — warmer than your wrist but not hot.
- 1 tablespoon orange zest — From about 2 medium oranges. This is non-negotiable. The citrus is what makes pan de muerto taste like pan de muerto.
- 1 teaspoon orange blossom water (optional but highly recommended) — You can find this in the international aisle or a Latin market. It adds a floral note that’s utterly intoxicating.
- 1 teaspoon vanilla extract — Pure vanilla, not imitation. It makes a difference.
For the Glaze and Topping
- 1/4 cup unsalted butter (56g), melted
- 1/4 cup granulated sugar (50g) — Mixed with 1 teaspoon of cinnamon if you’re feeling fancy
- Optional: 2 tablespoons orange juice — For a citrusy glaze variation
Ingredient Selection Tips
When you’re shopping for this recipe, look for oranges that feel heavy for their size — they’ll have more juice and zest. If you can’t find orange blossom water, just use an extra teaspoon of vanilla extract and another tablespoon of orange zest. The bread will still be delicious, I promise.
Equipment Needed
You don’t need a professional bakery setup for this. Here’s what you’ll actually use:
- Large mixing bowl — Glass or ceramic works best. Avoid metal if you’re proofing the dough in it, as metal can get cold and slow down the rise.
- Stand mixer with dough hook — This is a game-changer. I used to knead by hand, but the stand mixer saves your arms for more important tasks, like greeting guests. If you don’t have one, a wooden spoon and some elbow grease will do.
- Baking sheet — A half-sheet pan is perfect. Line it with parchment paper for easy cleanup.
- Plastic wrap or a clean kitchen towel — For covering the dough while it rises. I prefer a damp towel; it keeps the dough from drying out.
- Pastry brush — For applying the butter glaze. A silicone brush is easier to clean than a natural one.
- Sharp knife or bench scraper — For cutting the dough into those bone shapes. A pizza cutter works in a pinch.
- Cooling rack — Essential for letting the bread cool evenly. If you don’t have one, you can use the oven rack (just make sure the oven is off and cool).
I bought my stand mixer at a thrift store for twenty bucks, and it’s been going strong for five years. Don’t feel pressured to buy fancy equipment — your hands and a good attitude are the most important tools.
Preparation Method
Let’s get to the fun part. I’ve broken this down into clear steps so you don’t feel lost. Take your time, and remember — even if your bread looks a little wonky, it will still taste amazing.
- Activate the yeast (5 minutes): In a small bowl, combine the warm milk, 1 tablespoon of the sugar, and the yeast. Stir gently and let it sit for 5-10 minutes until it becomes foamy and smells like bread. If it doesn’t foam, your yeast is dead. Start over with fresh yeast — I’ve learned this the hard way.
- Mix the dry ingredients (2 minutes): In your large mixing bowl (or stand mixer bowl), whisk together the flour, remaining sugar, salt, and orange zest. Make a well in the center.
- Combine the wet ingredients (3 minutes): In a separate bowl, whisk the eggs, vanilla extract, and orange blossom water (if using) until smooth. Pour this mixture into the well of the dry ingredients, then add the yeast mixture.
- Knead the dough (8-10 minutes): If using a stand mixer, attach the dough hook and mix on low speed for 2 minutes, then medium speed for 6-8 minutes. The dough should pull away from the sides of the bowl and feel smooth and elastic. If kneading by hand, turn the dough onto a floured surface and knead for 10-12 minutes. You’ll know it’s ready when you press a finger into the dough and it springs back slowly.
- Add the butter (3 minutes): With the mixer running on low, add the softened butter one tablespoon at a time. Yes, this seems weird, but trust me. The dough will look greasy and might separate — keep mixing. After about 3 minutes, it will come back together into a silky, soft dough. This is the secret to that tender crumb.
- First rise (1.5 – 2 hours): Shape the dough into a ball and place it in a lightly oiled bowl. Cover with plastic wrap or a damp towel and let it rise in a warm, draft-free place. I usually put it in my oven with the light on (but the oven off!). It should double in size.
- Shape the loaf (15 minutes): Punch down the dough gently. Reserve about 1/4 of the dough for the decorations. Shape the remaining dough into a round loaf and place it on your parchment-lined baking sheet.
- Make the bone decorations (10 minutes): Divide the reserved dough into 4 equal pieces. Roll each piece into a rope about 6 inches long. Then, roll two smaller ropes for the “teardrop” shapes. Place two ropes across the top of the loaf in an X shape, and two more in an X on the bottom. Place the teardrop shapes in the center. This is the traditional pan de muerto look — it symbolizes the circle of life and death. Don’t stress about perfection; my first attempt looked like a sad spider, and everyone still loved it.
- Second rise (45 minutes – 1 hour): Cover the shaped loaf loosely with plastic wrap and let it rise again until puffy. It won’t double this time, but it should look noticeably larger.
- Bake (25-30 minutes): Preheat your oven to 350°F (175°C). Bake the bread on the middle rack for 25-30 minutes, until the top is deep golden brown and the loaf sounds hollow when you tap the bottom. If the top is browning too fast, tent it loosely with foil after 15 minutes.
- Glaze while warm (5 minutes): As soon as the bread comes out of the oven, brush the top generously with melted butter. Then sprinkle the cinnamon sugar mixture all over. The butter will make the sugar stick and give you that beautiful, crackly crust.
- Cool completely (1 hour): Transfer the bread to a cooling rack. I know it’s tempting to cut into it immediately, but let it cool for at least an hour. The structure needs to set, and the flavors need to meld. Use this time to set up your serving platter and brew some coffee for your guests.
Cooking Tips & Techniques
After making this bread more times than I can count, I’ve collected a few hard-won lessons. Let me save you from my mistakes.
Temperature is everything. The first time I made this, I used milk straight from the fridge. The dough refused to rise, and I ended up with a dense, sad hockey puck. Warm milk (around 110°F) is non-negotiable. If you don’t have a thermometer, test it on your wrist — it should feel like warm bath water, not hot.
Don’t over-flour your surface. This dough is supposed to be soft and slightly tacky. If you add too much flour while kneading, you’ll end up with a dry bread. Instead, oil your hands and the work surface lightly. The dough will be easier to handle, and the bread will stay tender.
The butter trick. Adding butter after the gluten has developed is a classic brioche technique. It gives the bread that rich, almost fluffy texture. Don’t skip this step, and don’t rush it. Let the mixer do the work.
Watch your oven like a hawk. Every oven runs differently. My old apartment oven would burn the bottom of the bread while the top was still pale. I learned to place the baking sheet on the second-to-top rack and rotate it halfway through. Check your bread at 20 minutes and go from there.
One disaster I’ll never forget: I once forgot to add the sugar. The bread rose beautifully, but it tasted like a slightly sweetened dinner roll. My guests were polite, but I knew. Double-check your ingredients before you start mixing — it takes two seconds and saves a lot of heartache.
Variations & Adaptations
This recipe is a beautiful canvas, and you can absolutely make it your own. Here are a few variations I’ve tried and loved:
- Chocolate Pan de Muerto: Replace 1/4 cup of the flour with unsweetened cocoa powder. Add 1/2 cup of dark chocolate chips to the dough after kneading. It’s rich, decadent, and always a hit with the kids (and the adults who pretend they’re too sophisticated for chocolate bread).
- Vegan Version: Substitute the butter with vegan butter (I like Miyoko’s), the eggs with flax eggs (1 tablespoon ground flaxseed + 3 tablespoons water per egg), and the milk with oat milk. The texture will be slightly denser, but the flavor is still incredible. I made this for a vegan friend last year, and she asked for the recipe twice.
- Filled Pan de Muerto: After the first rise, flatten the dough into a disk, spread 1/2 cup of cajeta (goat’s milk caramel) or dulce de leche in the center, then fold the dough around it and shape into a loaf. The filling will create a gooey, surprise center that’s absolutely irresistible.
- Gluten-Free Option: Use a 1:1 gluten-free flour blend that contains xanthan gum (like Bob’s Red Mill). The dough will be stickier, so wet your hands frequently while shaping. The bread won’t rise as high, but the flavor is still spot-on.
Serving & Storage Suggestions
This bread is at its absolute best on the day it’s made, served slightly warm with a cup of Mexican hot chocolate or café de olla. The combination of the sweet, orange-scented bread with the spiced, slightly bitter chocolate is nothing short of magical.
For a Day of the Dead gathering, I like to arrange the bread on a wooden board alongside fresh fruit, a bowl of whipped cream, and a small dish of honey. It makes for a beautiful, shareable centerpiece that guests can pick at throughout the evening.
Storage: If you have leftovers (which is rare, honestly), wrap the bread tightly in plastic wrap and store it at room temperature for up to 3 days. Do not refrigerate it — the fridge will dry it out and make it stale faster.
Freezing: This bread freezes beautifully. Wrap the completely cooled loaf in plastic wrap, then a layer of foil, and freeze for up to 3 months. To serve, thaw at room temperature, then warm in a 300°F oven for 10 minutes. The crust will crisp back up, and the inside will be soft and fragrant.
Reheating: For individual slices, a 15-second zap in the microwave works in a pinch. But if you’re serving guests, I highly recommend warming the whole loaf in the oven. It makes the kitchen smell amazing and brings back that just-baked magic.
Nutritional Information & Benefits
Let’s be real — this is a celebration bread, not a health food. But that doesn’t mean it’s without its merits. Here’s a rough breakdown per serving (1/8 of the loaf):
| Nutrient | Amount |
|---|---|
| Calories | ~320 |
| Total Fat | 14g |
| Saturated Fat | 8g |
| Carbohydrates | 44g |
| Sugar | 16g |
| Protein | 6g |
The orange zest provides a small dose of vitamin C and antioxidants, and the eggs contribute high-quality protein. The butter, while rich, gives you energy that lasts — perfect for a long evening of hosting and celebrating. If you’re watching your sugar intake, you can reduce the glaze sugar by half. The bread itself is only moderately sweet, so the glaze is really just for that beautiful presentation.
This recipe contains gluten, dairy, and eggs. For allergen-friendly versions, check the variations section above.
Conclusion
This pan de muerto has become my signature dish for Day of the Dead gatherings, and honestly, I’m a little proud of that. It started as a panic-induced experiment and turned into the bread that everyone asks for by name. It’s forgiving enough for a beginner but impressive enough for an experienced baker. It connects us to tradition without requiring a lifetime of practice.
I hope you make this for your next celebration — whether it’s Day of the Dead, a fall dinner party, or just a Tuesday that needs a little sweetness. Customize it, make mistakes, and enjoy every bite. And when your guests ask for the recipe (they will), send them my way.
Have you made this bread? I’d love to hear how it turned out. Drop a comment below, share a photo, or tell me about your own Day of the Dead traditions. Happy baking, and que viva la vida!
Frequently Asked Questions
Can I make this bread ahead of time for a party?
Absolutely. You can make the dough through the first rise, punch it down, wrap it tightly in plastic, and refrigerate it overnight. The next day, let it come to room temperature (about 2 hours), then shape, do the second rise, and bake. This actually develops the flavor even more.
Why didn’t my dough rise?
This is the most common issue, and it usually comes down to one of three things: your yeast was expired, your milk was too hot (above 120°F kills yeast), or your kitchen was too cold. Try proofing the dough in your oven with just the light on — it creates a perfect warm environment.
Can I use a bread machine for this recipe?
Can I use a bread machine for this recipe?
You can use the dough cycle on your bread machine for mixing and the first rise. Just add the ingredients in the order recommended by your machine’s manual. After the cycle finishes, take the dough out, shape it, and proceed with the second rise and baking in your oven.
What if I don’t have orange blossom water?
No problem at all. You can skip it entirely and increase the orange zest to 2 tablespoons. Alternatively, add an extra teaspoon of vanilla extract. The bread will still have that beautiful citrus flavor, just without the floral undertone.
How do I get the sugar topping to stick without it falling off?
The key is to brush the melted butter on while the bread is still hot from the oven. The butter melts into the crust and acts like glue for the sugar. Let it sit for 5 minutes before serving, and the sugar will set into a lovely, crackly coating.
Pin This Recipe!
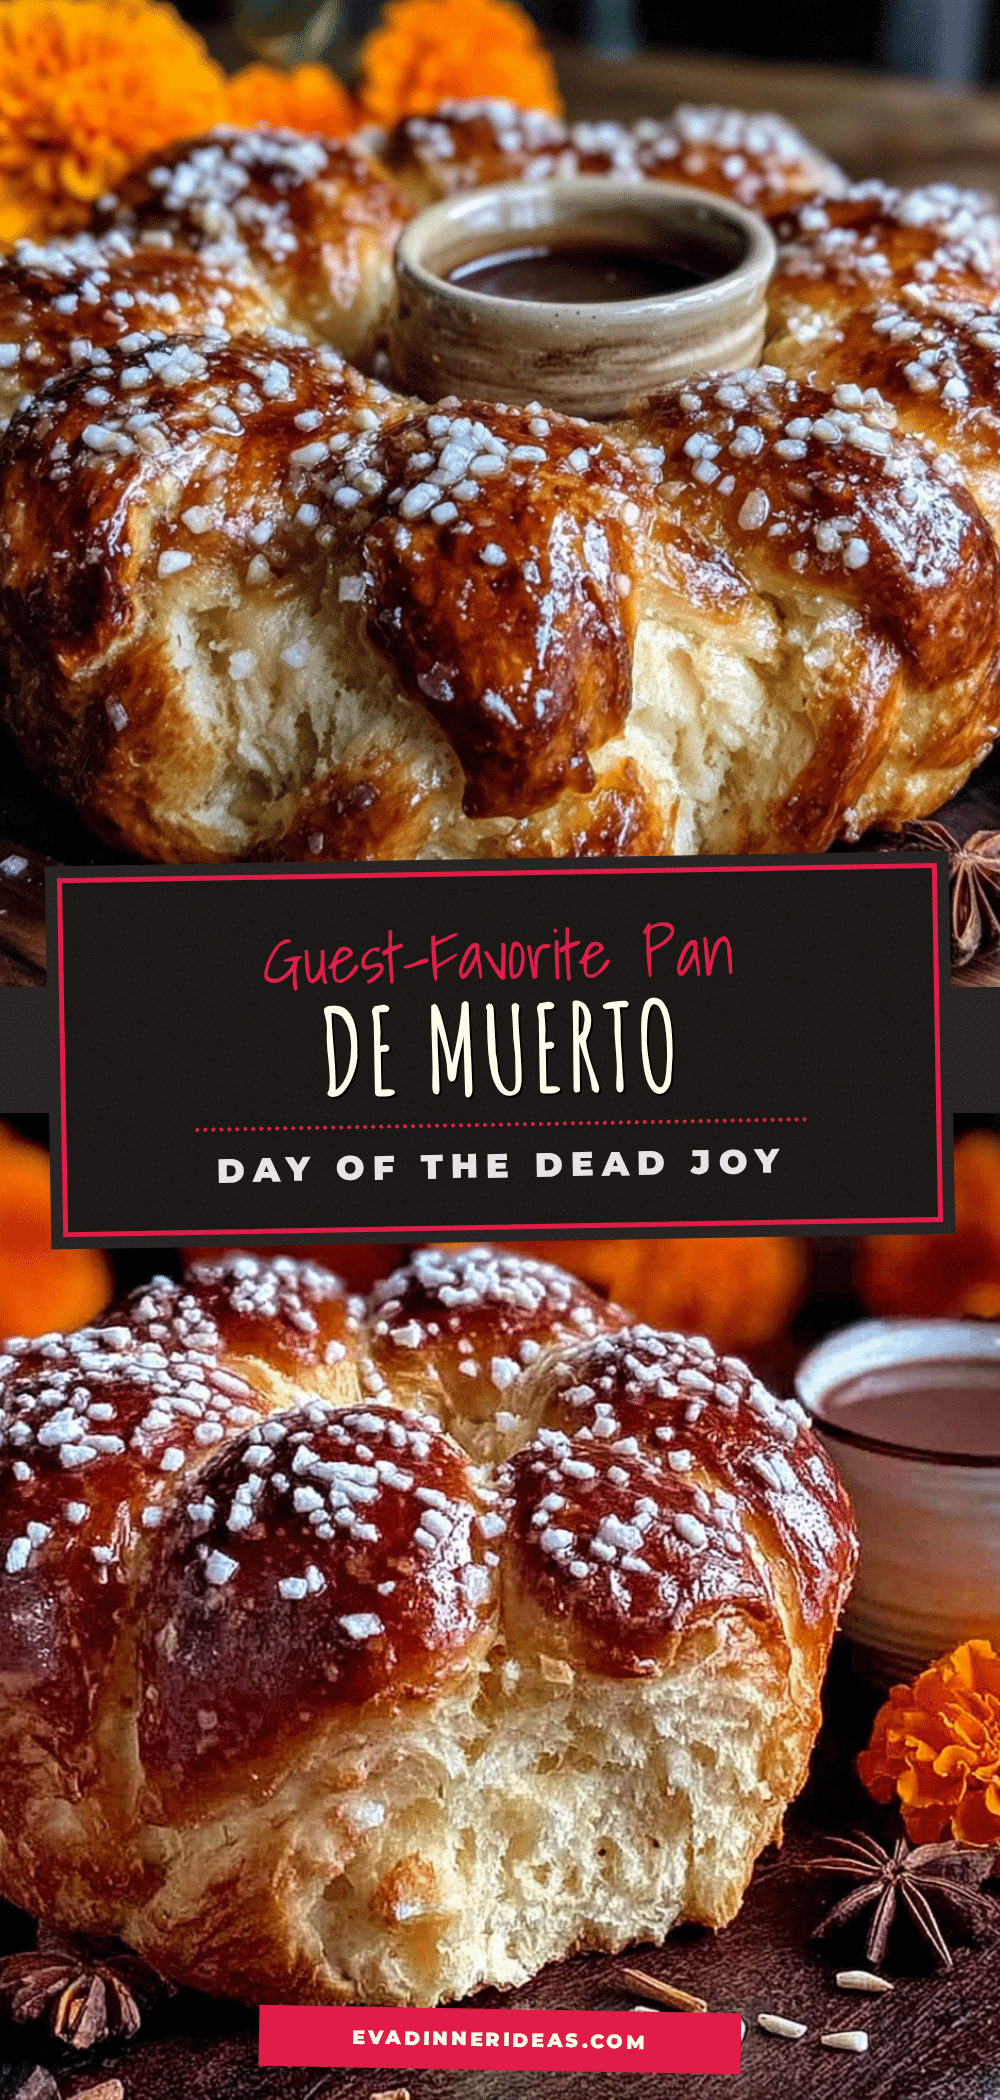
Best Homemade Pan de Muerto for Day of the Dead

This soft, orange-kissed bread dusted with sugar is the perfect centerpiece for Day of the Dead celebrations. It’s deceptively simple to make with pantry-friendly ingredients and yields a crowd-pleasing, visually stunning loaf that tastes like a Mexican bakery.
- Prep Time: 20 minutes
- Cook Time: 30 minutes
- Total Time: 3 hours 50 minutes (including rising time)
- Yield: 8 servings 1x
- Category: Bread
- Cuisine: Mexican
Ingredients
- 4 cups all-purpose flour (500g)
- 1/2 cup granulated sugar (100g)
- 1 packet active dry yeast (2 1/4 teaspoons)
- 1/2 teaspoon fine sea salt
- 3 large eggs, room temperature
- 1/2 cup unsalted butter (113g), softened
- 1/2 cup warm milk (120ml), about 110°F
- 1 tablespoon orange zest (from about 2 medium oranges)
- 1 teaspoon orange blossom water (optional but highly recommended)
- 1 teaspoon pure vanilla extract
- 1/4 cup unsalted butter (56g), melted (for glaze)
- 1/4 cup granulated sugar (50g), mixed with 1 teaspoon cinnamon (for topping)
- 2 tablespoons orange juice (optional, for glaze variation)
Instructions
- Activate the yeast: In a small bowl, combine the warm milk, 1 tablespoon of the sugar, and the yeast. Stir gently and let it sit for 5-10 minutes until foamy.
- Mix the dry ingredients: In a large mixing bowl, whisk together the flour, remaining sugar, salt, and orange zest. Make a well in the center.
- Combine the wet ingredients: In a separate bowl, whisk the eggs, vanilla extract, and orange blossom water (if using) until smooth. Pour into the well of dry ingredients, then add the yeast mixture.
- Knead the dough: If using a stand mixer with dough hook, mix on low for 2 minutes, then medium for 6-8 minutes until smooth and elastic. If kneading by hand, turn onto a floured surface and knead 10-12 minutes.
- Add the butter: With mixer on low, add softened butter one tablespoon at a time. Mix until dough comes together into a silky, soft dough (about 3 minutes).
- First rise: Shape dough into a ball and place in a lightly oiled bowl. Cover with plastic wrap or a damp towel and let rise in a warm, draft-free place for 1.5-2 hours until doubled in size.
- Shape the loaf: Punch down the dough. Reserve about 1/4 of the dough for decorations. Shape remaining dough into a round loaf and place on a parchment-lined baking sheet.
- Make bone decorations: Divide reserved dough into 4 equal pieces. Roll each into a 6-inch rope. Roll two smaller ropes for teardrop shapes. Place two ropes across the top of the loaf in an X shape, two more in an X on the bottom, and teardrop shapes in the center.
- Second rise: Cover shaped loaf loosely with plastic wrap and let rise for 45 minutes to 1 hour until puffy.
- Bake: Preheat oven to 350°F (175°C). Bake on middle rack for 25-30 minutes until deep golden brown and hollow when tapped. Tent with foil after 15 minutes if browning too fast.
- Glaze while warm: As soon as bread comes out of the oven, brush generously with melted butter. Sprinkle cinnamon sugar mixture all over.
- Cool completely: Transfer to a cooling rack and let cool for at least 1 hour before slicing.
Notes
Temperature is key: use warm milk (about 110°F) and room temperature eggs. Don’t over-flour the surface; oil your hands instead. The butter trick (adding after gluten develops) gives a tender crumb. Check your oven at 20 minutes and rotate if needed. For best results, serve slightly warm with Mexican hot chocolate or café de olla.
Nutrition
- Serving Size: 1 slice (1/8 of loaf
- Calories: 320
- Sugar: 16
- Sodium: 180
- Fat: 14
- Saturated Fat: 8
- Carbohydrates: 44
- Fiber: 1
- Protein: 6
Keywords: pan de muerto, Day of the Dead bread, Mexican sweet bread, orange bread, holiday bread, traditional Mexican bread