It was 11:47 PM on a particularly dreary Tuesday in early November, and I had a very specific craving for something warm, cheesy, and corn-based. I didn’t have the heavy cream a normal gratin would need, but I had a can of creamed corn, a block of sharp cheddar, and the impulsive idea to just… make a crust out of it. Honestly, I wasn’t sure if it would be a delicious accident or a total mess, but at that hour, the usual rules don’t apply. The kitchen was quiet except for the hum of the fridge, and I found myself pulling out a mixing bowl, the cheddar block, and a bag of frozen corn, feeling like a mad scientist in my own pajamas.
That first bite, standing over the counter with a fork, was a revelation. The crust was crispy, salty, and almost frico-like, while the filling was sweet, creamy, and surprisingly light. It felt like a hug in a baking dish. I mean, I’ve made a lot of casseroles in my day, but this one—born from a late-night fridge raid and a stubborn craving—became an instant classic in my kitchen. Maybe you’ve been there, staring into the pantry, needing something comforting and not wanting to overthink it. This is that recipe. The one you make when you need a little warmth, a little nostalgia, and a whole lot of cheesy goodness.
It was 11:47 PM on a particularly dreary Tuesday in early November, and I had a very specific craving for something warm, cheesy, and corn-based. I didn’t have the heavy cream a normal gratin would need, but I had a can of creamed corn, a block of sharp cheddar, and the impulsive idea to just… make a crust out of it. Honestly, I wasn’t sure if it would be a delicious accident or a total mess, but at that hour, the usual rules don’t apply. The kitchen was quiet except for the hum of the fridge, and I found myself pulling out a mixing bowl, the cheddar block, and a bag of frozen corn, feeling like a mad scientist in my own pajamas.
That first bite, standing over the counter with a fork, was a revelation. The crust was crispy, salty, and almost frico-like, while the filling was sweet, creamy, and surprisingly light. It felt like a hug in a baking dish. I mean, I’ve made a lot of casseroles in my day, but this one—born from a late-night fridge raid and a stubborn craving—became an instant classic in my kitchen. Maybe you’ve been there, staring into the pantry, needing something comforting and not wanting to overthink it. This is that recipe. The one you make when you need a little warmth, a little nostalgia, and a whole lot of cheesy goodness.
Why You’ll Love This Recipe
This isn’t just another side dish; it’s the main event on your plate. After testing this recipe a dozen times (and failing on attempt number three when the crust got too dark), I can tell you exactly why it works. It’s the kind of dish that makes you close your eyes after the first bite.
- Quick & Easy: Comes together in under 40 minutes, perfect for a busy weeknight or a last-minute holiday potluck.
- Simple Ingredients: No fancy grocery trips needed. You likely have everything in your fridge and pantry right now.
- Perfect for Cozy Nights: Great for Thanksgiving, Christmas dinner, or just a cold Tuesday when you need a little comfort.
- Crowd-Pleaser: Gets rave reviews from kids and adults alike. It’s sweet, savory, and cheesy—what’s not to love?
- Unbelievably Delicious: The texture combo of the creamy filling and the crispy, salty cheddar crust is next-level comfort food.
What makes this recipe different from the rest? It’s the texture. Most corn casseroles are mushy and one-note. This one has a distinct, crispy, cheesy crust that shatters when you bite into it, contrasting perfectly with the soft, sweet interior. It’s comfort food reimagined—faster, simpler, but with the same soul-soothing satisfaction.
What Ingredients You Will Need
This recipe uses simple, wholesome ingredients to deliver bold flavor and satisfying texture without the fuss. Most of these are pantry staples you probably already have on hand.
For the Corn Filling
- 2 cans (15 oz each) whole kernel corn, drained (I prefer Green Giant or Del Monte; avoid “no salt added” for best flavor)
- 1 can (14.75 oz) creamed corn (This is non-negotiable for the creamy texture)
- 1/2 cup sour cream (Full-fat works best, but Greek yogurt is a great substitute)
- 1/4 cup unsalted butter, melted (Salted butter works too; just skip the added salt later)
- 1 large egg, lightly beaten (Binds the filling together)
- 1/4 cup granulated sugar (Enhances the natural sweetness of the corn)
- 1/4 cup all-purpose flour (Helps thicken the filling)
- 1/2 teaspoon salt (Kosher salt preferred)
- 1/4 teaspoon black pepper
For the Cheddar Crust

- 1 1/2 cups sharp cheddar cheese, freshly shredded (Pre-shredded cheese won’t melt as smoothly; shred your own from a block for the best crust)
- 1/4 cup panko breadcrumbs (Adds extra crunch to the crust)
- 1 tablespoon unsalted butter, melted
Ingredient Tips: For the absolute best texture, use frozen corn that has been thawed and patted dry instead of canned whole kernel corn. In summer, fresh corn cut off the cob is incredible. If you want a little heat, add a pinch of cayenne pepper or smoked paprika to the filling.
Equipment Needed
You don’t need a fancy kitchen to pull this off. Here’s what you’ll need:
- 8×8 inch baking dish (A 9×9 works too, but the casserole will be slightly thinner)
- Large mixing bowl
- Whisk
- Box grater (For shredding the cheese—the microplane is too fine for this job)
- Measuring cups and spoons
Alternative suggestions: No 8×8 dish? Use a 9-inch pie plate or a small cast-iron skillet. The cast iron actually gives you an even crispier crust on the bottom. I’ve used my trusty old Lodge skillet for this, and it works like a charm. Just make sure to grease it well.
Preparation Method
Let’s get cooking. This is a straightforward recipe, but I’ll walk you through every step so you nail it on the first try.
- Preheat your oven to 350°F (175°C). Grease your 8×8 baking dish with butter or non-stick spray. This is crucial—you don’t want that beautiful crust sticking to the pan.
- Make the filling base. In a large mixing bowl, whisk together the melted butter, sour cream, and beaten egg until smooth. It should look pale yellow and creamy. Don’t overmix; just get it combined.
- Add the corn and dry ingredients. Stir in the drained whole kernel corn and the can of creamed corn. Add the sugar, flour, salt, and pepper. Mix until everything is evenly distributed. The mixture will look a little loose and soupy—that’s perfect.
- Pour into the baking dish. Scrape the filling into your prepared dish and spread it into an even layer. Give the dish a gentle tap on the counter to release any air bubbles.
- Bake the filling first. Place the dish on the middle rack and bake for 25 minutes. The filling should be set around the edges but still slightly jiggly in the center. This is how you avoid a mushy casserole.
- Make the cheddar crust. While the filling bakes, combine the shredded cheddar, panko, and melted butter in a small bowl. Toss with your fingers until the breadcrumbs are evenly coated with butter and cheese. It should look like a crumbly, golden topping.
- Add the crust and finish baking. After the 25 minutes, carefully remove the dish from the oven. Sprinkle the cheese mixture evenly over the top. Return to the oven and bake for another 10-12 minutes, until the crust is bubbly, golden brown, and slightly crispy at the edges.
- Cool and serve. Let the casserole cool in the dish for at least 10 minutes before serving. This allows the filling to set up properly. If you cut into it too soon, it will be runny. Trust me on this—I learned the hard way.
Sensory Cues: When it’s done, the kitchen will smell like buttery corn and toasted cheese. The top should be a deep golden brown with darker spots where the cheese has caramelized. You’ll hear a slight crackle when you press on the crust with a spoon.
Cooking Tips & Techniques
I’ve made this casserole more times than I can count, and I’ve learned a few things the hard way. Here’s how to avoid my mistakes.
- Don’t skip the first bake. I tried adding the crust from the start once, thinking it would save time. It didn’t. The crust burned before the filling was set. Baking the filling first ensures it’s cooked through and the crust gets that perfect golden finish.
- Shred your own cheese. Pre-shredded cheese is coated in cellulose to prevent clumping, which means it won’t melt as smoothly. For a crust that’s truly crispy and cohesive, buy a block of sharp cheddar and shred it yourself. It takes two extra minutes and makes a huge difference.
- Let it rest. I know you’ll be tempted to dig in right away, but letting the casserole rest for 10 minutes is non-negotiable. It allows the filling to thicken and the crust to set. If you serve it immediately, you’ll end up with a soupy mess.
- Watch the crust. Ovens vary. If your crust is browning too quickly in the last 10 minutes, tent the dish loosely with foil. You want a deep golden brown, not burnt.
Variations & Adaptations
This recipe is a great base for experimentation. Here are a few ways to make it your own.
- Spicy Southwest Version: Add 1 diced jalapeño (seeds removed), 1/2 teaspoon cumin, and 1/4 cup chopped cilantro to the filling. Use pepper jack cheese in the crust instead of cheddar. This is my personal favorite for summer barbecues.
- Gluten-Free Adaptation: Replace the all-purpose flour with a 1:1 gluten-free baking flour blend. Use gluten-free panko for the crust. It works perfectly and no one will know the difference.
- Loaded Bacon & Chive: Stir 1/2 cup cooked, crumbled bacon and 1/4 cup chopped fresh chives into the filling before baking. The smoky, salty bacon pairs beautifully with the sweet corn.
- Dairy-Free Option: Use a dairy-free sour cream (like Tofutti or Kite Hill), a dairy-free butter substitute, and a plant-based cheddar shred. The texture will be slightly less creamy, but it’s still delicious.
Serving & Storage Suggestions
This casserole is incredibly versatile. Here’s how to serve and store it.
Serving: Serve warm, straight from the oven. It’s fantastic alongside a simple green salad, roasted chicken, or grilled steak. For a holiday table, it pairs beautifully with ham or turkey. I love serving it in the baking dish family-style, with a big spoon for scooping.
Storage: Leftovers keep well in the refrigerator for up to 4 days. Store in an airtight container. The crust will lose some of its crispiness, but the flavor will still be amazing.
Reheating: For best results, reheat in a 350°F oven for 10-15 minutes, or until warmed through. The microwave works in a pinch, but the crust will be soft. If you have an air fryer, reheat at 350°F for 5 minutes to revive the crunch.
Freezing: You can freeze the fully baked and cooled casserole for up to 3 months. Wrap tightly in plastic wrap and then foil. Thaw overnight in the fridge and reheat in the oven. The texture will be slightly softer, but it’s still a wonderful comfort dish.
Nutritional Information & Benefits
Here’s an approximate nutritional breakdown for one serving (based on 8 servings).
- Calories: 310
- Fat: 18g
- Carbohydrates: 32g
- Protein: 9g
- Fiber: 2g
- Sugar: 8g
Health Benefits: Corn is a good source of fiber and antioxidants like lutein and zeaxanthin, which support eye health. The cheese provides calcium and protein. While this is certainly a comfort food, using sour cream instead of heavy cream keeps it a bit lighter than traditional gratins. For a lower-carb option, you can reduce the sugar to 2 tablespoons.
Dietary Considerations: This recipe is vegetarian. To make it gluten-free, follow the adaptations above. It contains dairy and gluten (unless modified).
Conclusion
This Cozy Sweet Corn Casserole with Cheddar Crust is more than just a side dish—it’s a little moment of warmth on a plate. It’s the kind of recipe that feels special enough for a holiday but simple enough for a Tuesday night. I love how forgiving it is; you can tweak the spices, swap the cheese, or add bacon, and it always delivers.
I hope you give this one a try. Whether you’re making it for a crowd or just for yourself on a quiet evening, I think you’ll fall in love with that crispy, cheesy crust and the sweet, creamy filling. If you do make it, I’d love to hear how it turned out. Drop a comment below or tag me in your photos—it honestly makes my day to see your creations. Happy cooking!
Frequently Asked Questions
Can I use frozen corn instead of canned?
Absolutely. Thaw 3 cups of frozen corn and pat it dry with a paper towel to remove excess moisture. Use it in place of the canned whole kernel corn. The creamed corn is still needed for the creamy texture.
Can I make this casserole ahead of time?
Yes, you can assemble the entire casserole (without the crust) up to 24 hours in advance. Cover and refrigerate. When ready to bake, add 10 minutes to the first bake time, then add the crust and finish baking.
Why is my casserole runny?
This usually happens if you don’t let it rest after baking. The filling needs 10 minutes to set up. It could also be from using frozen corn that wasn’t patted dry. Next time, make sure to drain your canned corn well.
Can I use a different cheese for the crust?
Yes! Gouda, Monterey Jack, or a smoked cheddar all work beautifully. Avoid soft cheeses like mozzarella, as they won’t create a crispy crust. A mix of parmesan and cheddar is also fantastic.
Is this recipe spicy?
No, as written, it’s sweet and savory with no heat. If you want a kick, add a diced jalapeño to the filling or use pepper jack cheese in the crust. You can also sprinkle a little smoked paprika on top before baking.
Pin This Recipe!
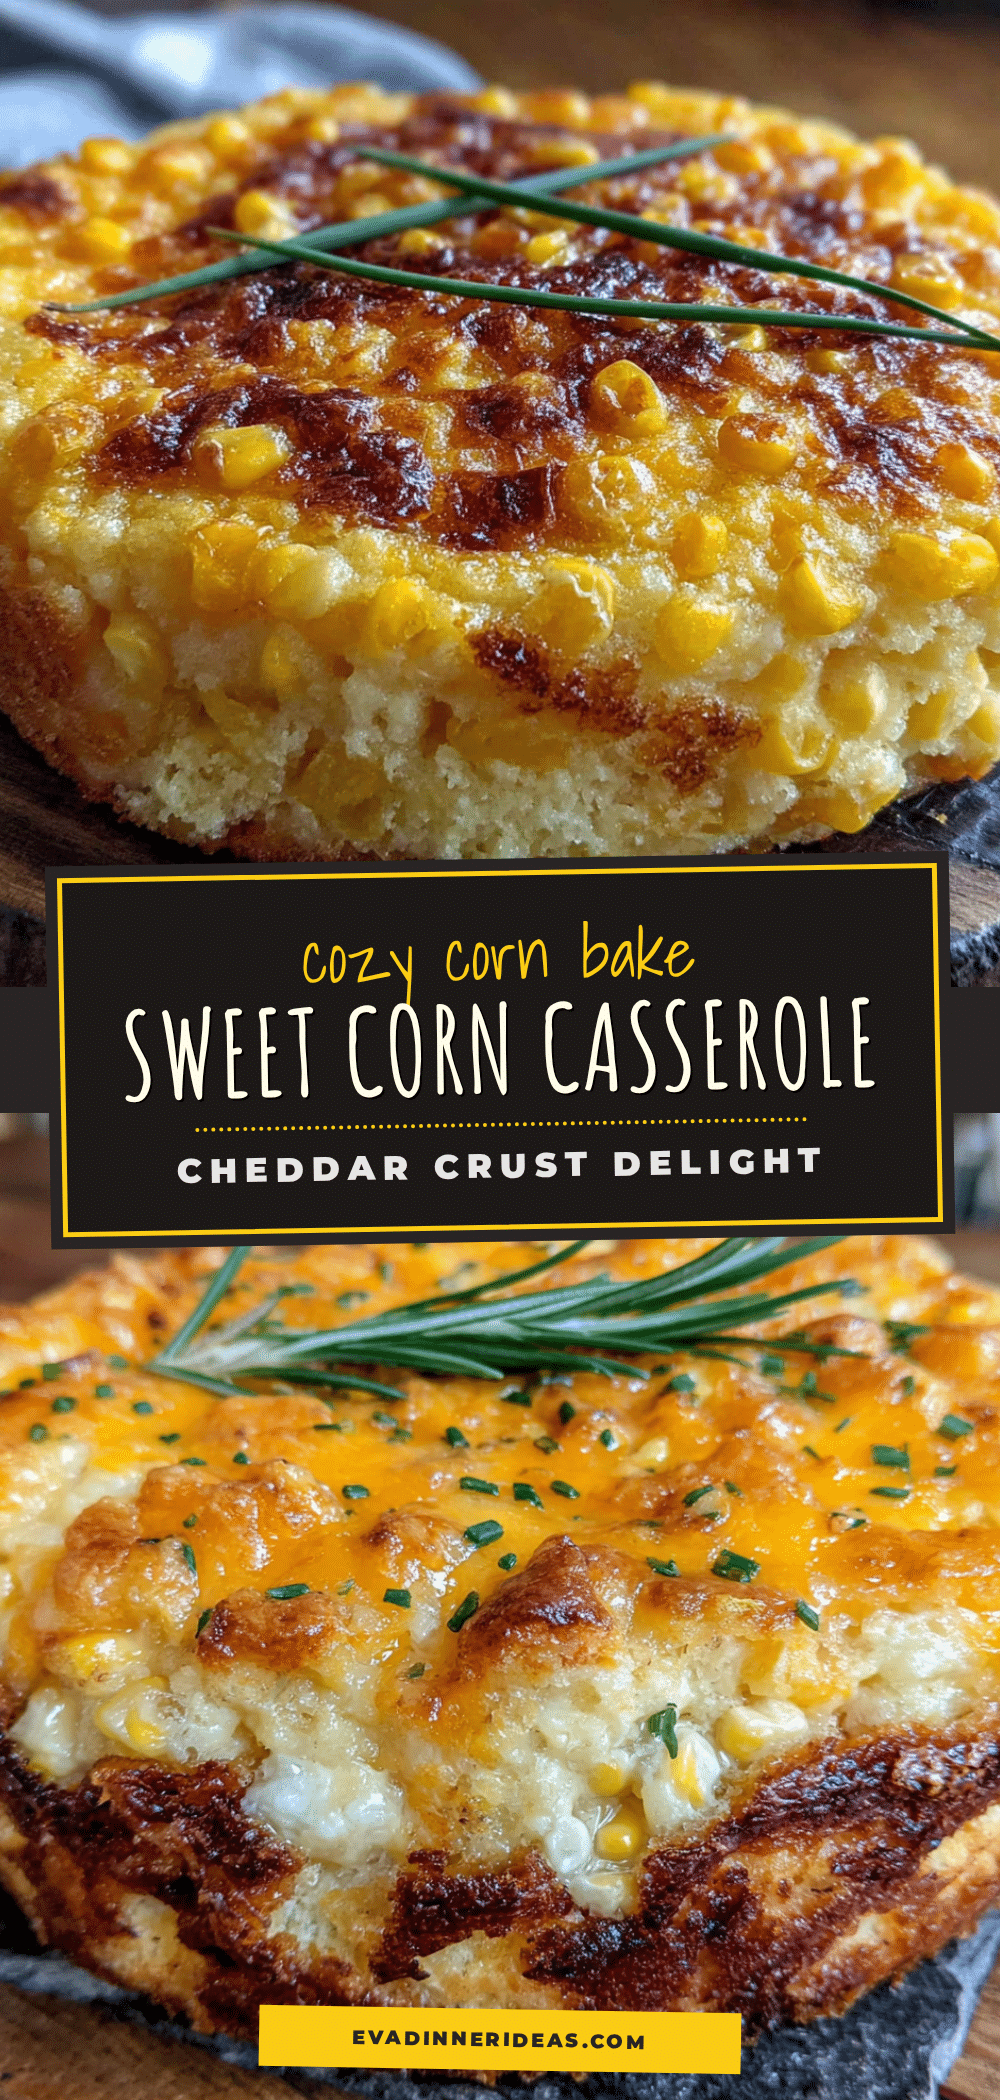
Best Easy Sweet Corn Casserole with Cheddar Crust

A quick and easy corn casserole with a crispy, salty cheddar crust and a sweet, creamy filling. Perfect for weeknights or holiday potlucks.
- Prep Time: 10 minutes
- Cook Time: 35 minutes
- Total Time: 45 minutes
- Yield: 8 servings 1x
- Category: Side Dish
- Cuisine: American
Ingredients
- 2 cans (15 oz each) whole kernel corn, drained
- 1 can (14.75 oz) creamed corn
- 1/2 cup sour cream
- 1/4 cup unsalted butter, melted
- 1 large egg, lightly beaten
- 1/4 cup granulated sugar
- 1/4 cup all-purpose flour
- 1/2 teaspoon salt
- 1/4 teaspoon black pepper
- 1 1/2 cups sharp cheddar cheese, freshly shredded
- 1/4 cup panko breadcrumbs
- 1 tablespoon unsalted butter, melted
Instructions
- Preheat your oven to 350°F (175°C). Grease your 8×8 baking dish with butter or non-stick spray.
- In a large mixing bowl, whisk together the melted butter, sour cream, and beaten egg until smooth.
- Stir in the drained whole kernel corn and the can of creamed corn. Add the sugar, flour, salt, and pepper. Mix until evenly distributed.
- Pour the filling into the prepared dish and spread into an even layer. Tap the dish gently on the counter to release air bubbles.
- Bake on the middle rack for 25 minutes, until the filling is set around the edges but still slightly jiggly in the center.
- While the filling bakes, combine the shredded cheddar, panko, and melted butter in a small bowl. Toss until the breadcrumbs are evenly coated.
- After 25 minutes, remove the dish from the oven. Sprinkle the cheese mixture evenly over the top.
- Return to the oven and bake for another 10-12 minutes, until the crust is bubbly, golden brown, and slightly crispy at the edges.
- Let the casserole cool in the dish for at least 10 minutes before serving.
Notes
For best results, shred your own cheddar cheese from a block. Let the casserole rest for 10 minutes after baking to allow the filling to set. If the crust browns too quickly, tent with foil.
Nutrition
- Serving Size: 1 serving
- Calories: 310
- Sugar: 8
- Sodium: 480
- Fat: 18
- Saturated Fat: 10
- Carbohydrates: 32
- Fiber: 2
- Protein: 9
Keywords: corn casserole, cheddar crust, sweet corn, easy side dish, holiday side, comfort food


