My nephew asked why I couldn’t just wrap the hot dogs in crescent roll dough and call it a day. I started to explain why that wouldn’t work—then stopped. He was eight. He had zero culinary training. And honestly? I was about to spend an hour making some complicated witch’s finger appetizer that nobody would actually eat.
So I did it. I grabbed the can of crescent rolls, tore off those little triangles, and started wrapping them around mini hot dogs like tiny gauze bandages. I mean, the kid was right. Why was I overthinking this? Halloween food for kids should be fun first, fussy second. I popped them in the oven, and ten minutes later, we had mummies. Cute, buttery, slightly crispy mummies with little mustard eyes staring back at us.
I’ll be honest—I felt a little silly that a second-grader had outsmarted me in my own kitchen. But that night, watching those mummy bites disappear from the platter before the first round of trick-or-treaters even showed up, I knew I’d learned something. Sometimes the simplest idea is the one everyone actually wants to eat. Maybe you’ve been there—spending way too long on a recipe when a shortcut would have worked perfectly.
These Easy Mummy Hot Dog Bites for Halloween have become my go-to ever since. They’re not fancy. They’re not complicated. But they are exactly what a Halloween party needs—something that looks festive, tastes great, and doesn’t keep you stuck in the kitchen while everyone else is having fun. Let me tell you, that’s a win I’ll take every October.
Why You’ll Love This Recipe
I’ve tested this recipe more times than I care to admit—through three Halloweens, two different brands of crescent rolls, and one memorable incident where I forgot to cut the dough strips wide enough. (Spoiler: they still tasted fine, they just looked like sad, skinny mummies.) Here’s why these little guys keep showing up on my party platter year after year:
- Quick & Easy: From fridge to table in under 20 minutes. Seriously. You can make these between answering the doorbell for the first round of trick-or-treaters.
- Simple Ingredients: You need exactly three things—mini hot dogs, crescent roll dough, and mustard. That’s it. No weird Halloween-store shopping required.
- Perfect for Halloween Parties: These work for school parties, neighborhood gatherings, or just a fun dinner before the candy hunt begins.
- Crowd-Pleaser: Kids love them because they’re cute. Adults love them because they’re basically pigs in a blanket with a costume. Everyone wins.
- Unbelievably Delicious: There’s something about that flaky, golden crust wrapped around a salty hot dog that just hits different when it looks like a mummy.
What makes this version different from every other mummy dog recipe out there? It’s the dough-to-dog ratio. I spent a good chunk of time figuring out exactly how wide to cut those crescent strips so you get enough flaky layers without overwhelming the hot dog. Too thin and they look like string cheese. Too thick and you’re eating a bread roll with a hot dog hiding somewhere inside. This version hits that sweet spot—enough dough to look wrapped up tight, but not so much that you lose the hot dog flavor.
This recipe is comfort food with a costume—faster than takeout, cuter than a plain hot dog, and somehow just as satisfying as the fancy appetizers you spend an hour on. It’s the kind of food that makes you smile before you even take a bite.
What Ingredients You Will Need
This recipe keeps things refreshingly simple. You don’t need a specialty grocery run or a dozen obscure ingredients. Most of these are probably already in your kitchen right now. The magic happens when you combine them in just the right way.
- Mini hot dogs or cocktail sausages (1 package, about 12-14 ounces): These are the base of your mummies. I prefer the mini smoked sausages from Hillshire Farm for their snappy texture, but any brand works. Look for the little ones that are about two inches long—they’re the perfect size for one-bite appetizers. If you can only find regular hot dogs, just cut them into thirds. Nobody will judge.
- Crescent roll dough (1 can, 8 ounces): This is your mummy wrapping. I’ve tried a few brands over the years, and Pillsbury consistently gives the flakiest, most buttery results. The key is getting the refrigerated kind that comes in a tube—the ones you pop open with that satisfying thwack against the counter. You’ll use the whole can for one package of mini hot dogs.
- Yellow mustard (about 2 tablespoons): This is for the mummy eyes. I know, I know—some people use ketchup or sriracha or even candy eyes. But yellow mustard gives that perfect pale yellow color that looks like little glowing mummy eyes against the golden dough. Plus, the tangy flavor cuts through the richness of the pastry and sausage beautifully. French’s is my go-to because it’s thick enough to stay put without running.
- Optional: Everything bagel seasoning or sesame seeds (1 teaspoon): This is totally optional, but I love sprinkling a little on top before baking. It adds a subtle crunch and makes the mummies look even more textured—like ancient wrappings. If you’re feeding kids who prefer plain, just skip it.
- Optional: Marinara sauce or ranch dressing for dipping: Not technically part of the mummy itself, but let’s be real—everything tastes better with something to dip it in. A small bowl of warm marinara looks like a blood pool (in a fun, not-gross way) and ranch is always a hit with the younger crowd.
One thing I learned the hard way—don’t use the reduced-fat crescent rolls. They don’t brown as nicely and the texture is a little rubbery. Your mummies deserve the full-fat, buttery version. Trust me on this one.
Equipment Needed
You don’t need a fancy kitchen setup for these. I’ve made them in my own cramped apartment kitchen with exactly four tools, and they turned out perfect every time.
- Baking sheet (standard half-sheet size, about 13×18 inches): Line it with parchment paper or a silicone baking mat. The parchment makes cleanup a breeze—just toss it when you’re done. I’ve forgotten the parchment before, and let me tell you, scrubbing baked-on mustard off a pan is not how you want to spend your Halloween evening.
- Sharp knife or pizza cutter: You need something to cut the crescent roll dough into strips. A pizza cutter works best because it glides through the dough without dragging. A sharp chef’s knife works too, just be gentle so you don’t squish the dough.
- Small bowl for mustard: You’ll use this to dip a toothpick or the tip of a knife for dotting on the eyes. A tiny ramekin works perfectly.
- Pastry brush (optional): If you want to brush the dough with egg wash for extra golden color, grab a pastry brush. I usually skip this step because the crescent rolls brown nicely on their own, but it’s a nice touch if you’re feeling fancy.
- Cooling rack: Not strictly necessary, but if you let the mummies cool on a rack instead of the hot baking sheet, the bottoms stay crisp instead of getting soggy. I learned this after one too many limp-bottomed mummies.
Budget-friendly tip: If you don’t have a pizza cutter, a butter knife works fine. Just use a gentle sawing motion. And if you don’t have a cooling rack, just transfer the mummies to a plate after a minute or two on the baking sheet.
Preparation Method
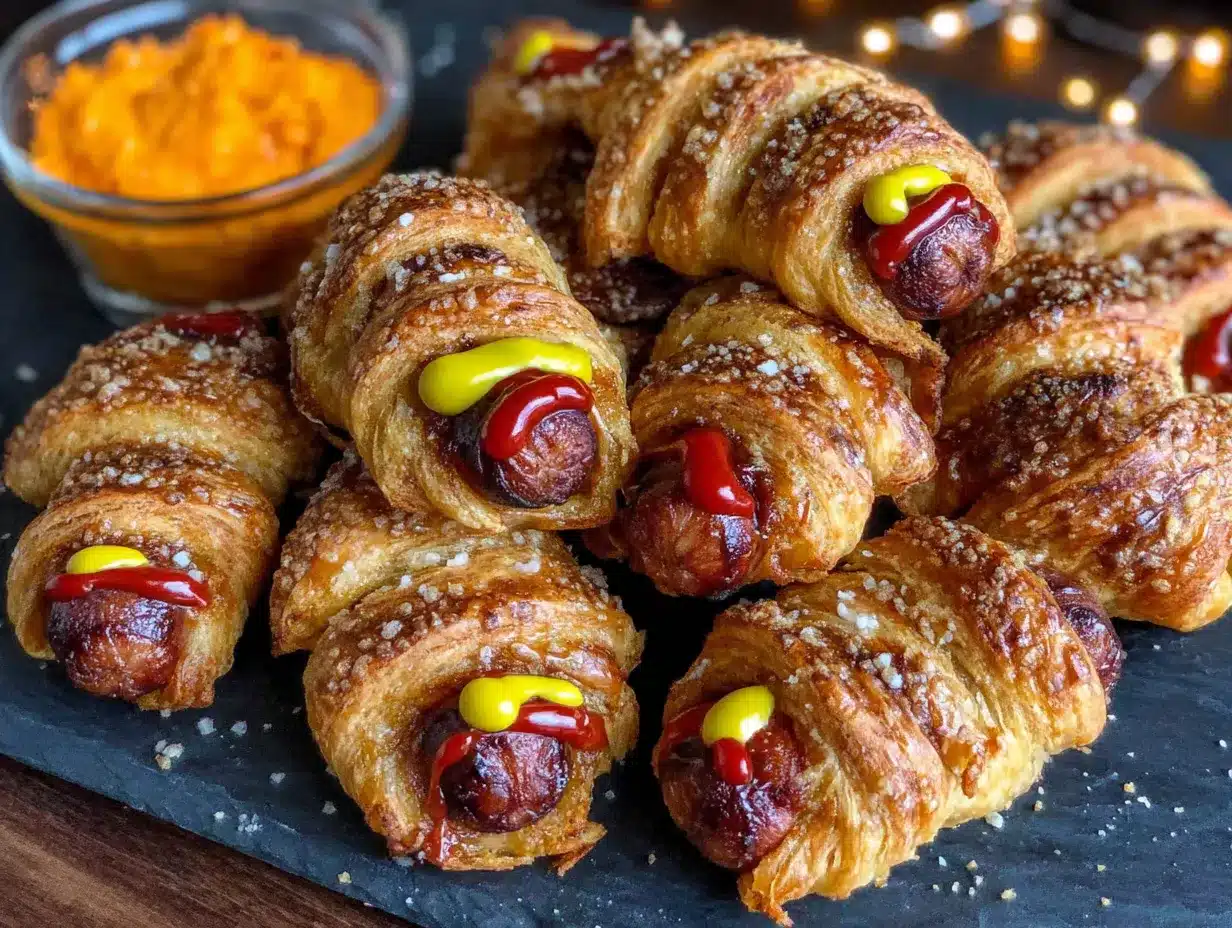
Alright, let’s make some mummies. This whole process takes about 15 minutes of active time and 10-12 minutes of baking. I’ve broken it down so clearly that even my nephew could follow along—and he did, the second time around.
- Preheat your oven to 375°F (190°C). Line your baking sheet with parchment paper. Do this first so the oven is hot and ready when your mummies are assembled. Nothing worse than having wrapped mummies sitting out while you wait for the oven to heat up.
- Pop open the crescent roll can. You know the move—press the spoon against the seam and twist. Unroll the dough and separate it along the perforated lines into 8 triangles. Press the seams together gently if they’re a little ragged.
- Cut each triangle into strips. Using your pizza cutter or knife, slice each triangle lengthwise into 3-4 thin strips. The strips should be about 1/2 inch wide. Don’t worry if they’re not perfectly even—mummies look better a little imperfect anyway. You’ll get about 24-32 strips total from one can.
- Wrap the hot dogs. Take one mini hot dog and lay a strip of dough across the middle. Wrap it around the hot dog at a slight angle, overlapping slightly as you go. Leave a small gap near the top for the eyes—about 1/4 inch of exposed hot dog. Tuck the end of the dough strip underneath to secure it. Repeat with all the hot dogs. You should get about 12-14 mummies from one package.
- Space them out on the baking sheet. Place each mummy about 1 inch apart. They’ll puff up a little as they bake, so give them room to breathe. If you crowd the pan, the dough won’t get as crispy on the sides.
- Bake for 10-12 minutes. Keep an eye on them around the 8-minute mark. You want the dough to be golden brown and puffed up, not dark brown. The hot dogs should be heated through and slightly sizzling. Every oven runs a little different—mine runs hot, so I check at 9 minutes.
- Let them cool for 2 minutes. This is important. If you try to add the mustard eyes right out of the oven, the heat will make the mustard runny and it’ll slide right off. Give them just a couple minutes to set up.
- Add the eyes. Dip a toothpick or the tip of a small knife into the yellow mustard. Dot two small eyes onto the exposed hot dog at the top of each mummy. Don’t overthink it—tiny dots are cuter than big blobs. I usually do one dot slightly smaller than the other for that adorable derpy mummy look.
- Serve warm or at room temperature. Transfer to a platter and watch them disappear. If you’re serving them at a party, they hold up well at room temperature for about an hour.
One thing I want to warn you about—don’t overwrap the hot dogs. I did this my first time, thinking more strips meant more mummy-like. It just meant doughy hot dogs with no visible sausage. Two to three wraps per mummy is the sweet spot. You want to see hints of the hot dog peeking through the dough layers.
Cooking Tips & Techniques
I’ve made these mummy hot dog bites at least a dozen times now, and I’ve collected a few tricks that make the process smoother and the results better. Here’s what I wish someone had told me before my first attempt.
Keep the dough cold. Crescent roll dough gets sticky and hard to work with if it sits out too long. Work with one triangle at a time and keep the rest in the fridge until you’re ready. If the dough starts feeling tacky, pop it in the freezer for 2 minutes. This makes a huge difference in how cleanly your strips cut and how well they wrap.
Don’t stretch the dough. When you’re wrapping, let the dough sit naturally around the hot dog. If you pull it tight, it’ll shrink as it bakes and leave big gaps. Gentle wrapping gives you those nice, puffy layers that look like actual bandages.
My biggest failure: The first time I made these, I used hot dogs straight from the fridge. The cold sausages took longer to heat through, so the dough got too brown before the hot dogs were warm. Now I let the hot dogs sit at room temperature for 10 minutes before wrapping. Problem solved.
Multitasking strategy: While the first batch bakes, wrap the second batch. These go fast at parties, so I always make a double batch. One pan goes in the oven while I wrap the next round. By the time the first batch is gone, the second is coming out hot.
Consistency tip: Use a ruler or just eyeball it—but try to keep your strips roughly the same width. I aim for about half an inch. Too thin and they break. Too thick and they overpower the hot dog. Half an inch is the goldilocks zone.
If the dough tears: Don’t panic. Just press the torn piece back together or overlap it slightly. The mummy look actually benefits from a little raggedness. I’ve had torn strips turn into my most photogenic mummies.
Variations & Adaptations
One of the best things about this recipe is how easy it is to tweak. I’ve tried several variations over the years, and they all bring something fun to the table.
Spicy Mummy Bites: Swap the mini hot dogs for spicy chorizo sausages or add a tiny smear of sriracha inside the wrap before baking. The heat contrasts beautifully with the buttery dough. My brother-in-law requests these every year—he says the regular ones are too tame for him.
Cheese-Stuffed Mummies: Cut a slit lengthwise in each hot dog and stuff a thin strip of cheddar or pepper jack cheese inside before wrapping. The cheese melts out slightly during baking and looks like mummy guts. It’s a little silly, but kids absolutely lose their minds over it.
Veggie Mummies: For the non-meat-eaters in your life, swap the hot dogs for vegetarian cocktail sausages or even carrot sticks that have been parboiled for 3 minutes. The carrot version is surprisingly good—the natural sweetness pairs well with the savory dough. I tried this last year for a friend who doesn’t eat meat, and she asked for the recipe.
Gluten-Free Option: Use gluten-free crescent roll dough if you can find it. I’ve tested this with the Annie’s gluten-free version, and it works fine—the dough is a little more fragile, so handle it gently. You can also use gluten-free puff pastry sheets cut into strips.
Air Fryer Method: Cook at 350°F (175°C) for 6-8 minutes, flipping halfway through. The air fryer gives you an extra-crispy exterior that’s honestly better than the oven version. Just don’t overcrowd the basket—work in batches if you need to.
I personally love the cheese-stuffed version. There’s something about that molten cheese peeking out that makes the mummies look both cute and slightly horrifying—which is exactly the Halloween vibe I’m going for.
Serving & Storage Suggestions
These mummy hot dog bites are best served warm, but they’re still delicious at room temperature for up to an hour. Here’s how I like to present them:
Arrange them on a dark platter or black serving board—the contrast makes the golden mummies pop. I scatter a few fake spider webs around the edges for decoration. A small bowl of warm marinara sauce in the center looks like a blood pool (in a fun way) and gives guests something to dip in. Ranch dressing works great too, especially if you’re serving kids who prefer milder flavors.
For a full Halloween spread, pair these with pumpkin-shaped cheese crackers, creepy-crawly veggie platters, and maybe some ghost-shaped cookies for dessert. They also go great with a bowl of warm chili—just let people dip their mummies right in.
Storage: Leftover mummies (if you have any—honestly, we never do) can be stored in an airtight container in the refrigerator for up to 3 days. The dough will soften slightly, but they’re still tasty.
Reheating: The best way to bring them back to life is in the oven at 350°F (175°C) for 3-4 minutes. The microwave works in a pinch, but the dough gets chewy instead of flaky. If you’re in a hurry, the air fryer at 300°F (150°C) for 2 minutes does a great job.
Freezer instructions: You can freeze the unbaked, wrapped mummies on a baking sheet until solid, then transfer them to a freezer bag. Bake from frozen at 375°F (190°C) for 14-16 minutes—just add 2-3 minutes to the regular baking time. I do this every October so I have a stash ready for last-minute parties.
One thing I’ve noticed—the flavors actually meld together a bit after a day in the fridge. The mustard soaks into the hot dog slightly, and the dough softens into something almost casserole-like. It’s different from fresh, but still good in its own way.
Nutritional Information & Benefits
Let’s be real—these are indulgent party snacks, not health food. But I believe in knowing what you’re eating so you can enjoy them without guilt. Here’s the breakdown for one mummy bite (based on using standard crescent rolls and mini hot dogs):
- Calories: Approximately 110-130 per piece
- Protein: 4-5 grams
- Carbohydrates: 8-10 grams
- Fat: 7-9 grams
- Sodium: 320-380 mg
These numbers will vary based on the specific brands you use and whether you add cheese or other fillings. The mini hot dogs provide a decent amount of protein for a snack, and the crescent dough gives you quick energy—which you’ll need if you’re running after trick-or-treaters all night.
If you’re watching your sodium intake, look for lower-sodium hot dogs or turkey dogs. The mustard adds a negligible amount of sodium for the flavor it brings. For a slightly lighter option, you can use reduced-fat crescent rolls, but as I mentioned earlier, the texture suffers a bit.
From a wellness perspective, I see these as a fun occasional treat. Halloween comes once a year, and I’d rather enjoy a couple of these mindfully than stress about the numbers. Pair them with some fresh veggies on the side if you want to balance things out. That’s what I do—a handful of carrot sticks with my mummy bites, and I feel great about it.
Conclusion
These Easy Mummy Hot Dog Bites for Halloween have become a staple in my kitchen for one simple reason—they actually work. They’re cute enough to impress at a party, simple enough to make with kids, and delicious enough that nobody cares they’re not fancy. I’ve brought them to school parties, neighborhood gatherings, and even a Halloween-themed work potluck, and they’ve never let me down.
What I love most about this recipe is how it proves that you don’t need complicated techniques or exotic ingredients to make something memorable. Sometimes the best ideas come from an eight-year-old who just wants to eat hot dogs shaped like mummies. And honestly? He was right.
I’d love to hear how yours turn out. Did you try the cheese-stuffed version? Did your kids have opinions about the mustard eyes? Drop a comment below and let me know—I read every single one, and your ideas might end up in next year’s Halloween post. Don’t forget to share this recipe with a friend who loves Halloween as much as we do. Happy haunting, and happy eating!
Frequently Asked Questions
Can I use puff pastry instead of crescent roll dough?
Absolutely. Puff pastry gives you an even flakier, more buttery result. Just thaw it first, cut it into strips about the same width, and wrap the same way. The baking time might be slightly longer—check at 12 minutes instead of 10.
How far in advance can I make these?
You can assemble them up to 24 hours ahead and keep them covered in the refrigerator. Bake them just before serving for the best texture. If you need to prep even further ahead, freeze the unbaked mummies for up to 3 months.
What if I don’t have mini hot dogs?
Regular-sized hot dogs work perfectly—just cut them into thirds. You’ll get about 3 mummies per hot dog. The baking time stays the same since the pieces are roughly the same size as mini hot dogs.
Can I make these in an air fryer?
Yes! Cook at 350°F (175°C) for 6-8 minutes, flipping halfway through. The air fryer gives you an extra-crispy exterior. Just don’t overcrowd the basket—work in batches if needed.
My dough strips keep breaking. What am I doing wrong?
The dough might be too warm. Pop it in the fridge for 5 minutes before cutting. Also, make sure you’re using a sharp knife or pizza cutter—dull blades drag and tear the dough. If strips do break, just press them back together gently; the mummy look is forgiving.
Pin This Recipe!
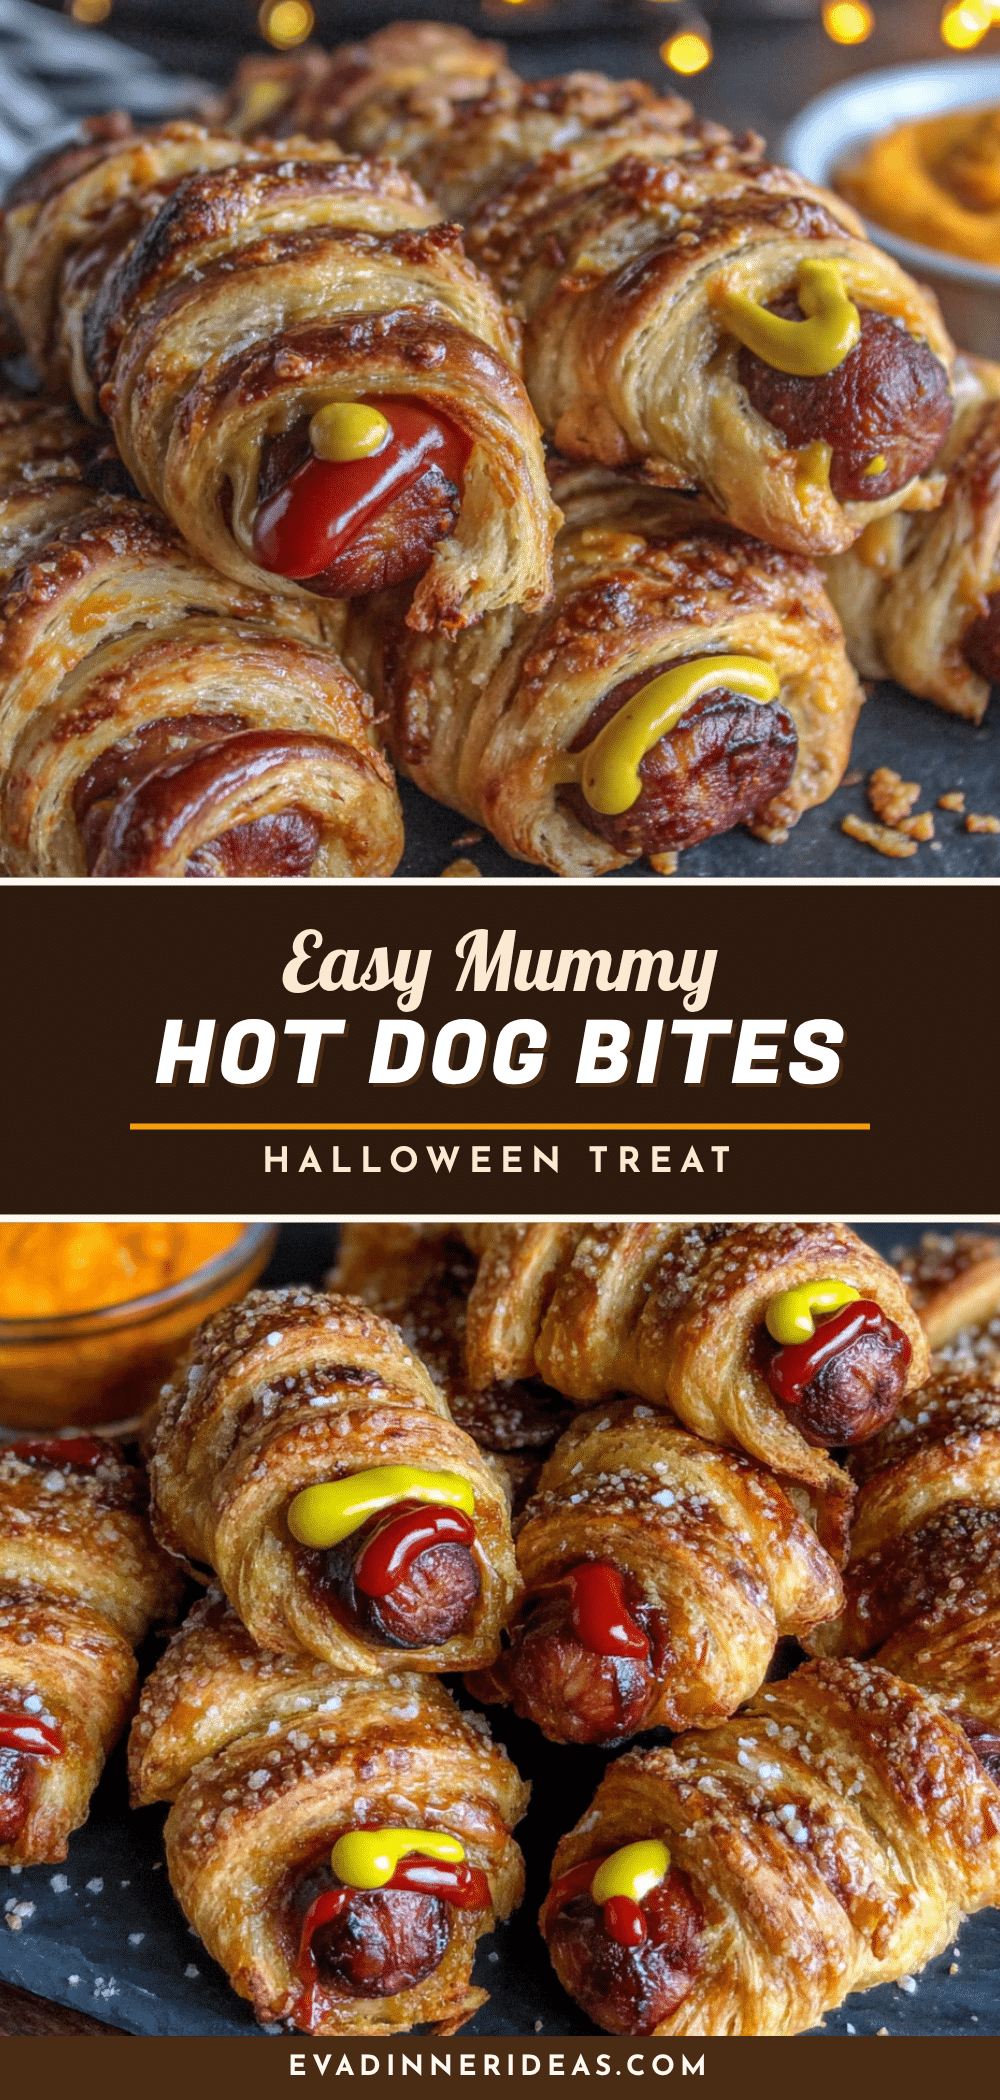
Best Easy Mummy Hot Dog Bites for Halloween

These Easy Mummy Hot Dog Bites for Halloween are a quick, fun, and delicious appetizer made with mini hot dogs wrapped in crescent roll dough, baked until golden, and finished with mustard eyes. Perfect for Halloween parties, they’re a crowd-pleaser that comes together in under 20 minutes.
- Prep Time: 15 minutes
- Cook Time: 12 minutes
- Total Time: 27 minutes
- Yield: 12-14 servings 1x
- Category: Appetizer
- Cuisine: American
Ingredients
- 1 package (12-14 ounces) mini hot dogs or cocktail sausages
- 1 can (8 ounces) crescent roll dough
- 2 tablespoons yellow mustard
- 1 teaspoon everything bagel seasoning or sesame seeds (optional)
- Marinara sauce or ranch dressing for dipping (optional)
Instructions
- Preheat your oven to 375°F (190°C). Line a baking sheet with parchment paper.
- Pop open the crescent roll can, unroll the dough, and separate it along the perforated lines into 8 triangles. Press the seams together gently if needed.
- Using a pizza cutter or sharp knife, cut each triangle lengthwise into 3-4 thin strips, about 1/2 inch wide.
- Take one mini hot dog and lay a strip of dough across the middle. Wrap it around the hot dog at a slight angle, overlapping slightly. Leave a small gap near the top for the eyes (about 1/4 inch of exposed hot dog). Tuck the end of the dough strip underneath to secure. Repeat with all hot dogs.
- Place each mummy about 1 inch apart on the prepared baking sheet.
- Bake for 10-12 minutes, until the dough is golden brown and puffed up. Check at 8 minutes if your oven runs hot.
- Let the mummies cool on the baking sheet for 2 minutes.
- Dip a toothpick or the tip of a small knife into the yellow mustard. Dot two small eyes onto the exposed hot dog at the top of each mummy.
- Serve warm or at room temperature. Transfer to a platter and enjoy.
Notes
Keep the dough cold for easier handling. Don’t stretch the dough when wrapping. Let hot dogs sit at room temperature for 10 minutes before wrapping to ensure even cooking. For best results, use full-fat crescent rolls. If dough tears, press it back together gently. For air fryer: cook at 350°F (175°C) for 6-8 minutes, flipping halfway. To freeze unbaked mummies, freeze on a baking sheet until solid, then transfer to a freezer bag; bake from frozen at 375°F (190°C) for 14-16 minutes.
Nutrition
- Serving Size: 1 mummy bite
- Calories: 120
- Sugar: 2
- Sodium: 350
- Fat: 8
- Saturated Fat: 3
- Carbohydrates: 9
- Protein: 4.5
Keywords: Halloween appetizer, mummy hot dogs, easy Halloween recipe, kids Halloween food, crescent roll hot dogs