I had this long-held position. I swore I didn’t like deviled eggs. For years. Honestly, I thought they were those sad, pale things you’d find at a potluck, sitting in a Tupperware container, smelling faintly of sulfur and regret. You know the ones. I’d walk right past them. Then, last summer, my friend Jenna brought a platter to our annual neighborhood block party. I watched a crowd three-deep form around her dish, and I found myself peeking over someone’s shoulder, fork in hand, ready to prove my point. I took a bite. And then I took another. And then I asked her for the recipe, trying to play it cool. The secret, she whispered with a wink, was the crispy bacon and the fresh chives. I went home that night, humbled, and immediately made a batch. Let me tell you, I’ve been making up for lost time ever since. This is the recipe that changed my mind, and I’m betting it’ll change yours too.
Why You’ll Love This Recipe
This isn’t just another deviled egg recipe. This is the one that disappears first from every table, every gathering, every holiday spread. I’ve tested it for years, tweaked the ratios, and finally landed on a version that’s absolutely foolproof.
- Quick & Easy: Comes together in under 30 minutes, perfect for last-minute party prep or a quick snack.
- Simple Ingredients: No fancy grocery trips needed. Eggs, bacon, chives, and pantry staples are all you need.
- Perfect for Hosting: These deviled eggs are the ultimate crowd-pleaser for brunches, potlucks, game days, and holiday dinners. They’re the first thing to go!
- Crowd-Pleaser: I’ve served these to kids, grandparents, and picky eaters. They all ask for the recipe.
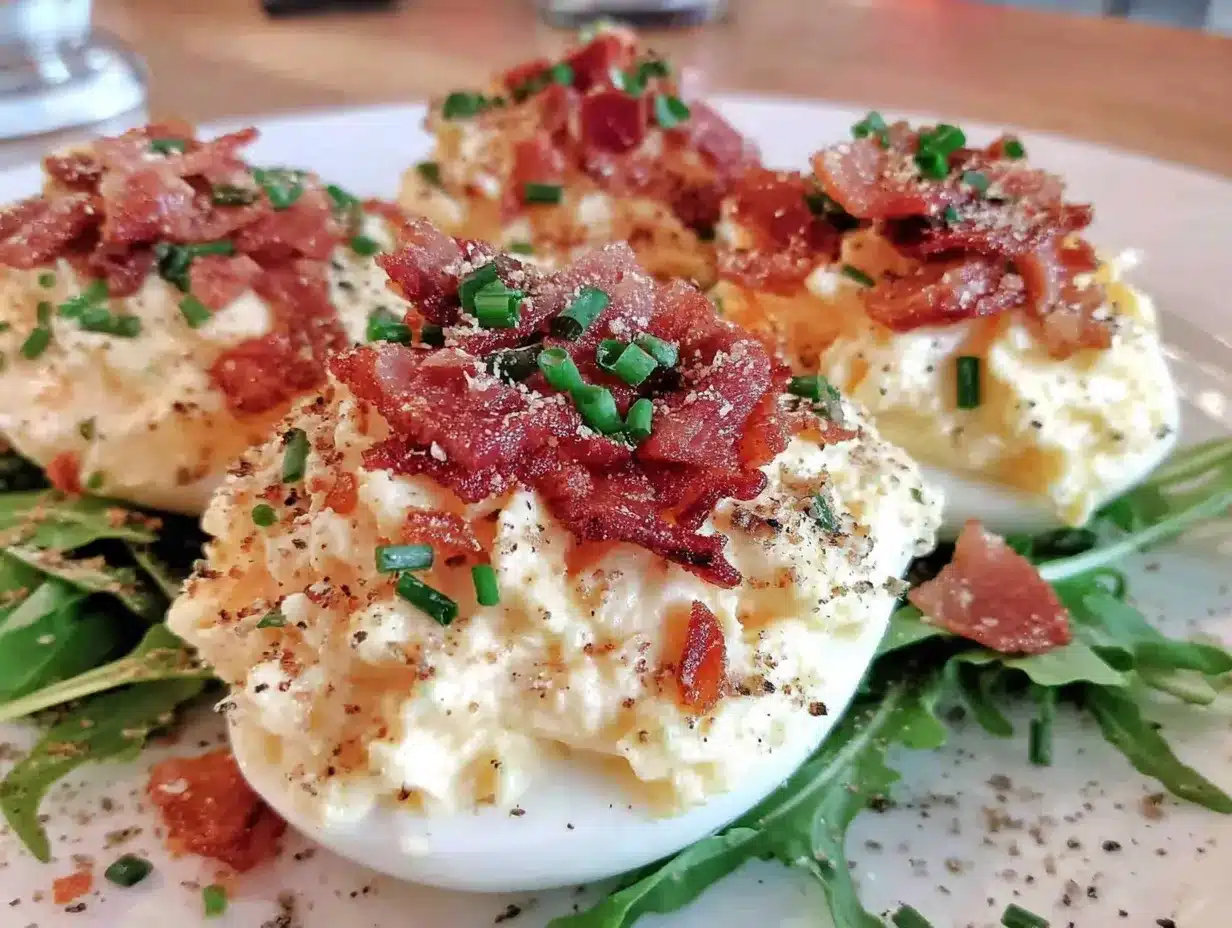
- Unbelievably Delicious: The smoky bacon, creamy yolk filling, and fresh chive topping create a flavor combination that’s next-level comfort food.
What makes this recipe different from the rest? It’s the perfect balance of textures. The filling is silky smooth, thanks to a touch of mayonnaise and a little pickle juice for tang. The bacon is cooked until shatteringly crisp, and the chives add a fresh, oniony bite. This isn’t just another version—it’s my best version. It’s the kind of recipe that makes you close your eyes after the first bite, the kind that turns a simple side dish into the star of the show. Perfect for impressing guests without stress, or turning a simple meal into something memorable.
What Ingredients You Will Need
This recipe uses simple, wholesome ingredients to deliver bold flavor and satisfying texture without the fuss. Most of these are pantry staples, which makes this recipe a lifesaver when you need to whip up something impressive quickly.
- 12 large eggs, (room temperature for easier peeling)
- 8 slices of thick-cut bacon, (I prefer Wright Brand or Nueske’s for the best smoky flavor)
- 1/3 cup of mayonnaise, (Duke’s or Hellmann’s work best here)
- 2 teaspoons of yellow mustard, (adds tang and color)
- 1 tablespoon of pickle juice, (from your favorite dill pickles—this is the secret to the perfect tang)
- 1/4 teaspoon of smoked paprika, (plus more for garnish)
- 1/4 teaspoon of garlic powder
- 1/4 teaspoon of onion powder
- Salt and freshly ground black pepper, to taste
- 3 tablespoons of fresh chives, (finely chopped, plus more for garnish)
Ingredient Tips: For the creamiest filling, make sure your cream cheese is at room temperature. If you don’t have pickle juice, a splash of white vinegar or apple cider vinegar will work. For a dairy-free version, use a vegan mayonnaise and skip the cream cheese. Look for firm, fresh eggs for the best peeling experience. I’ve learned the hard way that older eggs actually peel better, so don’t be afraid to use eggs that are a week or two old!
Equipment Needed
You don’t need much fancy equipment for this recipe, which is part of its beauty. Here’s what you’ll need:
- Large pot, for boiling the eggs
- Medium bowl, for the filling
- Skillet or frying pan, for cooking the bacon
- Paper towels, for draining the bacon
- Sharp knife and cutting board, for halving the eggs and chopping chives
- Small spoon or piping bag, for filling the eggs (a zip-top bag with the corner snipped off works perfectly)
- Measuring cups and spoons
- Fork or potato masher, for mashing the yolks
If you don’t have a piping bag, don’t worry. A small spoon works just fine, and I honestly think the rustic look is more charming. I’ve used both methods, and no one has ever complained. A good set of measuring spoons is worth the investment for consistent results.
Preparation Method
Let’s get cooking. This method is tried and true, and I’m going to walk you through every step so you get perfect results every time.
- Boil the eggs. Place the 12 large eggs in a single layer in a large pot. Cover them with cold water by about an inch. Bring the water to a rolling boil over high heat. Once boiling, cover the pot, remove it from the heat, and let it sit for exactly 12 minutes. This is my foolproof method for hard-boiled eggs with fully set yolks and no green ring.
- Ice bath. While the eggs are sitting, prepare a large bowl of ice water. After 12 minutes, transfer the eggs to the ice bath using a slotted spoon. Let them cool completely, about 10 minutes. This stops the cooking process and makes peeling much easier.
- Cook the bacon. While the eggs are cooling, cook the 8 slices of thick-cut bacon in a large skillet over medium heat. Cook until crispy and brown, about 6-8 minutes, flipping once. Transfer the bacon to a paper towel-lined plate to drain. Once cool, crumble or chop it into small pieces.
- Peel the eggs. Gently tap each egg on the counter to crack the shell, then roll it between your palms to loosen the shell. Peel under cold running water for the easiest removal. I’ve found that starting at the wider end of the egg (where the air pocket is) helps the shell come off in bigger pieces.
- Halve the eggs. Slice each peeled egg in half lengthwise. Carefully pop out the yolks into a medium bowl. Arrange the egg white halves on a serving platter.
- Make the filling. Mash the yolks with a fork until they’re crumbly. Add the 1/3 cup mayonnaise, 2 teaspoons yellow mustard, 1 tablespoon pickle juice, 1/4 teaspoon smoked paprika, 1/4 teaspoon garlic powder, 1/4 teaspoon onion powder, and a pinch of salt and pepper. Mix until smooth and creamy. Taste and adjust seasoning. I always add a little more pickle juice at this stage if I want more tang.
- Fold in the mix-ins. Gently fold in about 3/4 of the crumbled bacon and 2 tablespoons of the chopped chives. Reserve the rest for topping.
- Fill the eggs. Spoon the filling into the egg white halves. For a prettier presentation, transfer the filling to a piping bag or a zip-top bag with the corner snipped off and pipe it in. I usually pipe a nice swirl, but a spoonful is just as delicious.
- Garnish and chill. Sprinkle the remaining bacon, chives, and a dusting of smoked paprika over the top. For the best flavor, refrigerate the deviled eggs for at least 30 minutes before serving. This allows the flavors to meld together beautifully.
Cooking Tips & Techniques
I’ve made a lot of deviled eggs in my day, and I’ve learned a few things the hard way. Here are my best tips for success.
- The perfect hard-boiled egg: The 12-minute method I shared above is non-negotiable. It gives you a fully set yolk without that unappealing green ring. Don’t skip the ice bath!
- Peeling made easy: If you’re struggling with peeling, try adding a teaspoon of baking soda to the boiling water. It helps loosen the shells. Also, peeling under running water is a game-changer.
- Don’t overmix the filling: You want it smooth and creamy, not pasty. Mix just until everything is combined. Overmixing can make the filling gluey.
- Bacon texture: For the crispiest bacon, cook it low and slow. I like to render the fat slowly over medium-low heat. And always drain it on paper towels.
- Make ahead: You can boil and peel the eggs up to 3 days in advance. Store them in the fridge. You can also make the filling a day ahead. Just assemble the deviled eggs a few hours before serving.
I once forgot to add the pickle juice to my filling. I was rushing and just threw everything together. The deviled eggs were… fine. But they were missing that little something. The pickle juice is the secret ingredient that makes people say, “What’s in these? They’re amazing!” Don’t skip it.
Variations & Adaptations
This recipe is a fantastic base, and it’s easy to customize. Here are a few of my favorite variations.
- Spicy Kick: Add a teaspoon of sriracha or a pinch of cayenne pepper to the yolk mixture. Top with a thin slice of jalapeño for extra heat.
- Herb Garden: Swap the chives for fresh dill, parsley, or tarragon. Dill pairs particularly well with the mustard and pickle juice.
- Smoked Salmon: Replace the bacon with flaked smoked salmon and add a teaspoon of fresh lemon juice to the filling. Top with a tiny piece of salmon and a sprinkle of capers.
- Guacamole Twist: Mash half an avocado into the yolk mixture along with the mayonnaise. This creates an incredibly creamy, green-tinged filling. Top with a little extra bacon.
- Gluten-Free Option: This recipe is naturally gluten-free! Just double-check your bacon and mustard labels to be safe.
My personal favorite variation is the “Everything Bagel” deviled egg. I add a tablespoon of everything bagel seasoning to the filling and sprinkle more on top. It’s a total game-changer.
Serving & Storage Suggestions
These deviled eggs are best served chilled, straight from the fridge. Arrange them on a nice platter or a deviled egg carrier for easy transport. They’re the perfect appetizer for any gathering.
What to serve alongside: These deviled eggs pair beautifully with other finger foods. Think a classic southern fried chicken for a picnic, or a simple grilled vegetable skewer for a lighter meal. They’re also fantastic alongside a big bowl of creamy tomato basil soup for a cozy lunch.
Storage: Store leftover deviled eggs in an airtight container in the refrigerator for up to 2 days. I don’t recommend freezing them, as the texture of the filling will change.
Reheating: These are meant to be served cold, so no reheating needed. If you’re making them ahead, just pull them out of the fridge 15 minutes before serving to take the chill off.
Flavor development: Honestly, these deviled eggs taste even better the next day. The flavors have time to meld and deepen. I always try to make them a day ahead for the best results.
Nutritional Information & Benefits
Here’s an approximate nutritional breakdown for one deviled egg half (based on 24 servings).
| Nutrient | Amount per Serving |
|---|---|
| Calories | 75 |
| Total Fat | 6g |
| Saturated Fat | 2g |
| Cholesterol | 95mg |
| Sodium | 150mg |
| Total Carbohydrates | 1g |
| Protein | 5g |
Eggs are a fantastic source of high-quality protein and important nutrients like choline, which is great for brain health. The bacon adds a bit of smoky flavor and protein, while the chives provide a small dose of vitamins A and C. This recipe is naturally low in carbohydrates, making it a great option for those following a low-carb or keto lifestyle. As always, please be mindful of any allergies, particularly to eggs or pork.
Conclusion
So there you have it. The deviled egg recipe that turned a skeptic into a believer. These Crowd-Pleasing Deviled Eggs with Crispy Bacon & Chives are everything you want in an appetizer: easy to make, beautiful to look at, and absolutely delicious to eat. They’re the kind of thing that makes you the hero of the party without breaking a sweat.
I hope you give this recipe a try. Don’t be afraid to customize it, make it your own, and serve it with pride. Trust me, your guests will thank you. And who knows? You might just convert a few skeptics of your own.
If you make these, please come back and let me know how they turned out in the comments below. I love hearing about your kitchen victories. And if you share a photo on social media, tag me so I can see your beautiful creations. Happy cooking, friends!
Frequently Asked Questions
Can I make these deviled eggs ahead of time?
Absolutely! You can prepare the hard-boiled eggs and the filling up to 3 days in advance. Store the peeled eggs and the filling separately in the fridge. Assemble the deviled eggs a few hours before serving for the best texture.
How do I get my eggs to peel easily?
The key is to use slightly older eggs (a week or two old) and to shock them in an ice bath immediately after boiling. Adding a teaspoon of baking soda to the boiling water can also help loosen the shells. Peeling under cold running water is another great trick.
Can I make this recipe without bacon?
Of course! For a vegetarian version, simply omit the bacon. You can add extra chives, smoked paprika, or even a sprinkle of crispy fried onions for a similar texture and flavor.
What can I use instead of pickle juice?
If you don’t have pickle juice, you can use a splash of white vinegar, apple cider vinegar, or even a squeeze of fresh lemon juice. Each will add a slightly different tang, but all will work beautifully.
How long do deviled eggs last in the fridge?
Deviled eggs are best enjoyed within 2 days of being made. Store them in an airtight container in the refrigerator. I don’t recommend leaving them out at room temperature for more than 2 hours, especially if you’re serving them at a party.
Pin This Recipe!

Best Deviled Eggs with Bacon: Easy Crowd-Pleasing Recipe

This isn’t just another deviled egg recipe. This is the one that disappears first from every table, every gathering, every holiday spread. The smoky bacon, creamy yolk filling, and fresh chive topping create a flavor combination that’s next-level comfort food.
- Prep Time: 15 minutes
- Cook Time: 20 minutes
- Total Time: 35 minutes
- Yield: 24 servings 1x
- Category: Appetizer
- Cuisine: American
Ingredients
- 12 large eggs, room temperature
- 8 slices thick-cut bacon
- 1/3 cup mayonnaise
- 2 teaspoons yellow mustard
- 1 tablespoon pickle juice
- 1/4 teaspoon smoked paprika, plus more for garnish
- 1/4 teaspoon garlic powder
- 1/4 teaspoon onion powder
- Salt and freshly ground black pepper, to taste
- 3 tablespoons fresh chives, finely chopped, plus more for garnish
Instructions
- Boil the eggs: Place the 12 large eggs in a single layer in a large pot. Cover them with cold water by about an inch. Bring the water to a rolling boil over high heat. Once boiling, cover the pot, remove it from the heat, and let it sit for exactly 12 minutes.
- Ice bath: While the eggs are sitting, prepare a large bowl of ice water. After 12 minutes, transfer the eggs to the ice bath using a slotted spoon. Let them cool completely, about 10 minutes.
- Cook the bacon: While the eggs are cooling, cook the 8 slices of thick-cut bacon in a large skillet over medium heat until crispy and brown, about 6-8 minutes, flipping once. Transfer the bacon to a paper towel-lined plate to drain. Once cool, crumble or chop it into small pieces.
- Peel the eggs: Gently tap each egg on the counter to crack the shell, then roll it between your palms to loosen the shell. Peel under cold running water for the easiest removal.
- Halve the eggs: Slice each peeled egg in half lengthwise. Carefully pop out the yolks into a medium bowl. Arrange the egg white halves on a serving platter.
- Make the filling: Mash the yolks with a fork until they’re crumbly. Add the 1/3 cup mayonnaise, 2 teaspoons yellow mustard, 1 tablespoon pickle juice, 1/4 teaspoon smoked paprika, 1/4 teaspoon garlic powder, 1/4 teaspoon onion powder, and a pinch of salt and pepper. Mix until smooth and creamy. Taste and adjust seasoning.
- Fold in the mix-ins: Gently fold in about 3/4 of the crumbled bacon and 2 tablespoons of the chopped chives. Reserve the rest for topping.
- Fill the eggs: Spoon the filling into the egg white halves. For a prettier presentation, transfer the filling to a piping bag or a zip-top bag with the corner snipped off and pipe it in.
- Garnish and chill: Sprinkle the remaining bacon, chives, and a dusting of smoked paprika over the top. Refrigerate the deviled eggs for at least 30 minutes before serving.
Notes
For the creamiest filling, make sure your cream cheese is at room temperature. If you don’t have pickle juice, a splash of white vinegar or apple cider vinegar will work. For a dairy-free version, use a vegan mayonnaise and skip the cream cheese. Look for firm, fresh eggs for the best peeling experience. Older eggs actually peel better, so don’t be afraid to use eggs that are a week or two old!
Nutrition
- Serving Size: 1 deviled egg half
- Calories: 75
- Sodium: 150
- Fat: 6
- Saturated Fat: 2
- Carbohydrates: 1
- Protein: 5
Keywords: deviled eggs, bacon, chives, appetizer, party food, crowd-pleaser, easy, quick


