It was 11:47 PM on a Tuesday in early October, and I had a very specific, almost unreasonable craving for apple pie. Not just any apple pie, mind you—I wanted that deep, nutty flavor you only get from brown butter, and the savory, crumbly edge of a cheddar crust. The problem? My fridge held a block of sharp white cheddar, a bag of slightly bruised Honeycrisps, and a stick of butter that was about to turn. The ‘proper’ recipe called for a traditional pâte brisée and a double batch of fussy filling, but honestly, I was too tired for that. So I did what any sane, slightly sleepy person would do: I browned the butter right there in my single, slightly warped saucepan, let it cool while I grated the cheese into the flour, and just… went for it.
The kitchen smelled like a bakery and a cheese shop had a beautiful, delicious accident. I forgot to add the sugar to the crust—caught myself just before the water went in, thank goodness. There was flour on my glasses and a smear of butter on the light switch. But when I pulled that pie out of the oven at 1:15 AM, the golden crust bubbling with caramelized apple juice, I knew I had stumbled onto something. It wasn’t just good; it was the kind of pie that makes you close your eyes after the first bite. Maybe you’ve been there—late at night, no audience, just you and a hunch. This is that pie. This is the best brown butter apple pie with cheddar crust you’ll ever make, and it came to life when no one was watching.
Why You’ll Love This Recipe
Let me tell you, this isn’t your grandma’s apple pie—well, maybe it is if your grandma was a culinary genius with a rebellious streak. This recipe has been tested in my tiny kitchen more times than I care to admit, and it’s earned its spot as the crown jewel of my fall baking rotation. Here’s why you’re going to fall head over heels for it:
- Quick & Easy: Despite sounding fancy, this pie comes together in about 45 minutes of active prep. The brown butter takes 10 minutes, the crust comes together in a food processor, and the filling is a simple toss. Perfect for a weekend baking project or a last-minute dinner party showstopper.
- Simple Ingredients: No mail-order specialty flours or exotic spices here. You need butter, apples, flour, sugar, and a block of good cheddar cheese. That’s it. Your pantry is probably already ready for this.
- Perfect for Fall Gatherings: This is the pie you bring to Thanksgiving to get asked for the recipe. It’s equally at home on a cozy Sunday afternoon with a cup of coffee or as the grand finale to a festive holiday meal.
- Crowd-Pleaser: I’ve served this to kids who swear they hate cooked fruit and adults who “don’t do dessert.” Every single person has asked for seconds. The savory-sweet combo is universally addictive.
- Unbelievably Delicious: The brown butter adds this almost hazelnut-like depth that regular butter just can’t touch. Paired with the sharp, salty cheddar crust, each bite is a perfect balance of sweet, savory, nutty, and tart. It’s next-level comfort food that somehow feels both indulgent and wholesome.
What makes this recipe different from the rest is the technique of browning the butter before incorporating it into both the crust and the filling. It’s not just a flavor hack—it’s a game-changer. The nuttiness of the brown butter complements the sharpness of the cheddar in a way that makes you wonder why we haven’t been doing this all along. And honestly, this pie doesn’t just taste good—it makes you feel good. It’s comfort food reimagined: a little healthier because you’re using real, whole ingredients, faster than the traditional version, but with the same soul-soothing satisfaction that makes you want to curl up on the couch and forget about the world for a while.
What Ingredients You Will Need
This recipe uses simple, wholesome ingredients to deliver that bold, unforgettable flavor. You’ll find most of these in your kitchen right now, which is the whole point—no fancy grocery trips required. Let’s break down what you need and why each ingredient matters.
For the Brown Butter Cheddar Crust
- 1 ¼ cups all-purpose flour (plus extra for dusting) – I prefer King Arthur Flour for its consistent protein content, but any brand works.
- ½ teaspoon salt – Fine sea salt is best; it dissolves evenly into the dough.
- ½ cup cold unsalted butter, browned and then chilled – Yes, you brown it first, then chill it back into solid form. This is the secret to that deep, nutty flavor.
- ¾ cup sharp cheddar cheese, finely grated – Use a block and grate it yourself. Pre-shredded cheese has anti-caking agents that mess with the texture. I recommend Cabot Seriously Sharp or a good aged English cheddar.
- 3-4 tablespoons ice water – The colder, the better. This keeps the butter from melting into the flour before it hits the oven.
For the Brown Butter Apple Filling
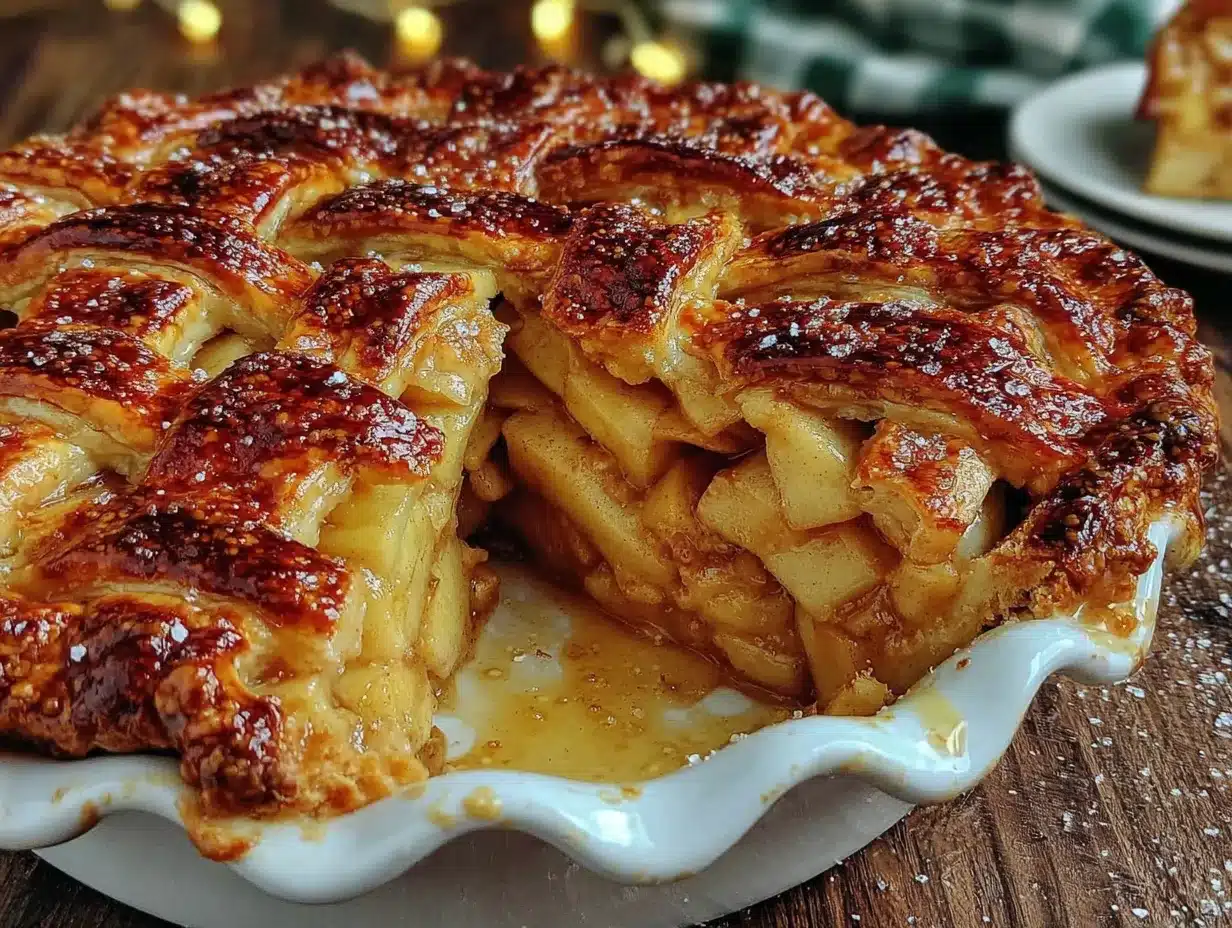
- 6 cups mixed apples, peeled, cored, and sliced (about 6 medium apples) – I use a mix of Honeycrisp for sweetness and Granny Smith for tartness. This gives you a complex flavor and a texture that holds up during baking.
- ½ cup brown butter (from the same batch you made for the crust) – You’ll make a big batch and split it. Efficiency at its finest.
- ½ cup granulated sugar – Adds sweetness and helps caramelize the apples.
- ¼ cup packed light brown sugar – Adds molasses notes that play beautifully with the cheddar.
- 2 tablespoons all-purpose flour – Helps thicken the juices so the filling isn’t runny.
- 1 teaspoon ground cinnamon – The classic apple pie spice. Use Ceylon cinnamon if you can; it’s milder and more floral.
- ¼ teaspoon ground nutmeg – Freshly grated if you have it. It makes a world of difference.
- ¼ teaspoon salt – Balances the sweetness and enhances the apple flavor.
- 1 tablespoon lemon juice – Freshly squeezed. It prevents the apples from browning and brightens the overall flavor.
- 1 teaspoon vanilla extract – Pure, not imitation. It rounds out the flavors beautifully.
For the Egg Wash & Topping
- 1 large egg – Beaten with a splash of water for that golden, glossy finish.
- 1 tablespoon turbinado sugar (optional) – For sprinkling on top. It adds a lovely crunch and sparkle.
- Extra grated cheddar for topping (optional) – Because more cheese is never a bad idea.
Substitution Guidance: For a gluten-free version, use a 1:1 gluten-free baking flour blend. The texture will be slightly more tender, but still delicious. If you’re dairy-free, this one’s tricky because the cheddar is integral, but you can use a high-quality vegan cheddar and vegan butter—just know the flavor profile will shift. For a lower-sugar option, reduce the granulated sugar to ¼ cup and skip the brown sugar; the apples’ natural sweetness will still shine.
Equipment Needed
You don’t need a professional pastry kitchen to pull this off, but having the right tools makes the process smoother and more enjoyable. Here’s what I use every time:
- 9-inch pie dish – A glass or ceramic dish works best. Glass lets you see the bottom crust browning, which is crucial for avoiding a soggy bottom.
- Food processor – For the crust. It makes cutting the butter into the flour a 30-second job. If you don’t have one, a pastry cutter or two forks will work—it just takes more elbow grease.
- Medium saucepan – For browning the butter. A light-colored pan is helpful so you can see the butter solids turn amber.
- Rolling pin – A standard wooden pin is fine. If you don’t have one, a wine bottle works in a pinch—just chill it first.
- Cheese grater – A box grater or microplane for the cheddar. The finer the grate, the better it incorporates into the dough.
- Parchment paper – For rolling out the dough without sticking and for lining the pie dish if needed.
- Sharp knife or apple peeler – For prepping the apples. A good peeler saves time and frustration.
- Mixing bowls – One for the crust, one for the filling.
- Pastry brush – For the egg wash. A silicone brush is easy to clean.
Budget-Friendly Tip: You don’t need a fancy pie shield for the crust edges. Simply cut a strip of aluminum foil and fold it over the crust rim halfway through baking. It works like a charm and costs nothing extra.
Preparation Method
Alright, let’s get to the good part. Follow these steps closely, and you’ll have a pie that tastes like you spent all day in the kitchen—even if you’re sneaking this in after the kids go to bed.
Step 1: Brown the Butter
Place 1 cup (2 sticks) of unsalted butter in a medium saucepan over medium heat. Let it melt completely, then swirl the pan gently. The butter will foam, then the foam will subside, and you’ll see tiny brown specks forming at the bottom. This is the milk solids toasting—exactly what you want. Keep a close eye on it; it goes from brown to burnt in seconds. Once it smells nutty and the solids are a deep amber color (about 5-7 minutes), remove it from the heat immediately. Pour it into a heat-safe bowl and let it cool to room temperature. You need ½ cup for the crust and ½ cup for the filling, so this batch covers both. Pop it in the fridge to solidify for about 30 minutes before using in the crust.
Step 2: Make the Cheddar Crust
In a food processor, combine 1 ¼ cups flour and ½ teaspoon salt. Pulse a few times to mix. Add the chilled, solid brown butter (cut into small cubes) and the finely grated cheddar cheese. Pulse until the mixture looks like coarse meal with pea-sized butter pieces. Don’t overdo it—you want visible bits of butter for flakiness. Add ice water, 1 tablespoon at a time, pulsing after each addition, until the dough just holds together when squeezed. It should be shaggy but not sticky. Turn it out onto a floured surface, shape into a disc, wrap in plastic wrap, and refrigerate for at least 1 hour. This rest is non-negotiable—it relaxes the gluten and lets the flavors meld.
Step 3: Prep the Apples
While the dough chills, peel, core, and slice your apples. I like them about ¼-inch thick—not too thin that they turn to mush, not too thick that they stay crunchy. Place them in a large bowl and toss with the lemon juice to prevent browning.
Step 4: Make the Filling
In a separate bowl, whisk together the granulated sugar, brown sugar, 2 tablespoons flour, cinnamon, nutmeg, and salt. Pour this mixture over the apples, then add the remaining ½ cup of brown butter (it should be liquid but not hot) and the vanilla extract. Toss everything together until the apples are evenly coated. Let this sit for 10-15 minutes. You’ll see some liquid release—that’s good. It means the flavors are marrying.
Step 5: Roll Out the Dough
Preheat your oven to 375°F (190°C). On a lightly floured surface, roll out the chilled dough into a 12-inch circle, about ⅛-inch thick. Don’t stress if the edges crack—just pinch them back together. Carefully transfer the dough to your pie dish by rolling it around your rolling pin and unrolling it over the dish. Gently press it into the bottom and up the sides, leaving a ½-inch overhang. Trim any excess, then crimp the edges however you like—I do a simple fork press or a classic thumb-and-forefinger crimp.
Step 6: Fill and Top
Spoon the apple filling into the crust, mounding it slightly in the center. Don’t pack it down—you want air pockets for even baking. If you have extra liquid in the bowl, drizzle a little over the top, but don’t drown it. For a lattice top, roll out the remaining dough scraps (if you made a double batch) or simply leave it open-faced. I often do a rustic galette-style fold for this pie—just fold the overhang up over the edges of the filling, leaving the center exposed. It looks beautiful and is way less fussy than a full top crust.
Step 7: Egg Wash and Bake
Brush the exposed crust with the beaten egg wash. Sprinkle with turbinado sugar and a little extra grated cheddar if you’re feeling bold. Place the pie on a baking sheet to catch any drips. Bake for 50-60 minutes, rotating halfway through. The crust should be deep golden brown and the filling should be bubbling up through the center. If the edges brown too quickly, tent them with foil at the 30-minute mark. Let the pie cool on a wire rack for at least 2 hours before slicing. I know it’s torture, but this step is crucial for the filling to set. Warm pie is delicious, but runny pie is a mess.
Cooking Tips & Techniques
I’ve made this pie at least a dozen times, and I’ve learned a few things the hard way so you don’t have to. Here are my best tips for success:
- Don’t skip browning the butter. I tried it once with regular butter just to see, and the pie was good but not great. The brown butter adds a nutty, almost caramel-like depth that makes the cheddar crust sing. It’s worth the extra 7 minutes.
- Keep everything cold. For the flakiest crust, the butter and water need to be ice-cold. If your kitchen is warm, pop the flour and bowl in the fridge for 10 minutes before you start. I’ve had crusts turn out tough because I got lazy with this step—don’t be me.
- Grate your own cheese. I know it’s tempting to buy the bagged stuff, but it won’t melt into the dough the same way. Pre-shredded cheese is coated in cellulose, which prevents it from incorporating smoothly. Take the extra 2 minutes to grate a block.
- Use a mix of apples. All Granny Smith will be too tart; all Honeycrisp will be too sweet and might turn to mush. A 50/50 blend gives you the best of both worlds—structure and sweetness.
- Let the filling sit. That 10-minute rest after tossing the apples with sugar and butter isn’t just for show. It draws out some liquid, which concentrates the apple flavor and prevents a watery pie.
- Bake on a lower rack. Place your pie on the bottom third of the oven. This helps the bottom crust crisp up before the top gets too dark. I learned this after several soggy-bottomed failures.
- Patience with cooling. I know you want to dig in immediately, but a hot pie is a runny pie. Let it cool completely—at least 2 hours—for clean slices. Trust me, the wait is worth it.
Variations & Adaptations
One of the best things about this recipe is how flexible it is. Here are some ways to make it your own:
- Gluten-Free Option: Substitute the all-purpose flour with a 1:1 gluten-free baking blend. Add ¼ teaspoon xanthan gum if your blend doesn’t include it. The crust will be more delicate, so handle it gently.
- Vegan Adaptation: Use vegan butter and a high-quality vegan cheddar. The brown butter step still works with vegan butter—just watch it closely as it can burn faster. For the egg wash, brush the crust with a little maple syrup or plant-based milk.
- Spice It Up: Add ¼ teaspoon ground ginger, a pinch of cardamom, or even a tiny pinch of black pepper to the filling. The pepper adds a subtle warmth that pairs beautifully with the cheddar.
- Savory Twist: Reduce the sugar to ¼ cup and add ½ cup caramelized onions to the filling. It sounds weird, but trust me—the sweet-savory combo is incredible. I tried this on a whim and it was a hit at a potluck.
- Mini Pies: Use a muffin tin to make individual hand pies. Roll the dough, cut circles, fill with a spoonful of filling, top with another circle, crimp, and bake for 20-25 minutes. Perfect for parties or portion control.
- Seasonal Fruit Swap: In summer, swap the apples for sliced pears or peaches. Adjust the sugar down by 2 tablespoons since stone fruits are sweeter. The brown butter cheddar crust works beautifully with any fruit.
Serving & Storage Suggestions
This pie is a star on its own, but the right accompaniments can take it to another level. Here’s how I like to serve and store it:
- Serving Temperature: Serve warm or at room temperature. If you’ve let it cool completely, you can reheat individual slices in a 300°F oven for 5-10 minutes. The crust stays flaky, and the filling gets gooey again.
- Perfect Pairings: A scoop of vanilla bean ice cream is the classic choice, but a dollop of lightly sweetened whipped cream or a drizzle of salted caramel sauce is divine. For a savory contrast, serve with a slice of sharp cheddar cheese on the side—it sounds indulgent, but it’s actually a traditional New England pairing.
- Beverage Matches: A cup of hot black coffee or a spiced chai latte complements the nutty, spicy flavors. For an adult version, a glass of hard cider or a bourbon cocktail is a match made in heaven.
- Storage: Cover the pie loosely with foil or plastic wrap and store at room temperature for up to 2 days. After that, refrigerate for up to 5 days. The crust may soften slightly in the fridge, but it’s still delicious.
- Freezing: You can freeze the unbaked pie for up to 3 months. Assemble it completely, wrap tightly in plastic wrap and foil, and freeze. Bake from frozen, adding 15-20 minutes to the baking time. Baked pie can also be frozen for up to 3 months—thaw overnight in the fridge and reheat in a 300°F oven.
- Flavor Development: Honestly, this pie tastes even better the next day. The flavors meld and deepen overnight, and the crust absorbs a hint of the apple juices. If you can resist eating it all on day one, you’re in for a treat on day two.
Nutritional Information & Benefits
Let’s be real—this is a pie, not a salad. But there are some surprising nutritional perks to this recipe that make it a little easier to justify that second slice. Here’s the breakdown per serving (based on 8 slices):
- Calories: Approximately 380-420 per slice, depending on exact ingredient brands and apple quantity.
- Fat: 22g (14g saturated) – The brown butter and cheddar contribute healthy fats that help with satiety and flavor absorption.
- Carbohydrates: 45g (28g sugar) – The apples provide natural sugars and fiber, which slows down glucose absorption compared to processed sweets.
- Protein: 6g – Thanks to the cheddar and eggs, this pie has more protein than your average dessert.
- Fiber: 3g – From the apples and flour. Apples are rich in pectin, a soluble fiber that supports gut health.
- Calcium: 15% of your daily value – The cheddar cheese is an excellent source of calcium for bone health.
Dietary Considerations: This recipe is vegetarian. For a lower-sugar option, reduce the granulated sugar to ¼ cup and use a sugar substitute like monk fruit in the filling. The apples’ natural sweetness will still shine. If you’re watching your sodium, use unsalted butter and reduce the added salt to ¼ teaspoon. The cheddar will still provide enough saltiness.
Wellness Perspective: I love that this pie uses whole, recognizable ingredients. There’s no corn syrup, no artificial flavors, no preservatives. It’s real food, made with care, and meant to be enjoyed in moderation. One slice of this pie is a celebration of seasonal ingredients and mindful indulgence—not a daily staple, but a beautiful treat that nourishes both body and soul.
Conclusion
So there you have it—my best brown butter apple pie with cheddar crust, born from a late-night craving and a fridge full of odds and ends. This pie isn’t just a recipe; it’s a reminder that some of the best things in life come from improvisation and a little bit of faith. The nutty brown butter, the sharp cheddar, the sweet-tart apples—it all comes together in a way that feels both familiar and totally new.
I hope you make this pie for yourself, for your family, for a holiday gathering, or just because it’s Tuesday and you feel like it. Don’t be afraid to tweak it, make it your own, and tell me about it. Have you tried adding a pinch of smoked paprika? What about swapping the apples for pears? I’d love to hear your twists and turns in the comments below. And if you make this and it becomes your new favorite fall tradition (like it has for me), please share a photo and tag me—I want to see your golden, bubbly, cheese-crusted masterpiece. Until next time, happy baking, and remember: the best recipes are the ones you make with a little bit of heart and a whole lot of butter.
Frequently Asked Questions
Can I use pre-shredded cheese for the crust?
I really don’t recommend it. Pre-shredded cheese is coated with anti-caking agents like cellulose or starch, which prevent it from melting smoothly into the dough. Grating a block of cheddar takes just a couple of minutes and makes a noticeable difference in the crust’s texture and flavor distribution.
How do I know when the brown butter is done?
Watch for the butter to turn a deep amber color and smell nutty and toasty. The milk solids will settle at the bottom of the pan as tiny brown specks. It happens fast—usually within 5-7 minutes over medium heat. As soon as you see the color change and smell that nutty aroma, pull it off the heat immediately to prevent burning.
Can I make this pie ahead of time?
Absolutely! You can make the dough up to 3 days in advance and keep it wrapped in the fridge. You can also assemble the entire pie (unbaked) and refrigerate it for up to 24 hours before baking. If baking from cold, add 5-10 minutes to the baking time. The baked pie keeps beautifully at room temperature for 2 days or in the fridge for up to 5 days.
Why did my crust turn out tough?
Tough crust usually means one of two things: you overworked the dough, or you used warm butter. When you overmix, you develop too much gluten, which makes the crust dense and chewy instead of flaky. Next time, pulse the food processor just until the dough comes together, and make sure your butter is thoroughly chilled before incorporating it into the flour.
Can I use this crust for a savory pie?
Yes, and you absolutely should! The brown butter cheddar crust is incredible with savory fillings like a mushroom and leek quiche, a turkey pot pie, or even a simple tomato and basil galette. Just reduce or omit the sugar in the dough if you’re going fully savory. I’ve made a breakfast quiche with this crust and it was life-changing.
Pin This Recipe!
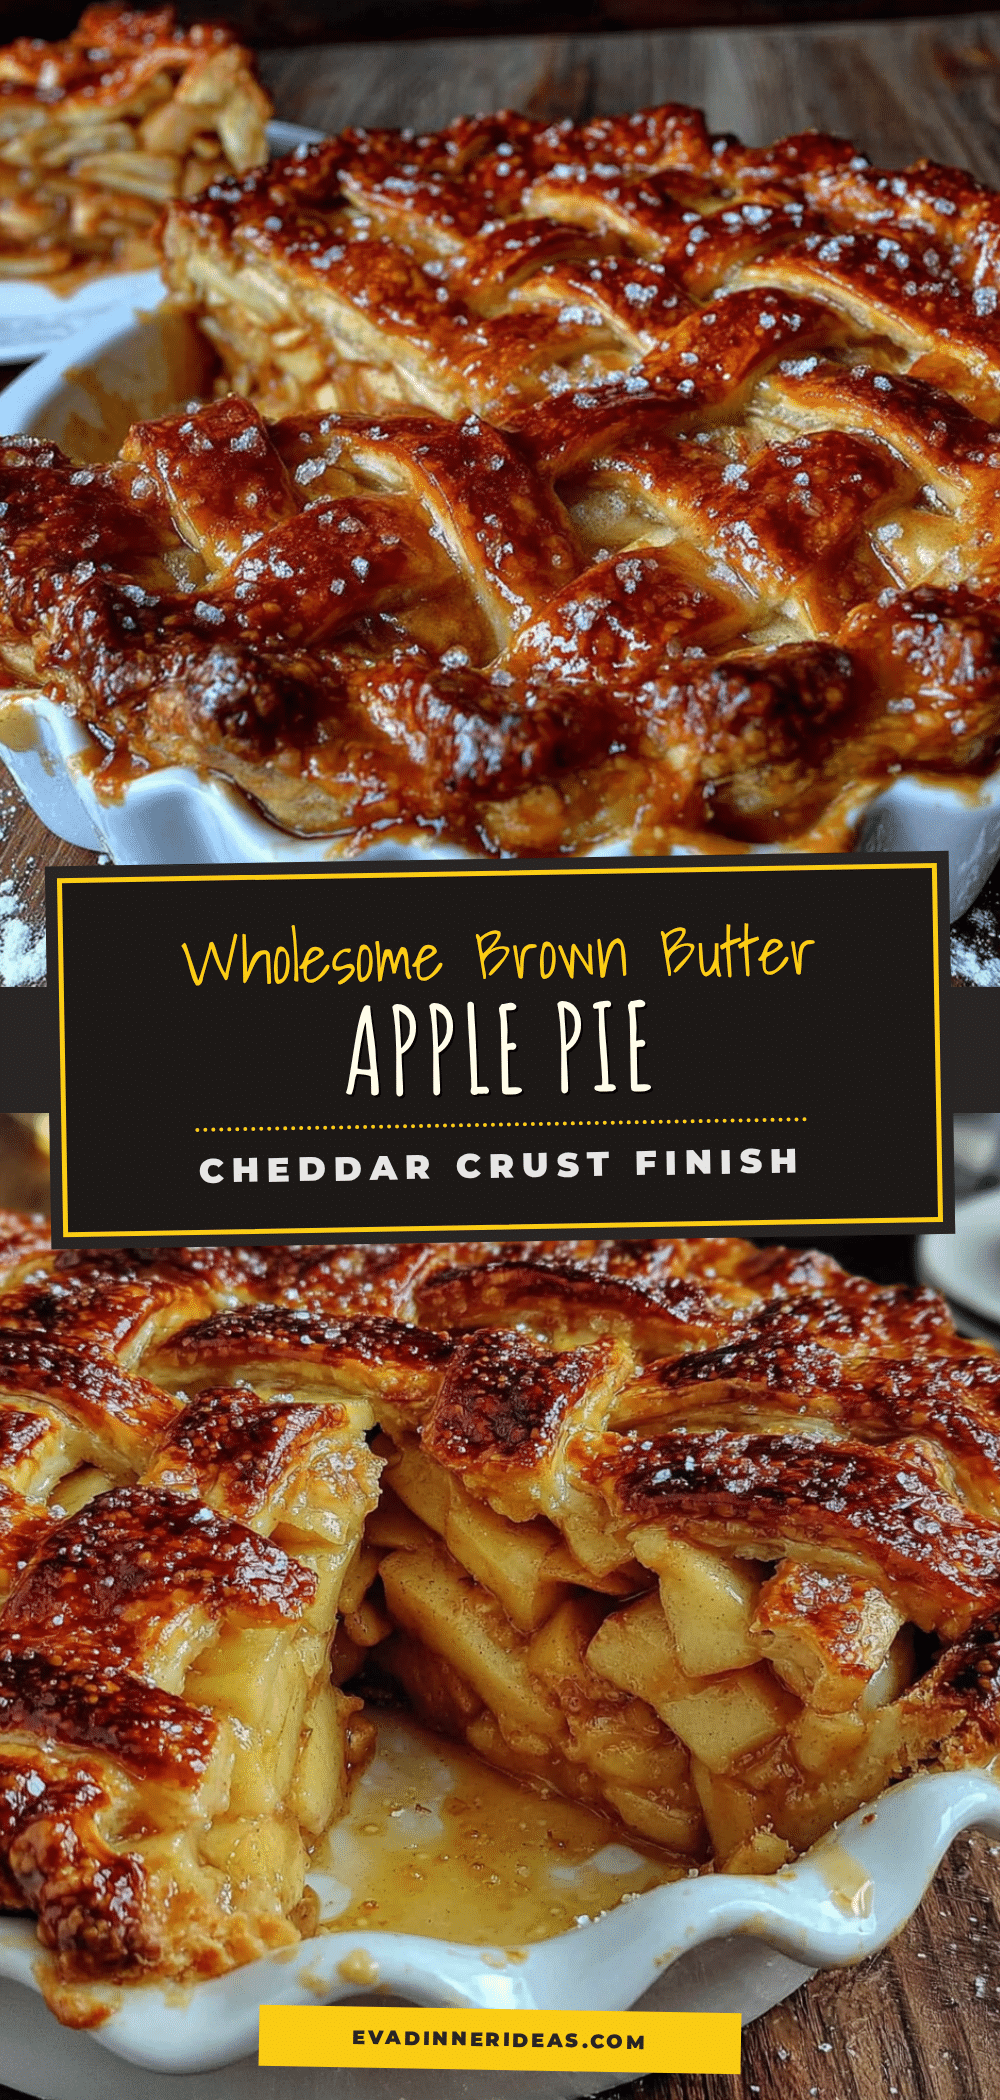
Best Brown Butter Apple Pie with Cheddar Crust
A deep, nutty brown butter apple pie with a savory, crumbly cheddar crust. This recipe combines sweet-tart apples, rich brown butter, and sharp cheddar for an unforgettable flavor experience that’s perfect for fall gatherings.
- Prep Time: 45 minutes
- Cook Time: 55 minutes
- Total Time: 1 hour 40 minutes (plus 1 hour chilling and 2 hours cooling)
- Yield: 8 servings 1x
- Category: Dessert
- Cuisine: American
Ingredients
- 1 ¼ cups all-purpose flour (plus extra for dusting)
- ½ teaspoon fine sea salt
- ½ cup cold unsalted butter, browned and then chilled
- ¾ cup sharp cheddar cheese, finely grated
- 3–4 tablespoons ice water
- 6 cups mixed apples, peeled, cored, and sliced (about 6 medium apples)
- ½ cup brown butter (from the same batch made for the crust)
- ½ cup granulated sugar
- ¼ cup packed light brown sugar
- 2 tablespoons all-purpose flour
- 1 teaspoon ground cinnamon
- ¼ teaspoon ground nutmeg
- ¼ teaspoon salt
- 1 tablespoon lemon juice
- 1 teaspoon vanilla extract
- 1 large egg (for egg wash)
- 1 tablespoon turbinado sugar (optional, for topping)
- Extra grated cheddar for topping (optional)
Instructions
- Brown the butter: Place 1 cup (2 sticks) of unsalted butter in a medium saucepan over medium heat. Let it melt completely, then swirl the pan gently. The butter will foam, then the foam will subside, and you’ll see tiny brown specks forming at the bottom. Once it smells nutty and the solids are a deep amber color (about 5-7 minutes), remove it from the heat immediately. Pour into a heat-safe bowl and let cool to room temperature. You need ½ cup for the crust and ½ cup for the filling. Refrigerat…
- Make the cheddar crust: In a food processor, combine 1 ¼ cups flour and ½ teaspoon salt. Pulse to mix. Add the chilled, solid brown butter (cut into small cubes) and the finely grated cheddar cheese. Pulse until the mixture looks like coarse meal with pea-sized butter pieces. Add ice water, 1 tablespoon at a time, pulsing after each addition, until the dough just holds together when squeezed. Turn out onto a floured surface, shape into a disc, wrap in plastic wrap, and refrigerate for at least 1…
- Prep the apples: While the dough chills, peel, core, and slice the apples to about ¼-inch thick. Place in a large bowl and toss with lemon juice to prevent browning.
- Make the filling: In a separate bowl, whisk together granulated sugar, brown sugar, 2 tablespoons flour, cinnamon, nutmeg, and salt. Pour over the apples, then add the remaining ½ cup of brown butter (liquid but not hot) and vanilla extract. Toss until apples are evenly coated. Let sit for 10-15 minutes.
- Roll out the dough: Preheat oven to 375°F (190°C). On a lightly floured surface, roll out the chilled dough into a 12-inch circle, about ⅛-inch thick. Transfer to a 9-inch pie dish, pressing gently into the bottom and up the sides, leaving a ½-inch overhang. Trim excess and crimp edges.
- Fill and top: Spoon the apple filling into the crust, mounding slightly in the center. For a rustic galette-style fold, fold the overhang up over the edges of the filling, leaving the center exposed.
- Egg wash and bake: Brush the exposed crust with beaten egg wash. Sprinkle with turbinado sugar and extra grated cheddar if desired. Place pie on a baking sheet. Bake for 50-60 minutes, rotating halfway through. If edges brown too quickly, tent with foil at the 30-minute mark. Let cool on a wire rack for at least 2 hours before slicing.
Notes
For the flakiest crust, keep all ingredients cold. Grate your own cheddar cheese—pre-shredded contains anti-caking agents that affect texture. Use a mix of apples (e.g., Honeycrisp and Granny Smith) for best flavor and texture. Let the filling sit for 10-15 minutes to draw out liquid and concentrate flavor. Bake on the bottom third of the oven to crisp the bottom crust. Cool completely (at least 2 hours) before slicing to allow the filling to set. The pie tastes even better the next day as flavors meld.
Nutrition
- Serving Size: 1 slice (1/8 of pie)
- Calories: 400
- Sugar: 28
- Sodium: 320
- Fat: 22
- Saturated Fat: 14
- Carbohydrates: 45
- Fiber: 3
- Protein: 6
Keywords: brown butter apple pie, cheddar crust apple pie, apple pie with cheddar, fall dessert, Thanksgiving pie, brown butter, cheddar cheese, apple pie recipe


