My neighbor, Mrs. Kowalski, watched me fumbling with a piping bag one rainy October afternoon. I was trying to get the perfect swirl on a batch of failed macarons, and my frustration was probably written all over my face. She didn’t say anything at first. She just shuffled back into her kitchen and returned with a worn, flour-dusted index card. “Forget the fancy stuff,” she said with a wink. “Make these ghosts. They’re impossible to mess up.”
The card had a simple recipe for meringue cookies, but her note in the margin—”add chips for eyes”—was pure genius. I made them that night, and honestly, I haven’t stopped since. These adorable ghost meringue cookies with chocolate chip eyes are the kind of recipe that feels like a secret handshake. They’re impossibly light, perfectly sweet, and they look like a little parade of happy spirits floating off your baking sheet. You know that feeling when something turns out so cute you almost don’t want to eat it? Yeah, that’s this recipe. Almost.
I’ve tweaked Mrs. Kowalski’s method over the years, perfecting the temperature and the whipping time so the ghosts hold their shape without cracking. Let me tell you, there’s something deeply satisfying about piping these little guys. They’re forgiving, they’re fun, and they always steal the show at any Halloween gathering or spooky-themed party. This recipe stayed with me because it transformed a moment of baking frustration into pure, joyful creativity.
Why You’ll Love This Recipe
These ghost meringue cookies are more than just a pretty face. I’ve tested this recipe more times than I can count, tweaking the sugar ratio and the oven temperature until the texture is just right—crisp on the outside, melt-in-your-mouth soft on the inside. They’re a certified crowd-pleaser, and they’re surprisingly simple to pull off.
- Incredibly Easy: With just four main ingredients, this recipe comes together in under an hour. The active prep time is only about 15 minutes.
- Naturally Gluten-Free & Low-Fat: Meringues are naturally gluten-free and contain almost no fat, making them a guilt-free treat for parties.
- Perfect for Halloween or Any Spooky Gathering: These ghosts are the star of any Halloween dessert table, but they’re also great for a “Day of the Dead” celebration or a fun baking project with kids.
- Unbelievably Cute: Let’s be honest—the chocolate chip eyes give these cookies so much personality. They look like a little ghost family, and everyone from toddlers to grandparents will smile when they see them.
- No Special Equipment Needed: You don’t need a stand mixer (though it helps). A hand mixer and a piping bag (or even a zip-top bag with the corner cut off) will work perfectly.
What makes this recipe different from every other meringue cookie out there? It’s the method. I use a slightly lower oven temperature and a longer drying time, which prevents the ghosts from browning and keeps them a brilliant, ghostly white. Plus, the chocolate chip eyes are pressed in at just the right moment—after the meringue has firmed up slightly but before it fully sets—so they stay put without sinking. This isn’t just another cookie; it’s your best version of a Halloween classic.
What Ingredients You Will Need
This recipe uses simple, pantry-friendly ingredients that work together to create a light, airy, and perfectly sweet cookie. The key is using room-temperature eggs and superfine sugar for the smoothest, most stable meringue.
- 3 large egg whites, at room temperature (this is crucial for maximum volume—cold eggs won’t whip up as high)
- 3/4 cup (150g) superfine sugar (also called caster sugar; it dissolves faster than granulated sugar, giving you a silkier meringue. You can make your own by pulsing granulated sugar in a food processor for 30 seconds)
- 1/4 teaspoon cream of tartar (this stabilizes the egg whites and helps them hold their shape—don’t skip it!)
- 1/2 teaspoon vanilla extract (pure vanilla extract adds a warm, sweet flavor; avoid imitation vanilla, which can leave a chemical aftertaste)
- 1/4 cup (45g) mini chocolate chips (mini chips are perfect for the eyes—they’re small enough to look cute but big enough to see. I prefer Ghirardelli or Enjoy Life brand for consistent quality)
For the eyes, you can also use regular chocolate chips cut in half, but mini chips are so much easier. If you’re feeling fancy, you can use white chocolate chips for a different look, but dark chocolate creates the best contrast against the white meringue.
One ingredient tip I learned the hard way: make sure your bowl and whisk are completely clean and free of any grease. Even a tiny bit of oil can prevent your egg whites from whipping up properly. I wipe my bowl down with a little lemon juice or white vinegar on a paper towel before I start—it’s a pro trick that guarantees success.
Equipment Needed
You don’t need a professional bakery setup for these ghosts, but having the right tools makes the process smoother and more fun.
- Electric hand mixer or stand mixer: A stand mixer with a whisk attachment is ideal, but a hand mixer works perfectly too. You’ll be whipping the egg whites for about 5-7 minutes, so you want something that won’t tire out your arm.
- Large mixing bowl: Use a glass or metal bowl. Plastic bowls can retain grease, which is the enemy of meringue.
- Piping bag with a large round tip: A Wilton 1A or 2A tip works great for creating ghost shapes. If you don’t have a piping bag, a sturdy zip-top bag with a 1/2-inch corner cut off will do the job.
- Baking sheet lined with parchment paper: Parchment paper is non-stick and makes cleanup a breeze. Silicone baking mats also work well.
- Small offset spatula: This is handy for smoothing the meringue in the piping bag and for cleaning up any drips.
- Kitchen scale (optional but helpful): Weighing your sugar ensures accuracy, but measuring by volume works fine too.
I’ve made these with just a hand mixer and a zip-top bag, and they turned out perfectly. Don’t let a lack of fancy equipment stop you!
Preparation Method
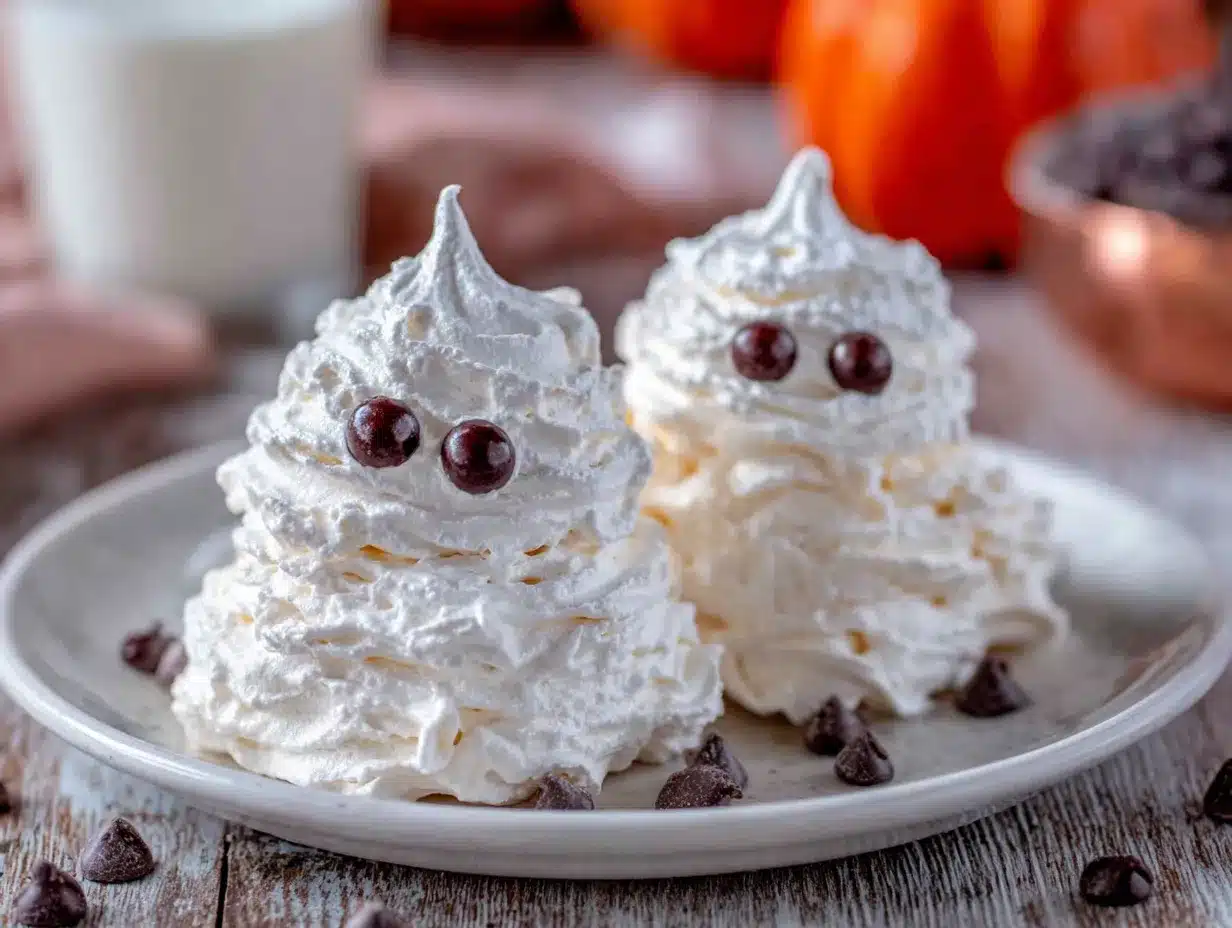
Follow these steps carefully, and you’ll have a tray of adorable ghost meringue cookies in no time.
- Preheat and prepare: Preheat your oven to 200°F (93°C). Line a large baking sheet with parchment paper. This low temperature is key—it dries the meringues out slowly without browning them.
- Whip the egg whites: In your clean, grease-free mixing bowl, combine the egg whites and cream of tartar. Beat on medium speed until soft peaks form—this means the whites will hold a gentle peak that droops over when you lift the whisk. This usually takes about 2-3 minutes with a stand mixer.
- Gradually add the sugar: With the mixer running on medium-high speed, add the superfine sugar one tablespoon at a time. This slow addition is crucial—it allows the sugar to dissolve fully. Continue beating until the meringue is stiff and glossy. You’ll know it’s ready when you can rub a small amount between your fingers and it feels smooth, not gritty. This takes about 5-7 minutes total.
- Add the vanilla: Beat in the vanilla extract on low speed for just 10 seconds until combined. Don’t overmix at this stage or you’ll deflate the meringue.
- Pipe the ghosts: Transfer the meringue to your piping bag fitted with the large round tip. Hold the bag straight up and down, about 1/2 inch above the baking sheet. Pipe a tall, rounded blob about 2 inches wide and 3 inches tall. To create the ghost shape, pipe a generous base, then lift the bag straight up while squeezing, and finish with a slight flick of your wrist to create a wispy tail on top. Leave about 2 inches between each ghost—they don’t spread much, but they need airflow.
- Add the eyes: This step requires a little timing. Let the piped ghosts sit for 2-3 minutes. The surface will begin to firm up slightly. Gently press two mini chocolate chips into each ghost to form eyes. If you press them in too early, they’ll sink; too late, and they won’t stick. The sweet spot is when the meringue feels dry to the touch but still soft underneath.
- Bake low and slow: Place the baking sheet in the preheated oven and bake for 60-75 minutes. The meringues are done when they are completely dry and can be lifted easily off the parchment paper. They should be firm to the touch but not browned at all. If they start to turn golden, your oven is too hot.
- Cool in the oven: Turn the oven off and leave the meringues inside with the door slightly ajar for another 30 minutes. This gradual cooling prevents cracking and ensures a perfectly dry interior.
- Cool completely: Transfer the baking sheet to a wire rack and let the ghosts cool completely for at least 15 minutes before serving or storing.
One time, I forgot to let the ghosts sit before adding the eyes, and they all sank to the bottom of the cookies. They looked like sad, blind ghosts! So trust me on that 2-3 minute wait.
Cooking Tips & Techniques
Making meringue can feel a little finicky, but with these tips, you’ll be a pro in no time.
- Humidity is your enemy: Meringue is essentially sugar foam, and it hates moisture. Don’t make these on a rainy or humid day—the cookies will turn out sticky and soft instead of crisp. A dry, cool day is ideal.
- Room temperature eggs are non-negotiable: Cold egg whites won’t whip to their full volume. Separate your eggs while they’re cold (it’s easier), then let the whites sit on the counter for 30 minutes before you start.
- Don’t over-whip: Once the meringue is stiff and glossy, stop. If you keep beating, the egg whites will become dry and grainy, and they’ll start to separate. You’ll see the texture change from smooth to slightly curdled—that’s the point of no return.
- Use a timer for the sugar addition: I set a timer for 5 minutes and add a tablespoon of sugar every 30 seconds. It sounds obsessive, but it guarantees the sugar dissolves completely. Gritty meringue is a tragedy.
- Pipe with confidence: Your first ghost might look a little lopsided—that’s okay! They’re supposed to be cute and imperfect. Hold the piping bag steady and squeeze with even pressure. If you mess up, just scrape the meringue back into the bowl and try again.
I once tried to make these on a humid August day, and the ghosts came out of the oven looking like deflated balloons. They still tasted good, but they were a sad, flat little family. Learn from my mistakes!
Variations & Adaptations
These ghost meringue cookies are a blank canvas for creativity. Here are some fun ways to make them your own.
- Spooky Flavor Twist: Add 1/4 teaspoon of peppermint extract along with the vanilla for a minty ghost that tastes like a candy cane. Or try 1/2 teaspoon of almond extract for a nutty, marzipan-like flavor.
- Colorful Ghosts: Divide the meringue into separate bowls and add a drop of gel food coloring to each. Pipe a rainbow of ghosts for a non-scary Halloween party. Gel coloring is better than liquid because it won’t thin the meringue.
- Chocolate Ghosts: Swap 2 tablespoons of the superfine sugar for 2 tablespoons of unsweetened cocoa powder. Sift the cocoa powder with the sugar before adding it to the egg whites. You’ll get chocolate ghosts with dark chocolate chip eyes—double the chocolate!
- Vegan Version: Use aquafaba (the liquid from a can of chickpeas) instead of egg whites. Whip 1/2 cup of aquafaba with 1/4 teaspoon cream of tartar until stiff peaks form, then proceed with the recipe. The result is eerily similar to traditional meringue.
- Mini Ghosts: Pipe smaller ghosts (about 1 inch wide and 1.5 inches tall) and reduce the baking time to 40-50 minutes. These are perfect for topping cupcakes or hot chocolate.
My personal favorite variation is the peppermint ghost. I made them for a Christmas party, and everyone thought they were snowmen. They’re just as cute and twice as festive!
Serving & Storage Suggestions
These ghost meringue cookies are best served at room temperature, straight from the baking sheet. They have a light, airy texture that practically dissolves on your tongue.
- Presentation Ideas: Arrange the ghosts on a platter with a dusting of powdered sugar (for a “snowy” effect) or place them standing upright in a small vase for a spooky centerpiece. You can also string them with edible glitter glue and hang them as decorations—though they’re so tasty, they might not last long enough!
- What to Serve With: These cookies pair beautifully with a cup of hot cocoa, a pumpkin spice latte, or a glass of cold milk. For a dessert board, arrange them alongside brownies, caramel apples, and candy corn.
- Storage Instructions: Store the ghosts in an airtight container at room temperature for up to 2 weeks. Do not refrigerate them—the moisture in the fridge will make them sticky. If you live in a humid climate, add a silica gel packet to the container to absorb excess moisture.
- Freezing: You can freeze baked meringues for up to 3 months. Place them in a single layer in a freezer-safe container with parchment paper between layers. Thaw at room temperature for 15 minutes before serving. They won’t be quite as crisp as fresh, but they’ll still be delicious.
- How Flavors Develop: The vanilla flavor will mellow slightly after a day or two, but the texture stays perfect. I actually think these cookies taste best on the second day—the sugar and vanilla have a chance to meld together.
Nutritional Information & Benefits
Per serving (1 ghost cookie, based on 24 cookies):
- Calories: 45
- Fat: 1g
- Carbohydrates: 10g
- Sugar: 9g
- Protein: 1g
- Sodium: 15mg
These ghost meringue cookies are naturally gluten-free and low in fat, making them a lighter option compared to traditional butter-based cookies. The egg whites provide a small amount of protein, and the cream of tartar adds a touch of potassium. While they’re still a treat (sugar is sugar, after all), they’re a guilt-free indulgence for Halloween parties. Plus, they’re free of common allergens like dairy and nuts when made with standard ingredients—just double-check your chocolate chips if you have sensitivities.
From a wellness perspective, I love that these cookies let you enjoy a sweet treat without the heavy feeling that comes with most desserts. They’re perfect for when you want something festive but not too filling.
Conclusion
These adorable ghost meringue cookies with chocolate chip eyes are more than just a Halloween treat—they’re a little piece of joy that you can create in your own kitchen. They’re forgiving, fun, and guaranteed to make everyone smile. Whether you’re making them for a spooky party, a classroom treat, or just a quiet afternoon of baking, they’ll bring a touch of magic to your table.
I encourage you to make these your own. Add a pinch of cinnamon for warmth, pipe them into different shapes, or go wild with the colors. The best recipes are the ones that evolve with you. And honestly, every time I make these, I think of Mrs. Kowalski and her flour-dusted index card. That’s the power of a good recipe—it connects us to the people and moments we love.
Have you tried making these ghost cookies? I’d love to see your creations! Drop a comment below with your favorite variation, or tag me in your photos on social media. Happy baking, and may your ghosts always have perfect little eyes!
Frequently Asked Questions
Can I make these ghost meringue cookies without a piping bag?
Absolutely! If you don’t have a piping bag, use a sturdy zip-top bag. Fill it with the meringue, seal it, and snip off a 1/2-inch corner. Pipe the ghosts directly onto the parchment paper. The shapes might be a little less defined, but they’ll still be adorable and delicious.
Why did my meringue turn out sticky?
Sticky meringue is usually a sign of humidity or under-baking. If you’re making these on a rainy day, the moisture in the air can prevent the meringue from drying out properly. Try baking them for an additional 10-15 minutes at 200°F (93°C), and make sure they’re completely cool before storing them in an airtight container.
Can I use granulated sugar instead of superfine sugar?
You can, but the texture won’t be as smooth. Granulated sugar takes longer to dissolve, which can result in a slightly grainy meringue. If you only have granulated sugar, pulse it in a food processor for 30 seconds to make your own superfine sugar. It’s a quick fix that makes a big difference.
How do I prevent the chocolate chips from sinking?
The key is timing. Let the piped ghosts sit at room temperature for 2-3 minutes before adding the chocolate chips. The surface will form a thin skin that supports the chips. If you add them too soon, they’ll sink to the bottom. If you wait too long, the meringue will be too firm to hold them.
Can I double this recipe?
Yes, you can easily double or triple this recipe. Just make sure you have enough space in your oven to bake multiple trays. Bake one tray at a time on the center rack for best results. If you try to bake two trays at once, the meringues might not dry evenly.
Pin This Recipe!
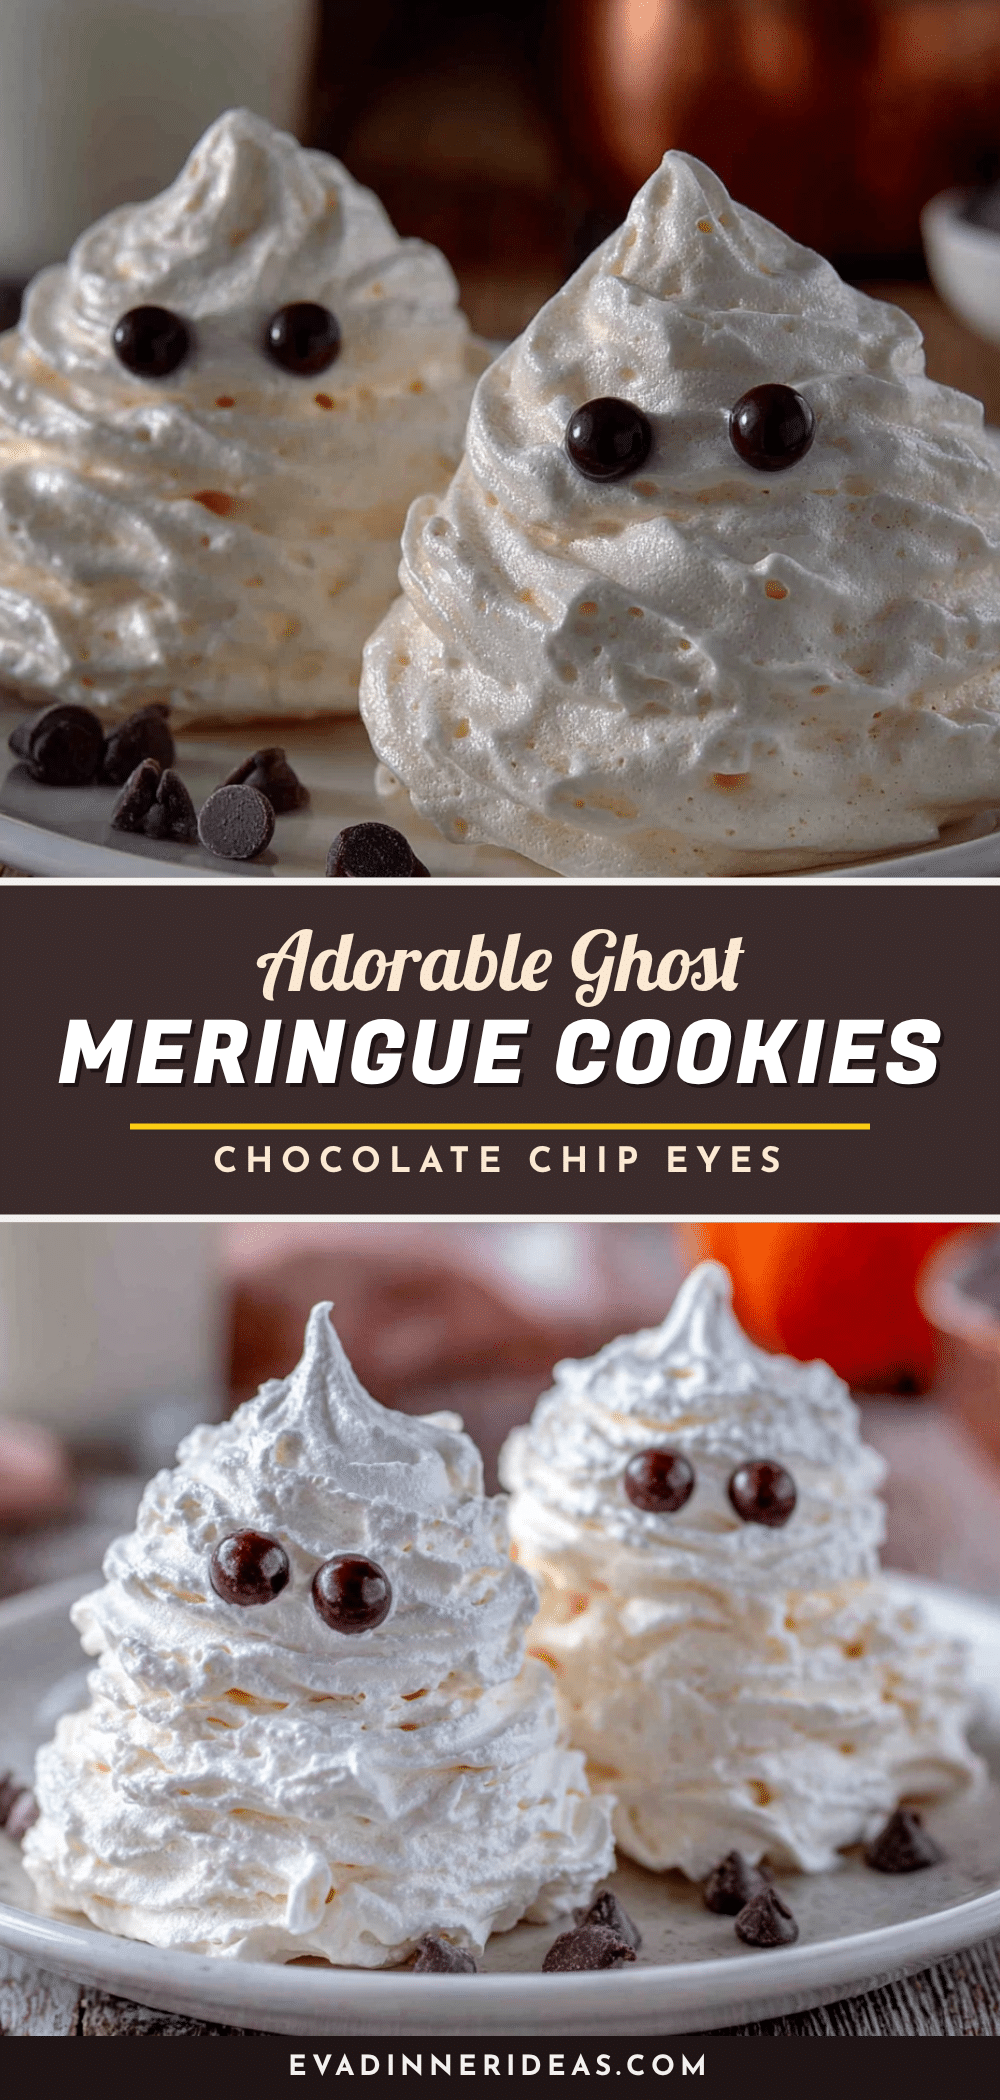
Adorable Ghost Meringue Cookies with Chocolate Chip Eyes
These adorable ghost meringue cookies with chocolate chip eyes are impossibly light, perfectly sweet, and look like a little parade of happy spirits floating off your baking sheet. They’re forgiving, fun, and always steal the show at any Halloween gathering or spooky-themed party.
- Prep Time: 15 minutes
- Cook Time: 60-75 minutes
- Total Time: 1 hour 45 minutes
- Yield: 24 servings 1x
- Category: Dessert
- Cuisine: American
Ingredients
- 3 large egg whites, at room temperature
- 3/4 cup (150g) superfine sugar
- 1/4 teaspoon cream of tartar
- 1/2 teaspoon vanilla extract
- 1/4 cup (45g) mini chocolate chips
Instructions
- Preheat your oven to 200°F (93°C). Line a large baking sheet with parchment paper.
- In a clean, grease-free mixing bowl, combine the egg whites and cream of tartar. Beat on medium speed until soft peaks form, about 2-3 minutes.
- With the mixer running on medium-high speed, add the superfine sugar one tablespoon at a time. Continue beating until the meringue is stiff and glossy, about 5-7 minutes total. The meringue should feel smooth, not gritty, when rubbed between your fingers.
- Beat in the vanilla extract on low speed for just 10 seconds until combined.
- Transfer the meringue to a piping bag fitted with a large round tip. Pipe tall, rounded blobs about 2 inches wide and 3 inches tall onto the prepared baking sheet, leaving about 2 inches between each ghost. Finish with a slight flick of your wrist to create a wispy tail on top.
- Let the piped ghosts sit for 2-3 minutes until the surface begins to firm up slightly. Gently press two mini chocolate chips into each ghost to form eyes.
- Bake for 60-75 minutes, until the meringues are completely dry and can be lifted easily off the parchment paper. They should be firm to the touch but not browned.
- Turn the oven off and leave the meringues inside with the door slightly ajar for another 30 minutes to cool gradually.
- Transfer the baking sheet to a wire rack and let the ghosts cool completely for at least 15 minutes before serving or storing.
Notes
Make sure your bowl and whisk are completely clean and free of any grease. Wipe the bowl down with a little lemon juice or white vinegar on a paper towel before starting. Do not make these on a rainy or humid day. Room temperature eggs are non-negotiable. Don’t over-whip the meringue. Let the piped ghosts sit for 2-3 minutes before adding the chocolate chips to prevent them from sinking.
Nutrition
- Serving Size: 1 ghost cookie
- Calories: 45
- Sugar: 9
- Sodium: 15
- Fat: 1
- Carbohydrates: 10
- Protein: 1
Keywords: ghost meringue cookies, Halloween cookies, meringue cookies, chocolate chip eyes, gluten-free cookies, low-fat cookies, spooky treats, easy Halloween dessert


