I was supposed to be making a fancy French macaron for a Halloween party. I had the almond flour measured, the egg whites sitting out to come to room temperature, and I even watched two YouTube tutorials on the perfect macaronage technique. But somewhere between separating the sixth egg and realizing my kitchen scale needed new batteries, I grabbed the wrong measuring cup. I dumped a full cup of granulated sugar into the egg whites before I realized my mistake. The bowl was already sitting in the mixer, and I was already running late for that party. I figured I’d just whip them anyway, see what happened, and then start over.
Honestly, I was frustrated. I mean, who does that? I stood there watching the mixer spin, fully expecting to toss the whole mess in the trash. But then something weird happened. The mixture got glossy. Then it got stiff. Then it started forming these perfect, firm peaks that looked nothing like the flat, sad puddle I was expecting. I grabbed a piping bag out of habit, scooped the mixture in, and squeezed out a little test blob onto a baking sheet. It looked exactly like a ghost. A tiny, white, perfect little ghost. I almost laughed out loud.
That night, I brought a platter of these ghost meringues to the party instead of the macarons. They disappeared in about ten minutes. People kept grabbing them, holding them up, and saying, “Wait, these are just sugar and egg whites?” Maybe you’ve been there — you try to make something complicated, mess it up, and accidentally stumble onto something way better. That’s this recipe. It’s the happy accident that turned into my most-requested Halloween treat. And I keep making them because they’re faster, easier, and honestly, more fun than anything I planned to make.
Why You’ll Love This Recipe
Let me tell you why these ghost meringue cookies have earned a permanent spot in my Halloween rotation. I’ve tested this recipe six times now — twice with kids helping, once in a humid kitchen, and once when I was so tired I almost fell asleep standing up. Every single time, they worked. That’s the kind of reliable you need on a busy weeknight when you’re already juggling costumes and candy.
- Quick & Easy: These come together in about 15 minutes of active prep time. The oven does the rest of the work while you help the kids with their vampire makeup or answer the door for the first trick-or-treaters.
- Simple Ingredients: You only need three things — egg whites, sugar, and vanilla extract. That’s it. No special trip to the store required.
- Perfect for Halloween: These little ghosts are the star of any spooky spread. They look impressive but take almost no effort.
- Crowd-Pleaser: Kids love them because they’re cute. Adults love them because they’re light and not too sweet. Everyone wins.
- Unbelievably Delicious: The texture is what gets people. They’re crispy on the outside, slightly chewy on the inside, and they melt in your mouth like a tiny cloud.
What makes this version different from other meringue recipes? It’s the technique. Most recipes tell you to use superfine sugar or heat your sugar in the oven first. Not this one. I use plain granulated sugar straight from the bag, and I’ve figured out exactly how long to whip it so you get that glossy, stable meringue without any fuss. It’s not just another cookie recipe — it’s the one that works when you’re tired, rushed, and using whatever you have in the pantry.
What Ingredients You Will Need
This recipe uses simple, wholesome ingredients to deliver that perfect ghostly texture and sweet flavor without any complicated shopping. Everything here is probably already in your kitchen right now.
- 3 large egg whites (room temperature — this matters for volume)
- ¾ cup granulated sugar (plain white sugar works best; I’ve tried organic cane sugar and it’s grainier)
- ½ teaspoon vanilla extract (pure vanilla, not imitation, for the best flavor)
- ¼ teaspoon cream of tartar (this stabilizes the meringue and helps it hold its shape)
- Pinch of salt (balances the sweetness)
- Mini chocolate chips (optional, for ghost eyes — about 2 tablespoons)
A few notes on ingredients. First, room temperature egg whites are non-negotiable here. Cold egg whites don’t whip up as high or as stable. I set my eggs out on the counter about 30 minutes before I start. If you forget, put the eggs in a bowl of warm water for 5 minutes — it works in a pinch.
Second, the cream of tartar is your best friend. I’ve made these without it, and they still worked, but they were flatter and less stable. It’s a small ingredient that makes a big difference. If you don’t have it, you can substitute ½ teaspoon of lemon juice or white vinegar.
For the sugar, stick with plain granulated. I’ve tried powdered sugar and it made the meringue too dense. I’ve also tried brown sugar, and while the flavor was interesting, the color was wrong for ghosts. White sugar keeps them looking spooky and pale.
And about those chocolate chips — they’re optional, but they make the ghosts look adorable. I use mini chips because they’re the perfect size for tiny ghost faces. If you don’t have them, you can pipe the eyes on with melted chocolate after baking, or just leave them plain. The ghosts look cute either way.
Equipment Needed
You don’t need fancy equipment for these ghost meringue cookies. Here’s what you’ll need:
- Stand mixer or hand mixer — A stand mixer with the whisk attachment is easiest, but a hand mixer works just fine. I’ve made these with both. The hand mixer takes a few extra minutes, but the results are the same.
- Large mixing bowl — Make sure it’s completely clean and dry. Any grease or moisture will ruin your meringue.
- Piping bag — A disposable piping bag is easiest. If you don’t have one, a zip-top bag with the corner snipped off works perfectly.
- Large round piping tip — I use a Wilton 1A tip. It gives the ghosts a nice rounded shape. If you’re using a zip-top bag, just snip a ½-inch opening.
- Baking sheet — A standard half-sheet pan works great.
- Parchment paper — Don’t skip this. Meringue sticks to unlined pans.
If you’re on a budget, skip the fancy piping tips and just use a zip-top bag. I’ve done it dozens of times and the ghosts still look adorable. Just make sure the opening is clean and even.
Preparation Method
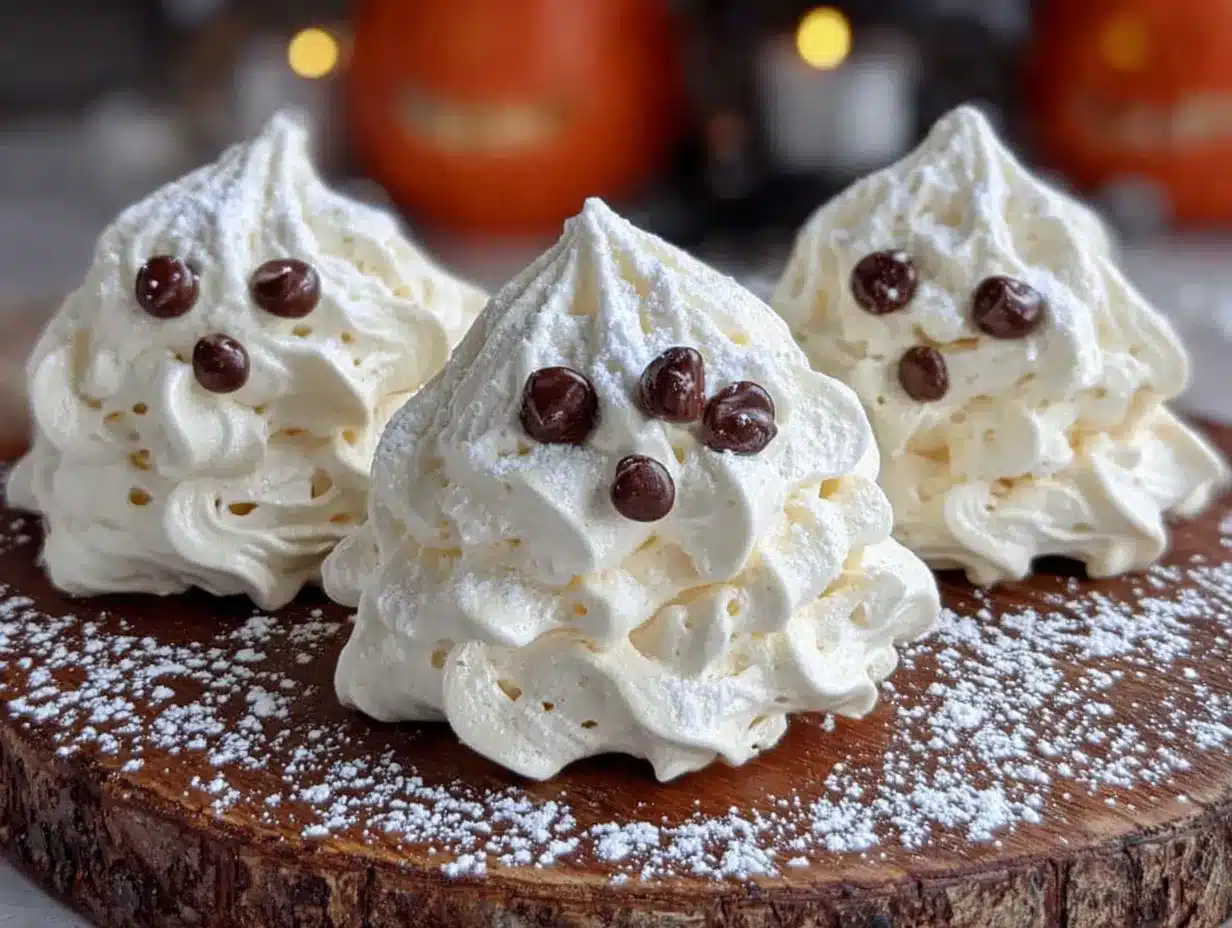
Follow these steps carefully, and you’ll have perfect ghost meringue cookies every time.
- Preheat your oven to 200°F (93°C). This is important — meringues bake low and slow. If your oven runs hot, use an oven thermometer. I ruined my first batch because my oven was actually running at 250°F.
- Line a baking sheet with parchment paper. Set it aside for now.
- Separate your eggs. This is the most critical step. Crack each egg carefully, letting the white fall into a small bowl. Transfer each white to your mixing bowl one at a time. If you get any yolk in there, start over. Fat is the enemy of meringue.
- Start whipping. Using the whisk attachment, beat the egg whites on medium speed until they become foamy and bubbly — about 1 minute. You’ll see lots of small bubbles forming.
- Add the cream of tartar and salt. Keep beating on medium speed until soft peaks form — about 2 minutes. When you lift the whisk, the peaks should flop over slightly.
- Start adding the sugar. With the mixer running on medium-high speed, add the sugar one tablespoon at a time. I know it’s tedious, but this gradual addition is what creates that glossy, stable meringue. If you dump it all in at once, your meringue will be grainy and flat.
- Keep whipping. After all the sugar is added, increase the speed to high and beat for 5 to 7 minutes. The mixture should be thick, glossy, and hold stiff peaks. When you lift the whisk, the peak should stand straight up without drooping. Rub a tiny bit between your fingers — it should feel smooth, not gritty. If it’s gritty, keep whipping.
- Add the vanilla. Beat for 30 seconds more until it’s fully incorporated.
- Transfer to a piping bag. Fit your piping bag with the round tip, then fill it with the meringue. Work quickly — meringue starts to deflate if it sits too long.
- Pipe the ghosts. Hold the piping bag straight up and down, about ½ inch above the parchment paper. Squeeze out a round base about 1½ inches wide. Then lift the bag straight up while continuing to squeeze, creating a tall peak. Release pressure and pull away. You should have a little ghost shape with a pointed head. Leave about 1 inch between each ghost.
- Add eyes (optional). Gently press two mini chocolate chips into each ghost for eyes. Do this immediately after piping, while the meringue is still soft.
- Bake for 60 to 75 minutes. The ghosts should be firm to the touch and easily peel off the parchment paper. They shouldn’t be brown at all — just pale and dry. If they start to brown, your oven is too hot.
- Turn off the oven and let them cool inside. Leave the door slightly ajar with a wooden spoon. Let them cool completely for at least 1 hour. This prevents cracking.
A few sensory cues to watch for. When you’re whipping the meringue, listen for the sound change. It starts sloshy and liquid, then becomes quiet and thick. When it’s done, the mixer will sound strained. The meringue should feel like marshmallow fluff — thick, sticky, and glossy.
Cooking Tips & Techniques
I’ve made these ghost meringue cookies more times than I can count, and I’ve learned a few things the hard way. Let me save you some trouble.
Humidity is your enemy. Meringue is basically sugar and egg whites, and sugar attracts moisture. If it’s a rainy or humid day, your meringue might turn out sticky or flat. I learned this the hard way when I made a batch during a thunderstorm and they never firmed up. If you can, make these on a dry day. If you can’t, add an extra 15 minutes to the baking time.
Don’t overmix after adding sugar. Once the sugar is fully dissolved, stop whipping. Overmixed meringue can become grainy and start to separate. You’ll see it look watery or curdled. If that happens, you can’t fix it — you have to start over.
Use a clean bowl. I cannot stress this enough. Any trace of grease or egg yolk will ruin your meringue. I wipe my bowl with a little lemon juice on a paper towel before I start, just to be safe.
Pipe with confidence. When you’re making the ghost shapes, don’t hesitate. A slow, steady squeeze creates a better shape than a hesitant one. If your first ghost looks weird, just scrape it back into the bag and try again. No one will know.
Let them cool completely. I know it’s tempting to grab one right out of the oven, but they need to cool inside the oven to prevent cracking. I’ve ruined a batch by pulling them out too early — they cracked and deflated within minutes.
Variations & Adaptations
These ghost meringue cookies are surprisingly versatile. Here are some ways to switch them up.
Flavor variations. Swap the vanilla extract for peppermint, almond, or coconut extract. Use ½ teaspoon for stronger flavors like peppermint, or 1 teaspoon for milder ones like almond. I made a batch with peppermint extract last year and they tasted exactly like candy canes — perfect for Christmas ghosts.
Color variations. Add a few drops of gel food coloring after the meringue is whipped. For Halloween, try orange or purple ghosts. For a spooky effect, leave half the ghosts white and color the other half a pale green for a zombie ghost look. Just fold the color in gently with a spatula — don’t overmix.
Dietary adaptations. These are naturally gluten-free and dairy-free. If you need them to be vegan, use aquafaba (the liquid from a can of chickpeas) instead of egg whites. Use 3 tablespoons of aquafaba per egg white. The texture is slightly different — a little less crisp — but they still work beautifully.
Topping variations. Instead of chocolate chip eyes, try pressing a tiny candy eyeball into each ghost. Or dust them with a little edible glitter for a magical effect. I’ve also drizzled melted white chocolate over the cooled ghosts for an extra layer of sweetness.
Size variations. Make mini ghosts by piping smaller rounds — they bake faster, about 45 minutes. Or make giant ghosts by piping larger rounds — they need about 90 minutes. Just keep an eye on them.
Serving & Storage Suggestions
These ghost meringue cookies are best served at room temperature. They’re light, airy, and perfect for snacking. Arrange them on a platter with other Halloween treats like chocolate spiders, pumpkin cupcakes, or caramel apples. They look especially cute scattered around a punch bowl or arranged on a cake stand.
For drinks, they pair beautifully with hot chocolate, apple cider, or a warm pumpkin spice latte. The sweetness of the meringue balances the richness of the drink.
Storage instructions. Store these in an airtight container at room temperature for up to 2 weeks. Do not refrigerate them — the moisture in the fridge will make them sticky. I keep mine in a glass jar with a tight lid, and they stay perfectly crisp.
Freezer instructions. You can freeze them for up to 3 months. Place them in a single layer in a freezer-safe container, with parchment paper between layers. Thaw at room temperature for about 30 minutes before serving. They won’t be quite as crisp as fresh, but they’re still delicious.
Flavor development. These actually taste better the next day. The flavors mellow and the texture becomes even more delicate. If you can resist eating them all on day one, they’re even better on day two.
Nutritional Information & Benefits
Here’s the nutritional breakdown for one ghost meringue cookie (based on a batch of 24 cookies):
| Nutrient | Amount per cookie |
|---|---|
| Calories | 25 |
| Total Fat | 0g |
| Sodium | 10mg |
| Total Carbohydrates | 6g |
| Sugars | 6g |
| Protein | 1g |
These cookies are naturally low in calories and fat-free. They’re also gluten-free and dairy-free, making them a great option for people with dietary restrictions. The egg whites provide a small amount of protein, and the sugar gives you a quick energy boost — perfect for a Halloween party where you need to keep going.
From a wellness perspective, I love that these are a lighter treat option. They satisfy a sweet craving without being heavy or greasy. Plus, they’re so cute that you only need one or two to feel satisfied.
Conclusion
These ghost meringue cookies are proof that sometimes the best recipes come from the biggest mistakes. They’re quick, easy, and absolutely adorable — everything you want in a Halloween treat. Whether you’re making them for a party, a school event, or just to surprise your family, they never fail to get smiles and compliments.
I love that they’re so forgiving. You don’t need to be a pastry chef to make them look good. You don’t need fancy ingredients or expensive equipment. You just need three simple ingredients, a little patience, and a willingness to laugh when your first ghost looks like a blob. Trust me, they get better with practice.
So grab your eggs, preheat your oven, and give these a try. I’d love to hear how they turn out. Drop a comment below and tell me about your ghost shapes — did they look spooky or silly? Share a photo on Pinterest and tag me so I can see your creations. Happy Halloween, and happy baking!
Frequently Asked Questions
Can I make these ghost meringue cookies without a stand mixer?
Absolutely. A hand mixer works perfectly fine. It might take a few extra minutes of whipping, but the results are the same. You can even whip them by hand with a whisk, but that takes about 15 to 20 minutes of constant whisking. Your arm will get a workout.
Why did my meringue turn out flat?
Flat meringue usually means one of three things: your bowl had grease or moisture, you got a bit of egg yolk in the whites, or you didn’t whip them long enough. Make sure your bowl is completely clean and dry, and separate your eggs carefully. If you’re not sure about the whipping time, go a minute or two longer than you think you need.
Can I use liquid egg whites from a carton?
I don’t recommend it. Liquid egg whites are pasteurized, which changes their protein structure and makes them harder to whip into stiff peaks. They can work in a pinch, but you’ll get a much better result with fresh egg whites. If you use carton egg whites, add an extra ¼ teaspoon of cream of tartar to help stabilize them.
How do I know when the meringue is done whipping?
There are two tests. First, lift the whisk attachment — the meringue should form a stiff peak that stands straight up without drooping. Second, rub a tiny bit between your fingers — it should feel completely smooth, not gritty. If it’s gritty, keep whipping for another minute or two.
Can I make these ahead of time for a party?
Yes, and I actually recommend it. These cookies store beautifully for up to 2 weeks in an airtight container at room temperature. Make them a few days before your party, and they’ll be perfectly crisp and ready to serve. Just keep them away from moisture — no refrigerating or freezing if you can help it.
Pin This Recipe!
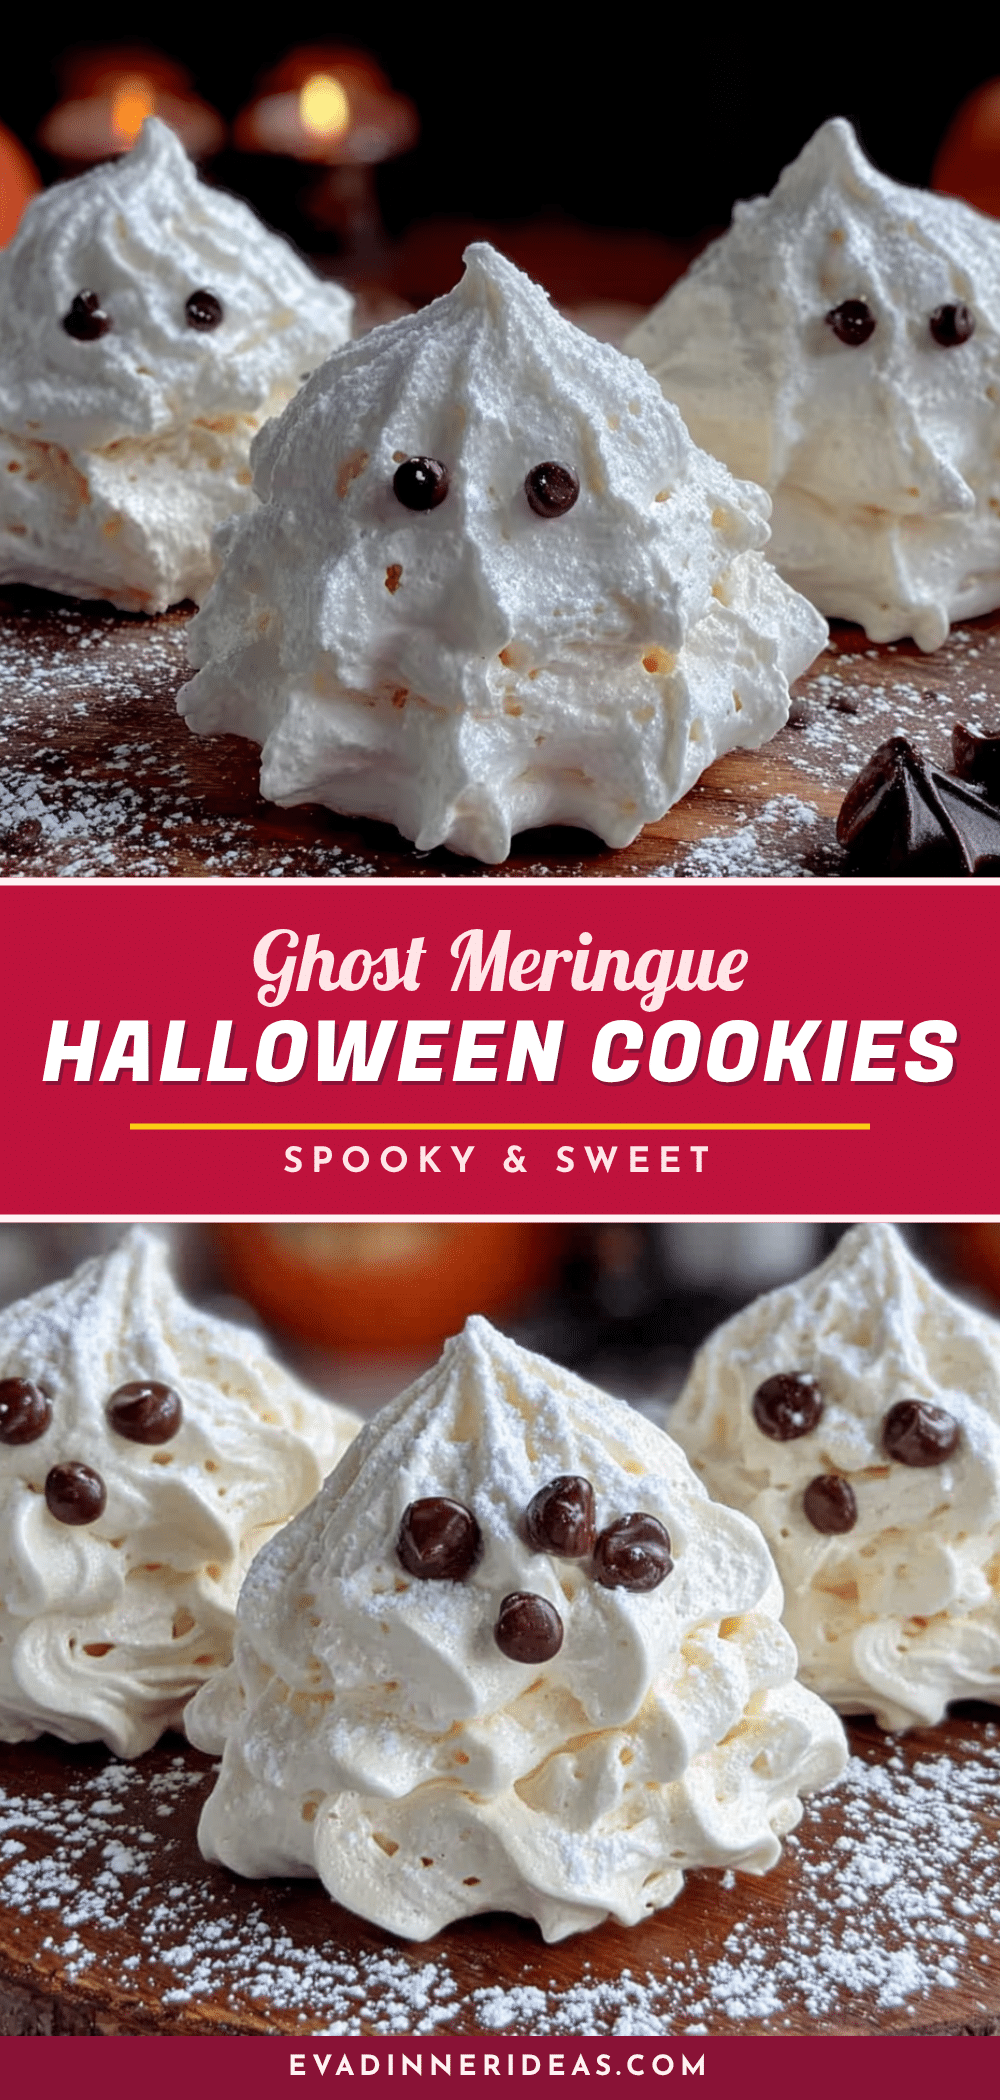
15-Minute Easy Ghost Meringue Cookies for Halloween
These ghost meringue cookies are a happy accident turned into the most-requested Halloween treat. Quick, easy, and absolutely adorable, they require only three simple ingredients and come together in about 15 minutes of active prep time.
- Prep Time: 15 minutes
- Cook Time: 60-75 minutes
- Total Time: 1 hour 15 minutes to 1 hour 30 minutes
- Yield: 24 cookies 1x
- Category: Dessert
- Cuisine: American
Ingredients
- 3 large egg whites (room temperature)
- ¾ cup granulated sugar
- ½ teaspoon vanilla extract (pure vanilla)
- ¼ teaspoon cream of tartar
- Pinch of salt
- Mini chocolate chips (optional, for ghost eyes — about 2 tablespoons)
Instructions
- Preheat your oven to 200°F (93°C).
- Line a baking sheet with parchment paper.
- Separate your eggs carefully, ensuring no yolk gets into the whites. Transfer each white to a clean, dry mixing bowl.
- Using the whisk attachment, beat the egg whites on medium speed until foamy and bubbly — about 1 minute.
- Add the cream of tartar and salt. Continue beating on medium speed until soft peaks form — about 2 minutes.
- With the mixer running on medium-high speed, add the sugar one tablespoon at a time.
- After all sugar is added, increase speed to high and beat for 5 to 7 minutes until thick, glossy, and stiff peaks form. The mixture should feel smooth, not gritty.
- Add the vanilla extract and beat for 30 seconds more until fully incorporated.
- Transfer the meringue to a piping bag fitted with a large round tip (or a zip-top bag with a ½-inch opening).
- Pipe ghost shapes: hold the piping bag straight up, squeeze out a round base about 1½ inches wide, then lift the bag straight up while continuing to squeeze to create a tall peak. Release pressure and pull away.
- If using, gently press two mini chocolate chips into each ghost for eyes immediately after piping.
- Bake for 60 to 75 minutes until firm to the touch and easily peel off the parchment paper. They should remain pale, not brown.
- Turn off the oven and let the ghosts cool inside with the door slightly ajar for at least 1 hour to prevent cracking.
Notes
Humidity is the enemy of meringue — make these on a dry day if possible. Ensure your bowl is completely clean and dry with no trace of grease or egg yolk. For best results, use room temperature egg whites. If you don’t have cream of tartar, substitute ½ teaspoon of lemon juice or white vinegar. These cookies store well in an airtight container at room temperature for up to 2 weeks. They actually taste better the next day.
Nutrition
- Serving Size: 1 cookie
- Calories: 25
- Sugar: 6
- Sodium: 10
- Carbohydrates: 6
- Protein: 1
Keywords: Halloween cookies, ghost meringue, meringue cookies, easy Halloween treats, gluten-free cookies, dairy-free cookies, low-calorie dessert