My brother-in-law, a man who proudly claims to despise anything “diet” or “sugar-free,” had a very firm stance on Jello. He swore he hated it. For years. The wiggly, artificially colored stuff from the grocery store? No thank you. He’d rather skip dessert entirely. Then, last summer at a family barbecue, I made a batch of these crowd-pleasing sugar-free protein Jello cups with Greek yogurt. I set them out on the counter, not making a big deal, just a little bowl of pretty pink and white stripes next to the fruit salad. I turned around to grab a plate, and when I looked back, there he was. Spoon halfway to his mouth, caught in the act. “These are… actually good,” he mumbled, trying to look unimpressed. Honestly, the look on his face was priceless. It was that moment I knew this recipe was a keeper. I mean, if I can convert a self-proclaimed Jello hater, I can convert anyone. Maybe you’ve been there, trying to find a dessert that feels like a treat but doesn’t wreck your progress? Let me tell you, these little cups are the answer. They look fancy enough for a dinner party but are so ridiculously easy to throw together, you’ll wonder why you haven’t been making them all along.
Why You’ll Love This Recipe
This isn’t just another sugar-free dessert. It’s a protein-packed, crowd-pleasing, make-ahead miracle that has been chef-tested (by me, in my own messy kitchen) and family-approved (by my skeptical brother-in-law and everyone else at that barbecue). Here is why these protein Jello cups are about to become your new go-to.
- Quick & Easy : Comes together in under 15 minutes of active time. The hardest part is waiting for them to set in the fridge.
- Simple Ingredients : No fancy grocery trips needed. You just need sugar-free Jello, Greek yogurt, and a little hot water. You probably have everything in your kitchen right now.
- Perfect for Hosting : These are a lifesaver for dinner parties, potlucks, and festive get-togethers. You can make them a day ahead, so you are not stressed when guests arrive.
- Crowd-Pleaser : Always gets rave reviews from kids and adults alike. Even the sugar-lovers at the table will ask for seconds.
- Unbelievably Delicious : The creamy, tangy yogurt layer paired with the light, fruity Jello is a textural dream. It’s next-level comfort food that feels indulgent.
What makes this recipe different from the rest? It is the perfect ratio of creamy to wiggly. I spent a few batches getting it just right—too much yogurt and it’s heavy, too much Jello and it’s watery. This is my best version. It is the kind of dessert that makes you close your eyes after the first bite, surprised by how good something so simple can be. It’s comfort food reimagined—healthier, faster, but with the same soul-soothing satisfaction. Perfect for impressing guests without stress, or turning a simple meal into something memorable.
What Ingredients You Will Need
This recipe uses simple, wholesome ingredients to deliver bold flavor and satisfying texture without the fuss. The magic is in the combination of a light, fruity Jello layer and a rich, creamy yogurt layer. You likely have most of these in your pantry already.
- For the Jello Layer:
- 1 box (0.6 oz / 17 g) sugar-free Jello (any flavor—I personally love strawberry or lime for a party)
- 1 cup (240 ml) boiling water
- 1/2 cup (120 ml) cold water
- For the Creamy Yogurt Layer:
- 1 cup (240 g) plain Greek yogurt (I recommend Fage 2% for the best texture—it is thick and not too tangy)
- 1 scoop (30 g) unflavored or vanilla protein powder (optional, but this is what makes them “protein” cups and keeps you full)
- 1-2 tablespoons (15-30 ml) milk or water (to thin the yogurt mixture so it pours easily)
- 1 teaspoon vanilla extract (adds warmth and depth to the flavor)
Ingredient Selection Tips: Look for a box of sugar-free Jello that is not expired—it sets best when fresh. For the yogurt, full-fat or 2% Greek yogurt works best because it creates a creamier, more stable layer. Non-fat yogurt can be a bit watery. If you are using a flavored protein powder, make sure it complements your Jello flavor. Vanilla is a safe bet with almost any fruit flavor.
Substitution Guidance: You can easily swap the Greek yogurt with a dairy-free coconut or soy yogurt for a lactose-free version. If you don’t have protein powder, just leave it out—the cups will still be delicious, just a little lower in protein. For a vegan option, use a plant-based yogurt and a vegan-friendly gelatin alternative (like agar-agar), but note that the setting time will vary.
Equipment Needed
You don’t need any fancy gadgets for this recipe. Just a few basic kitchen tools that you probably already own.
- Small mixing bowls (2): One for the Jello mixture and one for the yogurt layer. I use my favorite ceramic nesting bowls.
- Whisk: To make sure the Jello powder dissolves completely and the yogurt mixture is smooth.
- Measuring cups and spoons: For accuracy, especially with the water and yogurt.
- 4-6 small serving cups or ramekins: Clear glass cups look the prettiest because you can see the layers. I bought a set of 6-ounce glass cups from a dollar store and they work perfectly.
- Kettle or small saucepan: To boil the water.
- Liquid measuring cup: A 2-cup glass measuring cup with a spout makes pouring the Jello mixture so much easier and less messy.
Budget-Friendly Options: Don’t have ramekins? Use small mason jars, shot glasses for a fun party appetizer, or even a small baking dish to make a single large Jello “cake” that you can scoop out.
Preparation Method
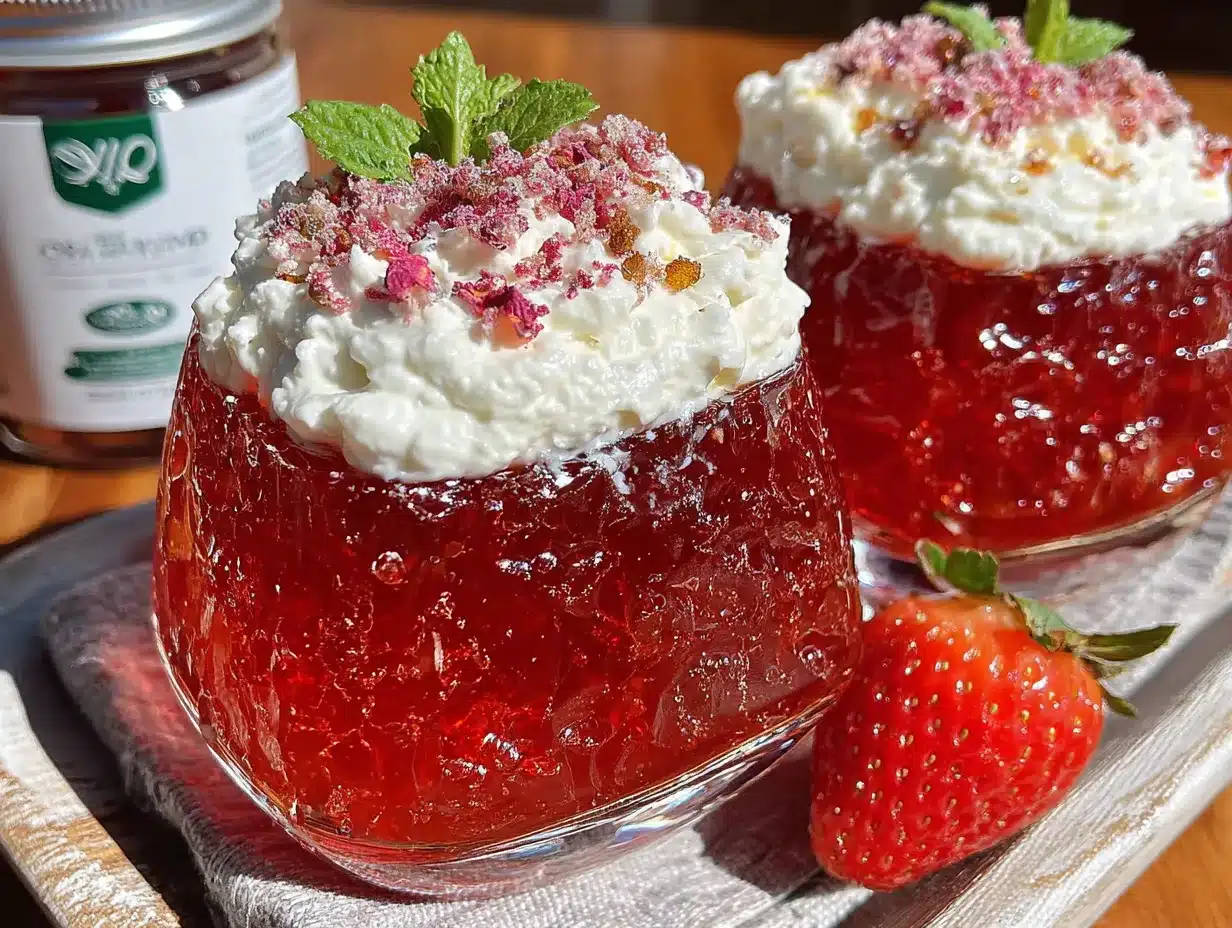
Follow these steps carefully, and you will have beautiful, layered protein Jello cups that will impress everyone. The key is patience—letting the first layer set fully before adding the second.
- Prepare the Jello Layer: In a small mixing bowl, empty the entire box of sugar-free Jello powder. Pour in 1 cup (240 ml) of boiling water. Whisk vigorously for about 2 minutes, until the powder is completely dissolved. You should see no granules at the bottom. Then, stir in 1/2 cup (120 ml) of cold water. This helps the Jello set at the right consistency.
- Pour the First Layer: Carefully pour the liquid Jello into your serving cups, filling them about halfway. I use a small liquid measuring cup with a spout to avoid drips. Place the cups on a small baking sheet for easy transport to the fridge.
- Set the Jello Layer: Place the cups in the refrigerator, uncovered, for at least 1.5 to 2 hours. You want the Jello to be completely firm to the touch, not jiggly at all. Pro-tip: If you are in a rush, you can speed this up by placing them in the freezer for 30-40 minutes, but watch them carefully so they don’t freeze solid.
- Make the Yogurt Layer: While the Jello sets, prepare the creamy layer. In a separate bowl, combine 1 cup (240 g) of Greek yogurt, 1 scoop of protein powder (if using), 1 teaspoon of vanilla extract, and 1-2 tablespoons of milk or water. Whisk until completely smooth and creamy. It should be thick but pourable—like a thick milkshake. If it is too thick, add a splash more milk.
- Assemble the Cups: Once the Jello layer is fully set, take the cups out of the fridge. Gently spoon or pour the yogurt mixture on top of the firm Jello. Use the back of a spoon to spread it evenly. Leave a little room at the top if you want to add a garnish.
- Final Set: Return the cups to the refrigerator for another 30-60 minutes. This allows the yogurt layer to chill and firm up slightly, making it easier to eat. The cups are now ready to serve!
Sensory Cue: When the Jello is set, it should feel firm and springy when you gently press the top with your finger. It should not be liquid at all. The yogurt layer should be thick and creamy, not runny.
Cooking Tips & Techniques
I have made this recipe more times than I can count, and I have definitely had some failures along the way. Here are my best tips to make sure you get perfect results every single time.
- The Water Temperature is Crucial: The first time I made these, I used water that was just hot from the tap, not boiling. The Jello powder didn’t dissolve properly, and I ended up with grainy, lumpy Jello. Always use water that has come to a full rolling boil.
- Don’t Rush the Layers: I once tried to pour the yogurt layer on top of Jello that was only partially set. They swirled together and looked like a muddy mess. It still tasted good, but it wasn’t the pretty layered look I was going for. Patience is key.
- Whisk the Yogurt Well: If you are using protein powder, it can sometimes clump. A vigorous whisking or even a quick blitz with an immersion blender will ensure a silky smooth yogurt layer.
- Multitasking Tip: While the Jello is setting in the fridge, you can make the yogurt mixture and clean up your dishes. That way, when it’s time to assemble, you are ready to go.
- Consistency for Success: For a firmer yogurt layer, use a thicker Greek yogurt (like Fage Total 2%). For a softer, more mousse-like texture, use a regular plain yogurt or even a dairy-free alternative.
Variations & Adaptations
This recipe is incredibly versatile. Here are a few ways to change it up based on the season, your diet, or just your mood.
- Berry Blast: Use sugar-free strawberry Jello for the bottom layer and mix a handful of fresh or frozen berries into the yogurt layer before pouring. It adds a nice tang and some texture.
- Citrus Zing: Use sugar-free lemon or lime Jello. For the yogurt layer, add a teaspoon of fresh lemon or lime zest. It makes for a super refreshing, bright dessert—perfect for spring or summer gatherings.
- Dairy-Free & Vegan: Swap the Greek yogurt for a thick, plain coconut or soy yogurt. Make sure your Jello is a vegan-friendly brand (some use animal-derived gelatin). You can also use agar-agar powder, but follow the package directions for setting times.
- Chocolate Dream: Use sugar-free chocolate Jello for the bottom layer. For the yogurt layer, add 1 tablespoon of unsweetened cocoa powder to the yogurt mixture. It tastes like a healthy chocolate mousse!
- Personal Variation: My favorite way to make these is with a tropical twist. I use sugar-free mango or pineapple Jello and fold some crushed, unsweetened pineapple into the yogurt layer. It reminds me of a vacation.
Serving & Storage Suggestions
These little cups are best served cold, straight from the fridge. The contrast between the cool, firm Jello and the creamy yogurt is perfect.
- Presentation Tips for Hosting: Serve them in clear glass cups so the layers are visible. Top each cup with a dollop of whipped cream (dairy or coconut-based), a sprinkle of colorful sprinkles, or a fresh berry. A tiny mint leaf on top looks very professional.
- What to Serve Alongside: These are a fantastic light dessert after a heavy meal like a barbecue, pasta dinner, or holiday feast. They also pair beautifully with a cup of hot coffee or tea.
- Storage Instructions: Store the assembled cups in the refrigerator, covered with plastic wrap or a lid, for up to 4 days. The Jello will stay firm, and the yogurt layer will remain creamy.
- Can You Freeze Them? I don’t recommend freezing these. The Jello will become watery and the yogurt will become grainy when thawed. They are strictly a refrigerated treat.
- How Flavors Develop: These actually taste even better the next day! The flavors meld together, and the texture becomes perfectly uniform. They are a fantastic make-ahead dessert for a dinner party.
Nutritional Information & Benefits
Each serving (assuming you get 4 cups from this recipe) is a guilt-free indulgence. Here is a rough estimate:
| Nutrient | Amount per Serving |
|---|---|
| Calories | ~120-150 kcal |
| Protein | ~15-20 g |
| Fat | ~3-5 g |
| Carbohydrates | ~5-8 g |
| Sugar | ~2-3 g (naturally occurring from yogurt) |
Pin This Recipe!
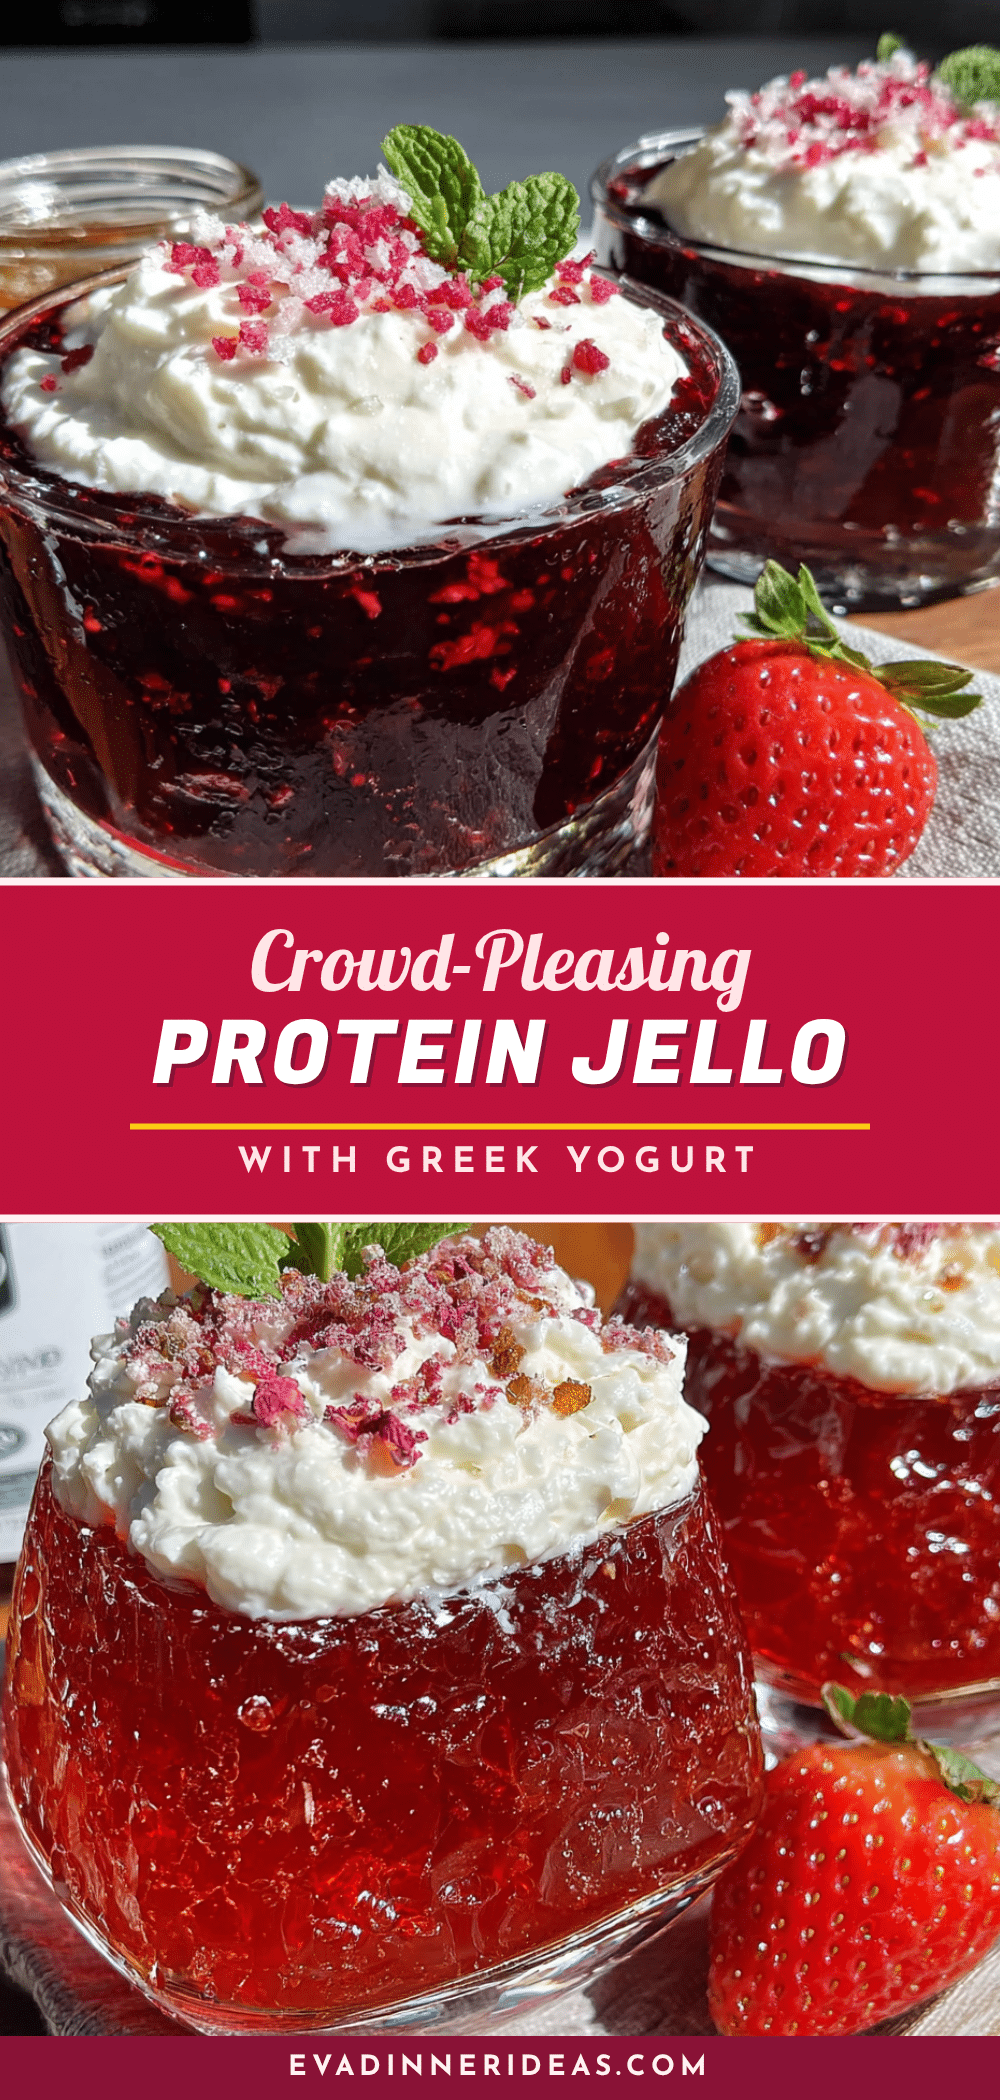
Easy Sugar-Free Protein Jello Cups with Greek Yogurt
These crowd-pleasing sugar-free protein Jello cups with Greek yogurt are a quick, easy, and healthy dessert that feels indulgent. Perfect for hosting or a guilt-free treat, they feature a creamy yogurt layer atop a fruity Jello layer.
- Prep Time: 15 minutes
- Cook Time: 0 minutes
- Total Time: 2 hours 15 minutes (including setting time)
- Yield: 4 servings 1x
- Category: Dessert
- Cuisine: American
Ingredients
- 1 box (0.6 oz / 17 g) sugar-free Jello (any flavor)
- 1 cup (240 ml) boiling water
- 1/2 cup (120 ml) cold water
- 1 cup (240 g) plain Greek yogurt (recommend Fage 2%)
- 1 scoop (30 g) unflavored or vanilla protein powder (optional)
- 1–2 tablespoons (15–30 ml) milk or water
- 1 teaspoon vanilla extract
Instructions
- Prepare the Jello Layer: In a small mixing bowl, empty the entire box of sugar-free Jello powder. Pour in 1 cup (240 ml) of boiling water. Whisk vigorously for about 2 minutes, until the powder is completely dissolved. Then, stir in 1/2 cup (120 ml) of cold water.
- Pour the First Layer: Carefully pour the liquid Jello into your serving cups, filling them about halfway.
- Set the Jello Layer: Place the cups in the refrigerator, uncovered, for at least 1.5 to 2 hours, until completely firm.
- Make the Yogurt Layer: In a separate bowl, combine 1 cup (240 g) of Greek yogurt, 1 scoop of protein powder (if using), 1 teaspoon of vanilla extract, and 1-2 tablespoons of milk or water. Whisk until completely smooth and creamy.
- Assemble the Cups: Once the Jello layer is fully set, gently spoon or pour the yogurt mixture on top of the firm Jello.
- Final Set: Return the cups to the refrigerator for another 30-60 minutes to chill and firm up slightly.
Notes
For best results, use water that has come to a full rolling boil to dissolve the Jello powder completely. Do not rush the layers; let the Jello set fully before adding the yogurt layer. The cups taste even better the next day. Store covered in the refrigerator for up to 4 days. Do not freeze.
Nutrition
- Serving Size: 1 cup (about 6 oz)
- Calories: 120150
- Sugar: 23
- Sodium: 100150
- Fat: 35
- Saturated Fat: 23
- Carbohydrates: 58
- Protein: 1520
Keywords: sugar-free, protein jello cups, Greek yogurt, healthy dessert, low-carb, keto-friendly, gluten-free, easy dessert, make-ahead dessert


