The neighborhood potluck was in six hours and I’d completely forgotten. Everyone else would be bringing their signature dishes—that infamous seven-layer dip, a perfectly charred brisket, hand-rolled sushi (yes, really). I had a carton of heavy cream sitting in my fridge and absolutely nothing else that felt party-worthy. I mean, who brings plain cream to a potluck? Let me tell you, the panic was real. I paced my kitchen, opened the fridge five times, and finally spotted the jar of yogurt I’d made last week. And that’s when it hit me—cultured butter. I’d read about it, pinned it, never actually tried it. With nothing to lose, I poured the cream into my stand mixer, added a spoonful of that tangy yogurt, and let it rip. Honestly, I was just hoping for something edible. What came out was a golden, silky, utterly ridiculous butter that had people asking for the recipe before I even set down the bowl. I didn’t mean to show off—I was just trying not to show up empty-handed. But now? This homemade cultured butter is my not-so-secret party trick, and I’m pretty sure it’ll be yours too.
Why You’ll Love This Recipe
Look, I’ve tested a lot of butter recipes. I’ve spent weekends churning, I’ve ruined a few batches (too salty, too soft, too sad), and I’ve learned exactly what makes this one different. This is the butter that gets you invited back. Here’s why you’ll absolutely love it:
- Unbelievably Simple: You only need two ingredients—heavy cream and a cultured starter like buttermilk or yogurt. That’s it. No fancy equipment, no complicated techniques.
- Next-Level Flavor: The fermentation process creates a subtle tanginess that store-bought butter just can’t touch. It’s complex, creamy, and totally addictive.
- The Ultimate Party Trick: Imagine setting a bowl of this golden butter on your brunch table, alongside some flaky sea salt and crusty bread. People will lose their minds. It’s the kind of thing that makes you look like a culinary genius with almost zero effort.
- Customizable: You can infuse it with garlic, herbs, honey, or smoked salt. The possibilities are endless, and each one feels like a new discovery.
- Cost-Effective: High-quality cultured butter from the store can cost a small fortune. Making it at home costs a fraction of that, and it tastes better.
This isn’t just a recipe—it’s a conversation starter. It’s the kind of thing that makes people lean in and say, “Wait, you made this?” And honestly, that feeling never gets old.
What Ingredients You Will Need
This recipe is a beautiful example of how simple ingredients can create something truly special. You likely have most of these in your kitchen right now, which is exactly the point. I’ve broken them down so you know exactly what to look for and why it matters.
The Core Ingredients
- Heavy Cream (4 cups / 960 ml): This is the star of the show. You want a high-quality heavy cream with at least 36% milk fat. I personally love the cream from Organic Valley or Straus Family Creamery for their rich, grassy flavor. Avoid ultra-pasteurized cream if you can—it can sometimes be a bit stubborn when culturing. The higher the fat content, the richer and more stable your butter will be.
- Cultured Starter (2 tablespoons / 30 ml): This is what gives your butter that signature tang. You have a few choices here, and each one adds a slightly different character:
- Buttermilk: The classic choice. It’s reliable and gives a clean, mild tang. I use Lifeway or Maple Hill buttermilk for consistently great results.
- Plain Yogurt: My personal favorite for a deeper, more complex flavor. Look for one with live active cultures—Greek yogurt works beautifully.
- Sour Cream: This will give you a richer, more decadent butter with a pronounced tang. It’s a fun variation to try once you’ve mastered the basic method.
- Salt (Optional, to taste): I recommend a flaky sea salt like Maldon or Fleur de Sel for finishing. It adds a wonderful crunch and bursts of salinity. For a more evenly salted butter, you can use a fine sea salt. Start with 1/2 teaspoon and adjust from there.
Ingredient Tips from My Kitchen
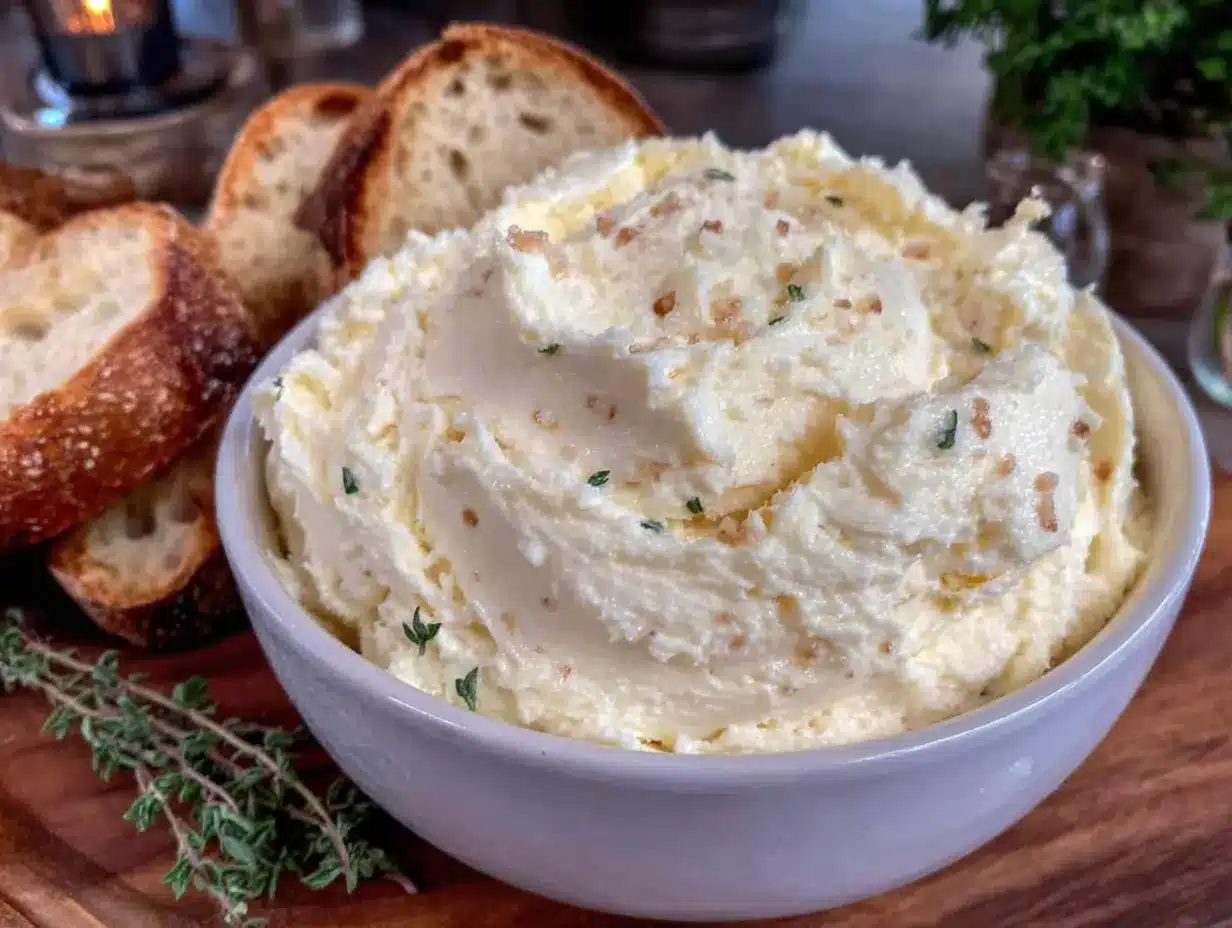
I’ve learned a few things the hard way. Once, I tried using a light cream with lower fat content, and the butter just wouldn’t separate properly. It was a sad, soupy mess. Stick with heavy cream. Also, if you’re using yogurt as your starter, make sure it’s at room temperature before you add it to the cream. Cold yogurt can shock the cream and slow down the culturing process. Another little trick: if you’re in a hurry, you can use a tablespoon of store-bought cultured buttermilk powder mixed with a splash of milk as your starter. It works in a pinch, but the flavor won’t be quite as deep.
Equipment Needed
You don’t need a fancy churn or any specialized gadgets for this. Here’s what I use, and some budget-friendly alternatives if you’re just starting out.
- Stand Mixer or Food Processor: This is the workhorse. A stand mixer with the whisk attachment makes the process incredibly easy. If you don’t have one, a food processor works just as well—just keep an eye on it, as it can go from cream to butter very quickly. My grandmother used a mason jar and a lot of elbow grease, so don’t let a lack of equipment stop you.
- Fine-Mesh Strainer or Cheesecloth: You’ll need this to drain the buttermilk from the butter solids. A fine-mesh strainer works perfectly. If you want to be extra thorough, line it with a couple of layers of cheesecloth.
- Large Bowl: For catching the buttermilk (save it! It’s amazing for pancakes and baking).
- Spatula or Wooden Spoon: For pressing and shaping the butter.
- Clean Kitchen Towel: For wrapping the finished butter.
- Parchment Paper or Wax Paper: For shaping and storing the butter log.
One piece of advice: don’t use a blender. I tried it once, and it was a disaster—the butter got stuck under the blades, and the motor struggled. Stick with a mixer or food processor.
Preparation Method
Alright, let’s make some magic. I’ll walk you through every step, including the little sensory cues that tell you you’re on the right track.
- Culture the Cream (12-24 hours before churning): Pour your 4 cups of heavy cream into a clean glass bowl or jar. Add your 2 tablespoons of cultured starter (buttermilk, yogurt, or sour cream). Stir gently to combine. Cover the bowl with a clean kitchen towel or plastic wrap and let it sit at room temperature (around 70-75°F / 21-24°C) for 12 to 24 hours. What to look for: The cream should thicken slightly and develop a gentle tangy smell, similar to sour cream. It shouldn’t smell funky or spoiled. If it does, toss it and start fresh. The texture will be like a very loose yogurt. This is the fermentation magic happening.
- Chill the Cultured Cream (30 minutes before churning): Pop the cultured cream into the refrigerator for about 30 minutes. You want it cold, but not ice-cold. This helps the butterfat separate more cleanly during churning. I’ve skipped this step before, and the butter took forever to form. Trust me on this one.
- Churn the Butter (5-10 minutes): Pour the chilled, cultured cream into your stand mixer bowl. Fit it with the whisk attachment. Start on low speed to avoid splattering, then gradually increase to medium-high. What to look for: First, you’ll get soft peaks, then stiff peaks, then the mixture will suddenly look grainy and separate. You’ll hear the sound change—it goes from a sloshing sound to a distinct slapping sound as the butter solids clump together. This is the moment of truth! It usually takes about 5-8 minutes in a stand mixer. In a food processor, it can happen in under 2 minutes, so keep a close eye on it.
- Drain the Buttermilk: Place your fine-mesh strainer over a large bowl. Pour the contents of the mixer bowl into the strainer. The liquid that drains out is fresh buttermilk! Save it for baking, pancakes, or drinking. It’s a beautiful, tangy byproduct.
- Wash the Butter (This is crucial): This step removes residual buttermilk, which can cause your butter to spoil faster. Place the butter solids back into the mixer bowl (or a clean bowl). Cover them with very cold water. Using a spatula or your hands (if the water isn’t too cold), gently press and knead the butter. The water will turn cloudy. Pour it off and repeat with fresh cold water. Keep doing this until the water runs clear. This usually takes 3-5 rinses. Pro tip: The colder the water, the easier it is to work the butter. I keep a pitcher of ice water handy for this step.
- Salt the Butter (Optional): Once the butter is washed, spread it out on a clean kitchen towel or paper towels to absorb any excess moisture. Then, transfer it to a bowl. If you’re adding salt, sprinkle it over the butter and use a spatula to work it in evenly. Start with 1/2 teaspoon of flaky sea salt and taste. Add more if you like. I prefer a generous pinch of Maldon for that delightful crunch.
- Shape and Store: Scoop the butter onto a sheet of parchment paper. Use the paper to shape it into a log, a block, or a round. Twist the ends of the paper to seal it. Refrigerate for at least 2 hours to firm up completely. The butter will be soft right after churning, so don’t skip this step if you want clean slices.
Cooking Tips & Techniques
I’ve made this recipe more times than I can count, and I’ve definitely had my share of failures. Here’s what I’ve learned so you don’t have to repeat my mistakes.
- The Temperature Sweet Spot: Culturing works best between 70-75°F (21-24°C). If your kitchen is colder, it might take closer to 24 hours. If it’s warmer, check it after 12 hours. I once left it in a warm spot for 30 hours, and it developed a slightly yeasty flavor. Still edible, but not ideal.
- Don’t Over-Whip: When churning, you’ll see the cream go from soft peaks to stiff peaks to separated. The moment you see the grainy texture and the liquid buttermilk, stop. If you keep going, you can overwork the butter, making it greasy and soft. It’s a fine line, but you’ll get a feel for it.
- The Ice Water Trick: If your butter is too soft to work with during the washing stage, add a few ice cubes to the water. The cold helps the butterfat firm up, making it easier to knead and press out the buttermilk.
- Save the Buttermilk: This is non-negotiable. The leftover buttermilk is liquid gold. Use it in fluffy buttermilk pancakes, salad dressings, or even in a marinade for chicken. It freezes beautifully for up to 3 months.
- Flavor Infusions: After washing the butter, you can fold in any number of additions. My go-to for parties is a honey-salted version: add 1 tablespoon of honey and a pinch of flaky salt. For a savory option, try minced roasted garlic and fresh thyme. The possibilities are endless.
Variations & Adaptations
Once you’ve mastered the basic recipe, the real fun begins. Here are some of my favorite ways to switch it up.
- Herb & Garlic Butter: Fold in 2 tablespoons of finely chopped fresh herbs (chives, parsley, dill) and 1 clove of grated or minced garlic. This is incredible on a crusty sourdough bread or melted over a grilled steak.
- Honey-Cinnamon Butter: Add 2 tablespoons of honey and 1/2 teaspoon of ground cinnamon. This is a showstopper on toast, muffins, or even drizzled over roasted sweet potatoes. It’s my secret weapon for holiday brunches.
- Smoked Salt & Black Pepper Butter: Use smoked sea salt and a generous crack of fresh black pepper. The smokiness adds a whole new dimension. It’s fantastic on corn on the cob or baked potatoes.
- Dairy-Free Version: While this isn’t traditional cultured butter, you can make a version using coconut cream. Use full-fat coconut cream (the solid part from a can of coconut milk) and culture it with a dairy-free yogurt starter. The flavor is different but still deliciously tangy.
- Compound Butter Logs for Gifting: Shape the finished butter into a log, wrap it in parchment, and tie it with twine. Attach a little tag with serving suggestions. It’s a homemade gift that feels incredibly thoughtful and luxurious.
Serving & Storage Suggestions
This butter is a star on its own, but here’s how to make it shine at your next gathering.
- At a Party: Serve it at room temperature. Take it out of the fridge about 30 minutes before guests arrive. The texture becomes soft and spreadable, which is exactly what you want. Present it on a small wooden board or a slate tile, with a sprinkle of flaky sea salt on top. Surround it with slices of a good baguette, crusty sourdough, or even some crisp radishes and celery sticks for a low-carb option.
- What to Serve Alongside: This butter is a natural companion to a cheese board. It also pairs beautifully with simple roasted garlic for spreading. For a sweet treat, offer it alongside fresh berries or slices of apple.
- Storage: Wrap the butter tightly in parchment paper or wax paper, then place it in an airtight container or a zip-top bag. It will keep in the refrigerator for up to 2 weeks. The flavor actually deepens and becomes more complex after a day or two in the fridge.
- Freezing: This butter freezes like a dream. Wrap it in a double layer of plastic wrap, then a layer of foil, and place it in a freezer bag. It will keep for up to 6 months. To thaw, simply transfer it to the refrigerator overnight.
- Reheating Note: You don’t really reheat butter, but if you’ve frozen it, let it come to room temperature slowly in the fridge. Avoid microwaving it, as it can melt and separate the butterfat.
Nutritional Information & Benefits
Let’s be honest—butter is a treat. But when you make it yourself, you control the quality of the ingredients, and there are some genuine benefits to this homemade version.
- Estimated Nutritional Values (per 1 tablespoon serving): Calories: 102, Fat: 11.5g (7g saturated), Cholesterol: 31mg, Sodium: 1mg (unsalted), Vitamin A: 11% of the Daily Value.
- Rich in Healthy Fats: Butter from grass-fed cows contains conjugated linoleic acid (CLA), which has been linked to various health benefits, including improved heart health and reduced inflammation.
- Contains Butyrate: This short-chain fatty acid is produced during the culturing process and is excellent for gut health. It supports the lining of your intestines and can help reduce inflammation.
- Dietary Considerations: This butter is naturally gluten-free, low-carb, and keto-friendly. It’s also suitable for vegetarian diets. If you’re lactose-intolerant, the culturing process breaks down much of the lactose, making it easier to digest than regular butter for some people.
- My Personal Take: I don’t believe in demonizing whole foods. This butter is a source of fat-soluble vitamins (A, D, E, K2) that are crucial for absorbing nutrients from other foods. Enjoy it in moderation as part of a balanced diet.
Conclusion
So there you have it—homemade cultured butter that’s about to become your new party trick. It’s the recipe that saves you from potluck panic, impresses your guests without any stress, and makes you feel like a kitchen wizard. I love this recipe because it’s proof that the simplest things, done with a little care and patience, can be the most memorable. It’s not about being fancy—it’s about sharing something real and delicious with the people you care about. I’d love to hear how your butter turns out! Did you try a fun variation? Did your guests freak out? Drop a comment below and let me know. And if you’re feeling generous, share this post with a friend who loves to cook. Happy churning, friends!
Frequently Asked Questions
Can I use ultra-pasteurized cream for cultured butter?
You can, but it might take a bit longer to culture. Ultra-pasteurization kills more of the natural bacteria, so the fermentation process can be slower. I recommend pasteurized cream for the best and most reliable results.
My butter didn’t separate. What went wrong?
This usually happens if the cream wasn’t cold enough when you started churning, or if the fat content was too low. Make sure you’re using heavy cream (at least 36% milk fat) and that it’s well-chilled. Also, be patient—sometimes it takes a few extra minutes.
How long does homemade cultured butter last?
Stored properly in the refrigerator, it will last for about 2 weeks. The culturing process actually acts as a natural preservative. You can also freeze it for up to 6 months.
Can I make this without a stand mixer?
Absolutely! You can use a food processor, a hand mixer, or even a mason jar. If you’re using a jar, fill it no more than halfway with cream, screw the lid on tight, and shake vigorously for about 10-15 minutes. It’s a great arm workout!
What can I do with the leftover buttermilk?
So many things! Use it in pancakes, waffles, biscuits, salad dressings, or even in a marinade for chicken. It freezes well, so you can save it for later. I like to freeze it in ice cube trays for easy portioning.
Pin This Recipe!
Homemade Cultured Butter – The Best Easy Party Trick
Learn how to make homemade cultured butter with just two ingredients. This easy recipe creates a golden, silky, tangy butter that’s perfect for impressing guests at any gathering.
- Prep Time: 15 minutes
- Cook Time: 5-10 minutes
- Total Time: 12-24 hours (includes culturing time) + 2 hours chilling
- Yield: About 1 pound (16 servings) 1x
- Category: Condiment
- Cuisine: American
Ingredients
- 4 cups (960 ml) heavy cream (at least 36% milk fat)
- 2 tablespoons (30 ml) cultured starter (buttermilk, plain yogurt, or sour cream)
- Salt (optional, to taste; flaky sea salt like Maldon or Fleur de Sel recommended)
Instructions
- Culture the cream (12-24 hours before churning): Pour 4 cups of heavy cream into a clean glass bowl or jar. Add 2 tablespoons of cultured starter (buttermilk, yogurt, or sour cream). Stir gently to combine. Cover with a clean kitchen towel or plastic wrap and let sit at room temperature (70-75°F / 21-24°C) for 12 to 24 hours. The cream should thicken slightly and develop a gentle tangy smell.
- Chill the cultured cream (30 minutes before churning): Refrigerate the cultured cream for about 30 minutes until cold but not ice-cold.
- Churn the butter (5-10 minutes): Pour the chilled cultured cream into a stand mixer bowl fitted with the whisk attachment. Start on low speed, then increase to medium-high. Churn until the mixture separates into butter solids and buttermilk (about 5-8 minutes in a stand mixer, or under 2 minutes in a food processor).
- Drain the buttermilk: Place a fine-mesh strainer over a large bowl. Pour the contents of the mixer bowl into the strainer. Reserve the buttermilk for other uses.
- Wash the butter: Place the butter solids back into the mixer bowl or a clean bowl. Cover with very cold water. Gently press and knead the butter with a spatula or your hands. Pour off the cloudy water and repeat with fresh cold water until the water runs clear (usually 3-5 rinses).
- Salt the butter (optional): Spread the washed butter on a clean kitchen towel or paper towels to absorb excess moisture. Transfer to a bowl. If adding salt, sprinkle over the butter and work in evenly with a spatula. Start with 1/2 teaspoon of flaky sea salt and adjust to taste.
- Shape and store: Scoop the butter onto a sheet of parchment paper. Shape into a log, block, or round. Twist the ends of the paper to seal. Refrigerate for at least 2 hours to firm up completely.
Notes
For best results, use pasteurized heavy cream (not ultra-pasteurized) with at least 36% milk fat. The culturing process works best at 70-75°F (21-24°C). Save the leftover buttermilk for pancakes, baking, or dressings. The butter can be flavored with herbs, garlic, honey, or smoked salt after washing. Store in the refrigerator for up to 2 weeks or freeze for up to 6 months.
Nutrition
- Serving Size: 1 tablespoon
- Calories: 102
- Sodium: 1
- Fat: 11.5
- Saturated Fat: 7
Keywords: homemade butter, cultured butter, easy butter recipe, party appetizer, homemade condiment, fermented butter


