Let me be honest with you for a second. I’ve killed more sourdough starters than I care to admit. I’ve had jars that smelled like nail polish remover. I’ve had jars that grew fuzzy mold on top. I’ve had jars that just sat there, day after day, looking exactly the same as they did when I started. It was frustrating. No, it was humbling.
But this method? This one works. I developed it after three failed attempts and a lot of late-night Googling. It’s designed for people who have never made a starter before, and it cuts through all the confusing advice out there.
- Foolproof for Beginners: No complicated ratios. No special tools. Just flour, water, and a little patience. I’ve tested this method with four different friends who had never baked bread in their lives, and every single one got a bubbly, active starter by day seven.
- Uses Simple Ingredients: You likely already have everything in your kitchen. All-purpose flour and whole wheat flour are all you need. No fancy organic rye flour or special spring water required.
- Perfect for Weekend Warriors: The daily feedings take about two minutes. You can do them while your coffee brews in the morning. The active time across the entire week is maybe 20 minutes total.
- Incredibly Rewarding: There is something deeply satisfying about watching a dormant jar of flour and water transform into a living, bubbling ecosystem. It feels like magic, but it’s actually just biology working in your favor.
- No More Store-Bought: Once you have a healthy starter, you’ll never need to buy yeast again. Plus, sourdough bread is easier to digest for many people, and it has a lower glycemic index than bread made with commercial yeast.
This isn’t just another starter guide. It’s the one I wish I had when I started. I’ve streamlined the process, removed the intimidating steps, and focused on what actually matters: getting those wild yeast colonies happy and active.
What Ingredients You Will Need
The beauty of a sourdough starter is its simplicity. You only need two ingredients, plus water. That’s it. No preservatives, no commercial yeast packets, no mystery additives. Just flour, water, and a little time. Here’s what you’ll need for the full seven-day process.
For the Starter Itself
- Unbleached all-purpose flour, 500 grams (about 4 cups): This is your workhorse flour. I prefer King Arthur Flour for its consistent protein content, but any brand of unbleached all-purpose flour works fine. Bleached flour has been chemically treated, and the wild yeast doesn’t seem to like it as much. Stick with unbleached.
- Whole wheat flour, 100 grams (about 3/4 cup): This is your secret weapon. Whole wheat flour has more nutrients and natural yeasts living on the bran than white flour does. It gives your starter a kickstart in the first few days. After day five, you’ll switch entirely to all-purpose flour.
- Filtered or bottled water, about 600 grams (2.5 cups) total across the week: Tap water often contains chlorine, which can inhibit yeast growth. If your tap water tastes strongly of chlorine, use filtered or bottled water. Letting tap water sit out overnight also allows the chlorine to dissipate. You’ll need about 80-100 grams per feeding session.
For Feeding (Days 2-7)
- All-purpose flour, about 350 grams (2.75 cups) total across the week: You’ll use roughly 50 grams per feeding session. Buy a 5-pound bag, and you’ll have plenty left over for your first loaf of bread.
- Water, about 350 grams (1.5 cups) total across the week: Same as above. Room temperature water is best. Cold water slows down fermentation, and hot water can kill the yeast.
Ingredient Selection Tips
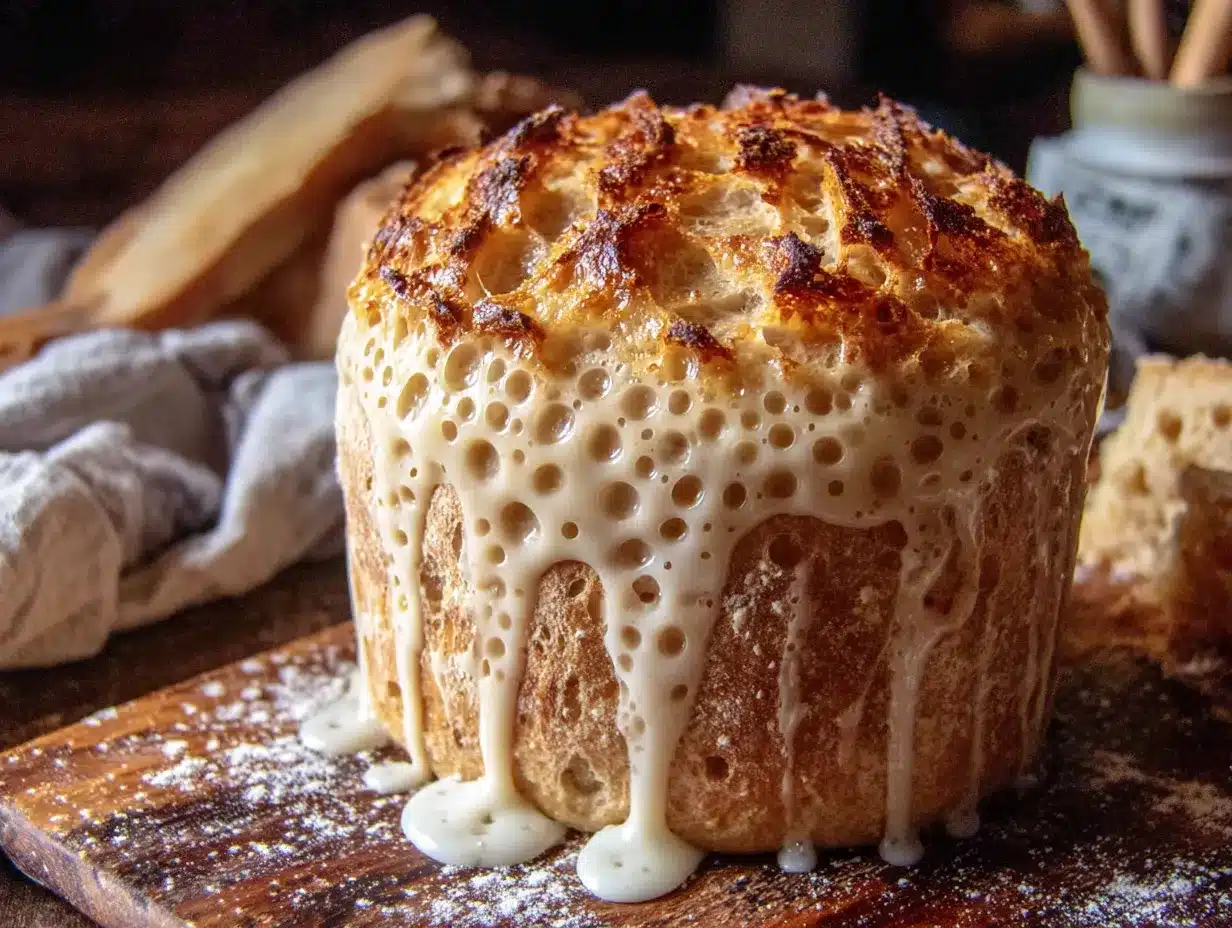
I’ve tested this method with generic store-brand flour from the discount grocery store, and it still worked. The starter was a little slower to develop, but by day nine, it was bubbling away happily. The key is consistency. Stick with the same brand of flour throughout the process if you can. Switching flours mid-week can confuse the developing yeast colony.
If you want to get fancy, you can use organic flour. It often has more natural yeasts living on the grain because it hasn’t been heavily processed. But honestly, it’s not necessary. I’ve made perfectly good starters with standard supermarket flour.
The water temperature matters more than you might think. Aim for water that feels neutral on your wrist, like you’re testing baby bottle temperature. Too cold, and the yeast stays sleepy. Too hot, and you’ll kill it before it gets started.
Equipment Needed
You don’t need a fancy bread-baking setup for this. Here’s what you’ll actually use:
- A clear glass jar, 1-quart size: A wide-mouth Mason jar is perfect. The clear glass lets you see what’s happening inside, which is important for tracking bubbles and activity. Avoid metal bowls, as they can react with the developing acids in the starter.
- A kitchen scale: This is non-negotiable. Measuring flour by volume (cups) is too inconsistent for sourdough. A digital kitchen scale costs about $15 and will save you endless frustration. I use the OXO Good Grips scale, and it’s lasted me years.
- A wooden or silicone spoon: Metal spoons can sometimes react with the acidic starter, though honestly, I’ve used a metal fork in a pinch and it was fine. Wooden chopsticks also work great.
- A rubber band or piece of tape: You’ll use this to mark the height of your starter after feeding. This helps you track how much it rises overnight.
- A clean kitchen towel or coffee filter: You’ll cover the jar loosely to keep dust and fruit flies out while allowing air to flow. Don’t screw the lid on tight. The starter needs to breathe, and the gases it produces need an escape route.
- A small spatula: For scraping down the sides of the jar after feeding. This prevents dried flour from creating a crust that can harbor unwanted bacteria.
That’s genuinely it. No proofing baskets, no lame for scoring bread, no Dutch oven. You can buy all that later when you’re making your first loaf. For now, a jar and a scale are all you need.
Preparation Method
Okay, here’s the step-by-step. I’m going to walk you through each day so you know exactly what to expect. I’ve included the sensory cues, the things you should look for, and the common pitfalls to avoid.
Day 1: The Beginning
In your clean jar, combine 50 grams of whole wheat flour and 50 grams of water. Stir until no dry flour remains. It should look like a thick paste. Scrape down the sides of the jar with your spatula. Cover loosely with your towel or coffee filter and set it in a warm spot in your kitchen. I keep mine on top of the refrigerator, where it’s consistently warm but not hot.
What to expect: Nothing much will happen today. The flour is just absorbing the water. You might see a tiny bubble or two by the evening, but don’t worry if you don’t. The wild yeast is waking up.
Day 2: First Signs of Life
Check your jar. You might see a few small bubbles on the surface. It might smell a little funky, like sour milk or even cheese. That’s normal. The bacteria are doing their thing.
Discard half of the starter. I know, throwing away food feels wrong. But you have to do it. If you don’t discard, you’ll end up with a massive jar of starter and not enough food-to-yeast ratio for it to thrive. The discard is inevitable.
Add 50 grams of all-purpose flour and 50 grams of water. Stir well, scrape down the sides, and cover again.
Pro tip: Start a discard collection in a separate jar in the fridge. After a week, you’ll have enough discard to make sourdough pancakes or crackers. It’s not wasted food. It’s deferred baking.
Day 3: The Smell Changes
Your starter will start to smell more acidic today, like vinegar or even nail polish remover. Don’t panic. That’s the acetic acid bacteria doing their job. The smell will mellow out in a few days.
Repeat the feeding process: discard half, then add 50 grams all-purpose flour and 50 grams water. Stir, scrape, cover.
Sensory cue: You should see more bubbles today. The mixture might look slightly frothy on top. If you don’t see any bubbles, move your jar to a slightly warmer spot.
Day 4: The Rise Begins
This is where things get exciting. Your starter should start rising noticeably after feeding. Mark the height with your rubber band right after feeding, then check it 8-12 hours later. You should see it has risen by about 25-50%.
Discard half, feed with 50 grams all-purpose flour and 50 grams water. Stir, scrape, cover.
Warning: If you see orange or pink streaks, or if it smells like rotten eggs or vomit, something went wrong. The starter is contaminated. Throw it away and start over. This is rare, but it happens. Don’t get discouraged.
Day 5: Doubling in Size
Your starter should now be doubling in size within 8-12 hours of feeding. It should smell pleasantly sour, like yogurt or sourdough bread. The bubbles should be small and numerous throughout the mixture.
Discard half, feed with 50 grams all-purpose flour and 50 grams water. Stir, scrape, cover.
Personal note: This is the day I usually get overexcited and try to bake with my starter. Don’t do it. It’s not strong enough yet. Wait two more days. Trust me, I’ve made this mistake three times, and each time I ended up with a dense, hockey-puck loaf of bread.
Day 6: Consistent Activity
Your starter should be predictably doubling within 6-8 hours after feeding. It should have a domed top when it’s at its peak, and it should look bubbly and alive.
Discard half, feed with 50 grams all-purpose flour and 50 grams water. Stir, scrape, cover.
Test: Drop a small spoonful of your starter into a glass of water. If it floats, it’s ready. If it sinks, give it another day.
Day 7: Ready to Bake
Congratulations! Your starter is now mature and ready to use. It should double within 4-6 hours, smell pleasantly sour, and have a light, airy texture.
Feed it one more time: discard half, add 50 grams all-purpose flour and 50 grams water. Let it peak, then use it in your favorite sourdough recipe.
Cooking Tips & Techniques
Here’s the stuff I wish someone had told me before I started. These are the little things that make the difference between a starter that barely survives and one that thrives for years.
Temperature is Everything
Your starter is alive, and like all living things, it has a preferred temperature range. The sweet spot is between 70°F and 80°F (21°C to 27°C). If your kitchen is cold, your starter will be sluggish. If it’s too hot, the yeast will over-ferment and then crash. I keep my starter on top of the refrigerator because it’s consistently a few degrees warmer than the rest of the kitchen. In winter, I sometimes move it to the microwave with the door cracked open and the light on for gentle warmth.
The Discard Dilemma
I know discarding feels wasteful. I struggled with it too. But here’s the thing: if you don’t discard, you’ll end up with a massive jar of starter that requires huge amounts of flour to feed. Plus, the yeast-to-flour ratio gets out of whack, and your starter becomes weak and sluggish. Think of it like a garden. You have to weed it out to let the strong plants thrive.
Save your discard in a separate jar in the fridge. Once you have about a cup, make sourdough pancakes. They’re tangy, fluffy, and absolutely delicious. Or use it to make crackers, waffles, or even pizza dough. Your discard is a gift, not garbage.
The Consistency Check
Your starter should have the consistency of thick pancake batter after feeding. If it’s too thick, add a tablespoon of water. If it’s too thin, add a tablespoon of flour. The right consistency helps the yeast trap the gases it produces, which creates those beautiful bubbles and that satisfying rise.
My Biggest Failure
I once forgot to feed my starter for four days. I went on a weekend trip and just… didn’t think about it. When I came back, the jar had a thick, dark liquid on top called “hooch.” It smelled like acetone. I was sure I’d killed it. But I poured off the hooch, fed it twice in one day, and by the next morning, it was bubbling away like nothing had happened. Sourdough starters are resilient. Don’t give up on them too quickly.
Variations & Adaptations
Once you’ve got your starter going strong, you can experiment with different flours and techniques. Here are a few variations I’ve tried.
Whole Wheat Starter
If you prefer a heartier flavor, you can maintain your starter with 100% whole wheat flour instead of switching to all-purpose after day five. The starter will be more active (whole wheat has more nutrients for the yeast), but it will also ferment faster and need more frequent feedings. I do this in the summer when my kitchen is warm and the yeast is especially active.
Rye Flour Starter
Rye flour is like rocket fuel for sourdough starters. It ferments faster and creates a deeper, more complex flavor. If you want to speed up the process, use rye flour for the first three days instead of whole wheat. I’ve had a rye starter ready to bake by day five. The downside is that rye starters are more acidic and can be a little finicky to maintain.
Gluten-Free Starter
You can make a gluten-free sourdough starter using brown rice flour or sorghum flour. The process is the same, but the starter will look different. It won’t rise as dramatically as a wheat-based starter, and it will be more liquidy. But it will still produce that tangy flavor and help your gluten-free bread rise. I’ve had good results with Bob’s Red Mill brown rice flour.
Stiff Starter vs. Liquid Starter
Most home bakers maintain a liquid starter with a 1:1 ratio of flour to water by weight. But you can also maintain a stiff starter with a 2:1 ratio of flour to water. Stiff starters produce a milder flavor and are more stable for long-term storage. I keep a stiff starter in my fridge for weeks at a time without feeding it. When I want to bake, I just wake it up with a few feedings a day before.
Serving & Storage Suggestions
Once your starter is mature, you need to decide how to store it. Here are your options.
Counter Storage
If you bake bread several times a week, keep your starter on the counter and feed it once a day. Use a 1:1:1 ratio: equal parts starter, flour, and water by weight. For example, 50 grams starter, 50 grams flour, 50 grams water. This keeps the starter active and ready to use at all times.
Refrigerator Storage
If you bake once a week or less, store your starter in the fridge. Feed it once a week instead of daily. Before you want to bake, take it out of the fridge, feed it, and let it sit at room temperature for 8-12 hours until it’s active and bubbly. Then use it in your recipe.
Pro tip: Always feed your starter before putting it in the fridge. A hungry starter in the cold will go dormant and might not wake up properly.
Freezer Storage
You can freeze a backup starter in case something happens to your main one. Spread a thin layer of starter on parchment paper, freeze it, then break it into pieces and store them in a freezer bag. When you want to revive it, just thaw a piece and feed it a few times until it’s active again.
Flavor Development Over Time
Your starter will develop more complexity as it ages. A starter that’s a month old will produce milder, more balanced bread than a week-old starter. A starter that’s a year old will have deep, nuanced flavors. I’ve been maintaining my starter for three years now, and the bread it produces is noticeably better than what I made in the first few months. It’s worth the patience.
Nutritional Information & Benefits
Sourdough bread made with a mature starter offers several health benefits compared to bread made with commercial yeast.
Estimated nutritional values per slice of sourdough bread (made from this starter):
- Calories: 120-150
- Carbohydrates: 25-30g
- Protein: 4-5g
- Fiber: 1-2g
- Fat: 1-2g
Health Benefits
The fermentation process in sourdough breaks down phytic acid, a compound in grains that can interfere with mineral absorption. This means your body can better absorb the iron, zinc, and magnesium in the bread. Sourdough also has a lower glycemic index than conventional bread, which means it causes a slower, steadier rise in blood sugar.
The lactic acid bacteria in sourdough also produce beneficial compounds that can support gut health. Some people who have trouble digesting conventional bread find that sourdough is easier on their digestive system.
Dietary considerations: This starter is naturally vegan and contains no added sugars or preservatives. It is not gluten-free, but the fermentation process does break down some of the gluten proteins, which may make it more tolerable for some people with mild gluten sensitivities.
Conclusion
Making a sourdough starter from scratch is one of those kitchen projects that feels intimidating until you actually do it. And then you wonder why you waited so long. It’s just flour and water, after all. A little patience, a little consistency, and you’ve got a living, breathing thing that will reward you with beautiful bread for years to come.
I won’t pretend it’s always smooth sailing. There will be days when your starter looks dead, or smells weird, or just sits there refusing to bubble. But keep going. Feed it anyway. Trust the process. I’ve had starters that looked hopeless on day three that were doubling by day six.
I’d love to hear how yours turns out. Drop a comment below and let me know how your starter is doing. Did it take off on day five? Did you hit any snags? Share your experience, and don’t forget to tag me in your sourdough photos. Happy baking, friend.
Frequently Asked Questions
Why does my sourdough starter smell like nail polish remover?
That’s completely normal, especially in the first few days. The smell comes from acetic acid bacteria, which produce that sharp, vinegary aroma. It will mellow out as your starter matures. If the smell doesn’t fade after day five, try feeding your starter more frequently or moving it to a slightly cooler spot.
Can I use bleached flour for my starter?
You can, but I don’t recommend it. Bleached flour has been chemically treated, which kills many of the natural yeasts and bacteria that help your starter develop. Unbleached flour has a much better track record for creating a strong, active starter. If all you have is bleached flour, mix it half-and-half with whole wheat flour for better results.
How do I know if my starter is ready to use?
Your starter is ready when it consistently doubles in size within 4-6 hours of feeding, has a pleasant sour smell, and is full of small and large bubbles. The float test is also a good indicator: drop a small spoonful of starter into a glass of water. If it floats, it’s ready to bake with. If it sinks, give it another day or two.
What should I do if my starter develops mold?
If you see fuzzy mold on top of your starter, especially if it’s green, black, or pink, throw the entire jar away and start over. Do not try to scrape off the mold and save the rest. The mold spores have likely spread throughout the starter. Wash your jar thoroughly with hot, soapy water before starting a new batch.
How often do I need to feed my mature starter?
It depends on how you store it. If you keep it on the counter, feed it once a day. If you keep it in the refrigerator, feed it once a week. Always feed it before using it in a recipe, and always feed it before putting it back in the fridge. A hungry starter is a sad starter.
Pin This Recipe!

Homemade Sourdough Starter in 7 Days – Easy Beginner Method
A foolproof, beginner-friendly method for creating a bubbly, active sourdough starter in just 7 days using simple ingredients and minimal effort. This guide cuts through confusing advice and focuses on what actually works.
- Prep Time: 20 minutes total active time across 7 days
- Cook Time: 0 minutes
- Total Time: 7 days
- Yield: 1 active sourdough starter (about 150-200 grams) 1x
- Category: Starter / Baking
- Cuisine: American
Ingredients
- 500 grams unbleached all-purpose flour (about 4 cups)
- 100 grams whole wheat flour (about 3/4 cup)
- 600 grams filtered or bottled water (about 2.5 cups), plus more for feeding
- 350 grams all-purpose flour for feeding (about 2.75 cups)
- 350 grams water for feeding (about 1.5 cups)
Instructions
- Day 1: In a clean 1-quart glass jar, combine 50 grams whole wheat flour and 50 grams water. Stir until no dry flour remains. Scrape down sides, cover loosely with a towel or coffee filter, and place in a warm spot (70-80°F).
- Day 2: Check for small bubbles. Discard half the starter. Add 50 grams all-purpose flour and 50 grams water. Stir, scrape, and cover.
- Day 3: Starter may smell acidic (vinegar or nail polish remover). Discard half, then add 50 grams all-purpose flour and 50 grams water. Stir, scrape, cover.
- Day 4: Starter should begin rising. Mark height with a rubber band after feeding. Discard half, feed with 50 grams all-purpose flour and 50 grams water. Stir, scrape, cover.
- Day 5: Starter should double in size within 8-12 hours. Discard half, feed with 50 grams all-purpose flour and 50 grams water. Stir, scrape, cover.
- Day 6: Starter should double within 6-8 hours. Discard half, feed with 50 grams all-purpose flour and 50 grams water. Stir, scrape, cover. Perform float test: drop a spoonful in water; if it floats, it’s ready.
- Day 7: Starter should double within 4-6 hours. Feed one more time: discard half, add 50 grams all-purpose flour and 50 grams water. Let it peak, then use in your favorite sourdough recipe.
Notes
Temperature is critical: keep starter between 70-80°F. Discard is necessary for a healthy starter; save discard for pancakes or crackers. If you see orange/pink streaks or smell rotten eggs, discard and start over. Starter can be stored in the fridge and fed weekly once mature.
Nutrition
- Serving Size: 1 slice of sourdough
- Calories: 120150
- Sugar: 1
- Sodium: 150200
- Fat: 12
- Saturated Fat: 1
- Carbohydrates: 2530
- Fiber: 12
- Protein: 45
Keywords: sourdough starter, homemade starter, beginner sourdough, easy sourdough, 7-day starter, wild yeast starter


