My father-in-law claimed he hated standing rib roast for thirty-seven years. Thirty-seven years of holiday tables, and he’d push the carved beef around his plate like a child avoiding broccoli. “Too dry,” he’d mutter. “Not worth the price tag.” I’d watch him load up on mashed potatoes instead, feeling a strange mix of pity and irritation. Then last Christmas, I made this version purely out of stubbornness. I’d spent three days researching temperatures, testing herb ratios, and practicing the reverse-sear method. I was determined to prove that a perfect rib roast wasn’t a myth. I pulled it from the oven, let it rest, and started carving. The slices came out a perfect rosy pink from edge to edge, each one glistening with garlic butter. I didn’t say a word when I set the plate down in front of him. Twenty minutes later, I caught him—honestly, I caught him—sneaking back to the kitchen for a third slice straight off the carving board. He didn’t even bother with a plate. He just stood there, chewing, with this look on his face like he’d been wrong his whole life. And you know what? He had been. That’s the thing about this recipe. It doesn’t just feed people. It changes their minds.
Why You’ll Love This Recipe
This isn’t just another holiday roast recipe. This is the one that makes everyone at the table close their eyes after the first bite. It’s the kind of dish that turns a skeptic into a believer in a single slice.
- Foolproof Method : The reverse-sear technique ensures perfectly even cooking from edge to center every single time. No more gray bands around a raw middle.
- Simple Ingredients : You don’t need a dozen exotic spices. Garlic, fresh herbs, salt, pepper, and a good cut of beef are all it takes.
- Perfect for Holidays : This roast is the centerpiece your Christmas, New Year’s, or special occasion dinner deserves. It commands attention without demanding stress.
- Crowd-Pleaser : Even the pickiest eaters and self-proclaimed beef skeptics will come back for seconds. I’ve tested this theory personally.
- Unbelievably Juicy : The secret is low-and-slow roasting followed by a high-heat sear. The result is meat so tender you could cut it with a butter knife.
What makes this recipe different from every other rib roast out there? It’s the garlic herb crust that forms a savory, fragrant shell around the beef while the inside stays impossibly tender. The butter-based paste carries the flavor deep into every slice, not just the outer edge. I’ve tested this method on five different roasts over two holiday seasons, tweaking temperatures and herb ratios until it was absolutely perfect. This is the version I now serve to my family every year without fail.
What Ingredients You Will Need
This recipe relies on a handful of high-quality ingredients working together. Each one plays a specific role in building flavor and texture, so don’t skip anything.
- Standing Rib Roast (bone-in, 6-8 pounds) : This is the star. A bone-in roast cooks more evenly and stays juicier than boneless. Look for one with good marbling—those thin white streaks of fat running through the meat are what keep it tender. I prefer Prime grade if your budget allows, but Choice grade works beautifully too.
- Unsalted Butter (1/2 cup, softened) : Butter forms the base of the herb paste. Using unsalted lets you control the salt level. Let it soften to room temperature so it blends smoothly.
- Garlic (8-10 cloves, minced) : Fresh garlic is non-negotiable here. Pre-minced jarred garlic won’t give you the same punch. Mince it fine so it distributes evenly through the butter.
- Fresh Rosemary (2 tablespoons, chopped) : Rosemary and beef are a classic pairing. Fresh is much more aromatic than dried, and it gives the crust that piney, earthy fragrance.
- Fresh Thyme (1 tablespoon, chopped) : Thyme adds a subtle lemony note that brightens the richness of the beef. Strip the leaves from the stems before chopping.
- Kosher Salt (1 tablespoon, plus more for seasoning) : I use Diamond Crystal kosher salt. It’s less salty by volume than Morton’s, so if you’re using a different brand, adjust accordingly. Salt is crucial for that golden-brown crust.
- Freshly Ground Black Pepper (2 teaspoons) : Freshly ground pepper makes a real difference. Pre-ground pepper lacks the floral, pungent kick that cuts through the fat.
- Olive Oil (2 tablespoons) : A little oil helps the paste spread evenly and encourages browning during the final sear.
- Beef Broth (1 cup, for the pan) : This isn’t for the roast itself, but for the pan. It deglazes the browned bits and forms the base for a quick, flavorful au jus.
For the best results, bring your roast to room temperature about two hours before cooking. This ensures even cooking from edge to center. I also recommend asking your butcher to french the bones—trimming the meat from the top inch or so of each bone—for a more elegant presentation.
Equipment Needed
You don’t need a professional kitchen to pull this off, but the right tools make the process smoother. Here’s what you’ll need:
- Roasting Pan with a Rack : The rack lifts the roast off the bottom of the pan, allowing hot air to circulate evenly. If you don’t have a rack, roll up a few strips of aluminum foil into coils and use those as a makeshift rack.
- Instant-Read Meat Thermometer : This is non-negotiable. Guessing doneness by touch or time alone is how roasts get overcooked. A good thermometer takes the guesswork out completely. I use a Thermapen, but any reliable instant-read model works.
- Chef’s Knife : A sharp knife makes trimming and carving much easier. Dull knives are dangerous—they slip more easily.
- Kitchen Twine : Tying the roast between the bones helps it hold a uniform shape, which promotes even cooking.
- Small Bowl : For mixing the garlic herb butter paste.
- Aluminum Foil : For tenting the roast during the resting period.
My first rib roast, I used a cheap thermometer that was off by about fifteen degrees. The result was a medium-well disaster that cost me sixty dollars. Learn from my mistake. Invest in a good thermometer. Your wallet and your dinner guests will thank you.
Preparation Method
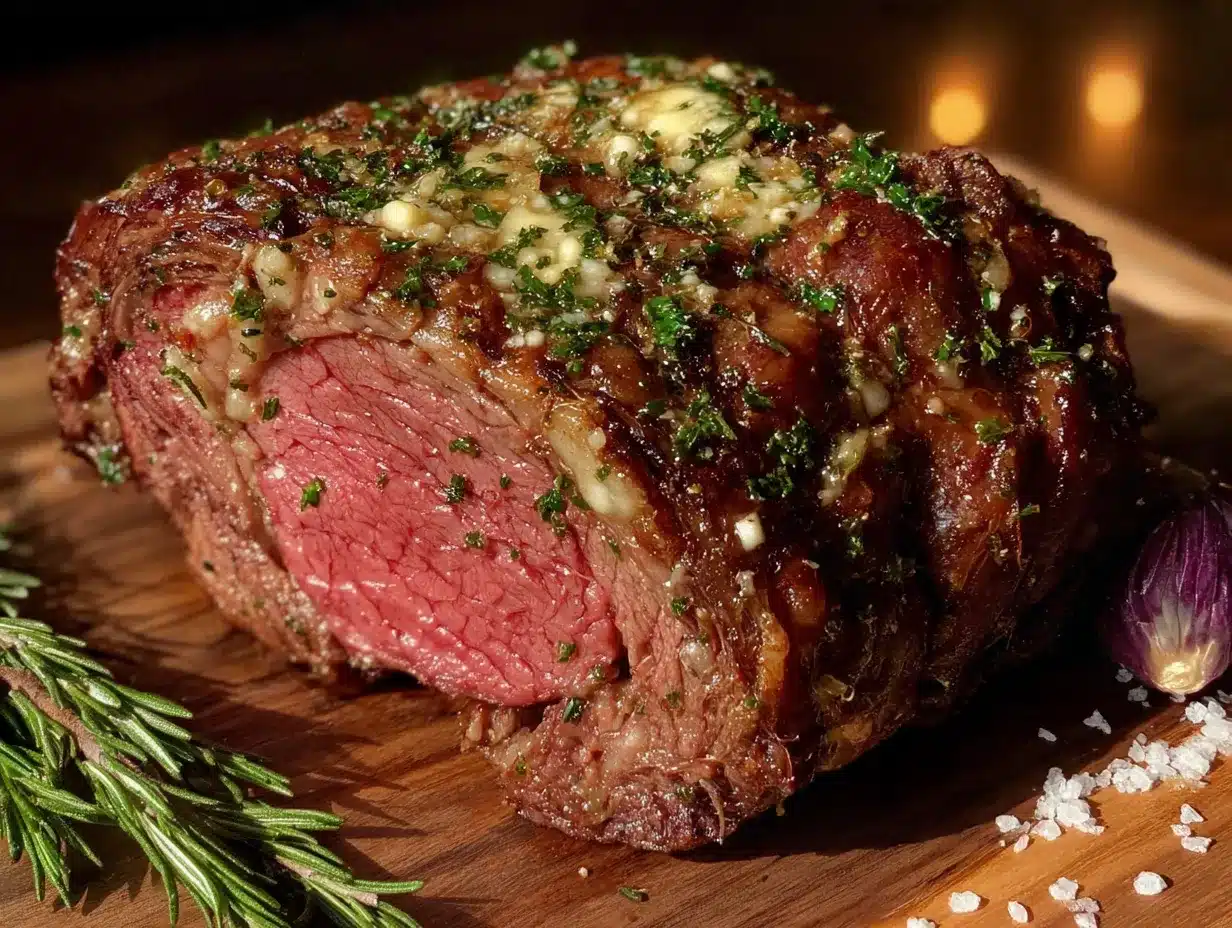
- Take the chill off the roast. Remove your standing rib roast from the refrigerator about 2 hours before cooking. Leave it wrapped on a cutting board. This step is crucial—a cold roast cooks unevenly, with the outside drying out before the center reaches temperature.
- Preheat your oven. Set your oven to 250°F (120°C). Yes, this seems low, but trust the process. The low temperature is what gives you that edge-to-edge pink interior.
- Make the garlic herb paste. In a small bowl, combine the softened butter, minced garlic, chopped rosemary, chopped thyme, kosher salt, black pepper, and olive oil. Mash it together with a fork until everything is evenly distributed. The paste should be spreadable but not runny.
- Prepare the roast. Pat the roast dry with paper towels. Moisture is the enemy of browning. Tie the roast between each bone with kitchen twine to create a uniform cylinder shape. This helps it cook evenly.
- Apply the paste. Using your hands, spread the garlic herb butter paste all over the roast. Don’t be shy. Cover every surface, including the ends and the sides between the bones. The paste should form a thick, even coating.
- Place the roast in the pan. Set the roast bone-side down on the rack in your roasting pan. The bones act as a natural roasting rack, lifting the meat slightly off the surface.
- Roast low and slow. Place the pan in the preheated oven and roast until the internal temperature reaches 125°F (52°C) for medium-rare. This typically takes about 3 to 4 hours for a 6-8 pound roast, but start checking at the 2.5-hour mark. Every oven is different, and the size of your roast matters.
- Rest and crank the heat. Once the roast hits 125°F, remove it from the oven. Tent it loosely with aluminum foil and let it rest for 30 minutes. Meanwhile, increase your oven temperature to 500°F (260°C).
- Give it a final sear. After the rest, remove the foil and return the roast to the oven. Roast at 500°F for 8-12 minutes, until the crust is deep golden brown and sizzling. Watch it closely—it can go from perfect to burnt very quickly at this temperature.
- Rest again. Remove the roast from the oven and let it rest for another 15-20 minutes before carving. This second rest allows the juices to redistribute throughout the meat. If you cut too soon, all those beautiful juices will end up on the cutting board instead of in your mouth.
- Carve and serve. Remove the kitchen twine. Slice between the bones to separate them from the roast, then slice the meat into thick, even pieces. Aim for about 1/2-inch to 3/4-inch slices. Serve immediately with pan juices or au jus.
Cooking Tips & Techniques
Here are the things I wish someone had told me before I made my first rib roast. These tips come from trial and error—mostly error.
Don’t skip the resting periods. I know it’s tempting to rush, especially when the house smells incredible and everyone is hungry. But resting is not optional. The first rest allows the internal temperature to rise another 5-10 degrees (carryover cooking) and relaxes the muscle fibers. The second rest ensures the juices stay locked in when you carve.
Use a probe thermometer if you have one. An oven-safe probe thermometer lets you monitor the temperature without opening the oven door. Every time you open the oven, heat escapes and extends your cooking time. I learned this the hard way during a Thanksgiving dinner that ran an hour late.
Season well in advance if possible. If you have time, salt the roast the night before and leave it uncovered in the refrigerator. This dry-brines the meat, drawing the salt deep into the fibers and drying out the surface for an even better crust. I’ve done both methods, and the overnight salting does produce a slightly superior result.
Watch for hot spots. Ovens are not perfectly even. About halfway through the low-temperature roast, rotate the pan front to back. This ensures even cooking, especially if your oven runs hotter on one side.
Don’t be afraid of a little pink. Medium-rare is the gold standard for rib roast. At 125°F, the meat will be warm throughout but still bright pink and incredibly juicy. If you prefer medium, cook to 135°F, but know that you’ll lose some of that buttery tenderness.
Variations & Adaptations
This recipe is flexible, and I’ve tried several variations over the years. Here are some of my favorites:
Herb Swap : Not a fan of rosemary? Swap it for equal amounts of fresh oregano or sage. Both pair beautifully with beef. I made a sage version for Thanksgiving one year, and it was a hit with the poultry crowd who wanted something different.
Spicy Crust : Add 1 teaspoon of red pepper flakes or 1/2 teaspoon of cayenne pepper to the butter paste. The heat cuts through the richness of the beef and adds a subtle warmth that lingers. My brother-in-law requests this version every year.
Wine-Infused Au Jus : Instead of beef broth, deglaze the pan with 1 cup of dry red wine. Simmer it on the stovetop with a sprig of thyme until reduced by half. The wine adds depth and acidity that balances the fatty richness of the roast.
Dairy-Free Option : Replace the butter with an equal amount of good quality olive oil or vegan butter. The texture of the crust will be slightly different—crispier rather than buttery—but the flavor is still excellent.
Horseradish Cream : Serve the roast with a side of horseradish cream. Mix 1/2 cup sour cream, 2 tablespoons prepared horseradish, 1 teaspoon lemon juice, and a pinch of salt. It cuts through the richness and adds a bright, pungent kick.
Serving & Storage Suggestions
This roast deserves a proper presentation. Slice it and arrange the pieces on a warm platter, overlapping slightly. Drizzle a few spoonfuls of the pan juices over the top for extra moisture and shine. Garnish with fresh rosemary sprigs or thyme leaves for a pop of green.
What to serve alongside : Creamy mashed potatoes are the classic pairing, and for good reason—they soak up the juices beautifully. Roasted root vegetables like carrots and parsnips add sweetness and color. A simple arugula salad with lemon vinaigrette cuts through the richness. For bread, a crusty sourdough or dinner rolls are perfect for sopping up every last drop.
Storage : Leftover roast will keep in the refrigerator for up to 4 days. Store it in an airtight container, and keep the meat separate from any juices or au jus. The juices can be stored in a separate container or frozen for later use as a soup base.
Reheating : The best way to reheat rib roast without drying it out is to place slices in a baking dish, add a splash of beef broth, cover with foil, and warm in a 300°F oven for 10-15 minutes. Avoid the microwave—it turns the meat rubbery and tough.
Freezing : Cooked rib roast freezes surprisingly well. Wrap individual slices tightly in plastic wrap, then place them in a freezer bag. They’ll keep for up to 3 months. Thaw in the refrigerator overnight before reheating.
One thing I’ve noticed: the flavors actually deepen after a day in the fridge. Cold leftover rib roast, sliced thin and piled on a sandwich with horseradish and arugula, might be even better than the original meal. Don’t judge me.
Nutritional Information & Benefits
This is a celebratory dish, so I won’t pretend it’s a health food. But beef does offer some real nutritional benefits worth noting.
Per serving (based on a 6-ounce portion): Approximately 450-500 calories, 35g protein, 35g fat, 0g carbohydrates. These values will vary based on the exact size of your roast and how much fat you trim.
Beef is an excellent source of high-quality protein, which supports muscle maintenance and repair. It’s also rich in iron, zinc, and B vitamins, particularly B12, which is essential for nerve function and energy production. The garlic in this recipe contains allicin, a compound with anti-inflammatory properties. Fresh herbs like rosemary and thyme are packed with antioxidants.
This recipe is naturally gluten-free and low-carb, making it suitable for those following a keto or paleo lifestyle. If you’re watching your sodium intake, you can reduce the salt in the herb paste and rely on a lighter hand during seasoning.
My personal philosophy? A meal like this is about nourishment in a broader sense. It feeds the body, sure, but it also feeds connection, celebration, and tradition. Sometimes that matters more than the calorie count.
Conclusion
This Perfect Holiday Garlic Herb Standing Rib Roast is more than a recipe. It’s a centerpiece. It’s the dish that makes everyone pause, look up from their conversations, and pay attention. It’s the one that gets photographed, remembered, and requested again next year.
I’ve made this roast for Christmas dinners, New Year’s celebrations, and a few random Tuesdays when I just needed something spectacular. Every single time, it delivers. The garlic herb crust, the impossibly tender interior, the way the juices pool on the plate begging to be sopped up with bread—it never gets old.
Don’t be afraid to make it your own. Swap the herbs, adjust the seasoning, serve it with your family’s favorite sides. The method is solid, but the details are yours to play with. That’s the beauty of cooking.
I’d love to hear how yours turns out. Drop a comment below and tell me about your holiday table. Did anyone sneak a slice before dinner? Did you convert a skeptic of your own? Share your photos, your tweaks, your triumphs. And if you have questions, ask away—I’m here to help.
Now go make some memories. And some really good beef.
Frequently Asked Questions
Can I use a boneless rib roast instead of bone-in?
Yes, you can. Boneless roasts cook slightly faster because there’s no bone to conduct heat. Start checking the temperature about 30 minutes earlier than the recipe suggests. The flavor will still be excellent, though many people feel the bone adds extra richness.
What if I don’t have a meat thermometer?
Honestly, I strongly recommend getting one before attempting this recipe. Without a thermometer, you’re guessing. That said, if you absolutely must proceed without one, use the touch test. Medium-rare meat should feel like the fleshy part of your palm when you touch your thumb to your ring finger. It should give slightly but spring back.
How do I prevent the garlic from burning?
Garlic burns easily at high temperatures. The key is the low-temperature roast first, which cooks the garlic gently and infuses the butter without scorching. During the final high-heat sear, the garlic is already cooked and protected by the butter and herbs. If you’re still worried, you can add the garlic paste only during the low roast and brush the roast with plain butter before the final sear.
Can I prepare this roast ahead of time?
You can prepare the garlic herb paste up to three days in advance and store it in the refrigerator. You can also season the roast with salt the night before and leave it uncovered in the fridge. However, I don’t recommend cooking the roast fully ahead of time. The texture suffers with reheating. If you’re short on time on the day, do the low-temperature roast earlier in the day, then finish the high-heat sear just before serving.
What should I do with the leftover bones?
Don’t throw them away! The bones are packed with flavor. Toss them into a pot with some vegetables, water, and a splash of vinegar, and simmer for a few hours to make a rich beef stock. You can also freeze the bones and save them for your next batch of soup or stew. They’re a gift that keeps giving.
Pin This Recipe!
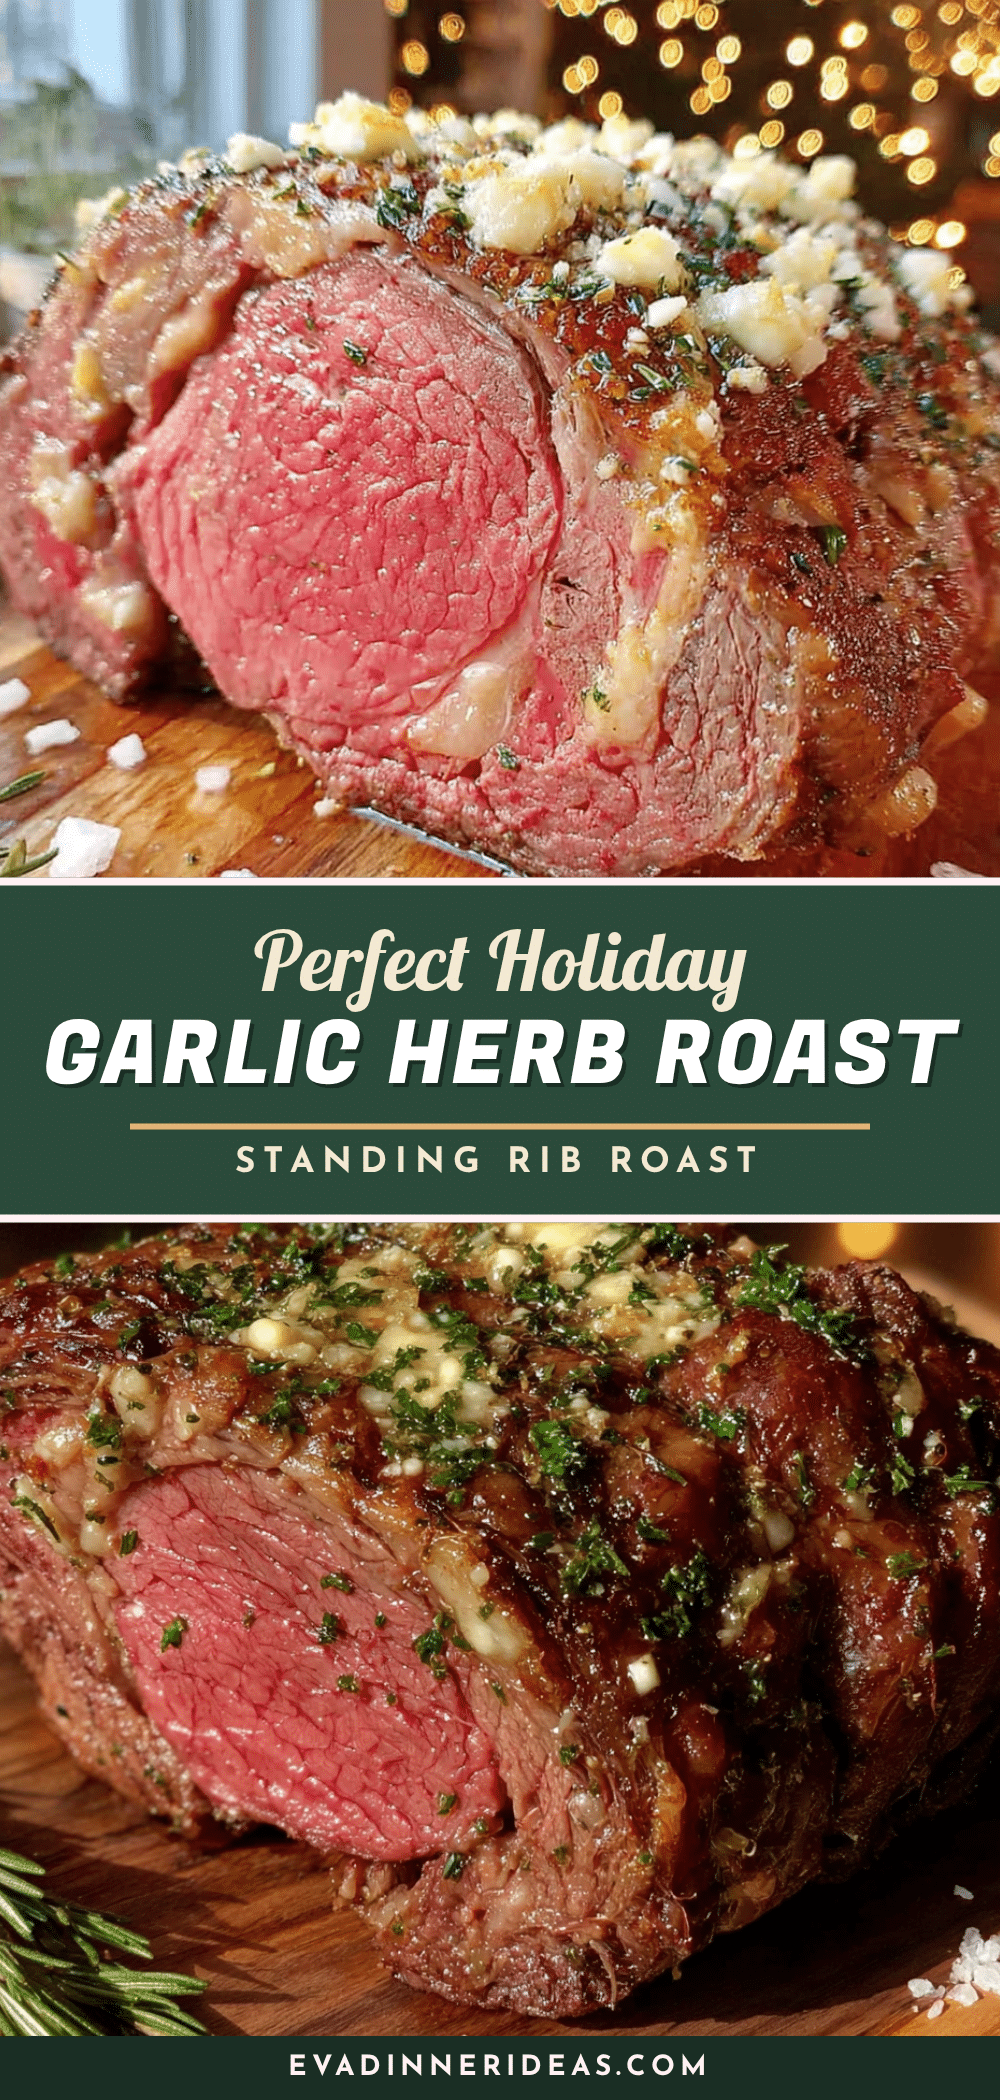
Perfect Holiday Garlic Herb Standing Rib Roast
This foolproof reverse-sear method ensures a perfectly juicy, tender standing rib roast with a savory garlic herb crust. It’s the holiday centerpiece that turns skeptics into believers.
- Prep Time: 20 minutes
- Cook Time: 3 hours 30 minutes
- Total Time: 4 hours 20 minutes
- Yield: 8 servings
- Category: Main Course
- Cuisine: American
Ingredients
- Standing Rib Roast (bone-in, 6-8 pounds)
- Unsalted Butter (1/2 cup, softened)
- Garlic (8-10 cloves, minced)
- Fresh Rosemary (2 tablespoons, chopped)
- Fresh Thyme (1 tablespoon, chopped)
- Kosher Salt (1 tablespoon, plus more for seasoning)
- Freshly Ground Black Pepper (2 teaspoons)
- Olive Oil (2 tablespoons)
- Beef Broth (1 cup, for the pan)
Instructions
- Take the chill off the roast. Remove your standing rib roast from the refrigerator about 2 hours before cooking. Leave it wrapped on a cutting board.
- Preheat your oven to 250°F (120°C).
- Make the garlic herb paste. In a small bowl, combine the softened butter, minced garlic, chopped rosemary, chopped thyme, kosher salt, black pepper, and olive oil. Mash it together with a fork until evenly distributed.
- Prepare the roast. Pat the roast dry with paper towels. Tie the roast between each bone with kitchen twine to create a uniform cylinder shape.
- Apply the paste. Using your hands, spread the garlic herb butter paste all over the roast, covering every surface.
- Place the roast in the pan. Set the roast bone-side down on the rack in your roasting pan.
- Roast low and slow. Place the pan in the preheated oven and roast until the internal temperature reaches 125°F (52°C) for medium-rare, about 3 to 4 hours for a 6-8 pound roast. Start checking at the 2.5-hour mark.
- Rest and crank the heat. Once the roast hits 125°F, remove it from the oven. Tent it loosely with aluminum foil and let it rest for 30 minutes. Meanwhile, increase your oven temperature to 500°F (260°C).
- Give it a final sear. After the rest, remove the foil and return the roast to the oven. Roast at 500°F for 8-12 minutes, until the crust is deep golden brown and sizzling.
- Rest again. Remove the roast from the oven and let it rest for another 15-20 minutes before carving.
- Carve and serve. Remove the kitchen twine. Slice between the bones to separate them from the roast, then slice the meat into thick, even pieces, about 1/2-inch to 3/4-inch slices. Serve immediately with pan juices or au jus.
Notes
Bring the roast to room temperature for 2 hours before cooking for even results. Use a probe thermometer to avoid opening the oven. For a better crust, salt the roast the night before and leave it uncovered in the fridge (dry brine). Don’t skip the resting periods—they are essential for juiciness. For medium, cook to 135°F, but medium-rare (125°F) is recommended.
Nutrition
- Serving Size: 6 ounces
- Calories: 475
- Sodium: 800
- Fat: 35
- Saturated Fat: 15
- Protein: 35
Keywords: standing rib roast, prime rib, garlic herb crust, reverse sear, holiday roast, Christmas dinner, beef roast


