This was supposed to be a straightforward vanilla protein shake. I had the milk, the scoop of powder, the usual blender routine. But my Ninja Creami was sitting on the counter, looking at me with that silent challenge it always gives. I grabbed a container, poured in the shake base, and thought, “Let’s see what happens.” Then I spotted the frozen strawberries in the freezer. I tossed a handful in without measuring. I was already running late for a friend’s dinner party, and honestly, I was just trying to use up what I had. The machine finished its spin cycle, and I scooped out something that looked like a cross between ice cream and a science experiment. It was icy, a little too tart, and definitely not pretty.
I almost dumped it. But I didn’t. I added a spoonful of cream cheese I had leftover from a baking project, a tiny splash of vanilla, and spun it again. The color turned from pale pink to a soft, creamy blush. The texture went from crunchy ice crystals to something that actually felt like a real, indulgent frozen treat. I took a bite, and I mean, I was shocked. It tasted exactly like the filling of a strawberry cheesecake, but without the crust, the sugar crash, or the hours of baking. I brought it to the party anyway, mostly as a joke, and told everyone it was a failed experiment. They ate it all. One friend asked for the recipe before I even finished explaining the disaster. That’s when I knew this accidental pint was something special.
Maybe you’ve been there, staring at a machine you bought on a whim, wondering if it was worth the counter space. Or maybe you’re just tired of protein treats that taste like cardboard and regret. This pint is neither of those things. It’s the happy accident that turned into a weekly staple in my house, and now, it’s the dessert I bring to every gathering where I want to impress without breaking a sweat. Honestly, it’s the kind of recipe that makes you look like a kitchen genius, even when you were just trying to salvage a mistake.
Why You’ll Love This Recipe
This isn’t just another protein ice cream recipe. It’s the one that actually delivers on flavor and texture without making you feel like you’re eating a health food compromise. I’ve tested this pint more times than I can count, tweaking the ratios, swapping ingredients, and even leaving it in the freezer for a week to see if it held up. It did. Here’s why you’ll keep coming back to it:
- Quick & Easy: From start to finish, this pint takes about 5 minutes of active prep. The Ninja Creami does all the heavy lifting. It’s perfect for those nights when a sugar craving hits and you need something fast.
- Simple Ingredients: You probably have everything in your kitchen right now. Cream cheese, strawberries, milk, and protein powder. No fancy syrups, no weird gums, no trips to a specialty store.
- Perfect for Hosting: This is the dessert you can make ahead of time, stash in the freezer, and pull out when guests ask for something sweet. It looks impressive, tastes indulgent, and nobody will guess it’s packed with protein.
- Crowd-Pleaser: I’ve served this to kids, fitness friends, and my aunt who swears she hates anything “healthy.” Every single person asked for a second scoop. It’s that good.
- Unbelievably Delicious: The texture is the real winner here. It’s creamy, scoopable, and has that slight tang from the cream cheese that mimics real cheesecake perfectly. You won’t miss the sugar or the fat.
What makes this recipe different from the dozens of other protein pint recipes out there is the technique. Most recipes rely on heavy cream or extra sweeteners to get that creamy texture. This one uses a simple trick: blending cream cheese directly into the base. It stabilizes the mixture, adds a rich mouthfeel, and gives you that authentic cheesecake flavor without any artificial ingredients. It’s a small change that makes a huge difference.
This recipe isn’t just good—it’s the kind that makes you close your eyes after the first bite. It’s comfort food reimagined, healthier, faster, but with the same soul-soothing satisfaction. Perfect for impressing guests without stress, or turning a simple Tuesday night into something memorable.
What Ingredients You Will Need
This recipe uses simple, wholesome ingredients to deliver that bold strawberry cheesecake flavor without the fuss. Most of these are pantry staples or easy to find at any grocery store. Let’s break down what each ingredient does and why I chose it.
- 1 cup unsweetened almond milk (or any milk of choice): This forms the liquid base. I prefer almond milk for its neutral flavor and low calorie count, but whole milk or oat milk will work just as well. If you use a thicker milk like oat, the texture will be slightly richer.
- 1 scoop vanilla or strawberry protein powder (about 30g): This is the backbone of the protein content. I recommend a whey or plant-based blend that mixes smoothly. My personal favorite is Orgain Vanilla Bean for its clean taste. Avoid collagen-based powders, as they don’t freeze well and can create a gummy texture.
- 2 tablespoons cream cheese, softened: This is the secret ingredient. It adds that signature tang and creamy richness that makes this taste like real cheesecake. Use full-fat cream cheese for the best texture; low-fat versions can sometimes turn icy. Let it sit out for 15 minutes to soften before mixing.
- 1/2 cup frozen strawberries (plus extra for mix-ins): Frozen strawberries are key here. They blend into the base for color and flavor, and you can chop a few extra to stir in after spinning for little bursts of fruit. If you only have fresh strawberries, freeze them for at least 4 hours before using.
- 1 tablespoon sweetener of choice (optional): I use a monk fruit and erythritol blend to keep it sugar-free, but honey, maple syrup, or even a mashed banana will work. Taste your base before freezing; if it’s not sweet enough for you, add a little more now.
- 1/2 teaspoon vanilla extract: This rounds out the flavors and enhances the cheesecake profile. Pure extract is best, but imitation vanilla will do in a pinch.
- Pinch of salt: A tiny amount of salt balances the sweetness and brightens the strawberry flavor. Don’t skip it.
For the mix-ins, I love adding a few tablespoons of crushed graham crackers or a sugar-free chocolate shell after the first spin. It gives that classic cheesecake crust feel without the extra work. If you’re dairy-free, swap the cream cheese for a vegan version and use a plant-based protein powder. The texture will be slightly less dense, but still delicious.
Equipment Needed
You don’t need a lot of fancy gear for this recipe, but a few tools make the process much smoother. Here’s what you’ll need:
- Ninja Creami (any model): This is the star of the show. The Creami’s unique spinning mechanism is what creates that ultra-creamy texture from a frozen solid base. I use the Ninja Creami Deluxe, but the original model works perfectly too. Just make sure your container is clean and completely dry before adding the base.
- Immersion blender or regular blender: You need to blend the ingredients until smooth before freezing. An immersion blender is easier for cleanup, but a countertop blender works just as well. If using a regular blender, scrape down the sides once to ensure everything is incorporated.
- Ninja Creami pint container: This comes with the machine. Make sure the lid seals tightly to prevent freezer burn. I’ve learned the hard way that a loose lid leads to icy crystals.
- Measuring cups and spoons: Precision matters here. Too much liquid and your base won’t freeze solid enough for the Creami to process correctly. Use standard measuring tools, not random kitchen spoons.
- Spatula: A small silicone spatula is perfect for scraping every last bit of the base into the container and for folding in mix-ins after spinning.
- Cutting board and knife: For chopping extra strawberries or graham crackers if you’re adding mix-ins.
If you don’t have an immersion blender, a mason jar and a good whisk will work in a pinch. It takes a little more elbow grease, but the result is the same. I’ve also used a food processor in a pinch, though it’s harder to scrape out the mixture cleanly.
Preparation Method
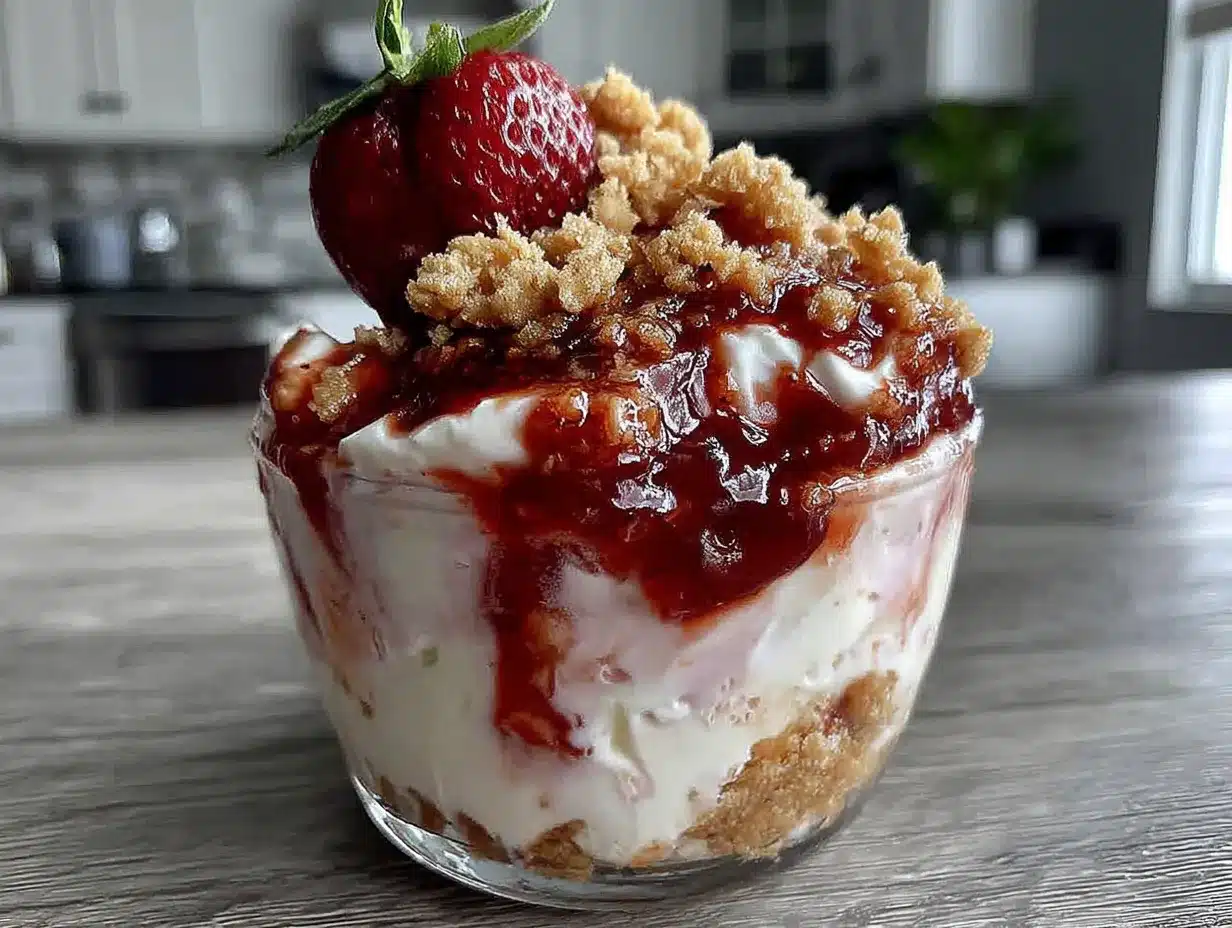
Follow these steps carefully, and you’ll have a perfect pint every time. The key is to not rush the freezing process—the base needs to be fully solid for the Creami to work its magic.
- Blend the base: In a small bowl or directly in your blender, combine the almond milk, protein powder, softened cream cheese, frozen strawberries, sweetener (if using), vanilla extract, and a pinch of salt. Blend on high for 30-45 seconds until completely smooth. The mixture should be a uniform pink color with no lumps of cream cheese. If you see any white specks, keep blending.
- Taste and adjust: This is your only chance to adjust the flavor before freezing. Dip a spoon in and taste it. Is it sweet enough? Tangy enough? Add a little more sweetener or a splash of lemon juice if needed. Remember, freezing dulls sweetness slightly, so make it a touch sweeter than you think you want.
- Pour into the pint container: Carefully pour the blended mixture into your Ninja Creami pint container. Leave about 1/2 inch of headspace at the top, as the mixture will expand slightly when frozen. Place the lid on tightly and make sure it’s sealed all around.
- Freeze for 24 hours: Place the container on a flat surface in your freezer. Do not tilt it. Freeze for at least 24 hours. I know it’s tempting to check it after 8 hours, but it won’t be solid enough. The base needs to be completely frozen through—no soft spots in the center. I usually make my base the night before I plan to serve it.
- Prepare the Creami: When you’re ready to spin, remove the pint from the freezer. Take off the lid and run the container under hot water for about 10 seconds. This loosens the sides and helps the Creami blade penetrate the frozen block. Dry the outside of the container thoroughly before placing it in the machine.
- First spin: Insert the pint into the Creami and select the “Lite Ice Cream” or “Ice Cream” setting (depending on your model). Let it run the full cycle. The machine will make a loud grinding noise—that’s normal. It’s breaking up the frozen block into a creamy texture.
- Check the texture: After the first spin, open the machine and look at the pint. It should look like soft-serve ice cream. If it’s still powdery or crumbly, that means your base was too dry. Add 1 tablespoon of milk directly into the pint, replace the lid, and run the “Re-spin” cycle. If it’s icy, add 1 tablespoon of cream cheese or a splash of heavy cream and re-spin.
- Add mix-ins (optional): If you want to add chopped strawberries, graham crackers, or a swirl of sugar-free jam, create a small well in the center of the spun pint with a spoon. Add your mix-ins, then use the “Mix-in” setting on the Creami. This gently folds them in without overmixing.
- Serve immediately or harden: The pint will be soft right after spinning. You can eat it right away for a soft-serve consistency, or place it back in the freezer for 20-30 minutes to firm up. If you freeze it for longer than an hour, let it sit on the counter for 5-10 minutes before scooping.
Cooking Tips & Techniques
I’ve made this pint more times than I care to admit, and I’ve learned a few things the hard way. Here are my best tips for getting that perfect, scoopable texture every time.
The fat content matters. I once tried to make this with fat-free cream cheese and skim milk, thinking I’d save a few calories. The result was a sad, icy block that crumbled instead of scooping. The cream cheese fat is what gives this recipe its luxurious texture. Don’t skimp on it. If you’re dairy-free, use a full-fat coconut cream-based cream cheese alternative.
Don’t overfill the container. I know it’s tempting to make a bigger batch, but the Creami needs that headspace to work properly. If you fill it to the brim, the mixture will expand and push the lid off during freezing, leading to freezer burn and a messy container. Stick to the fill line.
Temperature is everything. Your freezer should be at 0°F (-18°C) or colder. If your freezer is too warm, the base won’t freeze solid enough, and the Creami will struggle to process it. I use a small freezer thermometer to keep mine in check. Also, never spin a pint that’s still warm or even partially thawed. It will turn into a liquid mess.
Troubleshooting the texture: If your pint comes out powdery, it’s too dry. Add a tablespoon of milk and re-spin. If it’s icy, it’s too wet or didn’t have enough fat. Add a tablespoon of cream cheese or heavy cream and re-spin. If it’s soupy, your freezer wasn’t cold enough. Refreeze the pint for another 12 hours and try again. I’ve had to do this more than once, and it’s always worth the wait.
Multitasking strategy: Make the base while you’re cleaning up after dinner. It takes five minutes. Pop it in the freezer, and it’ll be ready for the next day. I usually make two or three bases at once, so I have a rotation of flavors ready to go. It’s a game-changer for busy weeks.
Variations & Adaptations
This recipe is incredibly versatile. Once you master the basic technique, you can adapt it to any flavor you crave. Here are a few of my favorite variations:
- Chocolate Strawberry Cheesecake: Swap the vanilla protein powder for chocolate and add 1 tablespoon of unsweetened cocoa powder to the base. The chocolate and strawberry combination is a classic for a reason. I like to add sugar-free chocolate chips as a mix-in.
- Vegan & Dairy-Free: Use a plant-based cream cheese (like Kite Hill or Violife) and a vegan protein powder. Swap the almond milk for oat milk for extra creaminess. The texture will be slightly less dense, but still delicious. I’ve tested this with a pea protein powder, and it worked beautifully.
- Low-Carb/Keto: Use a zero-carb sweetener like allulose or monk fruit, and choose a protein powder with no added sugars. Make sure your cream cheese is full-fat. This version is incredibly keto-friendly and satisfies that ice cream craving without the carbs.
- Peanut Butter Strawberry: Add 1 tablespoon of powdered peanut butter to the base before blending. The nutty flavor pairs surprisingly well with the strawberry and cream cheese. I’ve also used a swirl of sugar-free peanut butter as a mix-in.
- No Ninja Creami? No problem: If you don’t have a Creami, you can still make this. Pour the blended base into a shallow dish and freeze for 2-3 hours, stirring every 30 minutes to break up ice crystals. It won’t be as creamy, but it’ll still taste amazing. Or, use an ice cream maker if you have one.
Serving & Storage Suggestions
This pint is best served straight from the Creami, but it holds up well in the freezer for a few days. Here’s how to make the most of it.
Serving temperature: Right after spinning, the texture is soft and airy, like soft-serve. If you prefer a firmer scoop, pop the pint in the freezer for 20-30 minutes. For a more indulgent presentation, serve it in a chilled bowl with a few fresh strawberries on top and a sprinkle of crushed graham crackers. It looks beautiful and tastes even better.
What to serve alongside: This pint is rich enough to stand alone, but I love pairing it with a warm, gooey brownie or a slice of sugar-free pound cake. For a lighter option, serve it with a side of fresh berries. If you’re hosting, set up a “sundae bar” with toppings like sugar-free chocolate sauce, whipped cream, and chopped nuts. Let guests customize their own bowls.
Storage instructions: If you have leftovers (which is rare in my house), press a piece of plastic wrap directly onto the surface of the ice cream before sealing the lid. This prevents ice crystals from forming. Store in the freezer for up to 5 days. After that, the texture starts to degrade.
Reheating/softening: If the pint has been in the freezer for more than a day, it will be rock hard. Let it sit on the counter for 10-15 minutes before scooping. If you’re in a hurry, microwave the container for 10 seconds on low power. Do not overheat, or you’ll end up with soup.
Flavor development: The strawberry and cheesecake flavors actually meld together more after a day or two in the freezer. I’ve found that the pint tastes even better on day two than it does fresh. The tang from the cream cheese becomes more pronounced, and the strawberry flavor deepens. So don’t be afraid to make it ahead of time.
Nutritional Information & Benefits
This pint is a nutritional powerhouse disguised as a dessert. Here’s a rough estimate for the entire pint (using unsweetened almond milk, vanilla protein powder, and no added sweetener):
- Calories: Approximately 280-320
- Protein: 25-30g
- Fat: 10-12g (from cream cheese and protein powder)
- Carbohydrates: 15-20g (mostly from strawberries)
- Fiber: 3-5g
- Sugar: 8-10g (naturally occurring from strawberries)
The health benefits here are significant. The protein helps with muscle recovery and keeps you full, making this a great post-workout treat or a satisfying snack that won’t spike your blood sugar. Strawberries are packed with vitamin C and antioxidants, which support your immune system. Cream cheese, despite its bad reputation, provides a small amount of calcium and healthy fats that help with nutrient absorption.
This recipe is naturally gluten-free and can be made dairy-free or keto-friendly with simple substitutions. The only potential allergen is dairy from the cream cheese, but that’s easily swapped. I personally love that I can enjoy a full pint of “ice cream” without the guilt or the sugar crash. It’s a win-win.
Conclusion
This Crowd-Pleasing Ninja Creami Strawberry Cheesecake Protein Pint is more than just a recipe—it’s a solution to the eternal problem of wanting something indulgent without the regret. It started as a complete accident, a desperate attempt to use up leftovers, and turned into the dessert I’m most proud of. The texture is creamy, the flavor is authentic, and the protein content means you can actually feel good about eating the whole pint.
I encourage you to make this your own. Add different berries, swirl in some chocolate, or experiment with different protein powder flavors. The base technique is foolproof once you get the hang of it. And honestly, even if your first attempt isn’t perfect, it’ll still be better than anything you can buy at the store.
I’d love to hear how yours turns out. Did you add something unexpected? Did you serve it at a party and watch it disappear? Drop a comment below and share your creation. Don’t forget to pin this recipe for later, and share it with a friend who needs a little more protein in their life. Happy spinning!
Frequently Asked Questions
Can I use fresh strawberries instead of frozen?
Yes, but you’ll need to freeze them first. Fresh strawberries have a higher water content, which can make the base too watery and lead to an icy texture. Spread chopped fresh strawberries on a baking sheet and freeze for at least 4 hours before using. This concentrates their flavor and keeps the texture creamy.
Why is my protein pint powdery after spinning?
This usually happens when the base is too dry. It could be because your protein powder is very absorbent, or you didn’t use enough liquid. The fix is simple: add 1 tablespoon of milk directly into the pint, replace the lid, and run the “Re-spin” cycle. If it’s still powdery, add another tablespoon and re-spin again.
Can I make this without a Ninja Creami?
Absolutely. Pour the blended base into a shallow, freezer-safe dish and freeze for 2-3 hours, stirring every 30 minutes with a fork to break up ice crystals. The texture won’t be as creamy as the Creami version, but it will still taste delicious. You can also use a traditional ice cream maker if you have one.
How long does the base need to freeze?
At least 24 hours. I know it’s a long time, but it’s non-negotiable. The base needs to be completely solid—no soft spots in the center—for the Creami blade to work properly. If you try to spin it too early, you’ll end up with a soupy mess. I always make my base the night before I plan to serve it.
Can I double this recipe?
Yes, but you need to freeze each pint separately. The Creami can only process one pint at a time, so don’t try to cram two servings into one container. Make two separate batches of base, freeze them in their own containers, and spin them one after the other. They’ll keep in the freezer for up to 5 days.
Pin This Recipe!
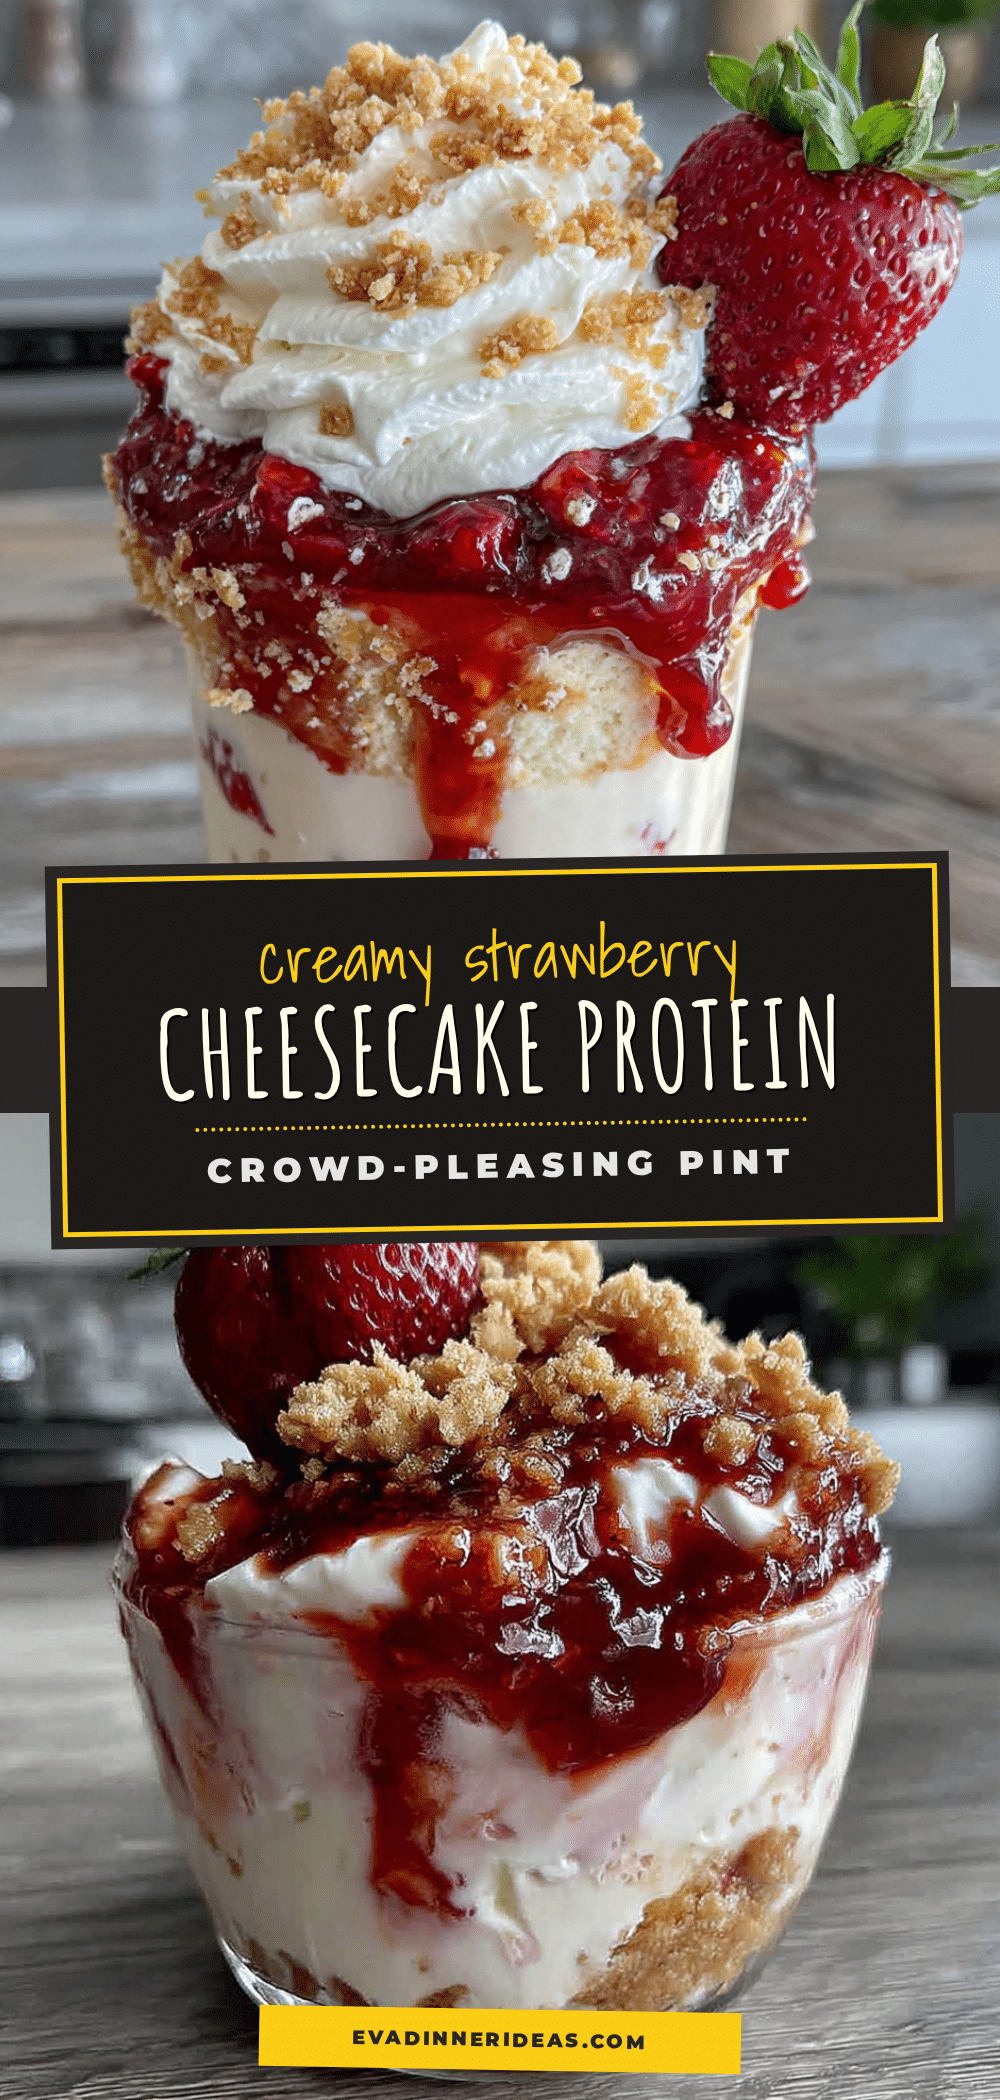
Crowd-Pleasing Ninja Creami Strawberry Cheesecake Protein Pint
This creamy, protein-packed frozen treat tastes just like strawberry cheesecake filling without the crust or sugar crash. It’s a quick, easy dessert that impresses guests and satisfies cravings.
- Prep Time: 5 minutes
- Cook Time: 0 minutes
- Total Time: 24 hours 5 minutes
- Yield: 1 pint (about 2 servings) 1x
- Category: Dessert
- Cuisine: American
Ingredients
- 1 cup unsweetened almond milk (or any milk of choice)
- 1 scoop vanilla or strawberry protein powder (about 30g)
- 2 tablespoons cream cheese, softened
- 1/2 cup frozen strawberries (plus extra for mix-ins)
- 1 tablespoon sweetener of choice (optional)
- 1/2 teaspoon vanilla extract
- Pinch of salt
Instructions
- Blend the base: In a small bowl or directly in your blender, combine the almond milk, protein powder, softened cream cheese, frozen strawberries, sweetener (if using), vanilla extract, and a pinch of salt. Blend on high for 30-45 seconds until completely smooth.
- Taste and adjust: Dip a spoon in and taste it. Adjust sweetness or tanginess if needed. Remember, freezing dulls sweetness slightly, so make it a touch sweeter than you think you want.
- Pour into the pint container: Carefully pour the blended mixture into your Ninja Creami pint container. Leave about 1/2 inch of headspace at the top. Place the lid on tightly.
- Freeze for 24 hours: Place the container on a flat surface in your freezer. Do not tilt it. Freeze for at least 24 hours until completely solid.
- Prepare the Creami: Remove the pint from the freezer. Take off the lid and run the container under hot water for about 10 seconds. Dry the outside thoroughly before placing it in the machine.
- First spin: Insert the pint into the Creami and select the ‘Lite Ice Cream’ or ‘Ice Cream’ setting. Let it run the full cycle.
- Check the texture: After the first spin, it should look like soft-serve ice cream. If powdery, add 1 tablespoon of milk and re-spin. If icy, add 1 tablespoon of cream cheese or heavy cream and re-spin.
- Add mix-ins (optional): Create a small well in the center of the spun pint, add your mix-ins, then use the ‘Mix-in’ setting on the Creami.
- Serve immediately or harden: Eat right away for soft-serve consistency, or place back in the freezer for 20-30 minutes to firm up.
Notes
The cream cheese fat is crucial for creamy texture; don’t use fat-free. Freeze the base for a full 24 hours. If the pint is powdery after spinning, add a tablespoon of milk and re-spin. For best results, let the cream cheese soften before blending.
Nutrition
- Serving Size: 1/2 pint
- Calories: 280320
- Sugar: 810
- Sodium: 200300
- Fat: 1012
- Saturated Fat: 68
- Carbohydrates: 1520
- Fiber: 35
- Protein: 2530
Keywords: protein ice cream, strawberry cheesecake, ninja creami, high protein dessert, healthy ice cream, sugar free, gluten free


