My friend Jen asked why I couldn’t just roast the garlic whole and mash it into the corn casserole instead of mincing it raw. I started to explain why that wouldn’t work — something about the raw garlic punch being essential, about how roasting would make it too subtle, too sweet. Then I stopped. Honestly, I had no real reason. I’d just always done it that way.
That conversation happened on a Tuesday, three winters ago, when the power had flickered twice during a snowstorm and my kitchen smelled like wet wool. Jen was helping me test recipes for a potluck we were hosting, and she kept sneaking spoonfuls of the roasted garlic I’d prepped for another dish. “This,” she said, pointing the spoon at me, “belongs in that corn thing.”
I almost argued. But she was holding the spoon like a weapon, and I was outnumbered by the smell of that garlic — nutty, buttery, almost caramelized. So I mashed three roasted cloves into the base before adding the corn. What came out of the oven was so good I actually texted her a photo with the words “you were right.” Which, let me tell you, I don’t say often.
The thing about this cozy cheesy roasted garlic corn casserole is that it taught me something I should have already known: sometimes the best version of a dish comes from letting someone else’s instinct take the wheel. Maybe you’ve been there — that moment when you realize your way isn’t the only way, and the other way is actually better.
Why You’ll Love This Recipe
This isn’t just another corn casserole. After testing this recipe seven times (yes, seven — my neighbors were very happy about it), I can tell you exactly why this version stands out. The roasted garlic changes everything. It melts into the creamy base without that sharp edge raw garlic can leave, creating a savory depth that makes people ask, “What is that amazing flavor?”
- Quick & Easy: Comes together in under 45 minutes, with only 10 minutes of active prep. Perfect for those evenings when you need comfort food fast.
- Simple Ingredients: You probably have most of these in your kitchen right now. No trips to specialty stores required.
- Perfect for Cozy Nights: This is the dish you want when the weather turns cold, when you’ve had a rough day, or when you just need something that feels like a hug.
- Crowd-Pleaser: I’ve served this at three different gatherings, and every single time, someone asked for the recipe. Kids love it. Adults love it. Even my picky uncle loved it.
- Unbelievably Delicious: The combination of sweet corn, creamy cheese, and that deep roasted garlic flavor is next-level comfort food. It’s the kind of dish that makes you close your eyes after the first bite.
What makes this recipe different is the technique. Instead of just mixing everything together and hoping for the best, we’re building layers of flavor. The roasted garlic gets mashed into a paste and whisked into the dairy base, ensuring every single bite has that complex, sweet-savory goodness. It’s comfort food reimagined — faster, easier, but with the same soul-soothing satisfaction.
What Ingredients You Will Need
This recipe uses simple, wholesome ingredients to deliver bold flavor and satisfying texture without the fuss. Most of these are pantry staples, which makes this perfect for those last-minute comfort food cravings.
For the Casserole Base
- 3 cups frozen corn kernels, thawed (or 4 cups fresh corn cut from the cob — use frozen for consistent results year-round)
- 1 whole head of garlic (yes, the entire head — trust me on this)
- 1 tablespoon olive oil (for roasting the garlic)
- 1 cup whole milk (adds richness; 2% works too but don’t go lower)
- 1/2 cup heavy cream (this is what makes it luxuriously creamy)
- 2 large eggs, room temperature (helps bind everything together)
- 1 cup sharp cheddar cheese, shredded (I prefer Tillamook or Cabot for best melt)
- 1/2 cup Monterey Jack cheese, shredded (adds that perfect stretchy texture)
- 1/4 cup unsalted butter, melted (salted butter works too — just reduce added salt)
- 1/4 cup all-purpose flour (or gluten-free 1:1 blend if needed)
- 1 tablespoon granulated sugar (brings out the corn’s natural sweetness)
- 1 teaspoon salt (I use fine sea salt)
- 1/2 teaspoon black pepper, freshly ground
- 1/4 teaspoon smoked paprika (optional but highly recommended — adds a subtle smokiness)
For the Topping
- 1/2 cup panko breadcrumbs (adds that irresistible crunchy top)
- 2 tablespoons unsalted butter, melted
- 1/4 cup Parmesan cheese, finely grated (use the real stuff, not the green can)
- Fresh parsley or chives, chopped (for garnish)
When selecting your corn, look for bags that feel loose and separate, not frozen into one solid block. For the cheese, I recommend shredding it yourself from a block — pre-shredded cheese has anti-caking agents that prevent it from melting as smoothly. It’s a small step that makes a big difference.
Equipment Needed
You don’t need a fancy kitchen to make this casserole. Here’s what you’ll need:
- 8×8 inch baking dish (or similar 2-quart casserole dish) — glass or ceramic works best for even heating
- Small baking sheet (for roasting the garlic)
- Aluminum foil
- Large mixing bowl
- Medium skillet (for toasting breadcrumbs, though you can skip this step)
- Chef’s knife and cutting board
- Microplane or box grater (for fresh Parmesan)
- Whisk
- Rubber spatula
If you don’t have a microplane, a fine box grater works perfectly for the Parmesan. And if you’re using a metal baking dish, just reduce the oven temperature by 25°F to prevent over-browning on the edges.
Preparation Method
Step 1: Roast the Garlic
Preheat your oven to 400°F (200°C). Take that whole head of garlic and slice off the top quarter-inch to expose the cloves. Drizzle with olive oil, wrap tightly in aluminum foil, and place on a small baking sheet. Roast for 35-40 minutes, until the cloves are soft and golden. You’ll know it’s done when you can easily pierce a clove with a knife. Let it cool until you can handle it — then squeeze the soft roasted garlic out of each clove into a small bowl. Mash it with a fork until it forms a paste. Set aside.
Step 2: Prep Your Dish
Reduce the oven temperature to 350°F (175°C). Grease your 8×8 baking dish with butter or non-stick spray. This step seems small, but I’ve had casseroles stick before, and it’s heartbreaking. Don’t skip it.
Step 3: Mix the Wet Ingredients
In your large mixing bowl, whisk together the milk, heavy cream, and eggs until smooth. Add the roasted garlic paste and whisk again — make sure it’s fully incorporated. You don’t want any clumps of garlic hiding in there. Add the melted butter and whisk once more.
Step 4: Add the Dry Ingredients
Add the flour, sugar, salt, pepper, and smoked paprika to the wet mixture. Whisk until smooth and no lumps remain. The batter should be thin and creamy at this point — that’s normal.
Step 5: Fold in the Corn and Cheese
Add the thawed corn kernels to the batter. Fold gently with your rubber spatula until evenly distributed. Then add the shredded cheddar and Monterey Jack, reserving about 1/4 cup of each for the top. Fold again until the cheese is evenly distributed throughout. The mixture will look thick and chunky — that’s exactly what you want.
Step 6: Assemble and Top
Pour the mixture into your prepared baking dish. Spread it evenly with the spatula. Sprinkle the reserved cheese over the top.
Step 7: Make the Crumb Topping
In a small bowl, combine the panko breadcrumbs with the melted butter and grated Parmesan. Stir until the breadcrumbs are evenly coated. Sprinkle this mixture over the cheese layer. Don’t press it down — you want it to stay light and crunchy.
Step 8: Bake
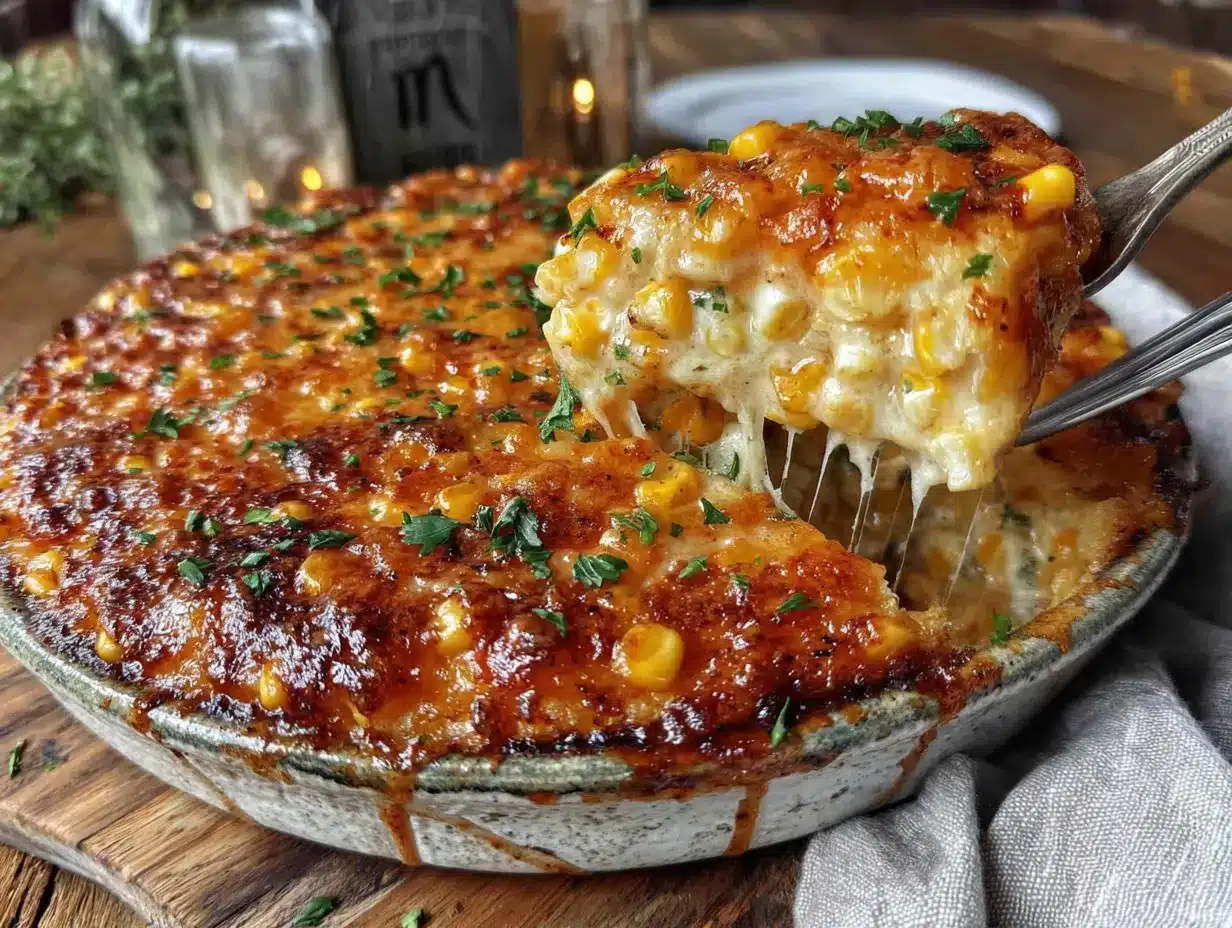
Place the dish in the preheated oven and bake for 35-40 minutes. The casserole is done when the edges are golden brown and bubbly, and the center is set but still slightly jiggly (it will firm up as it cools). The top should be beautifully browned and crispy. If the top is browning too quickly, tent loosely with foil for the last 10 minutes.
Step 9: Rest and Serve
Let the casserole rest for 10 minutes before serving. This is crucial — it allows the custard to set properly so you get clean slices instead of a soupy mess. Garnish with fresh parsley or chives before serving.
Cooking Tips & Techniques
I’ve made this casserole enough times to know exactly where things can go wrong. Here’s what I’ve learned:
Don’t skip roasting the garlic. I know it adds an extra step, but this is non-negotiable. Raw garlic will give you a harsh, almost spicy flavor that overpowers the corn. Roasted garlic is sweet, nutty, and mellow — it melts into the background and makes everything taste more savory without shouting about it.
Thaw your corn completely. Frozen corn straight from the bag will release too much water into the casserole, making it runny. Thaw it in the refrigerator overnight, or run it under warm water in a colander and pat it dry. This one step makes a huge difference in texture.
Watch your oven temperature. My first attempt at this casserole came out with burnt edges and a raw center. I learned the hard way that every oven runs differently. Start checking at 30 minutes — if the edges are browning too fast but the center is still liquid, cover with foil and continue baking.
Let it rest. I cannot stress this enough. The first time I made this, I was so excited that I cut into it immediately. It collapsed into a soupy mess. The 10-minute rest allows the eggs and flour to fully set the custard, giving you those beautiful, clean slices.
Toast your panko for extra crunch. If you have an extra 3 minutes, toast the panko in a dry skillet over medium heat until golden before mixing with butter and Parmesan. It adds an incredible depth of flavor and ensures the topping stays crunchy even after refrigeration.
Variations & Adaptations
This recipe is wonderfully flexible. Here are some variations I’ve tried and loved:
Spicy Southwest Version: Add one diced jalapeño (seeds removed unless you want heat) and 1/2 cup of fire-roasted diced green chiles to the batter. Swap the cheddar for pepper jack cheese. The roasted garlic still plays beautifully with the heat.
Bacon and Chive Version: Cook 6 strips of bacon until crispy, crumble them, and fold half into the batter. Sprinkle the remaining bacon over the top along with the breadcrumb mixture. Add 2 tablespoons of fresh chopped chives to the batter. This version disappears fastest at potlucks.
Herb and Mushroom Version: Sauté 8 ounces of sliced cremini mushrooms in butter until golden and all moisture has evaporated. Fold them into the batter along with 1 tablespoon of fresh thyme leaves and 1 tablespoon of fresh rosemary, finely chopped. The earthy mushrooms complement the sweet corn and roasted garlic beautifully.
Dairy-Free Adaptation: Substitute the milk with unsweetened oat milk, the heavy cream with full-fat coconut cream, and use dairy-free shredded cheese alternatives. Use vegan butter for the topping. It won’t be quite as rich, but it’s still delicious — I tested this version for a friend with dairy allergies and it passed the “can I have the recipe?” test.
Serving & Storage Suggestions
This casserole is best served warm, straight from the oven, when the top is still crispy and the inside is creamy and piping hot. Let it rest for those 10 minutes, then scoop generous portions onto plates.
What to serve with it: This casserole is incredibly versatile. It pairs beautifully with roasted chicken, grilled pork chops, or a simple green salad with vinaigrette. For a cozy comfort meal, serve it alongside a bowl of chili or a hearty soup. It also works as a vegetarian main dish when paired with a side of black beans and a fresh tomato salsa.
Storage: Leftovers keep well in an airtight container in the refrigerator for up to 4 days. The topping will lose some of its crunch, but the flavor actually gets better as it sits — the roasted garlic flavor deepens and melds with everything else.
Reheating: For best results, reheat in a 350°F oven for 10-15 minutes, or until warmed through. The microwave works in a pinch, but the texture won’t be as good — the custard can become slightly grainy. If you’re using the microwave, heat in 30-second bursts at 50% power to minimize texture changes.
Freezing: This casserole freezes surprisingly well. Assemble the casserole completely but don’t bake it. Cover tightly with plastic wrap and then foil, and freeze for up to 3 months. To bake, thaw overnight in the refrigerator, then bake as directed, adding 10-15 minutes to the baking time since you’re starting from cold.
Nutritional Information & Benefits
Here’s the honest truth: this is comfort food. It’s not health food, and I’m not going to pretend it is. But there are some redeeming qualities worth mentioning.
Estimated nutritional values per serving (serves 8):
- Calories: 320
- Total Fat: 22g
- Saturated Fat: 13g
- Cholesterol: 95mg
- Sodium: 480mg
- Total Carbohydrates: 24g
- Dietary Fiber: 2g
- Sugars: 6g
- Protein: 11g
Corn is actually a good source of fiber, vitamin C, and antioxidants called carotenoids. Garlic — especially roasted garlic — is known for its immune-supporting properties. And while this isn’t a low-calorie dish, it’s made with real ingredients, which I believe matters more than strict numbers. One serving as a side dish is completely reasonable. One serving as a main course is still reasonable. Two servings? Well, I’ve been there too, and I’m not judging.
Dietary considerations: This recipe contains dairy, eggs, and gluten. For gluten-free, use a 1:1 gluten-free flour blend and gluten-free panko. For dairy-free, see the variation notes above.
Conclusion
This cozy cheesy roasted garlic corn casserole has become my go-to for so many occasions. It’s the dish I bring to potlucks when I want to impress without stress. It’s what I make on cold Sunday afternoons when all I want is something warm and comforting. And it’s the recipe I share with friends who ask for something easy that still feels special.
The roasted garlic really does make all the difference. That one change — listening to Jen instead of my own stubborn instincts — transformed a good corn casserole into something I genuinely crave. I hope you’ll try it and make it your own. Maybe add bacon, maybe throw in some jalapeño, maybe keep it exactly as written. The beauty of a recipe like this is that it’s forgiving. It wants to be customized.
If you make this, I’d love to hear about it. Drop a comment below and tell me what variations you tried, or tag me in your photos. There’s something special about knowing a recipe I love is bringing warmth to someone else’s kitchen. Go ahead — preheat that oven. You deserve this.
Frequently Asked Questions
Can I use fresh corn instead of frozen?
Absolutely! Fresh corn from the cob works beautifully. You’ll need about 4-5 ears of corn to get 3 cups of kernels. Just cut the kernels off the cob and use them raw — they’ll cook perfectly in the oven. In fact, fresh corn can give you an even sweeter, more vibrant flavor during summer months.
Can I make this casserole ahead of time?
Yes, and it’s actually a great make-ahead dish. You can assemble the casserole completely (without the breadcrumb topping) up to 24 hours in advance and keep it covered in the refrigerator. When you’re ready to bake, add the breadcrumb topping and bake as directed, adding 5-10 minutes to the baking time since you’re starting from cold.
Why did my casserole turn out watery?
This usually happens for one of two reasons: either the corn wasn’t fully thawed and drained, or the casserole wasn’t baked long enough. Make sure your frozen corn is completely thawed and patted dry before adding it to the batter. And don’t pull the casserole out until the center is set — it should jiggle slightly but not look like soup.
Can I use pre-minced garlic instead of roasting a whole head?
I really wouldn’t recommend it. Pre-minced garlic lacks the sweet, mellow complexity that makes this dish special. Roasting the garlic transforms it completely — it becomes spreadable, almost buttery, with a deep nutty flavor that you simply can’t get from raw or jarred garlic. It’s worth the extra 40 minutes, I promise.
How do I know when the casserole is done baking?
The edges should be golden brown and bubbly, and the center should be set but still slightly jiggly — think of it like a cheesecake. A knife inserted near the center should come out mostly clean, with maybe a few moist crumbs attached. If the knife comes out wet with liquid, it needs more time. Let it rest for 10 minutes after baking, and it will firm up perfectly.
Pin This Recipe!
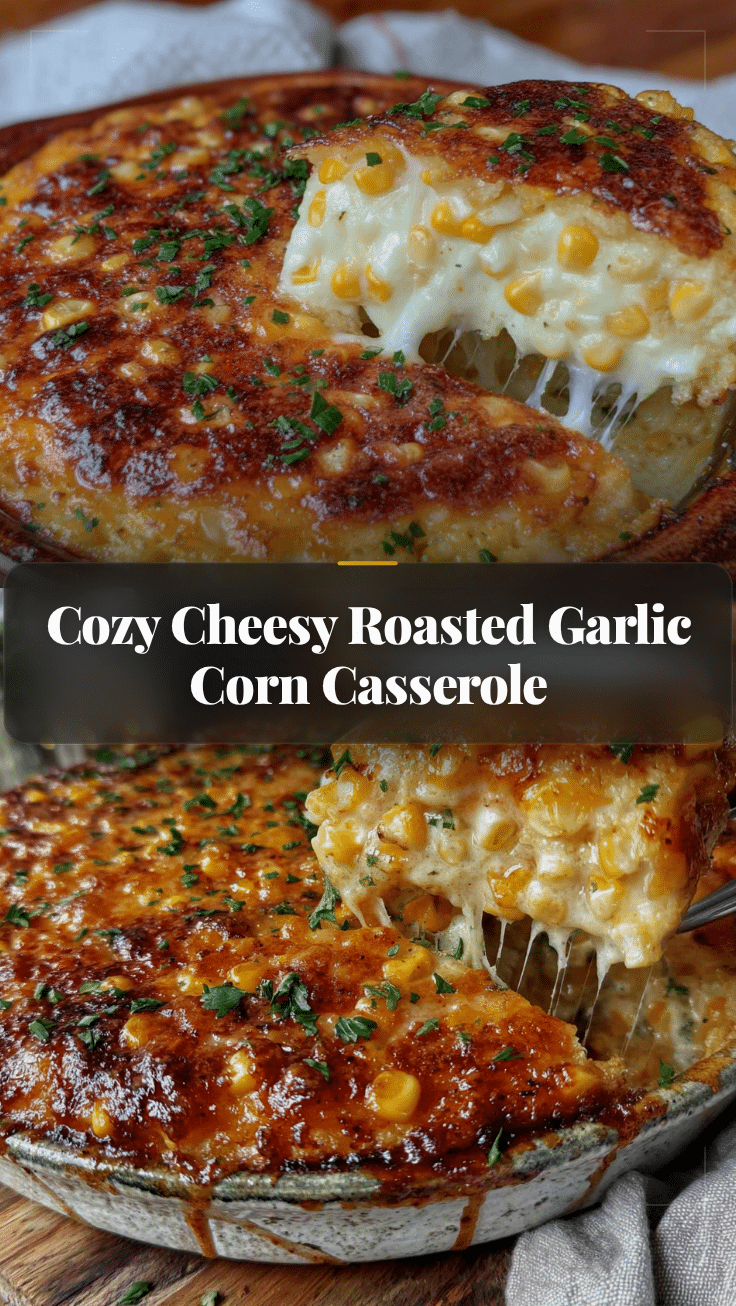
Cozy Cheesy Roasted Garlic Corn Casserole

A creamy, cheesy corn casserole elevated with sweet roasted garlic, perfect for cozy nights and potlucks. This easy side dish comes together in under 45 minutes with simple ingredients.
- Prep Time: 10 minutes
- Cook Time: 35-40 minutes
- Total Time: 45 minutes
- Yield: 8 servings 1x
- Category: Side Dish
- Cuisine: American
Ingredients
- 3 cups frozen corn kernels, thawed
- 1 whole head of garlic
- 1 tablespoon olive oil
- 1 cup whole milk
- 1/2 cup heavy cream
- 2 large eggs, room temperature
- 1 cup sharp cheddar cheese, shredded
- 1/2 cup Monterey Jack cheese, shredded
- 1/4 cup unsalted butter, melted
- 1/4 cup all-purpose flour
- 1 tablespoon granulated sugar
- 1 teaspoon fine sea salt
- 1/2 teaspoon freshly ground black pepper
- 1/4 teaspoon smoked paprika (optional)
- 1/2 cup panko breadcrumbs
- 2 tablespoons unsalted butter, melted (for topping)
- 1/4 cup Parmesan cheese, finely grated
- Fresh parsley or chives, chopped (for garnish)
Instructions
- Preheat oven to 400°F (200°C). Slice off the top quarter-inch of the garlic head to expose cloves. Drizzle with olive oil, wrap tightly in aluminum foil, and place on a small baking sheet. Roast for 35-40 minutes until soft and golden. Let cool, then squeeze roasted garlic out of each clove into a small bowl and mash into a paste.
- Reduce oven temperature to 350°F (175°C). Grease an 8×8 inch baking dish with butter or non-stick spray.
- In a large mixing bowl, whisk together milk, heavy cream, and eggs until smooth. Add roasted garlic paste and whisk until fully incorporated. Add melted butter and whisk again.
- Add flour, sugar, salt, pepper, and smoked paprika to the wet mixture. Whisk until smooth and no lumps remain.
- Fold in thawed corn kernels with a rubber spatula until evenly distributed. Add shredded cheddar and Monterey Jack, reserving about 1/4 cup of each for the top. Fold until cheese is evenly distributed.
- Pour mixture into prepared baking dish and spread evenly. Sprinkle reserved cheese over the top.
- In a small bowl, combine panko breadcrumbs with melted butter and grated Parmesan. Stir until evenly coated. Sprinkle over the cheese layer without pressing down.
- Bake for 35-40 minutes until edges are golden brown and bubbly, and center is set but slightly jiggly. If browning too quickly, tent loosely with foil for the last 10 minutes.
- Let casserole rest for 10 minutes before serving. Garnish with fresh parsley or chives.
Notes
Don’t skip roasting the garlic—it’s essential for the sweet, mellow flavor. Thaw corn completely and pat dry to avoid a watery casserole. Let the casserole rest for 10 minutes after baking to set properly. For extra crunch, toast panko in a dry skillet before mixing with butter and Parmesan.
Nutrition
- Serving Size: 1 serving
- Calories: 320
- Sugar: 6
- Sodium: 480
- Fat: 22
- Saturated Fat: 13
- Carbohydrates: 24
- Fiber: 2
- Protein: 11
Keywords: corn casserole, roasted garlic, cheesy casserole, comfort food, side dish, potluck, easy casserole


