There used to be a tiny, sticky-floored pub on the corner of Maple and 3rd in my old neighborhood called The Tipsy Goose. They made these salt and vinegar chicken wings that were honestly life-changing. When they closed down three summers ago to make way for a juice bar—a juice bar, of all things—I felt a genuine pang of loss. I mean, I actually mourned those wings. After twelve tries—and trust me, some of those batches were practically inedible—I finally got it.
The secret wasn’t some fancy brine or complicated technique. It turned out to be my air fryer and a little patience. Let me tell you, the first time I pulled a basket of these golden beauties out, the smell hit me and I nearly teared up. It was that exact pub wing smell—sharp vinegar cutting through rich, crispy chicken skin. Maybe you’ve been there with a dish that just sticks with you. For me, it was these wings.
I remember the exact Tuesday I cracked the code. I was standing in my kitchen, flour dusted across my forehead, muttering to myself about vinegar ratios. My neighbor knocked on the door to borrow sugar and found me staring at a bowl of wings like they held the secrets to the universe. She laughed, I laughed, and then she tried one and stopped laughing. She just closed her eyes and said, “These are the ones.” And she was right. These Crispy Air Fryer Salt and Vinegar Chicken Wings are the ones. They’re the recipe I kept chasing, and now they’re the recipe I keep making.
Why You’ll Love This Recipe
Let me be honest with you. I’ve tested more wing recipes than I care to count, and most of them fall into one of two categories: either they’re a soggy disappointment or they take three hours and a deep fryer the size of a small car. These wings? They’re different. They’re the Goldilocks of chicken wings—just right in every way.
- Quick & Easy: These come together in about 35 minutes from start to finish. No overnight marinating, no complicated steps. Perfect for those evenings when a wing craving hits hard and fast.
- Simple Ingredients: You probably have everything in your pantry right now. Chicken wings, salt, vinegar, a few pantry staples. No trips to specialty stores required.
- Perfect for Game Day or Cozy Nights: These work for everything from Super Bowl parties to a quiet Tuesday when you need something crispy and comforting.
- Crowd-Pleaser: I’ve served these to picky eaters, wing snobs, and people who swear they don’t like vinegar. They all go back for seconds.
- Unbelievably Delicious: The texture is what gets me every time. That impossibly crispy skin with the tangy, sharp vinegar punch. It’s next-level comfort food.
What makes this recipe different from all the others? It’s the technique. Most recipes either toss the wings in vinegar after cooking (which makes the skin soggy) or use a vinegar brine that never quite penetrates. I found a way to get that intense salt and vinegar flavor deep into the meat while keeping the skin shatteringly crisp. It’s not magic—it’s just smart cooking. And honestly, it’s the kind of recipe that makes you close your eyes after the first bite. That’s the kind of comfort we all need sometimes.
What Ingredients You Will Need
This recipe uses simple, honest ingredients to deliver that bold, tangy flavor and ultra-crispy texture. Most of these are probably already in your kitchen, which is exactly how I like to cook.
- Chicken Wings: 2 pounds (about 900g) of whole chicken wings, separated into drumettes and flats. I prefer buying whole wings and cutting them myself—it’s cheaper and you get better control over the pieces. Look for wings that are plump and have good color.
- Distilled White Vinegar: 1 cup (240ml). This is non-negotiable for that classic salt and vinegar flavor. The sharp acidity is what makes these wings sing. I’ve tried apple cider vinegar in a pinch, and it works, but it’s not the same.
- Kosher Salt: 2 tablespoons (30g), plus more for finishing. I use Diamond Crystal kosher salt because it’s less salty by volume than Morton’s, which gives me better control. If you’re using table salt, cut the amount in half.
- Baking Powder: 1 tablespoon (14g). This is the secret to crispy skin. It’s not the same as baking soda—don’t substitute! Baking powder raises the pH of the skin and helps it brown and crisp up beautifully in the air fryer.
- Cornstarch: 1 tablespoon (8g). This adds an extra layer of crunch. Together with the baking powder, it creates that shatteringly crispy exterior we’re after.
- Garlic Powder: 1 teaspoon (3g). Just a hint of savory depth. Don’t use garlic salt—we’re already controlling the salt level carefully.
- Onion Powder: 1/2 teaspoon (1.5g). Rounds out the savory notes without being overpowering.
- Black Pepper: 1/2 teaspoon (1g), freshly ground. A little warmth and bite.
- Optional – Vinegar Powder: 1 teaspoon (3g). If you can find malt vinegar powder or salt and vinegar seasoning, this is a fantastic finishing touch. I love the King Arthur Flour brand for this.
- Optional – Fresh Parsley: For garnish. It makes the plate look prettier, but honestly, I forget half the time.
A quick note on the vinegar: you’ll be using it in two ways. Part of it goes into a quick soak to infuse the meat with flavor, and part gets reduced into a glaze-like finish. Don’t skip either step—they work together to create that authentic salt and vinegar experience.
Equipment Needed
- Air Fryer: Any model works, but I prefer a basket-style air fryer for wings. My 5.8-quart Cosori handles 2 pounds of wings perfectly. If yours is smaller, cook in batches.
- Large Mixing Bowl: Glass or stainless steel works best. Avoid plastic—vinegar can absorb odors and flavors from previous uses.
- Paper Towels: Lots of them. Patting the wings dry is the most important step for crispy skin.
- Tongs: For flipping the wings halfway through cooking. Silicone-tipped tongs won’t scratch your air fryer basket.
- Small Saucepan: For reducing the vinegar mixture. A 1-quart saucepan is perfect.
- Measuring Cups and Spoons: Precision matters here, especially with the vinegar and salt.
- Instant-Read Thermometer: Optional but recommended. Chicken wings are safe at 165°F, but I pull them at 175°F for better texture.
If you don’t have an air fryer, you can use a convection oven set to 400°F. The cooking time will be similar, but you might need to flip the wings more frequently. I’ve also used a regular oven, and it works—it just takes longer and doesn’t get quite as crispy. Honestly, the air fryer is worth the investment if you make wings regularly.
Preparation Method
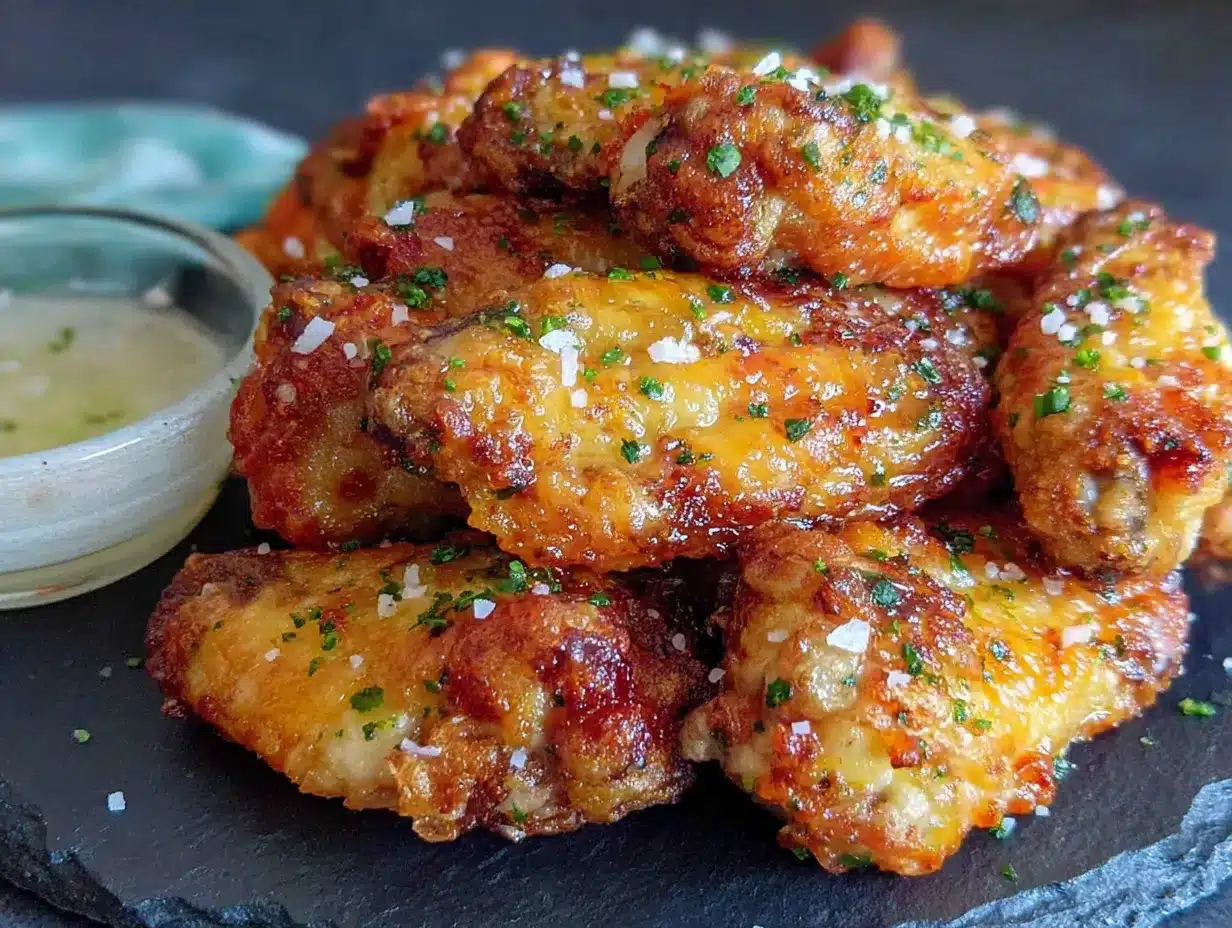
- Prep the Wings: Start by patting those chicken wings completely dry with paper towels. I mean really dry—you want to absorb every bit of moisture. If you have time, let them sit uncovered in the fridge for an hour to dry out even more. This is the single most important step for crispy skin, so don’t rush it.
- Make the Vinegar Soak: In your large mixing bowl, combine 3/4 cup (180ml) of the distilled white vinegar with 1 tablespoon (15g) of kosher salt. Stir until the salt dissolves. Add the dried wings and toss to coat. Let them sit for exactly 15 minutes—no longer, or the acid will start to break down the meat too much. Set a timer, I’m serious.
- Prepare the Dry Rub: While the wings soak, mix together the baking powder, cornstarch, garlic powder, onion powder, and black pepper in a small bowl. Give it a whisk to combine everything evenly.
- Drain and Dry Again: After 15 minutes, drain the wings in a colander. Pat them dry with fresh paper towels. Yes, again. I know it seems excessive, but this second drying is what makes the coating stick and crisp up properly.
- Season the Wings: Transfer the dried wings back to the bowl. Sprinkle the dry rub mixture over them and toss with your hands until every piece is evenly coated. Don’t be shy—get in there and make sure every nook and cranny is covered.
- Preheat the Air Fryer: Set your air fryer to 380°F (193°C) and let it preheat for 3-5 minutes. A hot start is crucial for immediate crisping.
- Arrange in the Basket: Place the wings in a single layer in the air fryer basket. Don’t overcrowd! They need room for hot air to circulate. If you’re making a double batch, cook in two batches. I know it’s tempting to cram them all in, but you’ll end up with steamed wings instead of crispy ones.
- First Cook: Air fry at 380°F for 12 minutes. Don’t open the basket during this time—let the heat do its work.
- Flip and Increase Heat: After 12 minutes, use your tongs to flip each wing. Increase the temperature to 400°F (204°C) and cook for another 10-12 minutes, until the wings are golden brown and the skin looks bubbly and crispy. The internal temperature should reach at least 175°F for the best texture.
- Make the Vinegar Glaze: While the wings finish cooking, pour the remaining 1/4 cup (60ml) of vinegar into a small saucepan. Bring it to a simmer over medium heat and let it reduce by half, about 2-3 minutes. It should be syrupy and intense. Remove from heat.
- Finish and Serve: Transfer the hot wings to a clean bowl. Drizzle the reduced vinegar over them and toss to coat. Sprinkle with a little extra kosher salt and that optional vinegar powder if you’re using it. Serve immediately while they’re still hot and crispy.
Here’s a pro tip I learned the hard way: don’t let the wings sit after tossing them in the vinegar reduction. The acid will start softening the crispy skin after about 5 minutes. So have everything ready to go, and serve them straight away.
Cooking Tips & Techniques
Let me save you from the mistakes I made. The first time I attempted these, I skipped the drying step and ended up with pale, leathery wings that tasted more like sadness than vinegar. Don’t be like me.
The Drying Obsession: I cannot stress this enough—dry wings are crispy wings. I’ve started patting my wings dry, then letting them sit uncovered in the fridge for an hour. If I’m really organized, I’ll do this in the morning and cook them at dinner time. The fridge air dries the skin even further, and the results are incredible.
Baking Powder vs. Baking Soda: These are not interchangeable. Baking powder is what you want here. Baking soda will leave a metallic taste that ruins the whole dish. I learned this the hard way when I grabbed the wrong box from my pantry. Trust me, it’s not a mistake you want to repeat.
Don’t Skip the Flip: Flipping the wings halfway through isn’t just for even cooking—it’s for even crisping. The bottom of the wing sits in its own rendered fat, and flipping it gives that side a chance to get golden and crunchy too. Set a timer if you need to.
The Temperature Trick: Starting at 380°F and finishing at 400°F gives you the best of both worlds. The lower temperature cooks the wings through without burning the exterior, and the higher temperature at the end crisps everything up perfectly. It’s a little two-step dance that makes all the difference.
Batch Cooking Strategy: If you’re making these for a crowd, keep the first batch warm in a 200°F oven while you cook the second batch. Don’t cover them with foil—that traps steam and ruins the crispiness. Just put them on a wire rack set over a baking sheet and let the oven keep them warm.
Variations & Adaptations
One of the best things about this recipe is how easily it adapts. Here are some variations I’ve tried and loved:
Spicy Salt and Vinegar Wings: Add 1 teaspoon of cayenne pepper and 1/2 teaspoon of red pepper flakes to the dry rub. The heat plays beautifully with the tangy vinegar. I made these for a football party and they disappeared in minutes.
Lemon Pepper Salt and Vinegar Wings: Replace the white vinegar with fresh lemon juice and add 2 tablespoons of lemon zest to the dry rub. It’s brighter and fresher than the original, perfect for summer cookouts. My sister-in-law actually prefers these to the classic version.
Smoky Salt and Vinegar Wings: Add 1 teaspoon of smoked paprika to the dry rub. The smoky flavor adds a whole new dimension that’s surprisingly good with the vinegar. I like to finish these with a sprinkle of flaky sea salt.
Oven-Baked Version: If you don’t have an air fryer, bake these on a wire rack set over a baking sheet at 425°F. Cook for 25-30 minutes, flipping halfway through. They won’t be quite as crispy as the air fryer version, but they’re still delicious.
Gluten-Free Adaptation: This recipe is naturally gluten-free as written. Just make sure your baking powder and any seasoning blends are certified gluten-free if that’s a concern.
I once tried a version with balsamic vinegar instead of white vinegar, and honestly, it was a disaster. The flavor was too sweet and heavy. Stick with the distilled white vinegar—it’s the right choice for that classic pub wing experience.
Serving & Storage Suggestions
These wings are best served immediately, while they’re still hot and the skin is at its crispiest. I like to arrange them on a platter with some celery sticks and carrot strips on the side. A bowl of ranch dressing or blue cheese dip is mandatory in my house—though honestly, these wings are so flavorful they don’t really need it.
For drinks, an ice-cold beer is the classic pairing. The bubbles cut through the richness of the wings perfectly. If you’re not drinking beer, a crisp sparkling water with lemon works just as well. My husband swears by a dry hard cider with these.
For storage, let any leftover wings cool completely before transferring them to an airtight container. They’ll keep in the refrigerator for up to 3 days. But here’s the thing—they won’t be crispy anymore. The vinegar and moisture from the fridge will soften the skin. That’s okay! They’re still delicious, just different.
To reheat, skip the microwave. It’ll turn them into rubber. Instead, pop them back in the air fryer at 375°F for 3-4 minutes. They’ll crisp right back up, though never quite as perfectly as fresh. If you’re reheating in a regular oven, use 400°F for about 5-7 minutes on a wire rack.
I don’t recommend freezing these wings. The texture just doesn’t hold up well. If you really need to freeze them, do it before the final toss in the vinegar reduction. Freeze the cooked, unglazed wings on a baking sheet, then transfer to a freezer bag. When you’re ready to eat, reheat and toss with the reduced vinegar.
Nutritional Information & Benefits
Here’s the honest truth about these wings: they’re not health food, but they’re not terrible for you either. Per serving (about 5-6 wings), here’s what you’re looking at:
- Calories: Approximately 380-420
- Protein: 28-32g
- Fat: 26-30g
- Carbohydrates: 4-6g
- Sodium: 800-1000mg (depends on how much salt you use)
Chicken wings are actually a good source of protein and contain essential nutrients like selenium, phosphorus, and B vitamins. The skin does contain fat, but cooking them in the air fryer means you’re using significantly less oil than deep-frying. I figure if I’m going to eat wings, I’d rather make them myself where I control the ingredients.
For those watching their sodium, you can reduce the salt in the dry rub and skip the final sprinkle. The vinegar provides plenty of flavor on its own. This recipe is naturally gluten-free and can be made dairy-free by choosing appropriate dips. It’s also low-carb and keto-friendly if you skip the cornstarch.
Conclusion
These Crispy Air Fryer Salt and Vinegar Chicken Wings are more than just a recipe to me. They’re a little piece of that old pub, a memory I can taste whenever I want. After all those failed attempts and vinegar-soaked disasters, I finally have a version that lives up to the original. And honestly? I think mine might be even better.
I’d love for you to try these and make them your own. Maybe you’ll add extra heat, or skip the vinegar reduction for a milder flavor. That’s the beauty of cooking—you get to make every recipe yours. If you do try them, come back and let me know how they turned out. Did your family love them? Did you discover a new favorite variation? I read every comment and I genuinely love hearing your stories.
Go ahead, preheat that air fryer. Your crispy, tangy, utterly satisfying wings are waiting. And trust me—once you taste them, you’ll understand why I spent twelve batches getting this right.
Frequently Asked Questions
Can I use chicken thighs or breasts instead of wings?
You can, but the cooking time and technique will be different. Chicken thighs and breasts are thicker and leaner than wings, so they’ll need more time to cook through and won’t get as crispy. If you try it, I’d recommend cutting the chicken into smaller pieces and adjusting the cooking time accordingly.
Why are my wings not getting crispy?
This usually happens for one of three reasons: the wings weren’t dried properly before cooking, the air fryer basket was too crowded, or the baking powder wasn’t fresh. Make sure you’re patting the wings completely dry, cooking in a single layer, and using fresh baking powder. Also, check that your air fryer is actually reaching the right temperature.
Can I make these ahead of time for a party?
You can cook the wings ahead of time and reheat them, but they’ll never be quite as crispy as fresh. If you must make them ahead, cook them without the final vinegar toss, then reheat in the air fryer and toss with the vinegar reduction just before serving. I usually plan to make them right before guests arrive.
How do I get the vinegar flavor without making the wings soggy?
The key is the two-step process: a quick soak to infuse the meat, and a reduced vinegar glaze at the end. The soak is short enough that it doesn’t make the skin soggy, and the reduced glaze is thick enough that it clings to the wings without soaking in. Don’t skip either step, and don’t let the wings sit in the glaze for more than a few minutes before serving.
Can I use apple cider vinegar instead of white vinegar?
You can, but the flavor will be different. Apple cider vinegar is milder and slightly fruity, while distilled white vinegar is sharper and more acidic. I’ve tried both, and I prefer white vinegar for that authentic pub wing taste. If you use apple cider vinegar, you might need to add a little extra salt to balance the flavor.
Pin This Recipe!
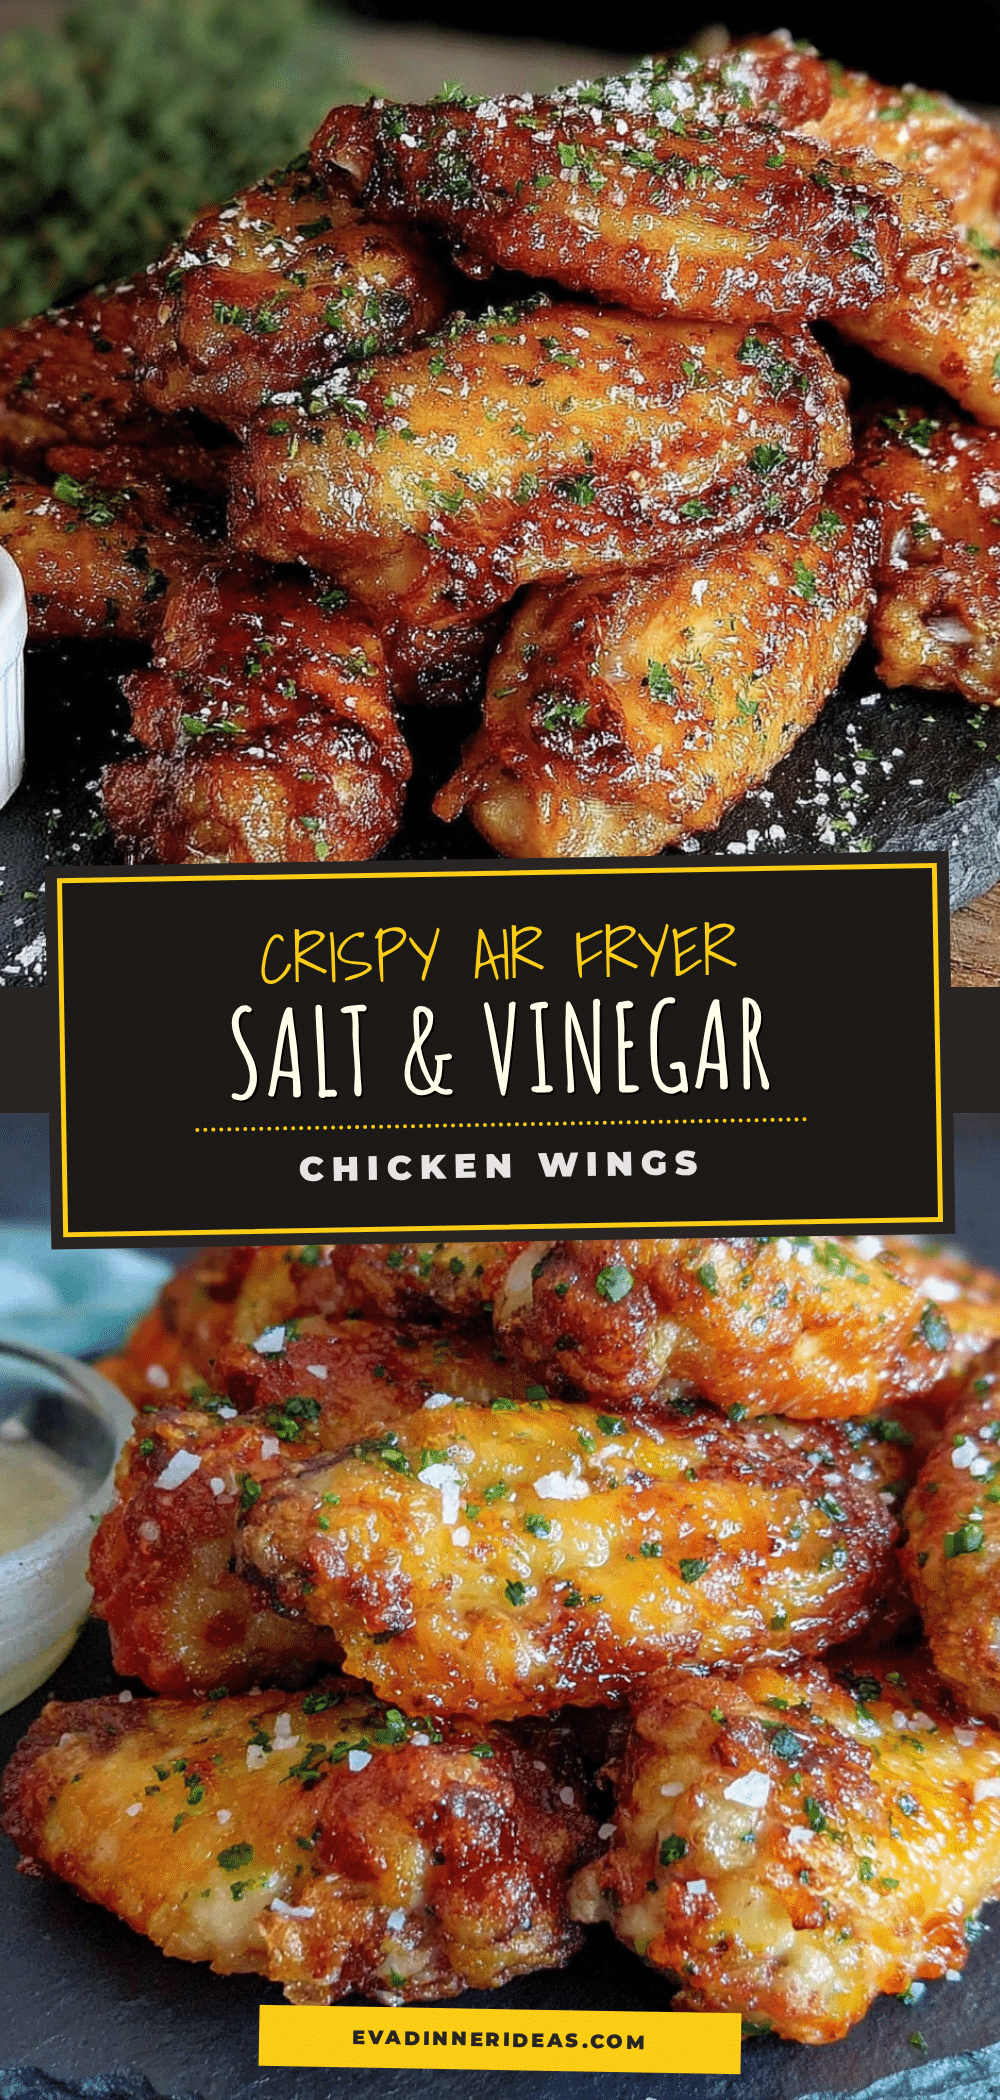
Crispy Air Fryer Salt and Vinegar Chicken Wings

These crispy air fryer salt and vinegar chicken wings deliver the perfect balance of tangy vinegar flavor and shatteringly crispy skin. A quick soak and reduced vinegar glaze recreate the magic of a beloved pub recipe, ready in just 35 minutes.
- Prep Time: 15 minutes
- Cook Time: 22-24 minutes
- Total Time: 35 minutes
- Yield: 4 servings 1x
- Category: Appetizer
- Cuisine: American
Ingredients
- 2 pounds (about 900g) chicken wings, separated into drumettes and flats
- 1 cup (240ml) distilled white vinegar
- 2 tablespoons (30g) kosher salt, plus more for finishing
- 1 tablespoon (14g) baking powder
- 1 tablespoon (8g) cornstarch
- 1 teaspoon (3g) garlic powder
- 1/2 teaspoon (1.5g) onion powder
- 1/2 teaspoon (1g) black pepper, freshly ground
- 1 teaspoon (3g) vinegar powder (optional, e.g., malt vinegar powder or salt and vinegar seasoning)
- Fresh parsley for garnish (optional)
Instructions
- Pat the chicken wings completely dry with paper towels. For extra crispiness, let them sit uncovered in the fridge for up to an hour.
- In a large mixing bowl, combine 3/4 cup (180ml) of the distilled white vinegar with 1 tablespoon (15g) of kosher salt. Stir until the salt dissolves. Add the dried wings and toss to coat. Let them soak for exactly 15 minutes.
- While the wings soak, mix together the baking powder, cornstarch, garlic powder, onion powder, and black pepper in a small bowl.
- After 15 minutes, drain the wings in a colander and pat them dry with fresh paper towels.
- Transfer the dried wings back to the bowl. Sprinkle the dry rub mixture over them and toss until every piece is evenly coated.
- Preheat the air fryer to 380°F (193°C) for 3-5 minutes.
- Place the wings in a single layer in the air fryer basket, ensuring they are not overcrowded.
- Air fry at 380°F for 12 minutes without opening the basket.
- After 12 minutes, flip each wing using tongs. Increase the temperature to 400°F (204°C) and cook for another 10-12 minutes, until the wings are golden brown and the skin is bubbly and crispy. The internal temperature should reach at least 175°F.
- While the wings finish cooking, pour the remaining 1/4 cup (60ml) of vinegar into a small saucepan. Bring to a simmer over medium heat and let it reduce by half, about 2-3 minutes, until syrupy. Remove from heat.
- Transfer the hot wings to a clean bowl. Drizzle the reduced vinegar over them and toss to coat. Sprinkle with a little extra kosher salt and optional vinegar powder. Serve immediately.
Notes
Don’t let the wings sit after tossing them in the vinegar reduction, as the acid will soften the crispy skin after about 5 minutes. For best results, serve immediately. If making ahead, cook without the final vinegar toss, then reheat in the air fryer and toss with the reduction just before serving.
Nutrition
- Serving Size: 5-6 wings
- Calories: 380420
- Sodium: 8001000
- Fat: 2630
- Saturated Fat: 810
- Carbohydrates: 46
- Protein: 2832
Keywords: air fryer chicken wings, salt and vinegar wings, crispy chicken wings, game day appetizer, pub style wings


