The neighborhood spring block party was in six hours and I’d completely forgotten. I mean, completely. I was standing in my kitchen at 10 AM on a Saturday, still in my pajamas, staring at the calendar on my phone like it had personally betrayed me. Everyone else would be bringing their elaborate, multi-day preparations — the kind of dishes that get photographed for Instagram before anyone even takes a bite. I had a half-empty bag of white chocolate chips, some crispy rice cereal, and a bag of frozen raspberries that I’d bought for smoothies I never made. Let me tell you, the panic was real.
I rummaged through my pantry hoping for a miracle, and honestly, that’s when I spotted the old peanut butter jar and the bag of mini marshmallows from last summer’s s’mores phase. My brain started connecting dots. No-bake cookies. Spring version. White chocolate instead of regular. Something light and pretty that wouldn’t look like I’d thrown it together in a panic — which, let’s face it, I absolutely had. The kitchen timer was already ticking in my head. I had maybe thirty minutes to pull something together before I needed to shower and actually look like a functioning human being.
What came out of that frantic pantry raid was these Spring No-Bake Avalanche Cookies with White Chocolate. They were supposed to be a backup plan, a Hail Mary pass for a potluck I’d spaced on. But here’s the thing — they were the first plate to empty. Not because they were fancy, but because they were exactly what everyone wanted on a warm spring afternoon. Light, sweet, with that pop of berry and the creamy white chocolate that melts on your tongue. I’ve made them every spring since, and honestly? I still laugh remembering how flustered I was that morning. Sometimes the best recipes come from the biggest mess-ups, and these little cookies are proof of that.
Why You’ll Love This Recipe
Let me tell you why these Spring No-Bake Avalanche Cookies with White Chocolate have become my secret weapon for every spring gathering. I’ve tested this recipe at least a dozen times across different kitchens, different weather conditions, and even different brands of white chocolate — and it holds up every single time. This isn’t just another no-bake cookie recipe; it’s the one that actually works when you need it to.
- Quick & Easy : These come together in about 15 minutes of active time. From pantry to plate in under an hour, including chilling. Perfect for those “oh no, I forgot” moments we all have.
- Simple Ingredients : You probably have most of these already. White chocolate chips, peanut butter, crispy rice cereal, mini marshmallows, and freeze-dried raspberries. No fancy grocery store runs needed.
- Perfect for Spring Gatherings : These are made for Easter brunches, baby showers, garden parties, and neighborhood block parties. They look festive without trying too hard.
- Crowd-Pleaser : Kids love the crispy texture and sweet white chocolate. Adults love that they’re not too heavy. I’ve watched people sneak seconds when they thought no one was looking.
- Unbelievably Delicious : The combination of creamy white chocolate, crunchy cereal, chewy marshmallows, and tart raspberries is honestly addictive. The texture contrast is what makes these special.
What makes this recipe different from other no-bake cookies is the freeze-dried raspberries. They add this pop of tartness that cuts through the sweetness of the white chocolate perfectly. I tried this with fresh raspberries at first — total disaster, too much moisture. The freeze-dried version is the secret. Plus, the ratio of white chocolate to peanut butter is dialed in so the cookies hold their shape without being greasy or falling apart. This isn’t just another version of avalanche cookies. It’s the spring version you’ll actually want to make again and again.
What Ingredients You Will Need
This recipe uses simple, wholesome ingredients to deliver that signature avalanche cookie texture — crispy, creamy, chewy, and tart all at once. Most of these are pantry staples, which makes these Spring No-Bake Avalanche Cookies with White Chocolate perfect for spontaneous baking.
- White chocolate chips, 2 cups (340g) — I recommend Ghirardelli or Guittard for the smoothest melt. Avoid white chocolate morsels with added stabilizers; they don’t melt as evenly.
- Creamy peanut butter, ½ cup (130g) — Use a natural, no-stir kind for best results. If your peanut butter is oily, stir it well before measuring. The oil separation can mess with the texture.
- Unsalted butter, ¼ cup (57g) — Adds richness and helps the white chocolate melt smoothly. You can use salted butter, just skip any extra salt.
- Crispy rice cereal, 3 cups (85g) — Classic Rice Krispies work perfectly. For a gluten-free version, use a certified gluten-free crispy rice cereal.
- Mini marshmallows, 1½ cups (85g) — The mini ones distribute better than jumbo. If you only have large marshmallows, snip them into quarters with kitchen shears.
- Freeze-dried raspberries, ½ cup (15g) — This is the spring twist that makes these cookies special. Don’t substitute fresh or frozen raspberries — they add too much moisture and the cookies won’t set. Look for them in the dried fruit aisle or online.
- Vanilla extract, 1 teaspoon — Pure vanilla is worth it here. The white chocolate flavor is delicate, and imitation vanilla can taste artificial.
- Salt, ¼ teaspoon — Just a pinch to balance the sweetness. Flaky sea salt on top is optional but gorgeous.
Ingredient Selection Tips: For the white chocolate, check the ingredients list. Real white chocolate contains cocoa butter, not just vegetable oils. The flavor is creamier and less waxy. For the freeze-dried raspberries, I’ve found the brand doesn’t matter much — just make sure they’re not stale. Give the bag a squeeze; they should crumble easily.
Substitution Guidance: Need a peanut-free version? Use sunflower seed butter or tahini. The flavor will change slightly, but the texture works. For a dairy-free option, use vegan white chocolate chips and a plant-based butter. Coconut oil works in a pinch but makes the cookies a bit softer. If you can’t find freeze-dried raspberries, freeze-dried strawberries work beautifully, or try dried cranberries for a different tart-sweet vibe.
Equipment Needed
You don’t need a fancy kitchen to make these Spring No-Bake Avalanche Cookies with White Chocolate. Here’s what you’ll actually use:
- Medium saucepan — For melting the white chocolate, peanut butter, and butter together. A heavy-bottomed pan prevents scorching.
- Large mixing bowl — You’ll combine the dry ingredients here. Go bigger than you think; you need room to stir without spilling.
- Rubber spatula — For folding everything together without crushing the cereal. A wooden spoon works too, but the spatula gets every bit of chocolate.
- Baking sheet — Line it with parchment paper or a silicone baking mat. Wax paper works in a pinch but can stick.
- Cookie scoop — A 1½-tablespoon scoop makes uniform cookies. If you don’t have one, use two spoons to drop the mixture.
- Measuring cups and spoons — Standard set. Nothing fancy needed.
Budget-Friendly Options: No cookie scoop? Use a regular spoon and shape the cookies with your hands — just spray your palms with cooking spray first to prevent sticking. No silicone mat? Parchment paper is cheaper and works just as well. I’ve made these in a friend’s tiny apartment kitchen with a beat-up saucepan and a plastic spatula, and they turned out perfect. The equipment really doesn’t matter here.
Personal Note: I learned the hard way that a thin-bottomed saucepan will scorch your white chocolate. I ruined my first batch because I walked away for thirty seconds. Use a heavy pan and keep stirring. Your future self will thank you.
Preparation Method
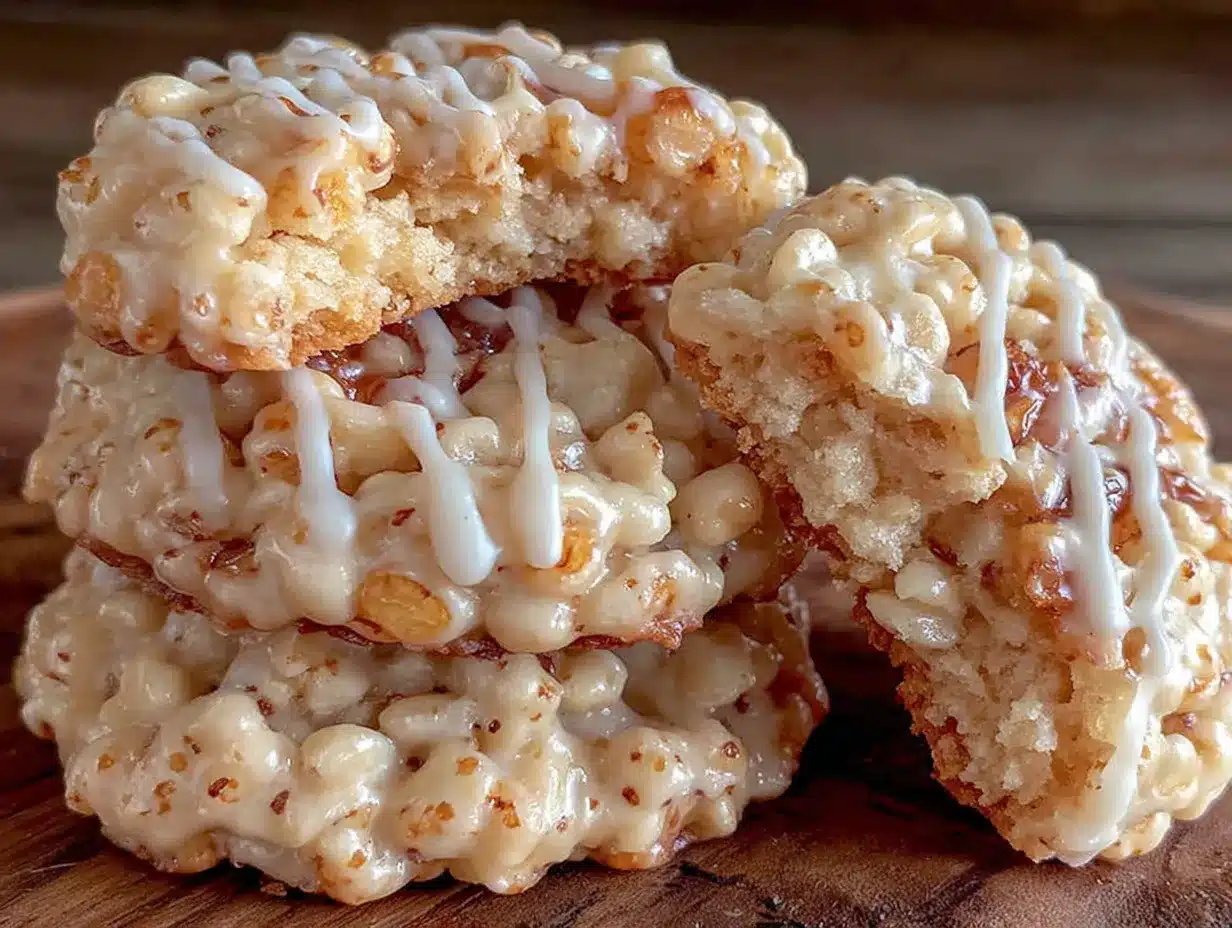
Let me walk you through making these Spring No-Bake Avalanche Cookies with White Chocolate step by step. I’ve made these more times than I can count, so I’ll tell you exactly what to look for at each stage.
- Prepare your work station. Line a large baking sheet with parchment paper or a silicone baking mat. Set it aside. Measure all your ingredients before you start — once the white chocolate melts, you need to work quickly.
- Combine the dry ingredients. In a large mixing bowl, gently stir together the crispy rice cereal, mini marshmallows, and freeze-dried raspberries. Be gentle with the raspberries; you want some whole pieces and some crushed for texture. Set the bowl aside.
- Melt the white chocolate mixture. In a medium saucepan over low heat, combine the white chocolate chips, creamy peanut butter, and unsalted butter. Stir constantly with a rubber spatula. This takes about 3-4 minutes. The mixture will look grainy at first — don’t panic, that’s normal. Keep stirring until it’s completely smooth and glossy. Remove from heat immediately. If you see any white chocolate starting to seize (get clumpy and stiff), you’ve gotten it too hot. Next time, use a double boiler or melt in 30-second bursts in the microwave, stirring between each.
- Add vanilla and salt. Stir in the vanilla extract and salt. The mixture should be smooth and pourable, like a thick sauce. Taste it here — the white chocolate and peanut butter should be balanced, not too sweet.
- Combine wet and dry. Pour the warm white chocolate mixture over the dry ingredients. Fold gently with your rubber spatula until everything is evenly coated. Work from the bottom up. You want every piece of cereal and marshmallow to have a coating of chocolate. This takes about 1-2 minutes of gentle folding. Don’t overmix or the cereal will start to break down.
- Shape the cookies. Using a 1½-tablespoon cookie scoop or two spoons, drop mounds of the mixture onto the prepared baking sheet. Space them about 2 inches apart — they don’t spread, but you want air circulation for even setting. If the mixture starts to stiffen as it cools, that’s fine. You can also use your hands (sprayed with cooking spray) to gently press the cookies into rounds.
- Optional: Add finishing touches. While the cookies are still slightly warm, press a few extra freeze-dried raspberry pieces on top for visual appeal. If you want, sprinkle a tiny pinch of flaky sea salt over each cookie. This sweet-salty combo is incredible.
- Chill to set. Place the baking sheet in the refrigerator for at least 30 minutes. The cookies need this time to firm up completely. Don’t skip this step — they’ll fall apart if you try to move them too soon. After 30 minutes, they should be firm to the touch but still have a slight give.
- Serve or store. Once set, transfer the cookies to a serving plate or an airtight container. They’re best enjoyed chilled or at room temperature, depending on your preference.
Sensory Cues: When the white chocolate mixture is ready, it should coat the back of a spoon and hold a line when you run your finger through it. The finished cookie mixture should look like a snowy landscape with pink speckles — the white chocolate coating the cereal, with bright raspberry pieces peeking through. When you bite into one, you should hear a slight crunch from the cereal, feel the soft chew of the marshmallow, and taste the bright tartness of the raspberry cutting through the sweet white chocolate.
Cooking Tips & Techniques
After making these Spring No-Bake Avalanche Cookies with White Chocolate more times than I can count, I’ve collected a few tricks that make the difference between good cookies and great ones.
Low and slow is the rule. White chocolate burns faster than regular chocolate because of the milk solids. I learned this the hard way when I cranked the heat to speed things up and ended up with a grainy, scorched mess. Keep the heat on low and stir constantly. If you’re nervous, use a double boiler — it takes a few extra minutes but gives you total control.
Don’t crush the cereal. When you’re folding the white chocolate mixture into the dry ingredients, use a gentle hand. You want the crispy rice cereal to stay mostly intact. Overmixing turns everything into a dense, sad paste. Fold just until you don’t see any dry spots, then stop.
Temperature matters. If your kitchen is warm and humid, the cookies might take longer to set. Pop them in the fridge for a full 45 minutes instead of 30. On the flip side, if your kitchen is cold, they might set on the baking sheet before you finish scooping. If that happens, just warm the mixture gently over low heat for 30 seconds to loosen it up.
My biggest failure: I once tried to double this recipe and use a massive pot. The white chocolate seized because the heat distribution was uneven across the larger surface area. Now I make two separate batches if I need more cookies. It takes the same amount of time and saves the headache.
Timing strategy: Make the white chocolate mixture while you measure the dry ingredients. Have everything ready to go before you turn on the stove. Once that chocolate melts, you’re on the clock. I set a timer for 10 minutes and challenge myself to have the cookies scooped and in the fridge before it goes off.
Variations & Adaptations
One of the best things about these Spring No-Bake Avalanche Cookies with White Chocolate is how flexible they are. Here are some variations I’ve tried and loved:
- Lemon Raspberry: Add 1 teaspoon of lemon zest to the white chocolate mixture along with the vanilla. The lemon brightens the whole cookie and pairs beautifully with the raspberries. I made this version for a baby shower and got asked for the recipe four times.
- Chocolate Lover’s Twist: Swap half the white chocolate chips for good-quality dark chocolate chips. The contrast between dark and white chocolate is stunning, and the bitterness balances the sweetness. Use a 70% dark chocolate for best results.
- Vegan Version: Use vegan white chocolate chips (Enjoy Life makes a good one), plant-based butter, and a creamy almond butter instead of peanut. The texture is slightly softer, so chill for an extra 15 minutes. I’ve served these to vegan and non-vegan friends alike, and no one noticed the difference.
- Berry Swap: Can’t find freeze-dried raspberries? Freeze-dried strawberries work beautifully. Cut them into smaller pieces if they’re large. Dried sour cherries are another option — they add a chewier texture and a different kind of tartness.
- Nut-Free Option: Use sunflower seed butter or WowButter instead of peanut butter. The color will be slightly different (greenish from the sunflower seeds), but the taste is still delicious. Just be aware that sunflower seed butter can react with baking soda if you ever use it in baked goods — not an issue here since this is no-bake.
Personal Variation: My favorite version is the one I make for Easter — I add a handful of toasted coconut flakes along with the cereal. The coconut adds a subtle tropical note that screams spring. Just toast the coconut in a dry pan over medium heat for 2-3 minutes until golden, let it cool, then fold it in.
Serving & Storage Suggestions
These Spring No-Bake Avalanche Cookies with White Chocolate are versatile when it comes to serving. Here’s how I handle them:
Serving Temperature: I prefer them straight from the fridge — the white chocolate is firmer and the texture contrast is more pronounced. But they’re also lovely at room temperature, especially if you’re serving them at a picnic or brunch where refrigeration isn’t practical. Let them sit out for about 10 minutes if you prefer a softer bite.
Presentation Ideas: Arrange them on a white platter to let the pink raspberry pieces pop. For spring parties, I sometimes nestle them in mini cupcake liners — it makes them look fancier and keeps fingers clean. A dusting of powdered sugar right before serving makes them look snow-kissed, which is a fun contrast for spring.
What to Serve With: These cookies pair beautifully with a cup of Earl Grey tea or a cold glass of almond milk. For a dessert board, arrange them alongside fresh strawberries, dark chocolate pieces, and a bowl of whipped cream. They’re also fantastic crumbled over vanilla ice cream for an easy sundae.
Storage Instructions: Store in an airtight container in the refrigerator for up to 1 week. Layer them between sheets of parchment paper to prevent sticking. They actually get better after a day — the flavors meld together and the texture settles into that perfect balance of crunchy and chewy.
Freezer Instructions: These freeze beautifully. Place the cookies in a single layer on a baking sheet and freeze for 1 hour, then transfer to a freezer-safe bag or container. They’ll keep for up to 3 months. Thaw in the refrigerator for about 30 minutes before serving. Don’t thaw at room temperature — they can get too soft.
Flavor Development Note: The freeze-dried raspberries continue to soften slightly over time, which actually improves the texture. By day three, the raspberry flavor has spread more evenly through the cookie. If you’re making these for an event, I recommend making them a day ahead.
Nutritional Information & Benefits
While these Spring No-Bake Avalanche Cookies with White Chocolate are definitely a treat, they do have some redeeming qualities. Here’s the estimated nutritional breakdown per cookie (based on 24 cookies):
- Calories: Approximately 155
- Fat: 9g
- Carbohydrates: 18g
- Protein: 3g
- Sugar: 12g
- Fiber: 1g
Health Benefits: The peanut butter provides a small amount of protein and healthy fats that help balance the sugar rush. Freeze-dried raspberries retain most of the fiber and antioxidants of fresh raspberries — they’re not just for looks. The crispy rice cereal adds iron and B vitamins. Is this a health food? No. But it’s a treat made with real ingredients, and that counts for something.
Dietary Considerations: This recipe is naturally egg-free and can be made gluten-free with certified gluten-free cereal. For vegan options, see the variations section. The main allergens are peanuts (from the peanut butter), dairy (from the white chocolate and butter), and gluten (from the cereal). Always check labels if you’re serving someone with allergies.
Personal Perspective: I believe in balance. These cookies are for celebrations, for spring afternoons, for moments when you want something sweet and special. They’re not an everyday snack, and that’s okay. Food is about joy as much as nourishment, and these cookies deliver plenty of joy.
Conclusion
These Spring No-Bake Avalanche Cookies with White Chocolate started as a panic-induced kitchen experiment and became one of my most-requested recipes. That’s the thing about cooking — sometimes the best discoveries happen when you’re scrambling. The combination of creamy white chocolate, crunchy cereal, chewy marshmallows, and tart raspberries is simple but somehow magical. It’s spring in cookie form, if you ask me.
I love that this recipe doesn’t require any oven time, fancy equipment, or hard-to-find ingredients. It’s approachable enough for a beginner baker but impressive enough for a spring party. And honestly? It’s forgiving. I’ve made it with different cereals, different nut butters, different berries — it always works. That’s the mark of a great recipe.
Now I want to hear from you. Have you tried these cookies? Did you add your own twist? Drop a comment below and tell me about it — I love seeing how people make recipes their own. And if you make these for your next spring gathering, take a photo and tag me. There’s nothing better than seeing these little cookies bring someone else joy the way they’ve brought me joy. Happy spring baking, friends!
Frequently Asked Questions
Can I use milk chocolate instead of white chocolate?
You can, but the flavor profile changes significantly. The white chocolate keeps these cookies light and spring-like. Milk chocolate makes them richer and more like traditional no-bake cookies. If you swap, reduce the sugar slightly since milk chocolate is sweeter.
Why did my white chocolate seize up?
White chocolate seizes when it gets too hot or when a drop of water gets into the melting bowl. Always melt on low heat and make sure your spatula and bowl are completely dry. If it does seize, you can try adding a teaspoon of coconut oil or vegetable shortening and stirring vigorously to bring it back.
Can I make these without peanut butter?
Yes! Use sunflower seed butter, almond butter, or cashew butter instead. The texture will be similar, though the flavor will change. For a completely nut-free version, sunflower seed butter is your best bet. Just be aware it can turn slightly green when combined with other ingredients — that’s normal and safe.
How do I keep the cookies from falling apart?
Make sure you chill them for the full 30 minutes minimum. The white chocolate needs time to firm up completely. Also, don’t skimp on the peanut butter — it acts as a binder. If your cookies are still crumbly, add an extra tablespoon of peanut butter next time.
Can I double this recipe?
You can, but I recommend making two separate batches rather than doubling in one pot. The heat distribution in a larger pot can cause the white chocolate to seize or burn. Two batches take the same amount of time and are much more reliable. Trust me on this one — I learned the hard way.
Pin This Recipe!

Spring No-Bake Avalanche Cookies: Easy White Chocolate Treats

These Spring No-Bake Avalanche Cookies with White Chocolate are a quick and easy treat perfect for spring gatherings. Made with white chocolate chips, peanut butter, crispy rice cereal, mini marshmallows, and freeze-dried raspberries, they come together in about 15 minutes of active time and require no oven.
- Prep Time: 15 minutes
- Cook Time: 5 minutes
- Total Time: 50 minutes
- Yield: 24 cookies 1x
- Category: Dessert
- Cuisine: American
Ingredients
- 2 cups (340g) white chocolate chips
- ½ cup (130g) creamy peanut butter
- ¼ cup (57g) unsalted butter
- 3 cups (85g) crispy rice cereal
- 1½ cups (85g) mini marshmallows
- ½ cup (15g) freeze-dried raspberries
- 1 teaspoon vanilla extract
- ¼ teaspoon salt
Instructions
- Line a large baking sheet with parchment paper or a silicone baking mat. Set aside.
- In a large mixing bowl, gently stir together the crispy rice cereal, mini marshmallows, and freeze-dried raspberries. Set aside.
- In a medium saucepan over low heat, combine the white chocolate chips, creamy peanut butter, and unsalted butter. Stir constantly with a rubber spatula until completely smooth and glossy, about 3-4 minutes. Remove from heat immediately.
- Stir in the vanilla extract and salt until well combined.
- Pour the warm white chocolate mixture over the dry ingredients. Fold gently with a rubber spatula until everything is evenly coated, about 1-2 minutes.
- Using a 1½-tablespoon cookie scoop or two spoons, drop mounds of the mixture onto the prepared baking sheet, spacing them about 2 inches apart.
- Optional: While still slightly warm, press a few extra freeze-dried raspberry pieces on top and sprinkle with flaky sea salt.
- Place the baking sheet in the refrigerator for at least 30 minutes to set.
- Once set, transfer to a serving plate or an airtight container. Serve chilled or at room temperature.
Notes
White chocolate burns easily; melt on low heat and stir constantly. For best results, use a heavy-bottomed saucepan. If the mixture stiffens while scooping, warm it gently over low heat for 30 seconds. For a peanut-free version, use sunflower seed butter or tahini. For dairy-free, use vegan white chocolate chips and plant-based butter. Store in an airtight container in the refrigerator for up to 1 week. Freeze for up to 3 months.
Nutrition
- Serving Size: 1 cookie
- Calories: 155
- Sugar: 12
- Sodium: 85
- Fat: 9
- Saturated Fat: 4
- Carbohydrates: 18
- Fiber: 1
- Protein: 3
Keywords: no-bake cookies, white chocolate cookies, spring cookies, avalanche cookies, easy dessert, no-bake dessert, raspberry cookies


