Someone asked me last week why I always seem to have a container of Greek yogurt in my shopping cart. It’s not the most exciting question, I’ll admit, but it got me thinking about all the ways I’ve learned to sneak that tangy creaminess into things where you’d never expect it. The conversation happened on a Tuesday, standing in the dairy aisle, and I remember because I was actually reaching for the cream cheese when my neighbor spotted me. She’s known me long enough to know I have a complicated history with pumpkin desserts. I’d avoided them for years, honestly. The texture was always wrong—too dense, too wet, or that weird gummy thing that happens when the filling doesn’t set right. So when I told her I was working on a pumpkin cheesecake that wouldn’t disappoint me, she laughed. She’d heard that before.
Here’s the thing about being stubborn about food: when you finally find the version that works, it feels like a small victory. I went home that afternoon, determined to prove myself wrong about pumpkin cheesecake. The kitchen got messy—there was a moment where I forgot to soften the cream cheese and tried to microwave it (don’t do that, by the way, it gets weirdly grainy). But when I pulled those mini cups out of the oven, something felt different. The tops had that slight crackle that says “I’m done right,” and the filling wasn’t sunken or weeping. I let them cool on the counter, maybe checking them more often than I should admit, and when I finally took that first bite, I just sat there with my eyes closed. That’s the moment you know you’ve got something worth sharing.
These Light & Creamy Mini Pumpkin Cheesecake Cups are the result of that Tuesday afternoon stubbornness. They’ve got all the fall flavor you want—warm spices, that unmistakable pumpkin richness—but without the heavy, sink-in-your-stomach feeling that usually follows. You know that feeling when a dessert is so good you almost can’t believe it’s not bad for you? That’s exactly what these are. And honestly, that’s why I keep making them, even after the season changes.
Why You’ll Love This Recipe
Let me tell you why these mini cheesecake cups have become my go-to fall dessert, and why I think they’ll become yours too.
- Quick & Easy: These come together in about 30 minutes of active time. No water bath, no complicated techniques—just simple steps that even a beginner baker can handle.
- Simple Ingredients: You probably have most of this stuff in your kitchen right now. Greek yogurt, cream cheese, pumpkin puree—these are things I keep on hand without thinking about it.
- Perfect for Fall Gatherings: Whether it’s Thanksgiving dessert, a Friendsgiving potluck, or just a cozy Sunday treat, these individual cups are made for sharing.
- Crowd-Pleaser: I’ve served these to people who swear they don’t like pumpkin desserts. Every single time, they ask for the recipe. It’s become a running joke in my family.
- Unbelievably Delicious: The texture is what gets you. It’s creamy without being heavy, light without being airy, and that pumpkin spice flavor hits just right.
What makes this recipe different from all the other pumpkin cheesecakes out there? It’s the Greek yogurt. I know, I know—it sounds like one of those healthy swaps that ruins everything. But here’s the secret: the tanginess of the yogurt actually enhances the pumpkin flavor instead of fighting it. Plus, it lightens the whole thing so you get that silky cheesecake texture without feeling like you need a nap afterward.
This isn’t just another pumpkin dessert—it’s the kind that makes you close your eyes after the first bite. It’s comfort food reimagined, with all the soul-soothing satisfaction of a classic cheesecake but without the guilt. Perfect for impressing guests without stress, or turning a simple fall evening into something memorable.
What Ingredients You Will Need
This recipe uses simple, wholesome ingredients to deliver that creamy pumpkin flavor without any fuss. Most of these are pantry staples, especially if you do any fall baking.
For the Crust
- 1 cup graham cracker crumbs (about 8-9 full sheets, crushed finely)
- 2 tablespoons granulated sugar
- 3 tablespoons unsalted butter, melted
- Pinch of salt (trust me on this—it balances the sweetness)
For the Cheesecake Filling
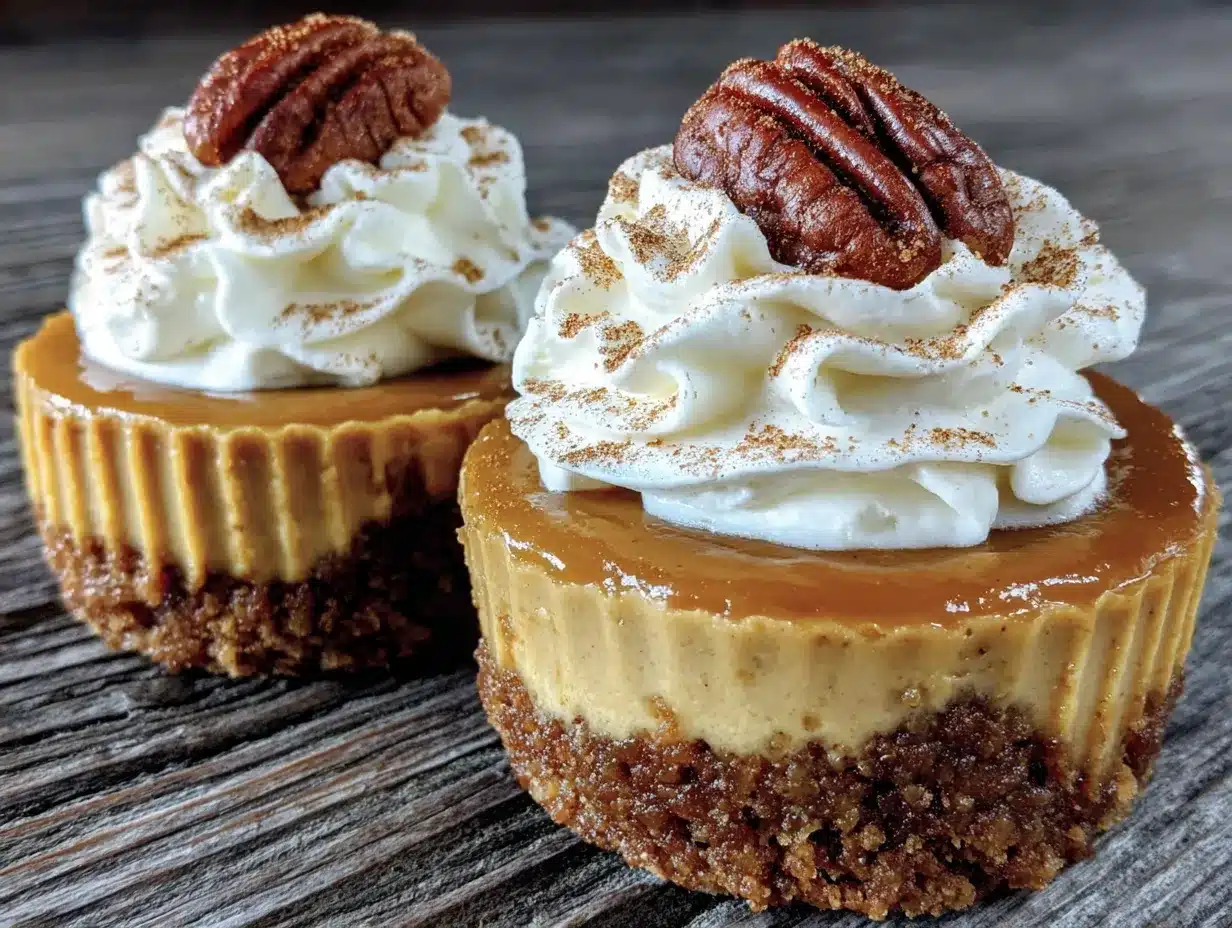
- 8 ounces cream cheese, softened to room temperature (I prefer Philadelphia for the smoothest texture—don’t skimp here)
- 1/3 cup granulated sugar
- 1/2 cup pumpkin puree (not pumpkin pie filling—make sure it’s 100% pure pumpkin)
- 1/4 cup plain Greek yogurt, at room temperature (full-fat works best for creaminess, but 2% is fine too)
- 1 large egg, at room temperature
- 1 teaspoon vanilla extract
- 1/2 teaspoon pumpkin pie spice (or make your own with cinnamon, nutmeg, ginger, and cloves)
- 1/4 teaspoon ground cinnamon
- Pinch of salt
For the Topping (Optional but Recommended)
- 1/2 cup heavy cream
- 1 tablespoon powdered sugar
- 1/4 teaspoon vanilla extract
- Pinch of cinnamon for dusting
A few notes on ingredients: When you’re picking out pumpkin puree, look for Libby’s or store brand—they’re all pretty similar. Just avoid anything labeled “pumpkin pie mix” because that has sugar and spices already added. For the Greek yogurt, I use Fage because it’s thick and doesn’t make the filling watery. If you need a dairy-free option, swap the cream cheese for a good vegan version and use coconut yogurt instead of Greek.
The cream cheese needs to be truly softened—like, leave it on the counter for an hour. Cold cream cheese makes lumpy cheesecake, and nobody wants that. Same goes for the egg and yogurt. Room temperature ingredients blend together smoothly, giving you that velvety texture you’re after.
Equipment Needed
You don’t need a lot of fancy tools for this recipe, which is one of the reasons I love it. Here’s what you’ll need:
- Muffin tin (standard 12-cup size) or mini cheesecake pan
- Muffin liners (paper or silicone—I prefer silicone for easy removal)
- Mixing bowls (one medium, one small)
- Electric hand mixer or stand mixer (you can do this by hand, but your arm will thank you for the mixer)
- Measuring cups and spoons
- Rubber spatula (for scraping the bowl clean—don’t waste any of that filling)
- Food processor or zip-top bag and rolling pin (for crushing graham crackers)
- Small saucepan or microwave-safe bowl (for melting butter)
If you don’t have a food processor, just put the graham crackers in a zip-top bag and go to town with a rolling pin. It’s actually kind of therapeutic. And if you don’t have a muffin tin, you can use ramekins—just adjust the baking time slightly since they’ll be deeper.
Preparation Method
Alright, let’s get to the good part. Here’s how to make these little beauties.
Step 1: Preheat and Prep
Preheat your oven to 325°F (163°C). Line your muffin tin with paper or silicone liners. If you’re using paper liners, give them a light spray with non-stick cooking spray—this makes peeling them off later so much easier.
Step 2: Make the Crust
In a small bowl, combine the graham cracker crumbs, 2 tablespoons sugar, and a pinch of salt. Pour in the melted butter and stir with a fork until everything looks like wet sand. It should hold together when you squeeze it in your hand. If it’s too dry, add another teaspoon of melted butter. If it’s too wet, add another tablespoon of crumbs.
Divide the mixture evenly among the 12 muffin cups—about 1 heaping tablespoon per cup. Use the bottom of a small glass or a shot glass to press the crumbs down firmly. This is important: if the crust isn’t packed tight, it’ll fall apart when you try to eat the cheesecake. Press until it’s flat and even. Pop the pan in the fridge while you make the filling.
Step 3: Make the Cheesecake Filling
In a medium mixing bowl, beat the softened cream cheese with an electric mixer on medium speed until it’s smooth and fluffy—about 2 minutes. Scrape down the sides of the bowl with your spatula. Add the 1/3 cup sugar and beat for another minute until everything’s combined and creamy.
Add the pumpkin puree, Greek yogurt, egg, vanilla extract, pumpkin pie spice, cinnamon, and a pinch of salt. Beat on low speed just until everything is combined—don’t overmix. Overmixing incorporates too much air, which can cause cracks in your cheesecake. You want it smooth but not fluffy at this point.
Here’s a tip I learned the hard way: scrape the bowl between each addition. It takes an extra 30 seconds but makes a huge difference in the final texture. Nobody wants a lump of cream cheese in their first bite.
Step 4: Fill the Cups
Take the muffin pan out of the fridge. Divide the filling evenly among the 12 cups, filling each about 3/4 full. This gives them room to puff up slightly without overflowing. If you want to be precise, use a cookie scoop—it makes the filling so much neater.
Tap the pan gently on the counter a few times to release any air bubbles. You’ll see tiny bubbles rise to the surface—that’s good. It means your filling is going to be smooth.
Step 5: Bake
Bake at 325°F (163°C) for 18-22 minutes. The edges should look set and slightly puffed, but the centers will still jiggle a little when you shake the pan. That jiggle is what gives you that creamy texture—don’t overbake until the centers are firm, or you’ll end up with dry cheesecake.
When they’re done, turn off the oven and crack the door open. Let the cheesecake cups sit in the warm oven for 10 minutes. This gentle cooling helps prevent cracks. Then remove them from the oven and let them cool completely on a wire rack—about 45 minutes to an hour.
Step 6: Chill
Once they’re at room temperature, transfer the pan to the refrigerator. Chill for at least 4 hours, but overnight is better. I know it’s hard to wait, but this is where the magic happens. The flavors meld together, the texture sets up perfectly, and they become that creamy, dreamy thing you’re after.
Step 7: Make the Whipped Topping
Right before you’re ready to serve, make the whipped cream. In a chilled bowl, beat the heavy cream, powdered sugar, and vanilla extract on medium-high speed until soft peaks form. Don’t overbeat—you want it light and fluffy, not butter.
Remove the cheesecake cups from the pan (if using silicone liners, they pop right out; if paper, gently peel them away). Top each with a dollop of whipped cream and a light dusting of cinnamon.
Cooking Tips & Techniques
Let me share some things I’ve learned from making these more times than I can count.
The room temperature rule is non-negotiable. I know it’s tempting to rush this step, but cold ingredients don’t blend smoothly. I once tried to use cold cream cheese and ended up with little white lumps in my filling. It still tasted fine, but the texture was off. Take the cream cheese, egg, and yogurt out of the fridge an hour before you start. Trust me on this.
Don’t overmix the filling. I learned this one the hard way too. The first time I made these, I got distracted and kept beating the filling while I looked for my phone. The cheesecake came out with cracks all over the top and a slightly spongy texture. Mix just until everything comes together—about 30 seconds on low speed after adding the wet ingredients.
Use a water bath hack. Traditional cheesecake recipes call for a water bath to prevent cracking, but with these mini cups, I’ve found a simpler trick. Place a small pan of hot water on the bottom rack of your oven while the cheesecakes bake. The steam keeps the oven environment moist, which helps prevent those surface cracks.
Check for doneness with the jiggle test. Every oven runs a little differently, so start checking at 18 minutes. Give the pan a gentle shake—if the centers wobble like Jell-O but the edges are set, they’re done. If the whole thing wobbles, give them another 2-3 minutes.
Let them cool slowly. That 10-minute rest in the turned-off oven is crucial. It prevents the sudden temperature change that causes cracking. I skipped this step once because I was in a hurry, and I ended up with cheesecake cups that looked like a map of the Grand Canyon.
Variations & Adaptations
One of the best things about this recipe is how easy it is to change up. Here are some variations I’ve tried and loved.
Gluten-Free Version
Swap the graham cracker crust for one made with gluten-free cookies or almond flour. I’ve used gluten-free vanilla wafers before, and they work beautifully. Just crush them up the same way and add a little extra butter if the mixture seems dry.
Dairy-Free Version
Use dairy-free cream cheese (I like Kite Hill or Miyoko’s) and coconut cream instead of Greek yogurt. The texture will be slightly different—a little denser—but still delicious. For the topping, use coconut whipped cream.
Low-Sugar Option
Reduce the sugar to 2 tablespoons and use a sugar substitute like monk fruit sweetener or erythritol. The pumpkin and spices provide plenty of flavor, so you won’t miss the extra sweetness. I’ve made these for friends who are watching their sugar intake, and they couldn’t tell the difference.
Flavor Twists
Add a tablespoon of bourbon or dark rum to the filling for a grown-up version. Or swap the pumpkin pie spice for chai spice blend—the cardamom and black pepper add an unexpected warmth. I tried this last fall and ended up making a second batch the same week.
Chocolate Lover’s Version
Add 2 tablespoons of melted dark chocolate to the filling and reduce the sugar by 1 tablespoon. The chocolate and pumpkin combination is surprisingly good—it’s like a healthier version of a chocolate pumpkin truffle.
Serving & Storage Suggestions
These mini cheesecake cups are best served cold, straight from the fridge. The texture is at its peak when they’re thoroughly chilled—creamy, firm, and absolutely dreamy.
For presentation, I like to arrange them on a serving platter with a few cinnamon sticks and star anise scattered around. It makes them look extra special without any extra work. If you’re serving them at a party, consider adding a small garnish to each one—a candied pecan, a dried cranberry, or a tiny mint leaf.
They pair beautifully with a cup of hot coffee or a spiced chai latte. For a boozy pairing, try them with a glass of dessert wine like Moscato or a spiced rum cocktail.
Storage: Keep the cheesecake cups in an airtight container in the refrigerator for up to 5 days. Don’t add the whipped cream until you’re ready to serve—it’ll get watery if it sits too long. If you’ve already topped them, they’re still good the next day, but the texture won’t be as perfect.
Freezing: These freeze beautifully. Place the cooled, un-topped cheesecake cups on a baking sheet and freeze until solid, then transfer to a freezer-safe container. They’ll keep for up to 3 months. Thaw in the refrigerator overnight before serving, then add the whipped cream fresh.
One thing I’ve noticed is that the flavor actually gets better after a day or two in the fridge. The spices meld together, and the pumpkin flavor becomes more pronounced. So if you can plan ahead, make them a day before you need them.
Nutritional Information & Benefits
Here’s the approximate nutritional breakdown for one mini cheesecake cup (without whipped topping):
- Calories: 185
- Total Fat: 12g
- Saturated Fat: 7g
- Cholesterol: 55mg
- Sodium: 160mg
- Total Carbohydrates: 17g
- Dietary Fiber: 1g
- Sugars: 12g
- Protein: 4g
What I love about these is that they’re a lighter take on traditional cheesecake without sacrificing flavor. The Greek yogurt adds protein and probiotics, while the pumpkin provides vitamin A and fiber. Plus, since they’re portion-controlled, you get that satisfying dessert experience without overdoing it.
For those with dietary restrictions, this recipe is naturally vegetarian. To make it gluten-free or dairy-free, just follow the variations I mentioned earlier. And if you’re watching your sugar intake, the low-sugar option works beautifully without compromising on taste.
I think of these as a dessert that fits into a balanced lifestyle. You’re not depriving yourself, but you’re also not going overboard. It’s that sweet spot where indulgence and wellness meet.
Frequently Asked Questions
Can I use pumpkin pie filling instead of pumpkin puree?
I wouldn’t recommend it. Pumpkin pie filling already has sugar and spices added, which will throw off the sweetness and texture of the cheesecake. Stick with 100% pure pumpkin puree for the best results. If you only have pumpkin pie filling, reduce the sugar in the recipe by half and skip the added spices.
Why did my cheesecake cups crack on top?
Cracks usually happen from overbaking or sudden temperature changes. Make sure you’re pulling them out when the centers still jiggle slightly, and let them cool gradually in the turned-off oven. Also, avoid overmixing the filling—too much air incorporated can cause cracks as the cheesecake settles.
Can I make these without a mixer?
Absolutely. You can mix the filling by hand with a whisk, but make sure your cream cheese is very soft first. It’ll take a little more elbow grease to get it smooth, but it’s totally doable. Just be patient and keep whisking until there are no lumps.
How do I know when the cheesecake cups are done baking?
The edges should look set and slightly puffed, but the centers should still wobble when you gently shake the pan. If the whole thing is firm and doesn’t jiggle at all, they’re overbaked. Start checking at 18 minutes—every oven is different, so your baking time might vary slightly.
Can I double this recipe?
Yes! This recipe doubles beautifully. Just use two muffin tins and bake them in the middle and lower thirds of the oven. You might need to swap the pans halfway through baking for even cooking. The baking time stays about the same, but check them a few minutes early just in case.
Conclusion
These Light & Creamy Mini Pumpkin Cheesecake Cups have become my fall signature, and I think they deserve to be yours too. They’re everything you want in a seasonal dessert—warm spices, creamy texture, that unmistakable pumpkin flavor—without any of the heaviness that usually comes with it. Plus, they’re so simple to make that you’ll find yourself whipping up a batch just because it’s Tuesday.
What I love most about this recipe is how adaptable it is. You can dress them up for a dinner party or keep them simple for a weeknight treat. They’re forgiving enough for beginners but impressive enough to serve to guests. And honestly, that first bite—when the creamy filling meets the buttery crust and that cinnamon hits your nose—it’s worth every minute of waiting for them to chill.
I’d love to hear how yours turn out! Did you try any of the variations? Did you add your own twist? Drop a comment below and let me know. And if you share them on social media, tag me—I love seeing your creations. Happy baking, friends. Here’s to finding those little moments of sweetness, one mini cheesecake cup at a time.
Pin This Recipe!
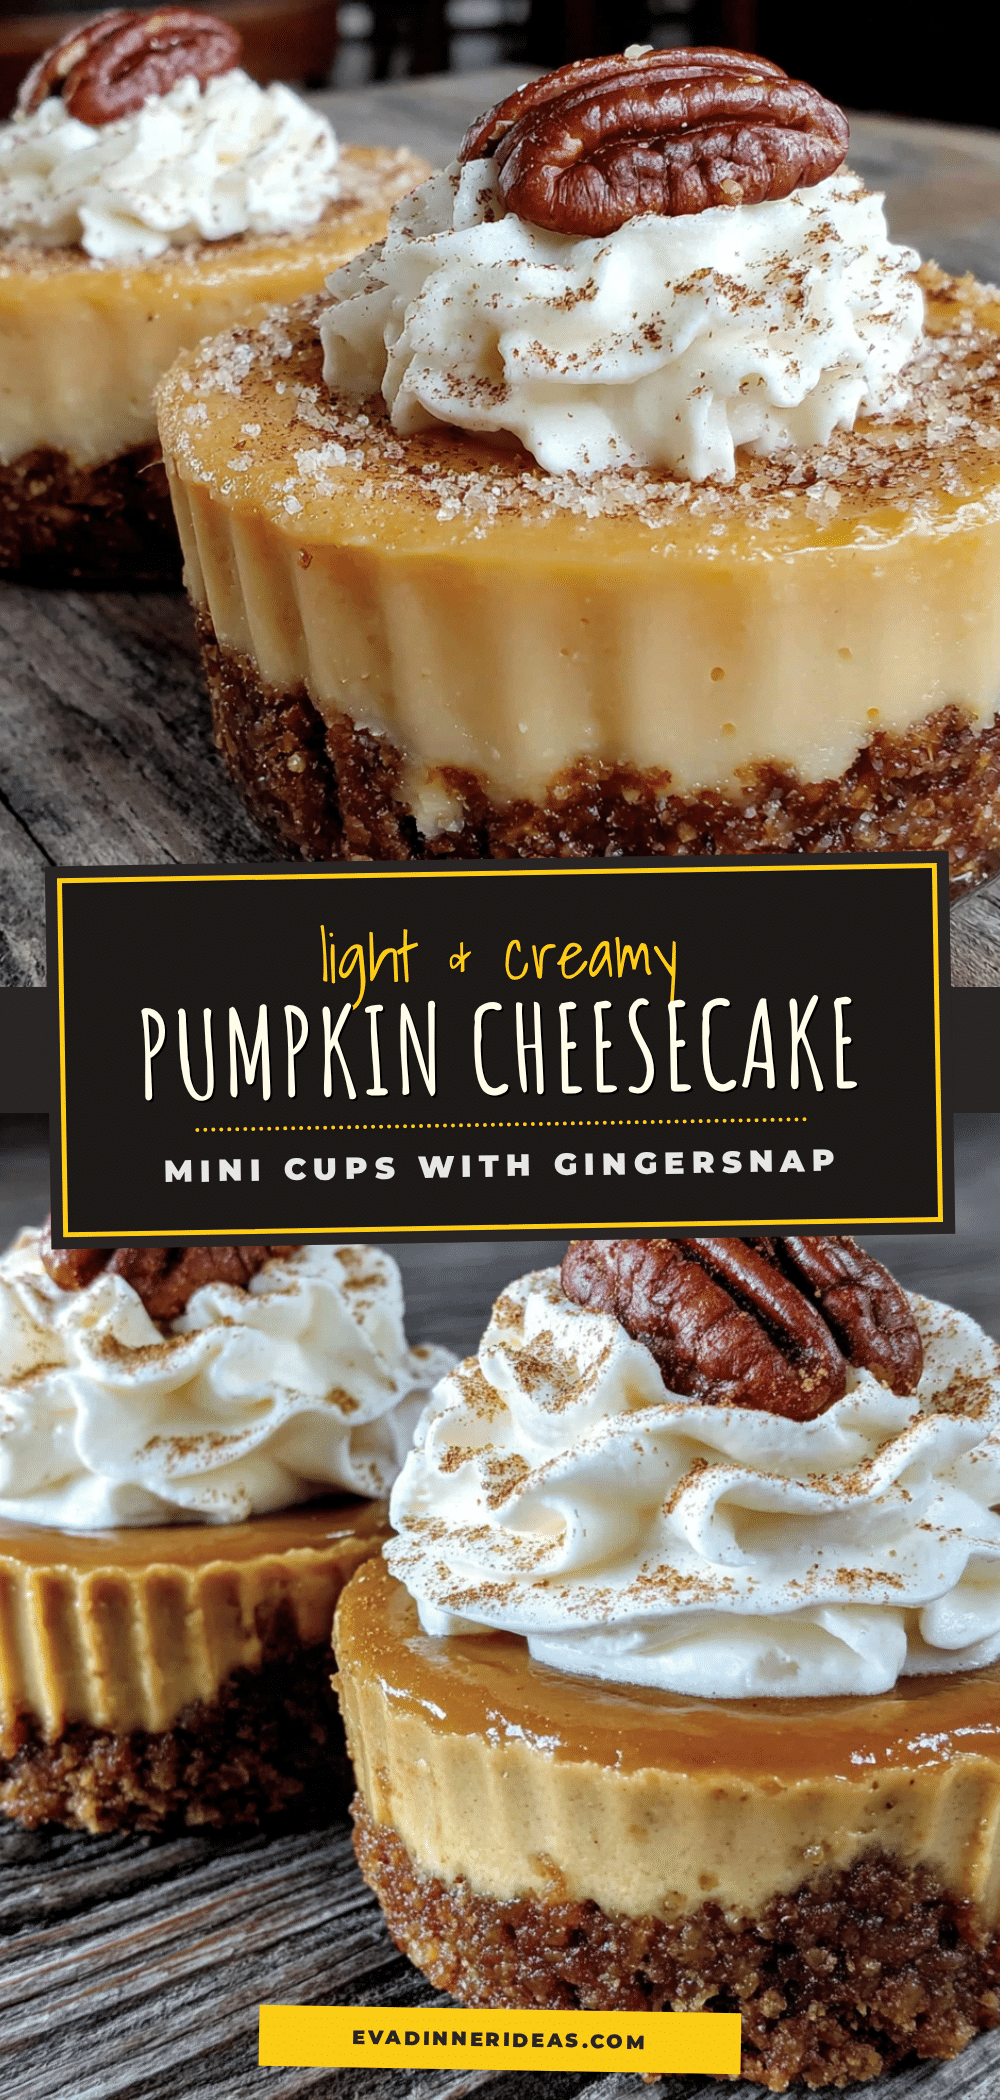
Light & Creamy Mini Pumpkin Cheesecake Cups – Easy Fall Dessert
These light and creamy mini pumpkin cheesecake cups are the perfect fall dessert. Made with Greek yogurt for a tangy twist, they’re quick, easy, and absolutely delicious.
- Prep Time: 30 minutes
- Cook Time: 20 minutes
- Total Time: 5 hours (including chilling time)
- Yield: 12 servings 1x
- Category: Dessert
- Cuisine: American
Ingredients
- 1 cup graham cracker crumbs (about 8–9 full sheets, crushed finely)
- 2 tablespoons granulated sugar
- 3 tablespoons unsalted butter, melted
- Pinch of salt
- 8 ounces cream cheese, softened to room temperature
- 1/3 cup granulated sugar
- 1/2 cup pumpkin puree (not pumpkin pie filling)
- 1/4 cup plain Greek yogurt, at room temperature
- 1 large egg, at room temperature
- 1 teaspoon vanilla extract
- 1/2 teaspoon pumpkin pie spice
- 1/4 teaspoon ground cinnamon
- Pinch of salt
- 1/2 cup heavy cream
- 1 tablespoon powdered sugar
- 1/4 teaspoon vanilla extract
- Pinch of cinnamon for dusting
Instructions
- Preheat your oven to 325°F (163°C). Line a muffin tin with paper or silicone liners. If using paper liners, lightly spray with non-stick cooking spray.
- In a small bowl, combine graham cracker crumbs, 2 tablespoons sugar, and a pinch of salt. Pour in melted butter and stir with a fork until the mixture resembles wet sand. Divide evenly among 12 muffin cups (about 1 heaping tablespoon per cup) and press firmly with the bottom of a small glass. Refrigerate while making the filling.
- In a medium mixing bowl, beat softened cream cheese with an electric mixer on medium speed until smooth and fluffy, about 2 minutes. Add 1/3 cup sugar and beat for another minute until combined.
- Add pumpkin puree, Greek yogurt, egg, vanilla extract, pumpkin pie spice, cinnamon, and a pinch of salt. Beat on low speed just until combined. Do not overmix.
- Remove muffin pan from fridge. Divide filling evenly among the 12 cups, filling each about 3/4 full. Tap the pan gently on the counter to release air bubbles.
- Bake at 325°F (163°C) for 18-22 minutes, until edges are set and slightly puffed but centers still jiggle slightly. Turn off oven, crack the door open, and let cheesecake cups sit in the warm oven for 10 minutes.
- Remove from oven and let cool completely on a wire rack, about 45 minutes to 1 hour. Then transfer to the refrigerator and chill for at least 4 hours, preferably overnight.
- Before serving, make the whipped topping: In a chilled bowl, beat heavy cream, powdered sugar, and vanilla extract on medium-high speed until soft peaks form. Remove cheesecake cups from pan, top each with a dollop of whipped cream, and dust with cinnamon.
Notes
Make sure cream cheese, egg, and yogurt are at room temperature for a smooth filling. Do not overmix the filling to avoid cracks. For a water bath hack, place a small pan of hot water on the bottom rack of the oven while baking. Chill for at least 4 hours, preferably overnight, for best texture. Store in an airtight container in the refrigerator for up to 5 days. Freeze un-topped cheesecake cups for up to 3 months.
Nutrition
- Serving Size: 1 mini cheesecake cu
- Calories: 185
- Sugar: 12
- Sodium: 160
- Fat: 12
- Saturated Fat: 7
- Carbohydrates: 17
- Fiber: 1
- Protein: 4
Keywords: pumpkin cheesecake, mini cheesecake, fall dessert, pumpkin dessert, cheesecake cups, easy dessert, Thanksgiving dessert


