The school bake sale was in twelve hours and I’d completely forgotten. Like, the kind of forgetting where you get a text at 9 PM that says “don’t forget treats tomorrow!” and you’ve got nothing in the house but apples, butter, and a vague sense of panic. Everyone else would be bringing those Pinterest-perfect cupcakes with the fancy piping and the homemade marshmallow fondant. I had a bag of slightly bruised apples, a half-stick of butter, and honestly? A kid who was counting on me not to show up empty-handed.
So there I was, standing in my kitchen at 9:15 on a Tuesday night, staring at my pantry like it might magically produce something impressive. My six-year-old had already gone to bed in his dinosaur pajamas, and I’d promised him we’d make something together for the sale. Now I was scrambling, and let me tell you, that feeling of letting your kid down is worse than any bake sale judgment. I grabbed the apples, found some pre-made pie crusts I’d stashed in the freezer for emergencies, and spotted a bag of store-bought caramels left over from Halloween. And right there, standing over my messy counter with flour on my elbow and defeat in my heart, I had an idea.
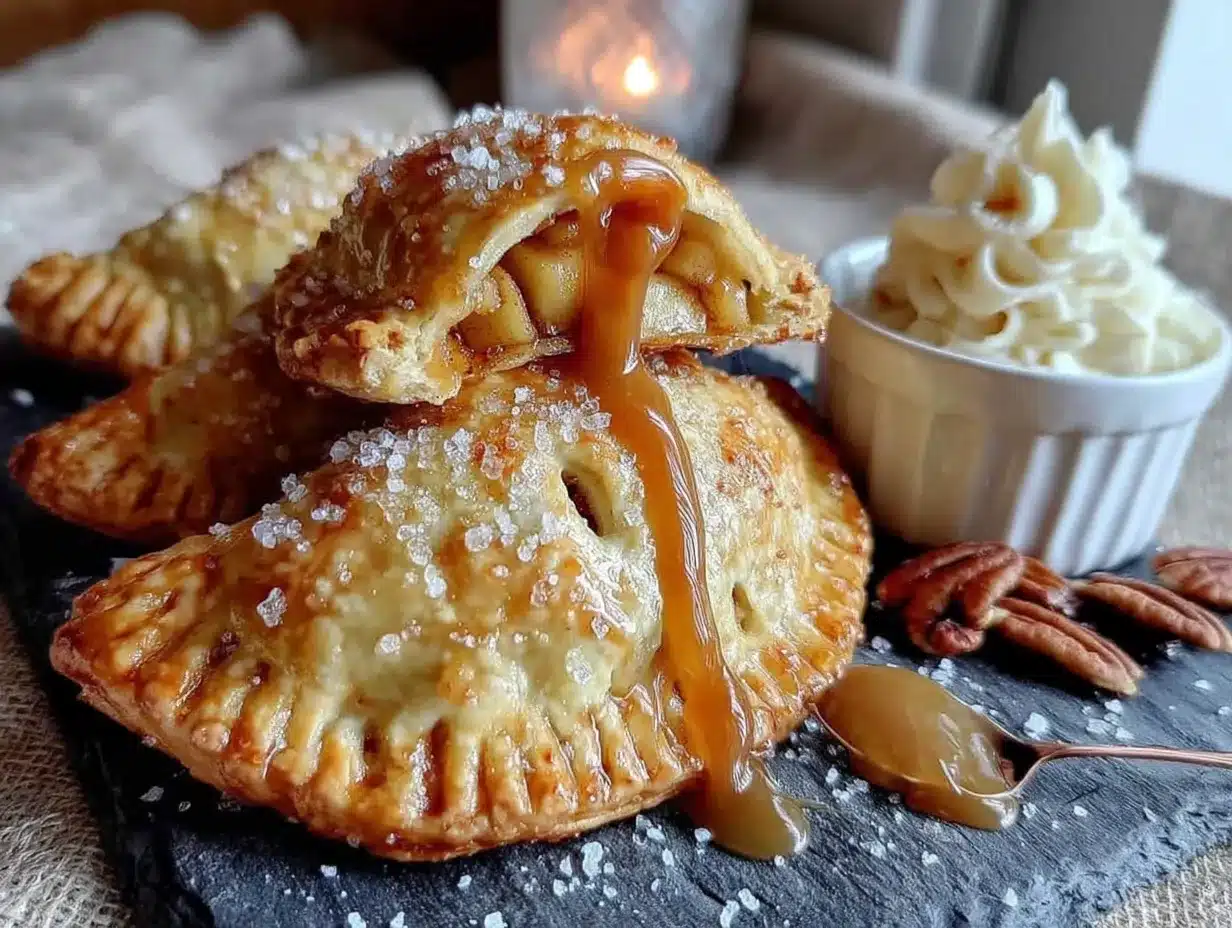
These hand pies came together in a blur of desperation and determination. I mean, I was literally pulling the pie crusts out of the freezer while they were still semi-frozen, cutting rough circles with a cereal bowl because my actual biscuit cutter was MIA. The caramel got all sticky and I burned my finger on the filling, and at one point I thought I’d overfilled them and they’d explode in the oven. But you know what? They didn’t. They came out golden and bubbly and smelling like the best kind of accident. The next morning, my son helped me sprinkle a little sea salt on top — because apparently even six-year-olds know about salted caramel these days — and we packed them up feeling like we’d pulled off a miracle.
They sold out in twenty minutes. The fancy cupcakes? Still sitting there. The hand pies? Gone. And that’s the thing about this recipe — it’s not fancy, it’s not complicated, and it definitely didn’t come from a place of having my act together. It came from a mom who forgot a bake sale and made it work anyway. And honestly, that’s the best kind of recipe to have in your back pocket.
Why You’ll Love This Recipe
Let me be real with you — I’ve made these hand pies at least two dozen times since that frantic bake sale night, and they’ve never let me down. Here’s why this recipe is worth keeping close:
- Budget-Friendly Ingredients : You don’t need anything fancy. Store-bought pie crust, regular apples, and basic caramels. No specialty stores, no expensive extracts, no hunting down hard-to-find items. Your wallet will thank you.
- Kid-Approved and Parent-Tested : My kids help me make these all the time now. They love rolling the dough, spooning the filling, and — their favorite part — sprinkling the salt on top. It’s a real kitchen activity that doesn’t end in tears or a giant mess.
- Ready in Under an Hour : From start to finish, you’re looking at about 45 minutes. That’s faster than a trip to the bakery, and way more satisfying.
- Perfect for Packed Lunches : These hold up beautifully in lunchboxes. No sogginess, no crumbling apart. Just a happy kid pulling out a hand pie at lunchtime.
- Leftovers Reheat Like a Dream : Pop one in the microwave for 15 seconds or the air fryer for 3 minutes, and it tastes fresh-baked. That’s rare for fruit desserts, honestly.
What makes these different from other apple hand pie recipes? It’s the salted caramel factor. Most recipes just do plain apple filling, which is fine but a little boring. The caramel adds this deep, buttery richness that makes the apples taste like they’ve been cooking all day — even though they haven’t. And the salt? It cuts through the sweetness just enough that you get that perfect sweet-salty balance that keeps you reaching for another one.
This is the kind of recipe that makes you look like you tried way harder than you actually did. Perfect for when you need to bring something to a school event, a potluck, or just want to make a Tuesday feel a little special without spending your whole afternoon in the kitchen.
What Ingredients You Will Need
This recipe uses simple, everyday ingredients that you probably already have in your kitchen. No fancy baking supplies or hard-to-find items — just honest, budget-friendly staples that come together beautifully.
For the Apple Filling
- 4 medium apples (about 500g) — peeled, cored, and diced small. I prefer Granny Smith for their tartness that balances the sweet caramel, but Honeycrisp or Fuji work great too. If you’re using sweeter apples, you can reduce the sugar slightly.
- 2 tablespoons unsalted butter (28g) — for sautéing the apples. It adds richness and helps the apples soften without turning mushy.
- 3 tablespoons brown sugar (40g) — packed. Light or dark both work; dark gives a deeper molasses flavor that I personally love.
- 1 teaspoon ground cinnamon — the backbone of any good apple dessert. I use cinnamon in both sweet and savory recipes, but it’s non-negotiable here.
- ¼ teaspoon ground nutmeg — fresh grated if you have it, but pre-ground is perfectly fine.
- 1 tablespoon lemon juice (15ml) — keeps the apples from browning and adds brightness.
- 1 teaspoon vanilla extract — pure or imitation, both work. I’ve used both and honestly can’t tell the difference in this recipe.
- Pinch of salt — just a tiny one to enhance all the flavors.
For the Salted Caramel
- 8 soft caramels (about 100g) — unwrapped. I use Kraft or store-brand; they all melt the same. Don’t use the hard, individually wrapped ones — they won’t melt smoothly.
- 2 tablespoons heavy cream (30ml) — helps the caramel stay silky. Half-and-half works in a pinch, but don’t use milk or it’ll get grainy.
- ½ teaspoon flaky sea salt — plus more for sprinkling on top. Maldon is my go-to, but any flaky salt works. Regular table salt is too fine and will make it taste overly salty.
For the Pastry
- 2 refrigerated pie crusts (from a 14-ounce box) — I’ve tried making my own pastry from scratch, and honestly? For these hand pies, the store-bought version works better. It’s flakier, more consistent, and saves you a solid hour. Pillsbury is reliable, but store brands are just as good and cost less.
- 1 large egg — beaten with 1 tablespoon water for the egg wash. This gives them that gorgeous golden-brown shine.
- 1 tablespoon coarse sugar — turbinado or demerara for sprinkling on top. Regular granulated sugar works too, but coarse sugar gives a nice crunch.
Ingredient Notes and Substitutions
If you’re dairy-free, use vegan butter and a dairy-free cream alternative for the caramel. The texture will be slightly different but still delicious. For gluten-free, there are some excellent gluten-free pie crusts available now — just check the package for size and adjust your cutting accordingly. And if you can’t find soft caramels, you can use ¼ cup of store-bought caramel sauce instead, just simmer it with the cream until it thickens slightly.
Equipment Needed
You don’t need a fancy kitchen to make these hand pies. Here’s what you’ll actually use:
- Large skillet or saucepan — for cooking the apple filling. A 10-inch skillet works perfectly.
- Mixing bowls — one medium for the filling, one small for the egg wash.
- Rolling pin — if your pie crusts need a little flattening. A wine bottle works in a pinch, I’ve done it.
- 3-inch round cutter — or a cereal bowl, or a large drinking glass. Whatever gets you a circle.
- Baking sheet — lined with parchment paper or a silicone baking mat.
- Pastry brush — for the egg wash. A clean paintbrush works if you’re in a bind.
- Fork — for crimping the edges and venting the pies.
- Cooling rack — optional but helpful for even cooling.
I’ve made these with a cracked ceramic bowl as my cutter and a butter knife for crimping. Don’t overthink the equipment. If you have a baking sheet and something round, you’re good to go.
Preparation Method
Step 1: Make the Apple Filling
Peel, core, and dice your apples into small, uniform pieces — about ¼-inch cubes. The smaller they are, the easier they’ll fit inside the hand pies and the more evenly they’ll cook. In a large skillet over medium heat, melt the butter until it’s foaming. Add the diced apples and cook for 3-4 minutes, stirring occasionally, until they start to soften. You want them to be tender but not mushy — they should still hold their shape a little.
Sprinkle the brown sugar, cinnamon, nutmeg, and salt over the apples. Stir to coat everything evenly. Cook for another 2 minutes, until the sugar has melted and the apples are glossy. Remove from heat and stir in the lemon juice and vanilla extract. Transfer the filling to a bowl and let it cool completely — this is important. If you put warm filling into the pastry, it’ll make the dough soggy and the pies won’t bake up flaky. Pop it in the fridge for 15 minutes if you’re in a hurry.
Step 2: Prepare the Salted Caramel
While the apples cool, make the caramel. In a small saucepan over low heat, combine the unwrapped caramels and heavy cream. Stir constantly with a silicone spatula or wooden spoon until the caramels are completely melted and the mixture is smooth. This takes about 3-4 minutes. Don’t rush it — high heat will scorch the caramel and give it a bitter taste. Once it’s smooth, remove from heat and stir in the flaky sea salt. Set aside to cool slightly. It’ll thicken as it cools, which is exactly what you want.
Step 3: Assemble the Hand Pies
Preheat your oven to 375°F (190°C). Line a baking sheet with parchment paper.
Lightly flour your work surface. Unroll one pie crust and use a rolling pin to gently smooth it out — just a few passes, don’t overwork it. Use your 3-inch cutter to cut out as many rounds as you can. You should get about 6 rounds per crust, for a total of 12 rounds. Gather the scraps, gently press them together, and re-roll to cut more rounds if needed. I usually get 13 or 14 total.
Place half of the rounds on your prepared baking sheet — these will be the bottoms. Spoon about 1 tablespoon of the cooled apple filling onto the center of each round, leaving a ½-inch border around the edges. Drizzle about 1 teaspoon of the salted caramel over the apples. Don’t overfill — trust me, I’ve learned this the hard way. Too much filling and they’ll burst open in the oven.
Brush the edges of the filled rounds with a little water — this helps the top crust stick. Place a second round on top of each filled round. Press the edges together gently with your fingers, then use a fork to crimp the edges all the way around. This seals the pies and gives them that classic hand pie look. Cut 2-3 small slits in the top of each pie with a sharp knife — these vents let steam escape and prevent explosions.
Step 4: Bake to Golden Perfection
In a small bowl, beat the egg with 1 tablespoon of water. Brush the tops of each hand pie with the egg wash — this is what gives them that beautiful golden shine. Sprinkle the coarse sugar over the tops, then add a tiny pinch of flaky sea salt on each one.
Bake for 18-22 minutes, until the crust is golden brown and the filling is bubbling through the vents. The smell in your kitchen at this point is absolutely ridiculous — like a bakery and a apple orchard had a baby. Let them cool on the baking sheet for 5 minutes, then transfer to a cooling rack. They need to cool for at least 15 minutes before serving, or the filling will be lava-hot. I speak from burned-tongue experience.
Cooking Tips & Techniques
After making these more times than I can count, here’s what I’ve learned the hard way so you don’t have to:
Don’t skip cooling the filling. I know it’s tempting to rush, but warm filling will make your pastry soggy before it even hits the oven. Cold filling = flaky crust. It’s that simple.
Seal your edges really well. If there’s even a tiny gap, the caramel will leak out and burn on your baking sheet. I use a fork and really press down firmly. If you’re nervous, you can even do a double crimp — once with the fork, then fold the edge over and crimp again.
Watch your oven like a hawk. Every oven runs differently. Mine runs hot, so I start checking at 16 minutes. Your hand pies are done when they’re deep golden brown and you can see the filling bubbling through the vents. If the edges start browning too fast, tent them loosely with foil.
Make extra caramel. Honestly, just double the caramel recipe. You’ll want extra for drizzling on top after they bake, and it keeps in the fridge for weeks. I’ve been known to eat it straight from the jar with a spoon, but I’m not proud of it.
Freeze them for later. These freeze beautifully before baking. Assemble the hand pies, place them on a baking sheet in the freezer until solid, then transfer to a freezer bag. Bake from frozen, adding 5-7 minutes to the baking time. Perfect for those mornings when you realize you need a school event contribution in an hour.
Variations & Adaptations
One of the best things about this recipe is how flexible it is. Here are some ways I’ve changed it up:
Apple-Pear Combo : Swap one apple for a ripe but firm pear. The pear adds a softer, more delicate sweetness that pairs beautifully with the caramel. My family actually prefers this version now.
Dairy-Free Version : Use vegan butter in the filling, a dairy-free cream alternative in the caramel, and check your pie crust label — many store-bought crusts are accidentally vegan. It works perfectly and tastes just as good.
Air Fryer Method : These cook beautifully in an air fryer at 350°F (175°C) for 10-12 minutes. The crust gets extra crispy and flaky. Just don’t overcrowd the basket — work in batches.
Spiced Apple Version : Add ¼ teaspoon of cardamom and a pinch of cloves to the apple filling. It gives them a chai-like warmth that’s incredible in the fall. I made these for a Thanksgiving potluck and they disappeared before the turkey was carved.
Mini Hand Pies : Use a 2-inch cutter to make bite-sized versions. Great for parties or lunchbox treats. Reduce baking time to 12-15 minutes.
Savory-Sweet Twist : Add a sprinkle of sharp cheddar cheese on top of the apple filling before sealing. Sounds weird, I know, but cheddar and apple is a classic combo that works. My kids think I’m a genius when I make these.
Serving & Storage Suggestions
These hand pies are best served warm, about 15-20 minutes after they come out of the oven. The filling is still gooey, the crust is flaky, and the salted caramel is at its peak. If you’re serving them at room temperature, they’re still delicious — just not quite as magical.
For presentation, I like to arrange them on a wooden board or a simple white plate. A light dusting of powdered sugar makes them look fancy, and an extra drizzle of warmed caramel sauce takes them over the top. They’re perfect alongside a scoop of vanilla ice cream or a cup of hot coffee.
Storage: Keep leftover hand pies in an airtight container at room temperature for up to 2 days, or in the refrigerator for up to 5 days. Layer them with parchment paper so they don’t stick together. The crust will soften slightly in the fridge, but reheating fixes that.
Reheating: Microwave for 15-20 seconds for a quick fix, or pop them in a 350°F oven for 5-7 minutes to restore that freshly-baked crispness. An air fryer at 325°F for 3 minutes works wonders too.
Freezing: Baked hand pies freeze well for up to 3 months. Wrap each one individually in plastic wrap, then place in a freezer bag. Thaw at room temperature and reheat as above. Unbaked hand pies (assembled but not baked) also freeze beautifully — just add 5-7 minutes to the baking time when cooking from frozen.
The flavors actually deepen after a day in the fridge. The caramel soaks into the apples a little more, and the spices meld together. I’ve been known to make a double batch just so we have leftovers for the next day.
Nutritional Information & Benefits
Per hand pie (based on 12 servings):
- Calories: 245
- Fat: 12g
- Saturated Fat: 6g
- Carbohydrates: 33g
- Fiber: 2g
- Sugar: 18g
- Protein: 3g
- Sodium: 220mg
These numbers are estimates and will vary based on your specific ingredients and portion sizes.
While these are definitely a treat, there are some redeeming qualities. Apples are a good source of fiber and vitamin C, and they contain antioxidants that support heart health. The cinnamon in the filling has anti-inflammatory properties and may help regulate blood sugar. And honestly? There’s something to be said for the mental health benefits of a homemade dessert shared with people you love.
If you’re watching your sugar intake, you can reduce the brown sugar in the filling to 2 tablespoons and use a sugar substitute in the caramel. The texture will be slightly different, but still tasty. For a lower-fat version, use a light butter spread and skip the egg wash — just brush with a little milk instead.
Conclusion
These salted caramel apple hand pies have become a staple in my kitchen, and I think they deserve a spot in yours too. They’re the recipe I turn to when I need something impressive but don’t have the time or energy for a complicated baking project. They’re the treat my kids request for birthdays, bake sales, and random Tuesday afternoons when they just need something sweet.
What I love most about this recipe is how forgiving it is. You don’t need to be a pastry chef to pull it off. You don’t need special equipment or hard-to-find ingredients. You just need some apples, a little patience, and the willingness to make a bit of a mess in the kitchen. And honestly? The mess is worth it.
I’d love to hear how these turn out for you. Did your kids help make them? Did you try a different filling? Did you double the caramel like I always do? Drop a comment below and let me know — your stories and ideas might inspire someone else to give these a try. And if you loved this recipe, share it with a friend who needs a budget-friendly dessert in their life. Happy baking, friends!
Frequently Asked Questions
Can I use homemade pie crust instead of store-bought?
Absolutely! Homemade pie crust works beautifully here. Just roll it to about ⅛-inch thickness and cut your rounds. Keep in mind that homemade crust may shrink slightly more than store-bought, so leave a little extra room around the edges when cutting.
Why did my hand pies burst open in the oven?
This usually happens for two reasons: too much filling or not enough venting. Make sure you’re only using about 1 tablespoon of filling per pie, and always cut at least 2-3 slits in the top. Also, make sure your edges are well-sealed with a fork.
Can I make these gluten-free?
Yes! Look for a gluten-free pie crust at your grocery store — many brands make them now. The filling is naturally gluten-free, just double-check your caramel ingredients. The texture will be slightly more delicate, so handle the pies gently when sealing the edges.
How do I prevent the caramel from leaking out?
Don’t put the caramel too close to the edges of the pastry, and make sure your edges are thoroughly sealed. Using a fork to crimp creates a stronger seal than just pressing with your fingers. Also, chilling the assembled pies for 10 minutes before baking helps the pastry hold its shape.
Can I use frozen apples instead of fresh?
Yes, but you’ll need to thaw and drain them first. Frozen apples release more water than fresh, which can make your filling too wet. Thaw them in a colander, press out the excess moisture with paper towels, and proceed with the recipe. You might need to cook the filling an extra minute or two to evaporate any remaining liquid.
Pin This Recipe!

Best Easy Salted Caramel Apple Hand Pies Recipe

These salted caramel apple hand pies are made with simple, budget-friendly ingredients and come together in under an hour. Perfect for bake sales, packed lunches, or a quick dessert that tastes like you tried way harder than you actually did.
- Prep Time: 20 minutes
- Cook Time: 22 minutes
- Total Time: 45 minutes
- Yield: 12 servings 1x
- Category: Dessert
- Cuisine: American
Ingredients
- 4 medium apples (about 500g), peeled, cored, and diced small (Granny Smith, Honeycrisp, or Fuji)
- 2 tablespoons unsalted butter (28g)
- 3 tablespoons brown sugar (40g), packed
- 1 teaspoon ground cinnamon
- ¼ teaspoon ground nutmeg
- 1 tablespoon lemon juice (15ml)
- 1 teaspoon vanilla extract
- Pinch of salt
- 8 soft caramels (about 100g), unwrapped
- 2 tablespoons heavy cream (30ml)
- ½ teaspoon flaky sea salt, plus more for sprinkling
- 2 refrigerated pie crusts (from a 14-ounce box)
- 1 large egg, beaten with 1 tablespoon water (for egg wash)
- 1 tablespoon coarse sugar (turbinado or demerara)
Instructions
- Peel, core, and dice apples into ¼-inch cubes. In a large skillet over medium heat, melt butter until foaming. Add apples and cook 3-4 minutes, stirring occasionally, until they start to soften.
- Sprinkle brown sugar, cinnamon, nutmeg, and salt over apples. Stir to coat. Cook 2 more minutes until sugar melts and apples are glossy. Remove from heat, stir in lemon juice and vanilla. Transfer to a bowl and cool completely (refrigerate 15 minutes if needed).
- In a small saucepan over low heat, combine unwrapped caramels and heavy cream. Stir constantly until caramels are melted and mixture is smooth (3-4 minutes). Remove from heat and stir in flaky sea salt. Set aside to cool slightly.
- Preheat oven to 375°F (190°C). Line a baking sheet with parchment paper.
- Lightly flour work surface. Unroll one pie crust and gently smooth with a rolling pin. Cut out rounds using a 3-inch cutter (about 6 per crust, 12 total). Gather scraps, press together, and re-roll to cut more rounds if needed.
- Place half the rounds on prepared baking sheet. Spoon about 1 tablespoon cooled apple filling onto center of each, leaving ½-inch border. Drizzle about 1 teaspoon salted caramel over apples.
- Brush edges of filled rounds with water. Place a second round on top. Press edges together with fingers, then crimp with a fork. Cut 2-3 small slits in top of each pie.
- Brush tops with egg wash. Sprinkle coarse sugar and a tiny pinch of flaky sea salt on each.
- Bake 18-22 minutes until golden brown and filling bubbles through vents. Cool on baking sheet 5 minutes, then transfer to cooling rack. Cool at least 15 minutes before serving.
Notes
Don’t skip cooling the filling—warm filling makes pastry soggy. Seal edges well to prevent caramel leakage. Watch oven closely; start checking at 16 minutes. Make extra caramel for drizzling. Unbaked hand pies freeze beautifully; bake from frozen adding 5-7 minutes.
Nutrition
- Serving Size: 1 hand pie
- Calories: 245
- Sugar: 18
- Sodium: 220
- Fat: 12
- Saturated Fat: 6
- Carbohydrates: 33
- Fiber: 2
- Protein: 3
Keywords: apple hand pies, salted caramel, hand pies, bake sale, easy dessert, apple dessert, kid-friendly


