I wasn’t trying to impress anyone. That’s the thing I remember most clearly about the first time I made this flaky chicken pot pie. I’d stopped by my neighbor Maria’s house on a random Tuesday afternoon to return her slow cooker, and the smell hit me before I even got through the screen door. Butter. Thyme. Something deeply savory that made my stomach growl in a way that was honestly a little embarrassing.
Maria wasn’t even in the kitchen when I walked in. She yelled from the back room, “Grab a fork, it’s on the counter!” And there it was — this gorgeous, golden-crusted pie sitting on a trivet like it was no big deal. Like she hadn’t just created something that looked like it belonged on the cover of a magazine. She came out wiping her hands on her jeans, totally nonchalant, and said she’d thrown it together because her son’s baseball team was coming over later.
Let me tell you, I’ve had chicken pot pie at fancy restaurants. I’ve ordered it from places that charge twenty dollars for a personal size. But Maria’s version? The crust shattered when I broke through it with my fork. I mean, it actually made that satisfying cracking sound. The filling was creamy but not heavy, packed with tender chicken and vegetables that still had a little bite to them. I asked her how she got the crust so flaky, and she just shrugged and said, “Cold butter. That’s it.”
I practically ran home to try it myself. And honestly? My first attempt was a disaster. The butter melted before I even got the dough in the pan. But I kept at it, tweaking and testing, until I landed on this version. Maybe you’ve been there — chasing a recipe that seems simple but takes a few tries to get right. This flaky chicken pot pie is the one that taught me patience in the kitchen. And now it’s the dish I bring to every potluck, every family dinner, every gathering where I want to hear that fork-crust crack sound again.
Why You’ll Love This Recipe
This isn’t just another chicken pot pie recipe you’ll find online. I tested this version seven times before I felt confident sharing it with you. Seven times of rolling dough, adjusting butter temperatures, and tweaking seasoning ratios. And you know what? Every single batch got eaten, but the final version is the one that made my husband say, “Don’t ever change this.”
Here’s what makes this flaky chicken pot pie stand out:
- Showstopper Crust: The secret is in the technique — layering butter into the dough creates those distinct, shatteringly flaky layers that make people stop mid-conversation when they take a bite.
- No Fancy Ingredients: You probably have 90% of these ingredients in your kitchen right now. No truffle oil, no exotic spices, nothing that requires a special trip to a gourmet store.
- Perfect for Hosting: This pie feeds a crowd — we’re talking 8 generous servings. It’s ideal for dinner parties, holiday gatherings, or when you want to show up at a potluck with something that makes everyone ask for the recipe.
- Make-Ahead Friendly: You can assemble this flaky chicken pot pie completely the day before and bake it when your guests arrive. That’s real host energy right there.
- Universal Crowd-Pleaser: I’ve served this to picky kids, vegetarian-leaning friends (who ate two slices anyway), and my dad who claims he doesn’t like “fancy food.” Everyone cleans their plate.
The texture and flavor combo here is next-level comfort food. The filling is velvety but not gloppy, with chunks of chicken that stay tender and vegetables that hold their shape. And that crust — I can’t say it enough — it’s the kind of crust that makes you close your eyes after the first bite. It’s comfort food reimagined: richer, flakier, and more satisfying than anything you’ll get from a store-bought version.
What Ingredients You Will Need
This flaky chicken pot pie uses simple, honest ingredients to create something truly special. Most of these are pantry staples, which makes this recipe perfect for when you want to impress without a complicated shopping list.
For the Flaky Crust:
- 2 ½ cups all-purpose flour (I prefer King Arthur for consistent results)
- 1 teaspoon salt
- 1 cup unsalted butter, very cold and cut into small cubes (freeze for 10 minutes before using)
- ½ cup ice water (plus more if needed)
- 1 tablespoon apple cider vinegar (this helps prevent gluten development, keeping the crust tender)
- 1 egg, beaten with 1 tablespoon water (for egg wash)
- Coarse sea salt for sprinkling
For the Filling:
- 3 tablespoons unsalted butter
- 1 large yellow onion, diced (about 1 ½ cups)
- 3 carrots, peeled and diced into ½-inch pieces
- 3 celery stalks, diced
- 3 cloves garlic, minced
- ⅓ cup all-purpose flour
- 3 cups chicken broth (low-sodium preferred so you can control the salt)
- 1 cup whole milk or heavy cream (heavy cream gives a richer result)
- 4 cups cooked chicken, shredded or cubed (rotisserie chicken works beautifully here)
- 1 cup frozen peas (no need to thaw)
- 1 cup frozen corn kernels
- 2 teaspoons fresh thyme leaves (or 1 teaspoon dried)
- 1 teaspoon salt
- ½ teaspoon black pepper
- ¼ teaspoon nutmeg (trust me on this — it brightens the whole dish)
A few notes on ingredients. For the butter in the crust, I use Kerrygold salted butter and then reduce the added salt slightly. The higher fat content in European-style butter really does make a difference in flakiness. If you’re using a different brand, just make sure it’s real butter — margarine won’t give you those layers.
For the chicken, I almost always use a rotisserie chicken from the grocery store. It saves time and adds flavor from the seasoned skin. Just remove the skin and bones, then shred the meat. If you’re cooking chicken specifically for this recipe, poach 1 ½ pounds of boneless, skinless chicken breasts in salted water until cooked through, then shred.
The frozen vegetables here are intentional. Frozen peas and corn are sweeter and more consistent than fresh in this application, and they hold up better during the longer baking time. If you’re using fresh vegetables, blanch them first so they’re tender by the time the crust is golden.
Equipment Needed
You don’t need a professional kitchen to make this flaky chicken pot pie, but a few key tools will make your life easier.
- 9-inch pie dish: A deep-dish glass or ceramic pie dish works best. I use a Pyrex dish because I can see how the bottom crust is browning.
- Pastry blender or food processor: For cutting butter into flour. A pastry blender gives you more control, but a food processor is faster. If using a food processor, pulse in short bursts — you want pea-sized butter pieces, not butter flour paste.
- Rolling pin: A standard rolling pin works fine. If you don’t have one, a wine bottle works in a pinch (chill it first).
- Large skillet or Dutch oven: For cooking the filling. A 12-inch skillet with high sides is ideal.
- Measuring cups and spoons: Accuracy matters in baking, especially for the crust.
- Plastic wrap: For chilling the dough.
- Pastry brush: For applying egg wash. A silicone brush is easier to clean.
- Cooling rack: So the bottom crust doesn’t get soggy while the pie rests.
If you don’t have a pastry blender, you can use two butter knives to cut the butter into the flour, or just use your fingertips — working quickly so the butter stays cold. I’ve made this crust with all three methods, and honestly, the hand method gives the most control once you get the feel for it.
Preparation Method
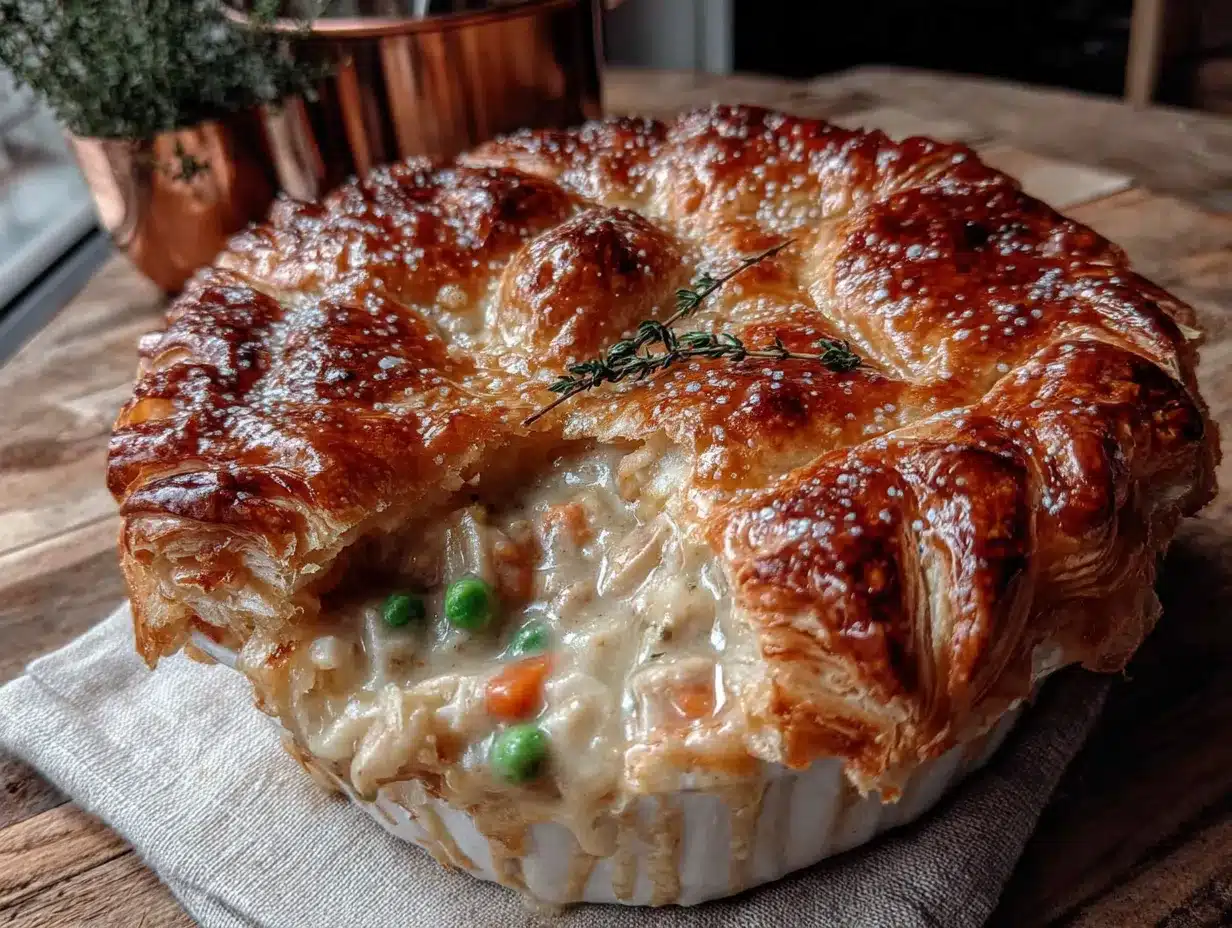
Let’s break this down into manageable steps. The key to this flaky chicken pot pie is giving yourself enough time — the dough needs to chill, and the filling needs to cool before assembly. Plan for about 1 hour of active prep time and 2 hours of inactive chilling time.
Step 1: Make the Crust Dough (20 minutes active, 1 hour chilling)
In a large bowl, whisk together the flour and salt. Add the cold butter cubes and toss to coat them in flour. Using a pastry blender or your fingertips, cut the butter into the flour until the mixture looks like coarse meal with some pea-sized butter pieces remaining. You want visible butter — that’s what creates the flaky layers.
Drizzle the ice water and apple cider vinegar over the mixture. Stir with a fork until the dough just comes together. It should look shaggy and slightly dry in spots. Turn it out onto a lightly floured surface and bring it together with your hands — don’t knead, just press it into a cohesive ball. Divide in half, flatten each half into a disc, wrap in plastic wrap, and refrigerate for at least 1 hour.
Step 2: Prepare the Filling (30 minutes)
In a large skillet or Dutch oven, melt the 3 tablespoons of butter over medium heat. Add the onion, carrots, and celery. Cook, stirring occasionally, until the vegetables are softened but not browned — about 8 minutes. Add the garlic and cook for 1 minute more until fragrant.
Sprinkle the flour over the vegetables and stir constantly for 2 minutes. This cooks out the raw flour taste and helps thicken the filling. Slowly pour in the chicken broth while whisking continuously to prevent lumps. Add the milk or cream and continue whisking until the mixture thickens — about 3-4 minutes.
Remove from heat and stir in the cooked chicken, frozen peas, frozen corn, thyme, salt, pepper, and nutmeg. Taste and adjust seasoning. The filling should be well-seasoned since the crust is relatively neutral. Let the filling cool completely — this is crucial. Hot filling will melt the butter in the crust before it bakes.
Step 3: Assemble the Pie (15 minutes)
Preheat your oven to 400°F (200°C). Remove one disc of dough from the refrigerator and let it sit at room temperature for 5 minutes. On a lightly floured surface, roll it out to a 12-inch circle, about ⅛-inch thick. Gently transfer it to your pie dish, pressing it into the bottom and sides. Trim the edges so about ½ inch overhangs.
Pour the cooled filling into the crust and spread it evenly. Roll out the second disc of dough to the same size. Place it over the filling. Crimp the edges together — I like to fold the overhang under itself and then press with a fork for a decorative edge. Cut 4-5 slits in the top crust to allow steam to escape.
Brush the top crust with the egg wash and sprinkle with coarse sea salt. This gives that beautiful golden color and a little crunch on top.
Step 4: Bake (45-50 minutes)
Place the pie on a baking sheet to catch any drips. Bake at 400°F for 20 minutes, then reduce the temperature to 375°F and bake for another 25-30 minutes. The crust should be deep golden brown and you should see the filling bubbling through the slits. If the edges are browning too quickly, cover them with foil strips.
Let the pie rest on a cooling rack for at least 20 minutes before slicing. This allows the filling to set so it doesn’t run all over the plate. I know it’s hard to wait, but trust me — it’s worth it.
Cooking Tips & Techniques
I’ve made this flaky chicken pot pie enough times to have a few battle scars. Here’s what I’ve learned the hard way so you don’t have to.
The Cold Butter Rule — This is non-negotiable. Your butter must be cold when it goes into the flour. I cube mine, then pop it in the freezer for 10 minutes while I measure out the flour. If your kitchen is warm, chill your bowl and flour too. The butter pieces create steam pockets as they melt in the oven, which is what gives you those flaky layers. Warm butter just gets absorbed into the flour, and you end up with a tough, dense crust.
Don’t Overwork the Dough — I ruined my first three attempts by overmixing. You want to handle the dough as little as possible. When you add the water, stir just until it comes together. When you roll it out, use gentle, even pressure. Overworking develops gluten, and gluten makes crust tough. We want tender and flaky, not chewy.
The Filling Must Cool — I cannot stress this enough. If you pour hot filling into your raw pie crust, the butter in the dough will start melting before it even hits the oven. This leads to a soggy bottom and less flaky layers. I make the filling first, then let it cool on the counter while I roll out the dough. Sometimes I even pop it in the fridge for 15 minutes if I’m in a hurry.
Blind Baking Isn’t Necessary Here — Unlike fruit pies that can make the bottom crust soggy, the thick, creamy filling in this chicken pot pie actually protects the bottom crust. Just make sure your oven is fully preheated and you bake at a high enough temperature to set the crust quickly.
Multitasking Strategy — Make the dough first and get it chilling. While it chills, make the filling. While the filling cools, roll out the dough. It’s a beautiful flow when you time it right. And if you’re making this for a party, assemble the whole thing the night before and keep it in the fridge. Just add 10-15 minutes to the baking time since you’re starting from cold.
Variations & Adaptations
This flaky chicken pot pie is incredibly adaptable. Here are some variations I’ve tested and loved.
Vegetarian Version — Omit the chicken and double the vegetables. Add 8 ounces of cremini mushrooms, sliced and sautéed with the onions. Swap the chicken broth for vegetable broth. The mushrooms add that savory, umami depth that makes you forget there’s no meat. I’ve also added cubed sweet potatoes in place of the chicken — they hold up beautifully.
Dairy-Free Adaptation — Use a high-quality vegan butter in the crust (I’ve had good results with Miyoko’s). Replace the butter in the filling with olive oil or vegan butter. Use oat milk or unsweetened cashew milk in place of the dairy. The filling won’t be quite as rich, but it’s still delicious. Just make sure your vegan butter is very cold when making the crust.
Herb and Spice Variations — The base recipe uses thyme, but you can play around. Rosemary and sage are wonderful in the fall. Add a pinch of cayenne or smoked paprika for warmth. In the summer, try fresh tarragon and lemon zest for a brighter flavor profile. I once added a tablespoon of Dijon mustard to the filling and it was incredible — it doesn’t make it taste like mustard, just adds depth.
Individual Pot Pies — For parties, I sometimes make these in 8-ounce ramekins. Roll out the dough and cut circles slightly larger than the ramekins. Fill each ramekin with filling, top with dough, and bake for about 25 minutes at 375°F. They’re adorable and everyone gets their own personal pie.
Puff Pastry Shortcut — If you’re truly short on time, you can use store-bought puff pastry for the top crust only. Make the filling as directed, pour it into a pie dish, and top with a sheet of thawed puff pastry. Cut slits, brush with egg wash, and bake. It won’t be quite as flaky as the homemade version, but it’s still really good.
Serving & Storage Suggestions
This flaky chicken pot pie is a showstopper right out of the oven, but here’s how to serve and store it for best results.
Serving: Let the pie rest for 20 minutes after baking. This isn’t just patience — it’s physics. The filling needs time to set so it holds its shape when sliced. Serve warm, not piping hot. I like to set the pie on a wooden board in the center of the table and let everyone serve themselves. It makes a beautiful presentation.
What to Serve Alongside: This pie is a complete meal on its own, but a simple green salad with a lemon vinaigrette cuts through the richness beautifully. I also love serving roasted asparagus or steamed green beans on the side. For drinks, a crisp white wine like Sauvignon Blanc or a light Pinot Noir pairs wonderfully. If you’re hosting a casual gathering, sparkling water with lemon is always a hit.
Storage: Leftovers keep in the refrigerator for up to 4 days. Cover the pie dish tightly with foil or transfer individual slices to airtight containers. The crust will lose some of its flakiness as it sits, but reheating can help restore some of that texture.
Reheating: The best way to reheat is in a 350°F oven for 15-20 minutes. This crisps the crust back up. The microwave works in a pinch but will make the crust soft. If you’re reheating individual slices, place them on a baking sheet in the oven. I sometimes cover the edges with foil if they’re browning too quickly.
Freezing: You can freeze this pie either baked or unbaked. To freeze unbaked, assemble the pie completely but don’t cut slits or add the egg wash. Wrap tightly in plastic wrap and then foil. Freeze for up to 3 months. Bake from frozen at 375°F for about 60-70 minutes, adding the egg wash and slits halfway through. To freeze baked, let the pie cool completely, then wrap and freeze. Reheat in a 350°F oven until warmed through.
The flavors actually deepen after a day in the fridge. I honestly think this pie is even better the next day, if you can believe that. The herbs meld together, and the filling becomes this cohesive, comforting whole.
Nutritional Information & Benefits
Let’s be real — this flaky chicken pot pie is comfort food, not health food. But it does have some redeeming qualities.
Per serving (1/8 of the pie):
- Calories: 520
- Protein: 28g
- Fat: 32g
- Carbohydrates: 34g
- Fiber: 3g
- Sugar: 5g
- Sodium: 680mg
The chicken provides lean protein that keeps you full and satisfied. The carrots and celery offer vitamin A and fiber. Peas add a surprising amount of vitamin K and manganese. And yes, there’s butter — but real butter contains butyrate, a fatty acid that supports gut health in moderate amounts.
If you’re watching your intake, here are a few adjustments. Use half whole wheat flour in the crust for more fiber. Swap the heavy cream for whole milk to reduce fat. Add extra vegetables and reduce the chicken by half. These changes will lower the calorie count without sacrificing too much flavor.
This recipe contains gluten (from the flour) and dairy (butter and milk). For gluten-free, use a 1:1 gluten-free flour blend in the crust and a gluten-free all-purpose flour for thickening the filling. For dairy-free, see the variations section above. I’ve tested both adaptations and they work well, though the crust won’t be quite as flaky.
Conclusion
This flaky chicken pot pie is the recipe I turn to when I want to feed people something that feels like a hug. It’s the dish that makes guests linger at the table, scraping their plates clean and asking for the recipe before they even leave. And the best part? It looks and tastes like you spent all day in the kitchen, but most of the work is just waiting — waiting for the dough to chill, waiting for the filling to cool, waiting for the pie to rest.
I love that this recipe has taught me to slow down in the kitchen. There’s something meditative about making pie crust by hand, feeling the butter pieces between your fingers, watching the dough come together. And when you pull that golden, bubbling pie out of the oven and set it on the table to a chorus of “wows”? That feeling never gets old.
I’d love to hear how your flaky chicken pot pie turns out. Did you try any variations? Did your guests make that fork-crust crack sound? Drop a comment below and let me know. And if you share it on social media, tag me — I want to see your beautiful pies.
Now go make some memories around the table. This one’s a keeper.
Frequently Asked Questions
Can I use store-bought pie crust instead of making my own?
Absolutely. If you’re short on time, a high-quality refrigerated pie crust will work. Just know that homemade crust gives you those distinct flaky layers that make this pie special. If using store-bought, brush the bottom crust with a little egg wash before adding the filling to help prevent sogginess.
Why is my crust tough instead of flaky?
This usually happens from overworking the dough or using butter that wasn’t cold enough. The butter pieces need to stay solid until they hit the oven. If your dough feels warm or sticky at any point, pop it in the fridge for 15 minutes. Also, handle the dough as little as possible — just bring it together and stop.
Can I make this gluten-free?
Yes! Use a 1:1 gluten-free flour blend in the crust and a gluten-free all-purpose flour for the filling. The crust will be more tender and less flaky, but still delicious. I recommend Cup4Cup or King Arthur’s gluten-free blend for the best results.
How do I prevent a soggy bottom crust?
Make sure your filling is completely cool before adding it to the crust. Also, preheat your oven fully and bake at a high enough temperature. Placing the pie on the bottom rack for the first 15 minutes helps the bottom crust cook faster. And always let the pie rest after baking — cutting too early releases steam that makes the crust soggy.
Can I use leftover turkey instead of chicken?
Absolutely! This is a fantastic way to use up Thanksgiving leftovers. The recipe works exactly the same with shredded or cubed turkey. In fact, the darker meat from turkey legs adds even more flavor to the filling. Just make sure your turkey isn’t too dry — if it is, add an extra ¼ cup of broth to the filling.
Pin This Recipe!
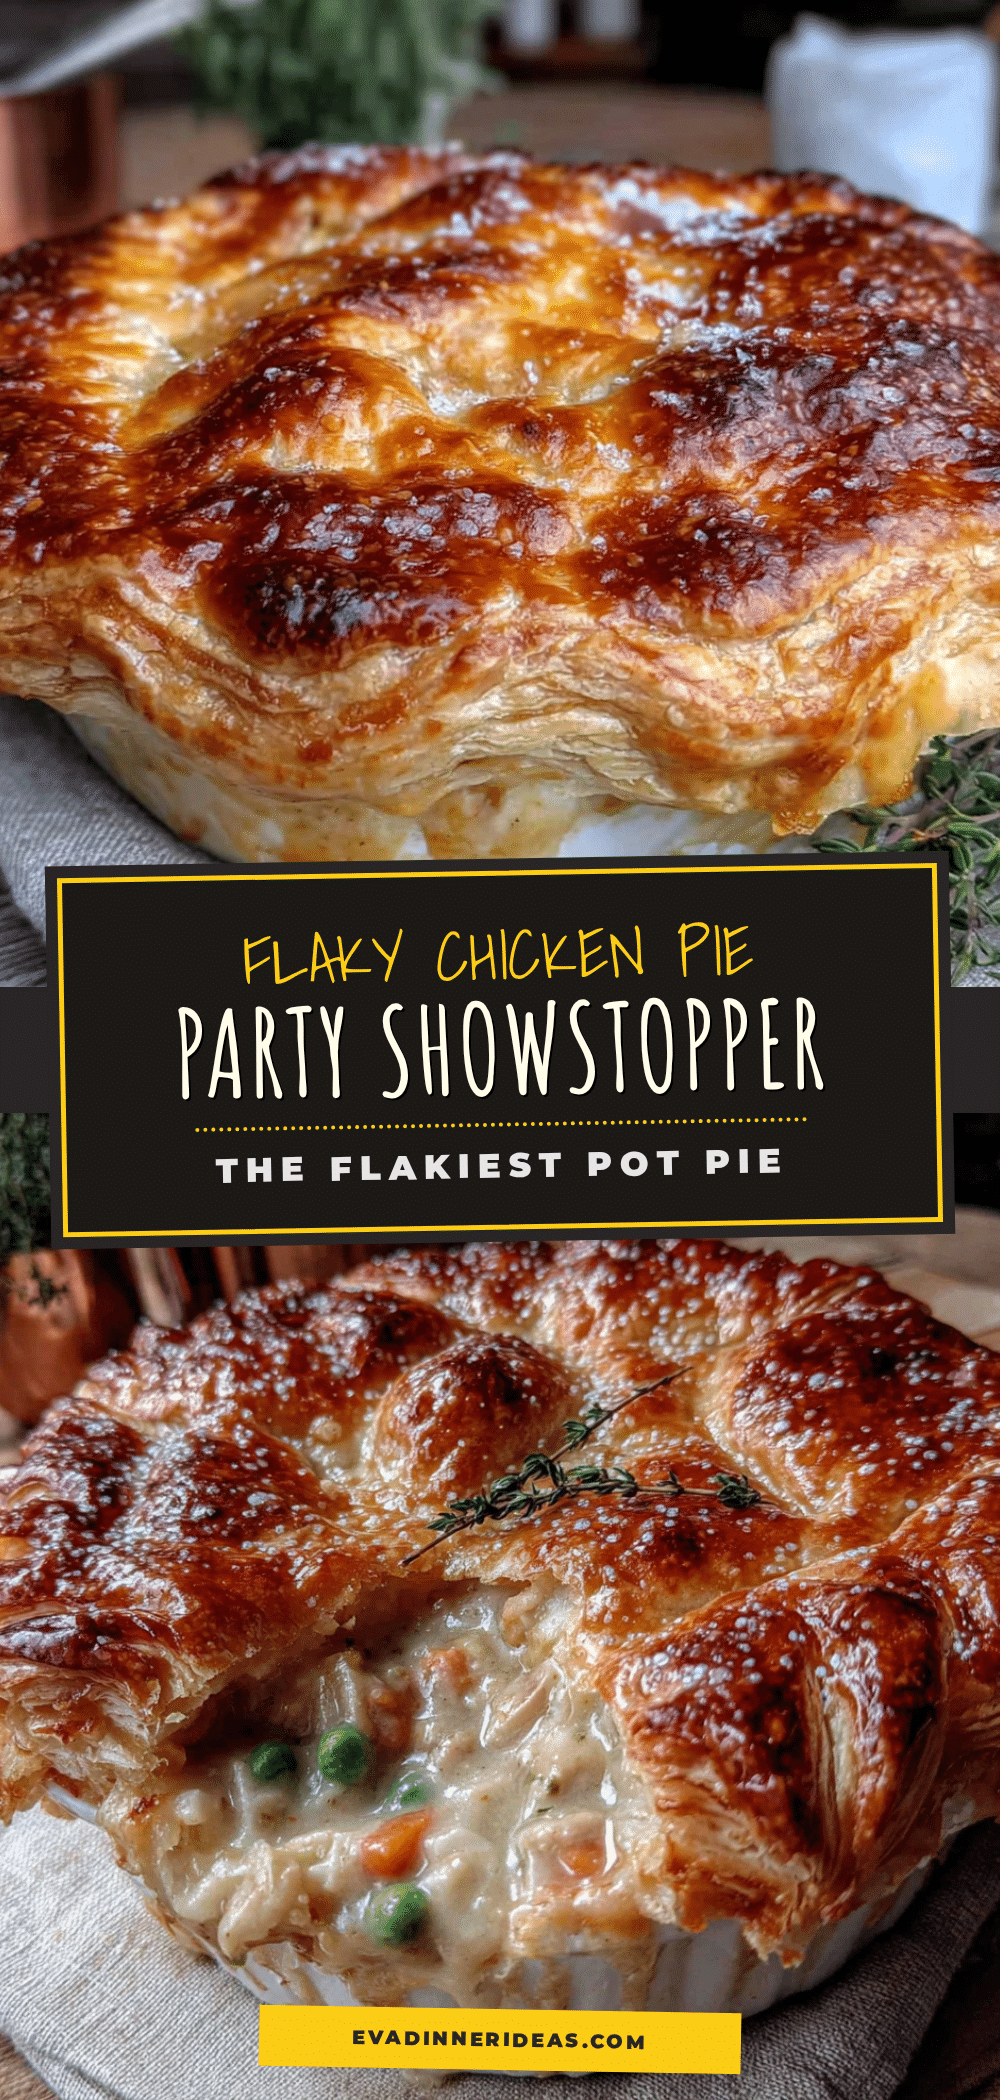
The Flakiest Chicken Pot Pie Recipe – Easy & Party Ready

This flaky chicken pot pie features a shatteringly crisp crust and a creamy, savory filling packed with tender chicken and vegetables. Perfect for potlucks, holiday gatherings, or any occasion where you want to impress with comfort food.
- Prep Time: 1 hour
- Cook Time: 45 minutes
- Total Time: 2 hours 5 minutes
- Yield: 8 servings 1x
- Category: Main Course
- Cuisine: American
Ingredients
- 2 ½ cups all-purpose flour
- 1 teaspoon salt
- 1 cup unsalted butter, very cold and cut into small cubes
- ½ cup ice water
- 1 tablespoon apple cider vinegar
- 1 egg, beaten with 1 tablespoon water (for egg wash)
- Coarse sea salt for sprinkling
- 3 tablespoons unsalted butter
- 1 large yellow onion, diced (about 1 ½ cups)
- 3 carrots, peeled and diced into ½-inch pieces
- 3 celery stalks, diced
- 3 cloves garlic, minced
- ⅓ cup all-purpose flour
- 3 cups chicken broth (low-sodium preferred)
- 1 cup whole milk or heavy cream
- 4 cups cooked chicken, shredded or cubed
- 1 cup frozen peas
- 1 cup frozen corn kernels
- 2 teaspoons fresh thyme leaves (or 1 teaspoon dried)
- 1 teaspoon salt
- ½ teaspoon black pepper
- ¼ teaspoon nutmeg
Instructions
- Make the crust dough: In a large bowl, whisk together flour and salt. Add cold butter cubes and toss to coat. Using a pastry blender or fingertips, cut butter into flour until mixture resembles coarse meal with some pea-sized butter pieces. Drizzle ice water and apple cider vinegar over mixture; stir with a fork until dough just comes together. Turn out onto a lightly floured surface and bring together with hands—do not knead. Divide in half, flatten each half into a disc, wrap in plastic wrap, …
- Prepare the filling: In a large skillet or Dutch oven, melt 3 tablespoons butter over medium heat. Add onion, carrots, and celery; cook until softened, about 8 minutes. Add garlic and cook 1 minute more. Sprinkle flour over vegetables and stir constantly for 2 minutes. Slowly pour in chicken broth while whisking continuously. Add milk or cream and whisk until mixture thickens, about 3-4 minutes. Remove from heat and stir in cooked chicken, frozen peas, frozen corn, thyme, salt, pepper, and nutme…
- Assemble the pie: Preheat oven to 400°F (200°C). Remove one disc of dough from refrigerator and let sit at room temperature for 5 minutes. On a lightly floured surface, roll out to a 12-inch circle, about ⅛-inch thick. Transfer to a 9-inch pie dish, pressing into bottom and sides. Trim edges to about ½-inch overhang. Pour cooled filling into crust. Roll out second disc of dough to same size and place over filling. Crimp edges together, cut 4-5 slits in top crust. Brush with egg wash and sprinkle…
- Bake: Place pie on a baking sheet. Bake at 400°F for 20 minutes, then reduce temperature to 375°F and bake for another 25-30 minutes, until crust is deep golden brown and filling is bubbling. If edges brown too quickly, cover with foil strips. Let pie rest on a cooling rack for at least 20 minutes before slicing.
Notes
Keep butter very cold for flaky crust. Let filling cool completely before assembling to prevent soggy bottom. Pie can be assembled a day ahead and refrigerated; add 10-15 minutes to baking time if starting from cold. For best results, let pie rest 20 minutes after baking before slicing.
Nutrition
- Serving Size: 1/8 of pie
- Calories: 520
- Sugar: 5
- Sodium: 680
- Fat: 32
- Saturated Fat: 18
- Carbohydrates: 34
- Fiber: 3
- Protein: 28
Keywords: chicken pot pie, flaky crust, comfort food, potluck, party recipe, homemade pie


