The PTA bake sale was in twelve hours and I’d completely forgotten. Not just forgotten—I’d blocked it out, the way you do with dentist appointments and school forms. I was staring into my pantry at 9 PM, holding a half-empty bag of black cocoa powder I’d bought on a whim last October, wondering if I could somehow turn it into something that didn’t look like a baking disaster. Everyone else would be bringing those Pinterest-perfect sugar cookies with royal icing, or those elaborate cake pops that take three days. I had black cocoa powder, some butter that was about to expire, and a vague memory of a spiderweb design I’d seen once on a food blog. Honestly, I was this close to just grabbing a store-bought sheet cake and hoping nobody noticed.
But then I remembered—I’d promised my daughter I’d make something “spooky and cool.” The look on her face when she’d asked was the whole reason I’d bought that black cocoa powder in the first place. So I grabbed a bowl, cracked an egg with maybe a bit too much desperation, and started mixing. The batter came together in about ten minutes flat, which felt like a small miracle at that hour. I poured it into the cupcake liners, crossed my fingers, and popped them in the oven while I figured out the spiderweb situation. I’ll be honest—when they came out, they looked like little lumps of charcoal. Not promising. But then I grabbed a bottle of white vanilla frosting and a toothpick, and something clicked. The spiderweb design was so simple it almost felt like cheating. A swirl of white, a few drags with a toothpick, and suddenly these sad little black cupcakes looked like they belonged in a Halloween magazine.
The next day at the bake sale, my cupcakes were gone in the first twenty minutes. A mom actually asked me for the recipe, and I had to admit I’d made it up on the fly at 9 PM in a mild panic. That’s the thing about these black cocoa spiderweb cupcakes—they look like you spent hours on them, but the whole process, from mixing to decorating, takes under an hour. Maybe you’ve been there, staring at an empty baking sheet the night before an event, feeling that familiar knot of panic. These cupcakes are my little secret weapon for exactly that moment. They’re dramatic, they’re delicious, and they save you from the store-bought cake shame. I’ve been making them every Halloween since, and honestly, they never last long enough.
Why You’ll Love This Recipe
Let me tell you why these black cocoa spiderweb cupcakes have become my go-to for every Halloween party and fall gathering. First off, they’re ridiculously quick. From the moment you start mixing to the moment you’re licking frosting off the spatula, you’re looking at about 45 minutes total. For a dessert that looks this fancy, that’s practically a magic trick.
- Quick & Easy : The batter comes together in one bowl in under 15 minutes. No stand mixer required, no complicated techniques. Just whisk, pour, and bake.
- Simple Ingredients : You probably have most of these in your pantry right now. Black cocoa powder is the only specialty item, and honestly, it’s worth keeping on hand for the dramatic color alone.
- Perfect for Halloween : These cupcakes are the star of any spooky celebration. They work for classroom parties, office potlucks, or just a fun weekend baking project with the kids.
- Crowd-Pleaser : The deep chocolate flavor is rich but not too sweet, which means both kids and adults go crazy for them. I’ve seen grown-ups sneak seconds when they think nobody’s looking.
- Unbelievably Delicious : The black cocoa gives these cupcakes a dark, almost Oreo-like flavor that’s totally different from regular chocolate cake. It’s deeper, more complex, and honestly addictive.
What makes these different from every other Halloween cupcake recipe out there is the technique. I’ve tested this batter at least a dozen times to get the perfect balance of moisture and structure. Black cocoa can be tricky—it tends to dry out baked goods if you’re not careful. But I’ve figured out the exact ratio of oil to buttermilk that keeps these cupcakes tender for days. And the spiderweb design? It’s so simple a five-year-old can do it, but it looks like you took a pastry decorating class.
These cupcakes aren’t just good—they’re the kind that make people close their eyes after the first bite. That deep, dark chocolate flavor hits you first, followed by that soft, tender crumb. It’s comfort food with a spooky twist, perfect for impressing guests without the stress. No fancy piping bags, no complicated techniques. Just honest, delicious cupcakes that happen to look like they crawled out of a haunted house.
What Ingredients You Will Need
This recipe uses simple, pantry-friendly ingredients to create cupcakes with an intensely dark color and rich flavor. The black cocoa powder does all the heavy lifting here—it’s what gives these cupcakes their dramatic, almost gothic appearance and that signature Oreo-like taste.
For the Cupcakes
- 1 ½ cups all-purpose flour (spooned and leveled for accuracy)
- 1 cup granulated sugar
- ½ cup black cocoa powder (I prefer this brand for the deepest color—regular Dutch-process cocoa works too, but the color won’t be as dramatic)
- 1 teaspoon baking soda
- ½ teaspoon baking powder
- ½ teaspoon salt
- 1 cup buttermilk (room temperature—adds tenderness and helps activate the baking soda)
- ½ cup vegetable oil (keeps the cupcakes moist; can substitute melted coconut oil)
- 2 large eggs (room temperature)
- 2 teaspoons vanilla extract
- ½ cup hot coffee (this doesn’t make them taste like coffee—it deepens the chocolate flavor and helps the black cocoa bloom)
For the Frosting
- 1 cup unsalted butter (softened to room temperature)
- 3 ½ cups powdered sugar (sifted if lumpy)
- ¼ cup black cocoa powder (for that dark, moody frosting)
- 2 teaspoons vanilla extract
- 3-4 tablespoons heavy cream (or milk, if that’s what you have)
- Pinch of salt
For the Spiderweb Decoration
- ½ cup white frosting (store-bought or homemade—I use a simple buttercream)
- Small piping bag or zip-top bag (for the spiderweb design)
- A toothpick or skewer (the real hero of this decoration)
The coffee might seem like a strange addition, but trust me on this one. It doesn’t make the cupcakes taste like a morning brew—it actually enhances the chocolate flavor while helping the black cocoa powder dissolve fully. I’ve made these without it, and they weren’t nearly as moist or flavorful. If you’re caffeine-sensitive, you can use hot water instead, but the results won’t be quite as rich.
For the black cocoa powder, look for one that’s labeled “black” or “extra dark.” Regular Dutch-process cocoa will work in a pinch, but your cupcakes will be more of a dark brown than true black. I’ve tested both, and the visual difference is significant enough that I always recommend springing for the real deal. A 8-ounce bag will last you through multiple batches, so it’s a worthwhile investment for Halloween baking.
Equipment Needed
You don’t need a professional bakery setup to make these black cocoa spiderweb cupcakes, but having the right tools makes the process smoother and more enjoyable. Here’s what I use every time:
- Standard 12-cup muffin tin (non-stick works best)
- Paper cupcake liners (orange or black ones add to the Halloween vibe—I use the Reynolds brand)
- Large mixing bowl (for the dry ingredients)
- Medium bowl or large liquid measuring cup (for the wet ingredients)
- Whisk (for combining everything smoothly)
- Electric hand mixer or stand mixer (for the frosting—you can do it by hand, but your arm will thank you for the mixer)
- Cooling rack (essential for even cooling—don’t skip this or your cupcakes will get soggy bottoms)
- Small piping bag or zip-top bag (for the spiderweb design)
- Toothpick or skewer (for creating the web pattern)
- Offset spatula (makes frosting so much easier, but a butter knife works too)
If you don’t have a piping bag, don’t worry. A zip-top bag with the corner snipped off works just as well for the spiderweb design. I’ve actually found it easier to control the flow with a bag than a fancy piping tip. And if you’re really in a pinch, you can even use a spoon to drizzle the white frosting—the toothpick does all the real work anyway.
One tip I learned the hard way: make sure your muffin tin is completely cool before you fill it for a second batch. I once rushed through two batches and the second one spread out like pancakes because the pan was still hot. Let it cool for at least 10 minutes between batches, or rinse it with cold water and dry it thoroughly.
Preparation Method
Alright, let’s get to the fun part. I’ve broken this down into clear steps so you can follow along without any guesswork. Take your time with the first batch—once you get the hang of it, these black cocoa spiderweb cupcakes come together in no time.
Step 1: Preheat and Prep
Preheat your oven to 350°F (175°C). Line your muffin tin with 12 paper liners. I like using black or orange ones for Halloween, but any color works. Set the pan aside while you make the batter.
Step 2: Mix the Dry Ingredients
In a large bowl, whisk together the all-purpose flour, granulated sugar, black cocoa powder, baking soda, baking powder, and salt. Make sure there are no lumps—black cocoa tends to clump up, so spend an extra 30 seconds breaking up any chunks with the back of your whisk. This step matters more than you think.
Step 3: Combine the Wet Ingredients
In a separate medium bowl or large liquid measuring cup, whisk together the buttermilk, vegetable oil, eggs, and vanilla extract until smooth. The mixture should look pale and well-combined. If your eggs are cold, they’ll seize up the buttermilk a bit—that’s fine, just keep whisking until it’s smooth.
Step 4: Bring It All Together
Pour the wet ingredients into the dry ingredients and stir with a spatula or whisk until just combined. A few streaks of flour are okay at this point. Now pour in the hot coffee and stir gently until the batter is smooth and liquid. It will be very thin—thinner than regular cupcake batter—but that’s exactly what you want. The coffee helps the black cocoa bloom and gives the cupcakes their tender crumb.
Step 5: Fill the Liners
Divide the batter evenly among the 12 liners. I use a ¼-cup measure or a cookie scoop for this—it keeps things neat and ensures even baking. Fill each liner about ⅔ full; these cupcakes rise nicely, so don’t overfill them. The batter will be runny, so pour carefully near the center of each liner.
Step 6: Bake to Perfection
Bake for 18-22 minutes, or until a toothpick inserted into the center of a cupcake comes out with just a few moist crumbs attached. The tops should spring back when lightly touched. My oven runs hot, so I check at 18 minutes and go from there. Let the cupcakes cool in the pan for 5 minutes, then transfer them to a wire rack to cool completely. Don’t skip this cooling step—frosting warm cupcakes is a recipe for a melty mess.
Step 7: Make the Frosting
While the cupcakes cool, make the black cocoa frosting. In a large bowl, beat the softened butter with an electric mixer until smooth and creamy, about 2 minutes. Add the powdered sugar, black cocoa powder, vanilla extract, and a pinch of salt. Beat on low speed until the sugar is incorporated, then add 3 tablespoons of heavy cream. Increase the speed to medium-high and beat for 3-4 minutes until the frosting is light, fluffy, and spreadable. If it’s too thick, add another tablespoon of cream. If it’s too thin, add a bit more powdered sugar.
Step 8: Frost the Cupcakes
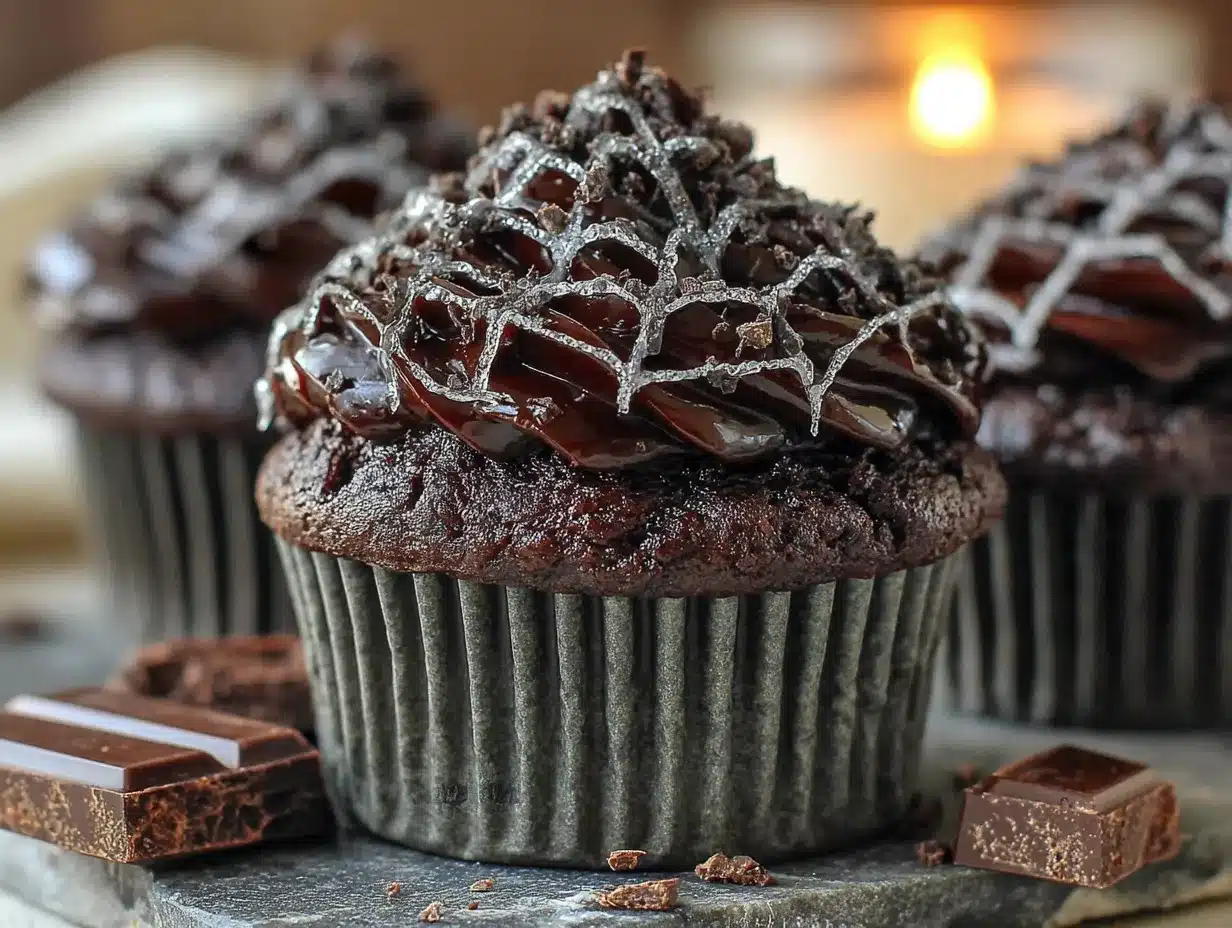
Once the cupcakes are completely cool, spread a generous amount of black cocoa frosting on each one. An offset spatula makes this look professional, but a butter knife works perfectly fine. Smooth the tops as evenly as you can—the spiderweb design looks best on a flat surface.
Step 9: Create the Spiderweb Design
Here’s where the magic happens. Fill a small piping bag or zip-top bag with the white frosting. Snip off a tiny corner of the bag. Pipe a small circle of white frosting in the center of each cupcake. Then pipe concentric circles around it, spacing them about ½ inch apart. You should have 3-4 circles total, depending on the size of your cupcake. Now take a toothpick or skewer and drag it from the center outward through all the circles, like you’re drawing spokes on a wheel. Wipe the toothpick clean after each drag. Then drag from the outer edge back toward the center, spacing these lines between the first set. The white frosting will pull into a beautiful web pattern. It sounds complicated, but honestly, it takes about 30 seconds per cupcake once you get the rhythm.
Step 10: Finishing Touches
For extra Halloween flair, you can add a small plastic spider on top of each cupcake, or sprinkle some black sanding sugar around the edges. I’ve also used edible glitter for a slightly spooky sparkle. Let the frosting set for about 15 minutes before serving or storing.
Cooking Tips & Techniques
After making these black cocoa spiderweb cupcakes more times than I can count, I’ve picked up a few tricks that make the process smoother and the results better. Let me share what I’ve learned the hard way so you don’t have to.
The coffee trick is non-negotiable. I know it sounds weird, but hot coffee is what makes these cupcakes moist and gives them that deep, complex flavor. The heat helps the black cocoa powder bloom, which intensifies both the color and the taste. I once tried using hot water instead because I was out of coffee, and the cupcakes were noticeably less flavorful. If you’re worried about caffeine, use decaf—it works just as well.
Don’t overmix the batter. This is true for most baked goods, but especially for these cupcakes. The batter is thin, which makes it tempting to keep stirring until it looks perfectly smooth. Stop as soon as the flour disappears. Overmixing develops the gluten and makes the cupcakes dense and tough instead of tender and light.
Room temperature ingredients matter. I know, I know—nobody remembers to take eggs and buttermilk out of the fridge ahead of time. But cold ingredients don’t emulsify properly, which can lead to a greasy texture. If you’re in a rush, place your eggs in a bowl of warm water for 5 minutes and microwave the buttermilk for 15 seconds. It’s not perfect, but it helps.
The spiderweb design takes practice. My first attempt looked more like a sad scribble than a web. The key is to use a light touch with the toothpick and to wipe it clean between each drag. If you drag through the circles too aggressively, the white frosting will smear instead of creating clean lines. Start with a gentle hand and adjust as you go.
Let the cupcakes cool completely. I cannot stress this enough. Frosting warm cupcakes is a disaster waiting to happen—the frosting will melt into a puddle, and your beautiful spiderweb design will turn into a gray mess. Give them at least 30 minutes on a wire rack. If you’re in a hurry, pop them in the fridge for 15 minutes to speed things up.
Make the frosting ahead of time. This is a lifesaver for busy Halloween schedules. The black cocoa frosting can be made up to three days in advance and stored in the fridge. Just let it come to room temperature and give it a quick whip before using. The same goes for the white frosting for the spiderweb design—store it separately and pipe it fresh.
Variations & Adaptations
One of the best things about these black cocoa spiderweb cupcakes is how easy they are to adapt. I’ve tried several variations over the years, and they’ve all been hits in their own way. Here are some of my favorites:
Gluten-Free Version
Substitute the all-purpose flour with a 1:1 gluten-free baking flour blend. I’ve had great results with the Cup4Cup brand. Add an extra tablespoon of buttermilk to compensate for the drier texture of gluten-free flours. Everything else stays the same, and nobody will be able to tell the difference.
Dairy-Free Version
Replace the buttermilk with a mixture of 1 cup unsweetened almond milk plus 1 tablespoon apple cider vinegar (let it sit for 5 minutes to curdle). Use a dairy-free butter substitute for the frosting—I like the Miyoko’s brand for its creamy texture. The cupcakes will be slightly less tender but still delicious.
Spiderweb Color Variations
Instead of white frosting for the web, try using orange or green for a different Halloween look. I’ve done neon green webs for a more cartoonish, fun vibe, and they were a huge hit with the kids. Just add food coloring to the white frosting and proceed with the same technique.
Mini Cupcake Version
For parties where you want bite-sized treats, use a mini muffin tin and bake for 10-12 minutes instead of 18-22. You’ll get about 36 mini cupcakes from one batch. The spiderweb design is trickier on a smaller surface, but it’s totally doable with a steady hand.
Black Velvet Cupcakes
If you want to lean into the Halloween theme even more, add 1 tablespoon of red food coloring to the wet ingredients. The combination of black cocoa and red dye creates a deep, dark red velvet effect that’s perfect for spooky season. The flavor is slightly different—more like traditional red velvet with a dark twist—but equally delicious.
Serving & Storage Suggestions
These black cocoa spiderweb cupcakes are best served at room temperature, which lets the frosting soften slightly and the cake stay tender. If you’ve stored them in the fridge, take them out about 30 minutes before serving to let them come to room temperature.
For presentation, I like to arrange them on a black cake stand or a wooden board with some fake spiderwebs draped around the edges. A few plastic spiders scattered between the cupcakes adds to the spooky vibe without looking overdone. If you’re bringing them to a party, a simple white platter makes the dark cupcakes pop beautifully.
These cupcakes pair wonderfully with a cold glass of milk, a hot cup of coffee, or even a scoop of vanilla ice cream on the side. For a Halloween party spread, I serve them alongside other spooky treats like ghost-shaped cookies or pumpkin spice donuts. They also work great as a dessert after a hearty fall meal like chili or roasted chicken.
Storage Instructions: Store unfrosted cupcakes in an airtight container at room temperature for up to 3 days. Frosted cupcakes should be stored in the refrigerator, where they’ll keep for up to 5 days. The spiderweb design might soften slightly in the fridge, but it will still look impressive.
Freezing Instructions: These cupcakes freeze beautifully. Place unfrosted cupcakes in a single layer in a freezer-safe container, separating layers with parchment paper. They’ll keep for up to 3 months. When you’re ready to serve, thaw them at room temperature for about an hour, then frost and decorate as usual. I’ve done this for Halloween parties where I wanted to prep ahead, and nobody could tell they weren’t freshly baked.
Reheating Tip: If you prefer your cupcakes slightly warm, microwave an unfrosted cupcake for 10-15 seconds before adding the frosting. The warmth makes the cake extra tender and brings out the chocolate flavor even more.
Nutritional Information & Benefits
Let’s be real—these are cupcakes, not health food. But I believe in knowing what you’re eating, so here’s the breakdown. Each cupcake (with frosting) contains approximately 380-420 calories, 22g of fat, 48g of carbohydrates, and 4g of protein. The exact numbers depend on your specific ingredients and portion sizes.
That said, there are a few redeeming qualities. Black cocoa powder is rich in antioxidants called flavonoids, which can help reduce inflammation and support heart health. It also contains less sugar than milk chocolate, so the overall sweetness is more balanced. The buttermilk adds calcium and probiotics, while the eggs provide a good source of protein and vitamin D.
If you’re watching your sugar intake, you can reduce the sugar in the cupcakes to ¾ cup without affecting the texture too much. The frosting is harder to adjust—it needs the powdered sugar for structure—but you can use a sugar substitute like Swerve for a lower-calorie version. Just note that the texture will be slightly different.
These cupcakes are not gluten-free, dairy-free, or vegan as written, but I’ve included adaptations above for those dietary needs. They do contain eggs, dairy, and wheat, so they’re not suitable for those with allergies to those ingredients. Always check your labels if you’re serving people with sensitivities.
My personal take? These are a treat, plain and simple. I don’t make them every week, but for Halloween and fall celebrations, they’re worth every bite. Life is about balance, and sometimes balance means enjoying a dark, decadent cupcake with a perfect spiderweb on top.
Conclusion
These black cocoa spiderweb cupcakes have become a staple in my Halloween baking rotation for a reason. They’re quick enough for a last-minute bake sale, impressive enough for a party, and delicious enough that people ask for the recipe every single time. The deep, dark chocolate flavor is unlike anything you’ll get from a box mix, and that spiderweb design? It’s the kind of simple trick that makes you look like a baking genius.
I love that this recipe doesn’t require any special skills or expensive equipment. You don’t need a piping bag with a fancy tip or a pastry degree. Just a toothpick, some white frosting, and a willingness to try something that looks way harder than it actually is. That’s the kind of recipe I live for—the ones that make you feel like you’ve pulled off something magical when really, you just followed a few simple steps.
I’d love to hear how yours turn out! Did you try a different color for the spiderweb? Add a plastic spider on top? Or maybe you made the gluten-free version and it was a hit at your party? Drop a comment below and let me know—I read every single one, and your feedback helps me create better recipes for you. And if you took a photo, tag me on Pinterest so I can see your beautiful creations. Happy Halloween baking, friends!
Frequently Asked Questions
Can I use regular cocoa powder instead of black cocoa?
Yes, you can use regular Dutch-process cocoa powder, but your cupcakes will be dark brown instead of true black. The flavor will also be less intense—more like a standard chocolate cupcake. If you want that dramatic black color, I really recommend tracking down black cocoa powder. It’s available at most baking supply stores and online.
Why did my spiderweb design turn into a messy smear?
This usually happens for one of three reasons: your frosting was too thin, you dragged the toothpick too aggressively, or you didn’t wipe the toothpick clean between each drag. Use a thick white frosting (add extra powdered sugar if needed), apply gentle pressure, and wipe the toothpick after every single drag. Practice on a piece of parchment paper first if you’re nervous.
Can I make these cupcakes ahead of time for a party?
Absolutely! Bake the cupcakes up to two days in advance and store them unfrosted in an airtight container. Make the frosting up to three days ahead and keep it in the fridge. On the day of your party, frost and decorate the cupcakes—the whole process takes about 20 minutes. The spiderweb design is best done fresh, so don’t try to do it the night before.
How do I get my cupcakes to dome perfectly on top?
For perfectly domed tops, make sure your oven is fully preheated before baking and don’t open the oven door during the first 15 minutes of baking. Filling the liners to exactly ⅔ full also helps. If your cupcakes still come out flat, try adding an extra ¼ teaspoon of baking powder to the dry ingredients.
Can I use this recipe to make a cake instead of cupcakes?
Yes! Pour the batter into two greased 8-inch round cake pans and bake at 350°F for 25-30 minutes, or until a toothpick comes out clean. The spiderweb design works beautifully on a cake too—just pipe concentric circles across the entire top and drag the toothpick through them. You’ll need about double the frosting for a layered cake.
Pin This Recipe!
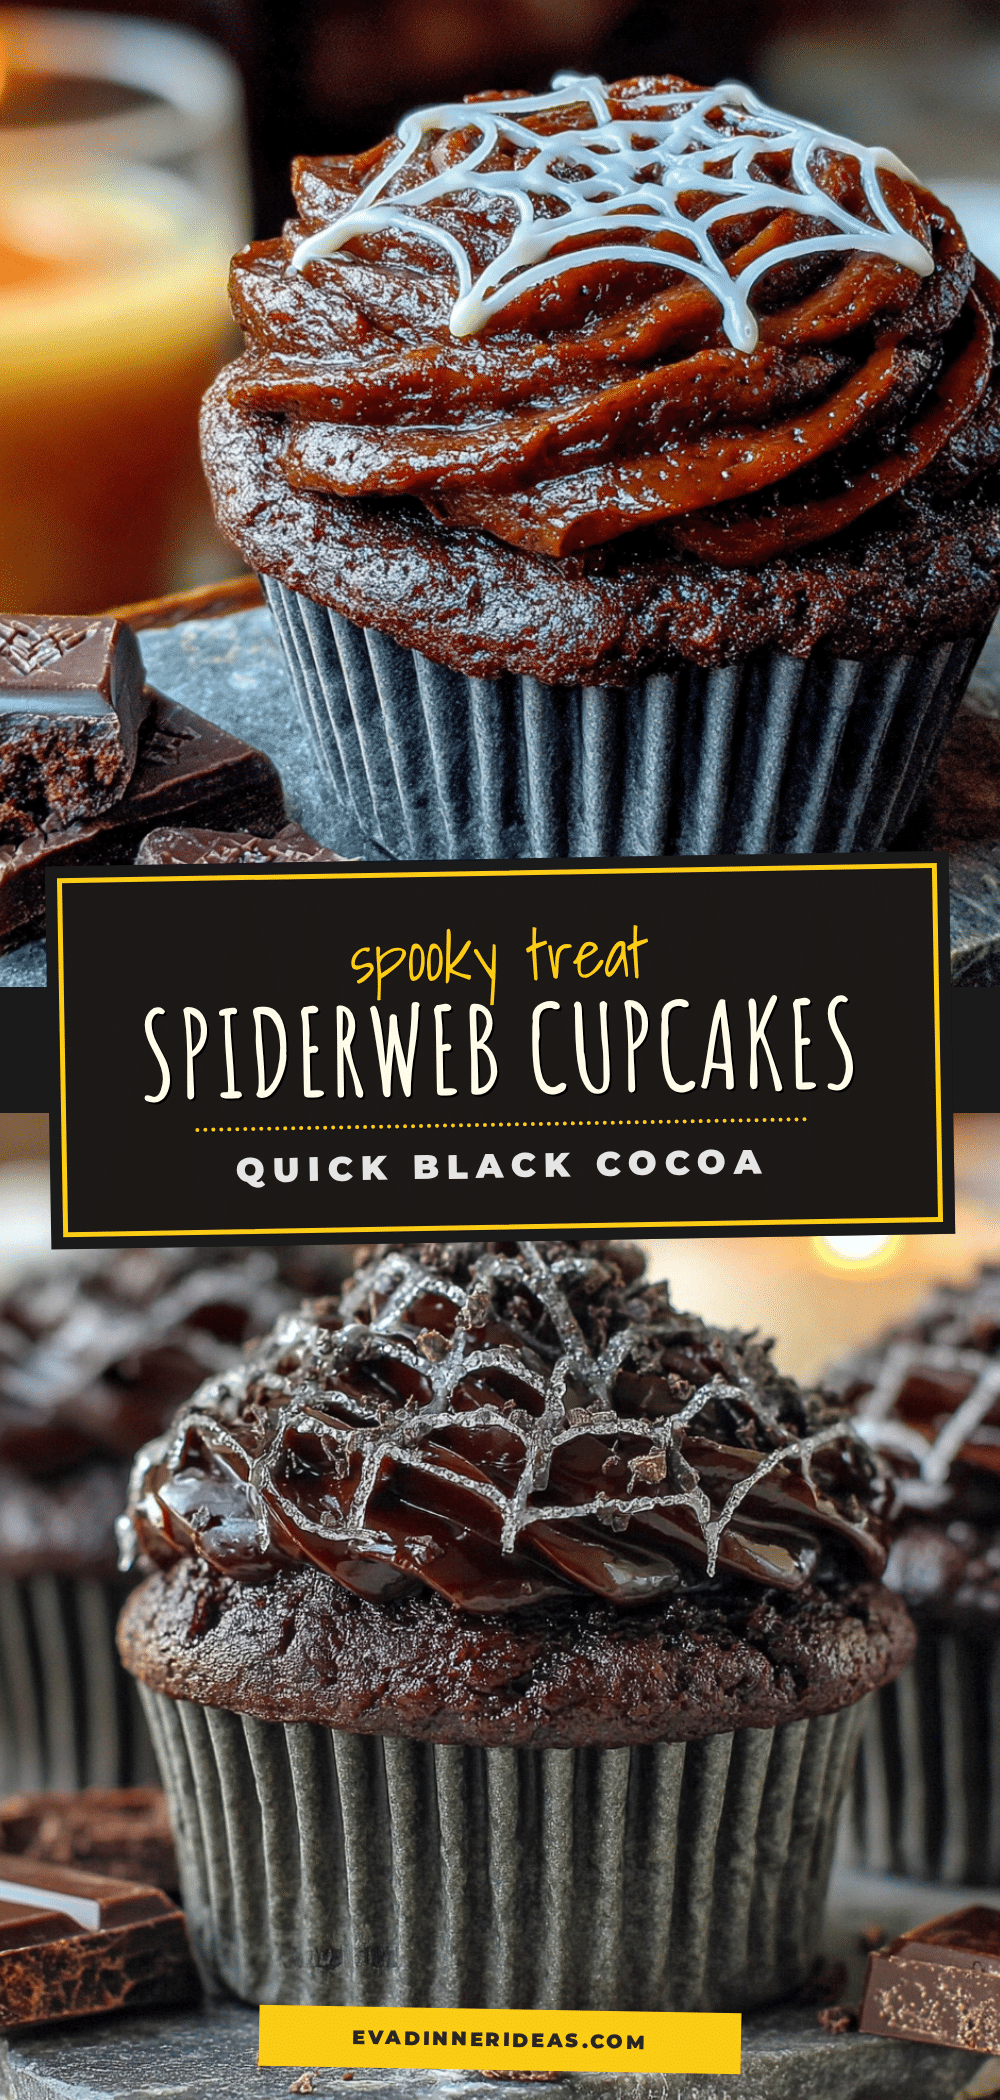
Best Black Cocoa Spiderweb Cupcakes – Easy Halloween Recipe
These black cocoa spiderweb cupcakes are quick, easy, and perfect for Halloween. With a deep Oreo-like chocolate flavor and a simple toothpick spiderweb design, they look fancy but come together in under an hour.
- Prep Time: 15 minutes
- Cook Time: 20 minutes
- Total Time: 45 minutes
- Yield: 12 servings 1x
- Category: Dessert
- Cuisine: American
Ingredients
- 1 ½ cups all-purpose flour (spooned and leveled)
- 1 cup granulated sugar
- ½ cup black cocoa powder
- 1 teaspoon baking soda
- ½ teaspoon baking powder
- ½ teaspoon salt
- 1 cup buttermilk (room temperature)
- ½ cup vegetable oil
- 2 large eggs (room temperature)
- 2 teaspoons vanilla extract
- ½ cup hot coffee
- 1 cup unsalted butter (softened)
- 3 ½ cups powdered sugar (sifted)
- ¼ cup black cocoa powder (for frosting)
- 2 teaspoons vanilla extract (for frosting)
- 3–4 tablespoons heavy cream (or milk)
- Pinch of salt
- ½ cup white frosting (for spiderweb decoration)
- Small piping bag or zip-top bag
- Toothpick or skewer
Instructions
- Preheat oven to 350°F (175°C). Line a 12-cup muffin tin with paper liners.
- In a large bowl, whisk together flour, sugar, black cocoa powder, baking soda, baking powder, and salt until no lumps remain.
- In a separate bowl, whisk together buttermilk, vegetable oil, eggs, and vanilla extract until smooth.
- Pour wet ingredients into dry ingredients and stir until just combined. Add hot coffee and stir gently until batter is smooth and thin.
- Divide batter evenly among the 12 liners, filling each about ⅔ full.
- Bake for 18-22 minutes, until a toothpick inserted in the center comes out with a few moist crumbs. Cool in pan for 5 minutes, then transfer to a wire rack to cool completely.
- For frosting: Beat softened butter until creamy. Add powdered sugar, black cocoa powder, vanilla, and salt. Beat on low, then add 3 tablespoons heavy cream. Beat on medium-high for 3-4 minutes until fluffy. Adjust consistency with more cream or sugar as needed.
- Once cupcakes are cool, spread black cocoa frosting evenly on each.
- For spiderweb: Fill a piping bag or zip-top bag with white frosting. Snip a tiny corner. Pipe a small circle in the center of each cupcake, then pipe 3-4 concentric circles around it, spaced ½ inch apart.
- Drag a toothpick from the center outward through all circles (like spokes). Wipe toothpick clean after each drag. Then drag from outer edge back toward center between the first lines. Repeat for each cupcake.
- Let frosting set for 15 minutes before serving. Optionally add plastic spiders or black sanding sugar for decoration.
Notes
Hot coffee deepens the chocolate flavor and helps black cocoa bloom—don’t skip it. Use decaf if needed. For best results, ensure all ingredients are at room temperature. The spiderweb design is easiest with a light touch; wipe the toothpick clean between each drag. Cupcakes can be made ahead: bake and store unfrosted for up to 2 days, or freeze for up to 3 months. Frosting can be made up to 3 days in advance.
Nutrition
- Serving Size: 1 cupcake
- Calories: 400
- Sugar: 35
- Sodium: 280
- Fat: 22
- Saturated Fat: 10
- Carbohydrates: 48
- Fiber: 2
- Protein: 4
Keywords: Halloween cupcakes, black cocoa cupcakes, spiderweb cupcakes, easy Halloween dessert, chocolate cupcakes, spooky cupcakes


