This was supposed to be a batch of caramel popcorn. I had the brown sugar measured out, the butter softening on the counter, and a whole plan for a sticky, gooey, classic fall snack. But somewhere between the school pickup chaos and a toddler who decided the living room floor needed a yogurt facial, my plan fell apart. I grabbed a bag of candy corn instead of chocolate chips, the butter got a little too brown, and honestly? I was already running on fumes. The oven was preheating before I realized I was making something completely different. What came out of that oven was nothing like the plan—and better.
The first piece I pulled off the baking sheet was a mess. The popcorn was barely holding onto the white chocolate, the candy corn looked like it was melting into little alien blobs, and I was this close to just calling it a loss and ordering pizza. But my oldest walked by, grabbed a piece, and said, “Mom, this is the best thing you’ve ever made.” I thought she was just being nice. Then she grabbed three more pieces. Then the neighbor kid who was over for a playdate asked if he could have some for the road. Suddenly, my failed caramel popcorn experiment was the most popular thing in the house. Maybe you’ve been there—when a kitchen disaster turns into a happy little miracle. This candy corn popcorn bark is that miracle.
It’s crunchy, sweet, salty, and has that perfect fall vibe without any of the fuss. No stirring a pot of caramel for twenty minutes. No candy thermometer. No stress. Just popcorn, candy corn, and a little white chocolate magic. I keep making it because it’s the kind of treat that makes everyone happy without making me want to pull my hair out. And honestly? It tastes way better than the caramel popcorn I was originally trying to make. Go figure.
Why You’ll Love This Recipe
This easy candy corn popcorn bark isn’t just another fall dessert—it’s the one that disappears fastest at every party, school event, and movie night. I’ve tested it with my own kids, their friends, and even a few skeptical adults who swore they didn’t like candy corn. Spoiler alert: they all came back for seconds. Here’s why this recipe works so well for busy families:
- Quick & Easy : From start to finish, this comes together in about 15 minutes. No baking, no complicated steps. Just melt, mix, and set. Perfect for those afternoons when you need a treat fast.
- Simple Ingredients : You likely already have popcorn, white chocolate chips, and candy corn in your pantry. No fancy grocery trips needed. I always keep a bag of candy corn stashed away for moments like this.
- Perfect for Fall Gatherings : Whether it’s a Halloween party, a Thanksgiving kids’ table, or just a cozy Friday night movie, this bark fits right in. It’s festive without being fussy.
- Crowd-Pleaser : Kids love the sweet crunch, and adults appreciate the salty-sweet balance. I’ve never seen a batch last longer than an hour at any gathering.
- Unbelievably Delicious : The combination of crispy popcorn, creamy white chocolate, and chewy candy corn creates a texture that’s next-level. It’s like a candy bar and popcorn had a delicious little baby.
What makes this recipe different from all the other popcorn bark recipes out there? It’s the ratio. I spent way too many batches figuring out the perfect balance of popcorn to chocolate to candy corn. Too much chocolate and it becomes a sticky mess. Too little and the candy corn falls off. This version? It’s just right. Every piece has that perfect mix of crunch, creaminess, and sweet corn flavor. Plus, it’s kid-approved by a panel of very honest little taste testers. My youngest actually said, “Mom, you should put this in a store.” That’s high praise from a four-year-old.
This bark is the kind of treat that makes you close your eyes after the first bite. It’s comfort food reimagined—simpler, faster, but with the same soul-soothing satisfaction. Perfect for impressing your kids without any stress, or turning a simple fall evening into something memorable. And the best part? No one has to know it started as a failed experiment.
What Ingredients You Will Need
This recipe uses simple, pantry-friendly ingredients to deliver that perfect fall flavor without any fuss. Most of these are things you might already have on hand, especially if you’ve stocked up for Halloween. Here’s what you’ll need:
For the Bark Base
- 8 cups popped popcorn (about 1/2 cup unpopped kernels, or one standard bag of microwave popcorn, lightly salted) — I prefer using air-popped or lightly salted microwave popcorn for the best texture. Avoid heavily buttered varieties as they can make the chocolate slide off.
- 2 cups white chocolate chips (I recommend Ghirardelli or Guittard for the smoothest melt) — These create the creamy binder that holds everything together. You can also use white melting wafers if you prefer a slightly firmer texture.
- 1 ½ cups candy corn — The star of the show! I like using classic Brach’s candy corn for that nostalgic fall flavor. You can also try the autumn mix with the little pumpkins and mellowcremes for extra color.
- ½ cup salted peanuts (optional, but highly recommended) — Adds a wonderful salty crunch that balances the sweetness. If your family has nut allergies, you can skip these or substitute with roasted pumpkin seeds.
- ¼ teaspoon salt (if using unsalted popcorn) — Don’t skip this! That little pinch of salt makes all the difference in balancing the sweet flavors.
Optional Add-Ins for Extra Flair
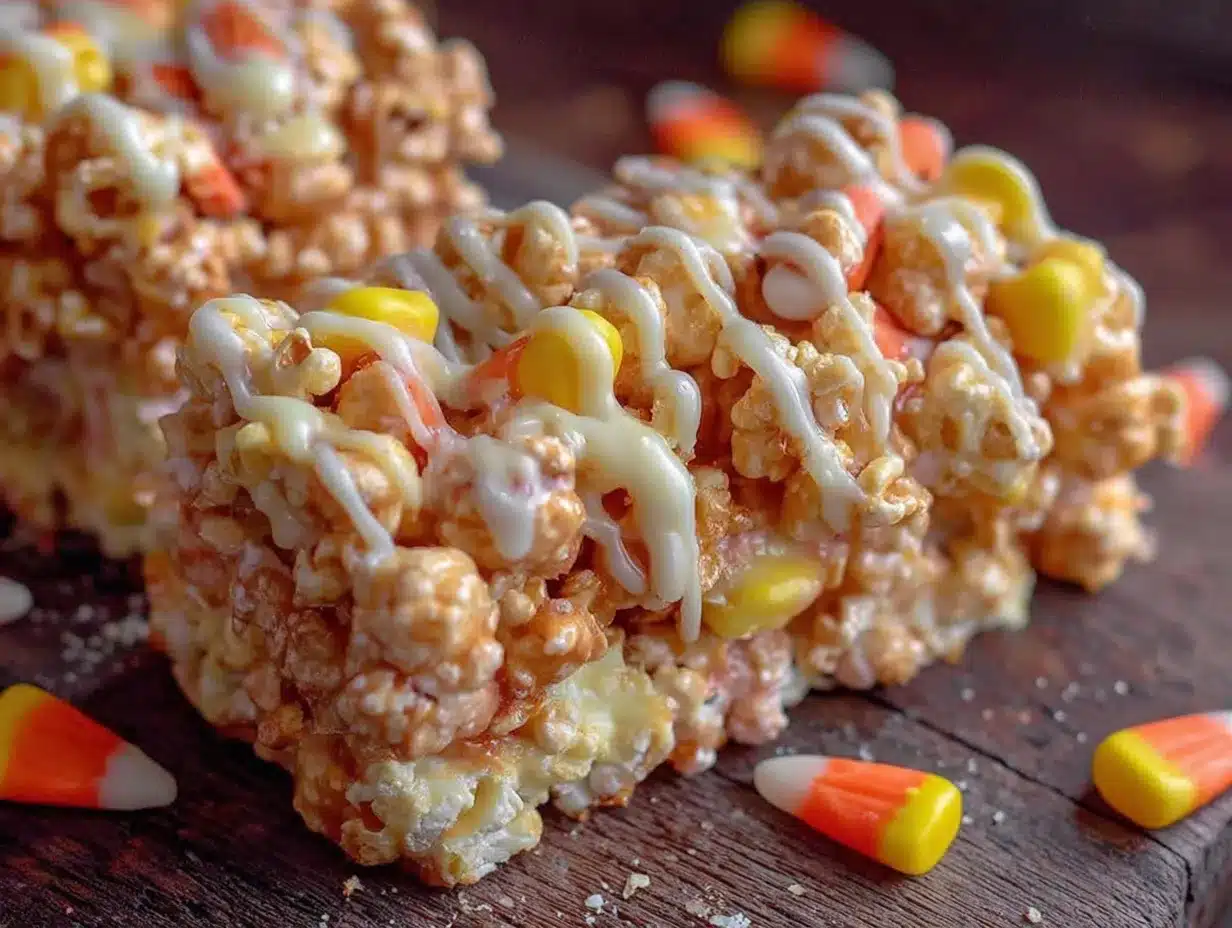
- ¼ cup fall-themed sprinkles — Adds a festive touch for parties or Halloween gatherings.
- ¼ cup dried cranberries — For a tart twist that cuts through the sweetness beautifully.
- 2 tablespoons coconut oil (for thinning the chocolate, if needed) — Helps create a smoother, more drizzle-friendly consistency.
Ingredient Selection Tip: When buying candy corn, look for bags that feel fresh and slightly soft. Stale candy corn gets hard and crunchy, which doesn’t work as well in this bark. I always check the date on the package before buying. Also, if you’re using microwave popcorn, go for the “light butter” or “natural” varieties. The heavily buttered ones leave a greasy residue that prevents the chocolate from sticking properly. Trust me on this—I learned the hard way after a sad, greasy batch that ended up in the trash.
Substitution Guidance: If white chocolate isn’t your thing, you can use milk chocolate or even dark chocolate chips for a different flavor profile. Just note that darker chocolates will make the bark less sweet and more sophisticated. For a dairy-free version, use vegan white chocolate chips and coconut oil. The texture will be slightly different, but still delicious. And if you’re not a fan of candy corn (I know, I know, but some people aren’t), you can substitute with chopped candy pumpkins or even M&Ms for a year-round treat.
Equipment Needed
You don’t need any fancy equipment for this recipe—just a few basic kitchen tools that you probably already have. Here’s what you’ll need:
- Large baking sheet (11×17 inches or similar) — This is where the magic happens. A rimmed baking sheet works best to keep everything contained. If you don’t have a large one, you can use two smaller sheets.
- Parchment paper or silicone baking mat — Absolutely essential for easy cleanup and preventing sticking. Trust me, you don’t want to be scraping hardened chocolate off your baking sheet. I learned that lesson the hard way.
- Large microwave-safe bowl (2-quart or larger) — For melting the white chocolate. Glass or ceramic works best. Avoid plastic bowls as they can warp or hold onto odors.
- Rubber spatula — For stirring the chocolate and gently folding in the popcorn. A silicone spatula is my go-to because it doesn’t scratch bowls and makes scraping every last bit of chocolate easy.
- Measuring cups — For measuring popcorn, candy corn, and any add-ins. A liquid measuring cup for the chocolate chips is also handy.
- Cooling rack (optional but helpful) — If you have one, placing the baking sheet on a cooling rack helps the bark set faster by allowing air to circulate underneath.
Budget-Friendly Tip: Don’t have parchment paper? You can use aluminum foil lightly greased with cooking spray. It works in a pinch, though the cleanup isn’t quite as easy. Also, if you don’t have a microwave, you can melt the white chocolate in a double boiler on the stovetop. Just be careful not to overheat it—white chocolate can seize up if it gets too hot. I’ve ruined more than a few batches by getting impatient and cranking up the heat. Slow and steady wins this race.
Preparation Method
This recipe comes together in about 15 minutes of active time, plus 30 minutes for the bark to set. It’s so simple that my kids can make it with just a little supervision. Here’s how to do it:
Step 1: Prep Your Workspace
Line your large baking sheet with parchment paper or a silicone baking mat. Make sure the paper extends slightly over the edges—this gives you handles to lift the bark out later. Set the sheet aside. If you’re using microwave popcorn, pop it according to package directions and let it cool for a couple of minutes. You want the popcorn to be at room temperature, not hot, so the chocolate doesn’t melt too quickly when you mix it.
Step 2: Remove Unpopped Kernels
This step is crucial! Go through your popped popcorn and remove any unpopped or partially popped kernels. Nothing ruins a bite of this bark like cracking a tooth on a hard kernel. I usually spread the popcorn out on a clean kitchen towel and pick through it while watching TV. It’s a little tedious, but totally worth it. You should end up with about 8 cups of clean, fluffy popcorn.
Step 3: Melt the White Chocolate
Place the white chocolate chips in a large microwave-safe bowl. Microwave in 30-second intervals, stirring well after each interval. White chocolate can be finicky—it burns easily and can seize up if overheated. I usually stop when the chips are about 75% melted and then stir until the residual heat melts the rest. If the chocolate seems too thick, add 1 tablespoon of coconut oil and stir until smooth. The chocolate should be glossy and smooth, with no lumps. This usually takes about 1 ½ to 2 minutes total, depending on your microwave.
Step 4: Combine the Ingredients
Pour the melted white chocolate over the popcorn in a large bowl. Gently fold with a rubber spatula until the popcorn is evenly coated. Be careful not to crush the popcorn—you want those nice, fluffy pieces intact. Add the candy corn and peanuts (if using) and fold gently again. The mixture should look like a beautiful, messy pile of coated popcorn and candy. Don’t overmix or the candy corn might start to melt and streak the chocolate.
Step 5: Spread on the Baking Sheet
Transfer the mixture to your prepared baking sheet. Spread it into an even layer, about ½ to ¾ inch thick. Don’t press too hard—you want some texture and air pockets. If you want a more even bark, you can gently press down with the back of a spatula. Sprinkle any extra candy corn or peanuts on top for a prettier presentation. If using sprinkles, add them now while the chocolate is still wet.
Step 6: Let It Set
Place the baking sheet in the refrigerator for at least 30 minutes, or until the chocolate is completely firm. If you’re in a hurry, you can pop it in the freezer for 15 minutes. The bark is ready when it lifts easily from the parchment paper and the chocolate feels solid to the touch. Don’t rush this step—if the chocolate isn’t fully set, the bark will fall apart when you break it.
Step 7: Break into Pieces
Once the bark is set, lift it from the baking sheet using the parchment paper handles. Place it on a cutting board and break it into irregular pieces with your hands. I like keeping some pieces large (about 3-4 inches) and some smaller for snacking. The rustic, imperfect pieces are part of the charm. Store in an airtight container at room temperature for up to 5 days—if it lasts that long.
Sensory Cue: The bark should have a satisfying snap when you break it. The popcorn should still be crunchy, not chewy. If the popcorn feels soft or stale, it means the chocolate wasn’t fully set, or the popcorn was too warm when you mixed it. No worries—just pop it back in the fridge for another 10 minutes and try again.
Cooking Tips & Techniques
After making this candy corn popcorn bark more times than I care to count (and ruining a few batches along the way), I’ve picked up some tricks that make all the difference. Here are my best tips for perfect bark every time:
Don’t Overheat the White Chocolate. This is the number one mistake I see people make. White chocolate burns at a lower temperature than milk or dark chocolate. If it gets too hot, it will seize up into a grainy, clumpy mess that’s impossible to work with. Always melt it in short bursts and stir frequently. If it does seize, you can try adding a tablespoon of vegetable oil and stirring vigorously, but honestly, it’s usually better to start over. I’ve learned to keep an extra bag of chips on hand just in case.
Use Room Temperature Popcorn. I know it’s tempting to dump the chocolate on hot, freshly popped popcorn, but don’t do it. The heat will cause the chocolate to thin out too much and slide right off the popcorn. Let your popcorn cool completely before mixing. I usually pop mine first and let it sit while I gather the other ingredients. This also gives me time to pick out those stubborn unpopped kernels.
The Candy Corn Placement Matters. If you mix the candy corn in too vigorously, it will start to melt and create weird, streaky orange lines in the white chocolate. Instead, fold it in gently with just a few strokes. I actually like to press a few pieces of candy corn into the top of the bark after spreading it on the sheet. This way, each piece has visible, intact candy corn that looks beautiful and tastes great.
Multitasking Strategy: While the bark is setting in the fridge, use that time to clean up your workspace. The melted chocolate can be a pain to clean once it hardens, so wash your bowls and spatulas right away with warm, soapy water. I’ve ruined a few good kitchen towels by letting chocolate dry on them. Trust me, it’s not worth the hassle.
Consistency Tip: If your bark turns out too soft or doesn’t set properly, it’s usually because the chocolate-to-popcorn ratio is off. You want just enough chocolate to coat the popcorn without drowning it. If you find yourself with a puddle of chocolate at the bottom of the bowl, add a little more popcorn to balance it out. The perfect bark should have visible popcorn throughout, with chocolate acting as the glue, not the main event.
Variations & Adaptations
One of the best things about this easy candy corn popcorn bark is how adaptable it is. I’ve tried several variations over the years, and each one brings something new to the table. Here are some of my favorites:
Chocolate Lover’s Bark
Swap the white chocolate for milk chocolate or semi-sweet chocolate chips. The darker chocolate balances the sweetness of the candy corn beautifully. I made this version for a Halloween party last year, and the adults went crazy for it. If you go this route, add a pinch of sea salt on top before the chocolate sets—it takes the flavor to a whole new level.
Nut-Free Friendly Bark
Skip the peanuts and add ½ cup of roasted pumpkin seeds (pepitas) or sunflower seeds instead. They provide the same salty crunch without the allergy concerns. My daughter’s school has a strict nut-free policy, so this is the version I send in for classroom parties. It’s always a hit, and no one misses the peanuts.
Spicy Sweet Bark
For those who like a little heat, add ¼ teaspoon of cayenne pepper or chili powder to the melted white chocolate before mixing. The spicy kick pairs surprisingly well with the sweet candy corn and salty popcorn. I was skeptical the first time I tried this, but now it’s my secret weapon for adult gatherings. Just be careful not to add too much—a little goes a long way.
Fall Harvest Bark
Add ¼ cup of dried cranberries and ¼ cup of chopped dried apricots along with the candy corn. The tartness of the dried fruit cuts through the sweetness and adds a lovely chewy texture. This version feels a little more sophisticated and is perfect for Thanksgiving dessert tables. I also like to add a sprinkle of cinnamon for extra fall flavor.
Halloween Candy Bark
Replace half of the candy corn with chopped Halloween candy bars (like Snickers, Milky Way, or Reese’s cups). Just chop them into small pieces and fold them in with the popcorn. This version is dangerously addictive and perfect for using up leftover Halloween candy. I made this last November and my kids begged me to make it again for weeks.
Serving & Storage Suggestions
This candy corn popcorn bark is best served at room temperature, right after it’s been broken into pieces. The texture is perfect—crunchy popcorn, creamy chocolate, and chewy candy corn all in one bite. I like to arrange the pieces on a large platter or in a festive bowl for parties. For a Halloween party, I’ll add some fake spider webs or plastic spiders around the platter for a spooky touch. For Thanksgiving, I’ll sprinkle a little cinnamon on top and serve it alongside other fall desserts.
Complementary Dishes: This bark pairs beautifully with warm apple cider, hot chocolate, or even a glass of cold milk. If you’re serving it at a party, try setting it out next to a bowl of caramel apples or pumpkin pie bites. The flavors all complement each other without competing. I’ve also been known to crumble the bark over vanilla ice cream for an extra-special sundae. Trust me, it’s life-changing.
Storage Instructions: Store the bark in an airtight container at room temperature for up to 5 days. Do not refrigerate it after it’s set, as the popcorn can absorb moisture and become chewy. If you live in a humid climate, you might notice the bark getting a little soft after a day or two. In that case, you can store it in the refrigerator, but let it come to room temperature before serving for the best texture. I don’t recommend freezing this bark, as the popcorn can lose its crunch when thawed.
Flavor Development: Interestingly, this bark actually tastes better on the second day. The flavors meld together overnight, and the candy corn softens slightly, making it even more delicious. If you can resist eating it all in one sitting, try saving some for the next day. I’ve been known to hide a small stash in the back of the pantry for “emergencies.” Not that I’m admitting to anything.
Nutritional Information & Benefits
Let’s be real—this is a treat, not a health food. But that doesn’t mean it can’t fit into a balanced diet. Here’s the estimated nutritional breakdown for a 1-cup serving (about 2 ounces) of this candy corn popcorn bark:
- Calories: Approximately 220-250
- Total Fat: 12-15g
- Saturated Fat: 7-9g
- Carbohydrates: 28-32g
- Sugar: 20-24g
- Protein: 3-5g
- Fiber: 1-2g
- Sodium: 150-200mg
Health Benefits of Key Ingredients: Popcorn is actually a whole grain, which means it provides fiber and antioxidants. Air-popped popcorn is a healthy snack on its own, and even in this bark, it adds some nutritional value. The peanuts (if you use them) offer healthy fats, protein, and vitamin E. And while candy corn is mostly sugar, it does bring a little bit of joy, which I think counts for something.
Dietary Considerations: This recipe is naturally gluten-free if you use certified gluten-free popcorn and white chocolate. For a dairy-free version, use vegan white chocolate chips and skip the butter. The bark is also vegetarian-friendly. However, it’s not suitable for vegans unless you use plant-based chocolate. Potential allergens include dairy (from the white chocolate) and peanuts (if using). Always check labels if you’re serving guests with allergies.
Personal Wellness Perspective: I believe in the power of treats made with love. This bark is something I make for special occasions and family movie nights, not for everyday snacking. It’s about balance—enjoying a sweet, festive treat without guilt and then getting back to your normal routine. Life is too short to skip the candy corn popcorn bark, you know?
Conclusion
This easy candy corn popcorn bark has become a staple in our home every fall, and I think it deserves a spot in yours too. It started as a complete kitchen disaster—a failed caramel popcorn experiment that somehow turned into something even better. That’s the thing about cooking, isn’t it? Sometimes the best recipes come from the biggest mistakes. This bark is proof that you don’t need fancy techniques or complicated steps to create something truly special. Just a few simple ingredients, a little patience, and a willingness to embrace the happy accidents.
I love this recipe because it brings people together. Whether it’s a Halloween party, a Thanksgiving gathering, or just a quiet Friday night with the kids, this bark always gets smiles. It’s the kind of treat that makes people pause, take a bite, and say, “Wow, this is really good.” And honestly? That never gets old. So go ahead—make a batch for your family. Customize it with your favorite add-ins. Break it into big, messy pieces and watch it disappear. And if anyone asks where you got the recipe, just tell them it was a happy little accident.
I’d love to hear how your bark turns out! Drop a comment below and let me know if you tried any fun variations or if your kids loved it as much as mine do. Don’t forget to share this recipe with a friend who needs a quick, kid-approved fall treat. Happy snacking!
Frequently Asked Questions
Can I use microwave popcorn for this recipe?
Absolutely! Microwave popcorn works perfectly. Just make sure to use a lightly salted or natural variety. Avoid heavily buttered popcorn, as the extra grease can prevent the chocolate from sticking properly. Let it cool completely before mixing with the melted chocolate.
Why did my white chocolate seize up?
White chocolate is sensitive to heat and moisture. If it gets too hot or if even a drop of water gets into the bowl, it can seize up into a grainy, clumpy mess. Always melt it in 30-second intervals and stir frequently. If it does seize, try adding a tablespoon of vegetable oil and stirring vigorously. If that doesn’t work, it’s best to start over with fresh chocolate.
Can I make this bark ahead of time for a party?
Yes! You can make this bark up to 3 days in advance. Store it in an airtight container at room temperature. I actually think it tastes even better on the second day, as the flavors have time to meld together. Just make sure it’s fully set before storing, and keep it away from humidity to maintain the crunch.
How do I prevent the candy corn from melting into the chocolate?
The key is to fold the candy corn in gently and not overmix. If you stir too vigorously, the heat from the melted chocolate can cause the candy corn to soften and streak. I like to add the candy corn last and fold it in with just a few strokes. Pressing a few pieces into the top of the bark after spreading also helps keep them visible and intact.
Can I use other types of candy instead of candy corn?
Definitely! This recipe is very versatile. Try using chopped candy pumpkins, M&Ms, Reese’s Pieces, or even chopped chocolate bars. Just keep in mind that softer candies might melt slightly when mixed with warm chocolate, so you may want to let the chocolate cool for a minute or two before adding them. For a non-Halloween version, try using chopped peanut butter cups or toffee bits.
Pin This Recipe!
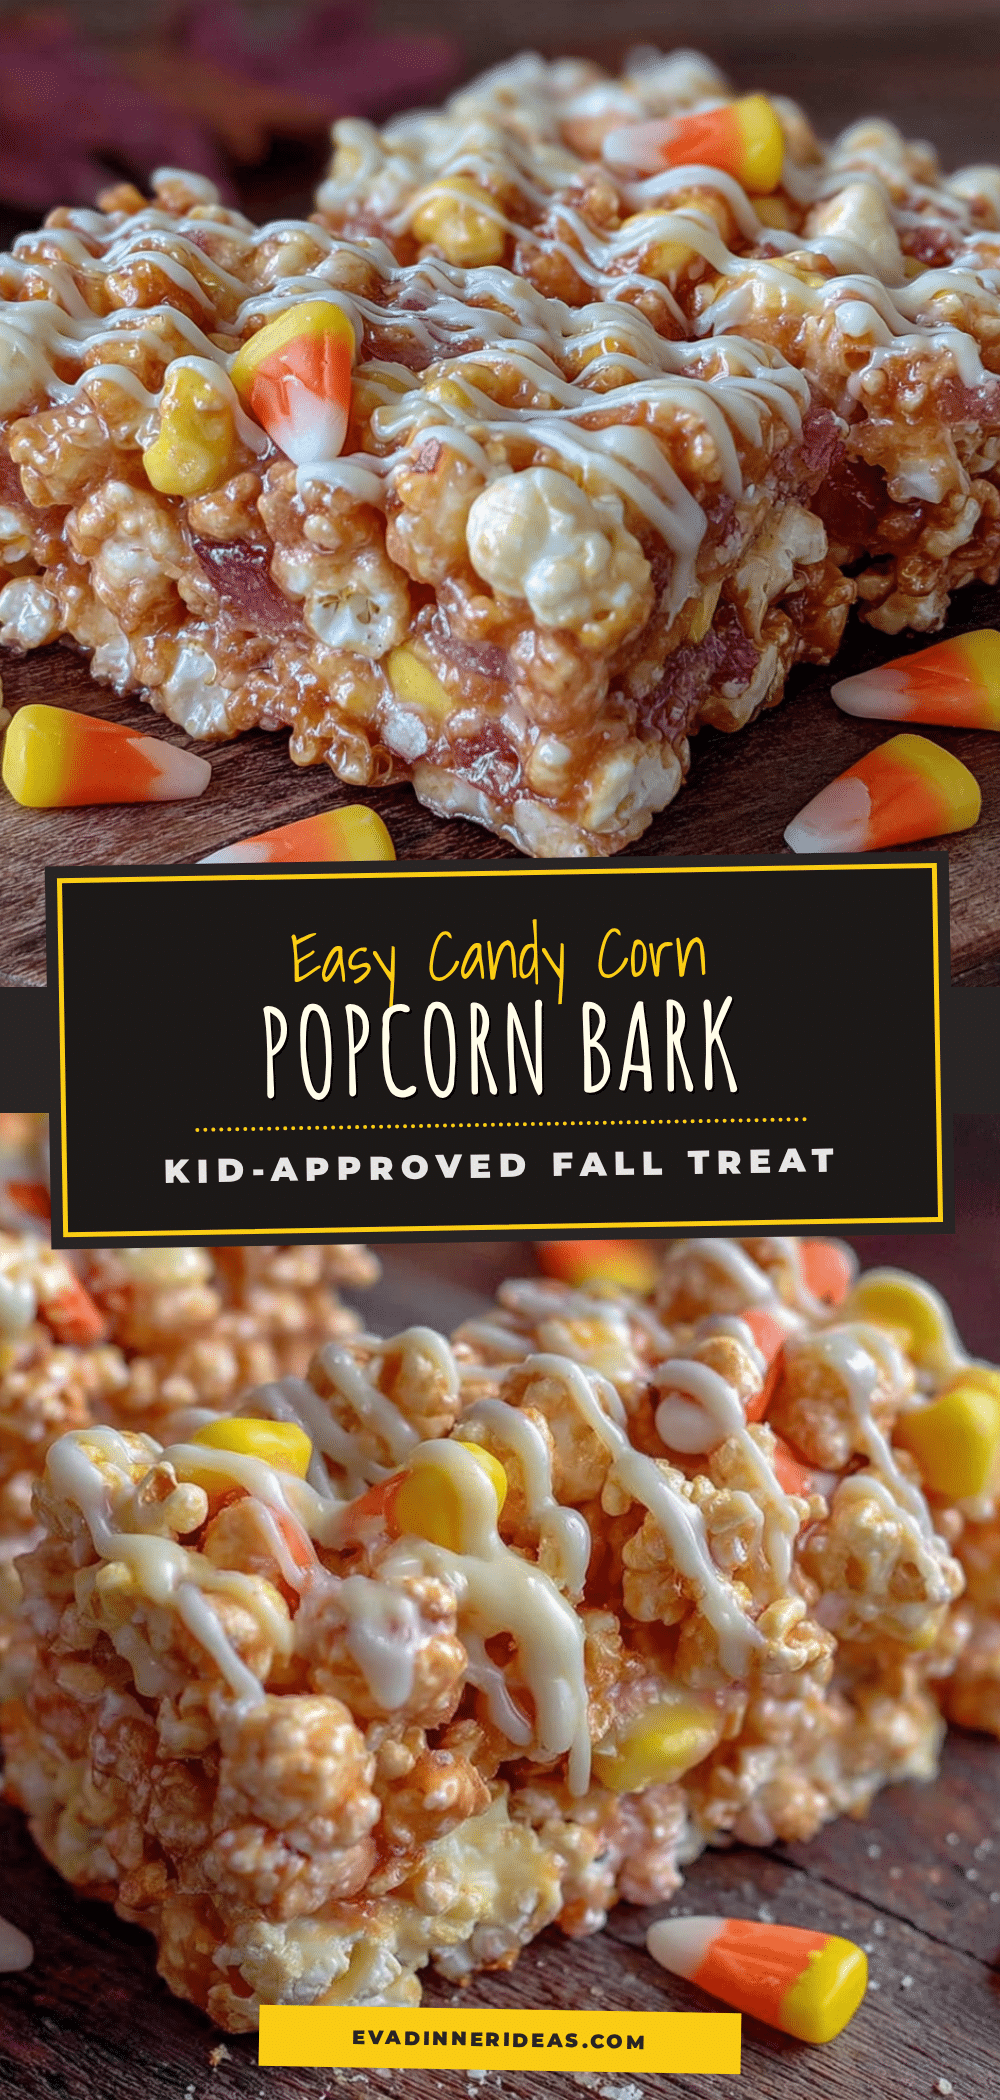
Easy Candy Corn Popcorn Bark: Best Fall Treat
This easy candy corn popcorn bark is a crunchy, sweet, and salty fall treat that comes together in about 15 minutes. It’s the perfect no-fuss dessert for Halloween parties, Thanksgiving, or cozy movie nights.
- Prep Time: 15 minutes
- Cook Time: 0 minutes
- Total Time: 45 minutes (including setting time)
- Yield: 8 servings 1x
- Category: Dessert
- Cuisine: American
Ingredients
- 8 cups popped popcorn (about 1/2 cup unpopped kernels, or one standard bag of microwave popcorn, lightly salted)
- 2 cups white chocolate chips (recommended: Ghirardelli or Guittard)
- 1 ½ cups candy corn (recommended: Brach’s)
- ½ cup salted peanuts (optional)
- ¼ teaspoon salt (if using unsalted popcorn)
- ¼ cup fall-themed sprinkles (optional)
- ¼ cup dried cranberries (optional)
- 2 tablespoons coconut oil (optional, for thinning chocolate)
Instructions
- Line a large baking sheet (11×17 inches or similar) with parchment paper or a silicone baking mat. Set aside.
- Pop the popcorn and let it cool to room temperature. Remove any unpopped or partially popped kernels.
- Place the white chocolate chips in a large microwave-safe bowl. Microwave in 30-second intervals, stirring well after each, until about 75% melted. Stir until smooth. If too thick, add 1 tablespoon of coconut oil and stir.
- Pour the melted white chocolate over the popcorn in a large bowl. Gently fold with a rubber spatula until evenly coated. Add candy corn and peanuts (if using) and fold gently.
- Transfer the mixture to the prepared baking sheet and spread into an even layer, about ½ to ¾ inch thick. Sprinkle any extra candy corn, peanuts, or sprinkles on top.
- Refrigerate for at least 30 minutes (or freeze for 15 minutes) until the chocolate is completely firm.
- Lift the bark from the baking sheet using the parchment paper handles. Break into irregular pieces with your hands. Store in an airtight container at room temperature for up to 5 days.
Notes
Don’t overheat the white chocolate—it burns easily. Use room temperature popcorn to prevent the chocolate from thinning. Fold candy corn gently to avoid melting. For best texture, let the bark set fully before breaking. The bark tastes even better on the second day.
Nutrition
- Serving Size: 1 cup (about 2 ounce
- Calories: 235
- Sugar: 22
- Sodium: 175
- Fat: 13.5
- Saturated Fat: 8
- Carbohydrates: 30
- Fiber: 1.5
- Protein: 4
Keywords: candy corn popcorn bark, fall treat, Halloween dessert, easy popcorn bark, white chocolate popcorn bark


