Introduction
The woman at the farmers market watched me hover over her mushroom display for a solid five minutes before she said anything. I was trying to decide between cremini and shiitake, completely overthinking it, and she just laughed. “You’re a baker, not a mushroom hunter,” she said, pointing at the smudge of flour on my sleeve. I laughed too, embarrassed, and we got to talking. Her name was Margaret, and she’d been selling at that market for twenty-two years. By the time I walked away with a bag of mixed mushrooms, she’d also handed me her mother’s recipe for brown butter chocolate chip cookies, scribbled on the back of a seed packet.
Honestly, I almost lost that seed packet twice. It sat crumpled in my coat pocket for a week before I found it again, the ink slightly smudged from a coffee spill. But when I finally made those cookies, I understood why she’d shared it. The brown butter changes everything. It adds this nutty, almost caramel warmth that regular butter just can’t touch. And for fall baking, when you want something that feels like a hug in cookie form, that’s exactly what you need. Maybe you’ve been there—standing in your kitchen, craving something cozy, but tired of the same old recipes. These cookies are the answer you didn’t know you were looking for.
I’ve made these cookies at least a dozen times since that market day, tweaking and testing until they were just right. The first batch, I forgot to chill the dough and ended up with flat, greasy discs. The second batch, I burned the butter so badly it tasted like regret. But the third batch? That was the one. Golden edges, soft centers, that deep nutty flavor running through every bite. I knew I had to share this recipe with you. Because some recipes are worth the trial and error, and this one is absolutely worth it.
Why You’ll Love This Recipe
These brown butter chocolate chip cookies aren’t just another cookie recipe. They’re the result of careful testing, a few happy accidents, and a lot of taste-testing (the sacrifices I make for you). Here’s why they deserve a permanent spot in your fall baking rotation:
- Deep, Cozy Flavor: Brown butter adds a nutty, toasty richness that regular butter can’t match. It’s like the difference between a plain sweater and one lined with cashmere—both keep you warm, but one feels special.
- Perfect Texture: These cookies come out with crispy edges and soft, chewy centers every time. The secret is a combination of melted brown butter and a brief chill time that lets the flavors meld.
- Simple Ingredients: You probably have everything you need already. No fancy extracts, no specialty flours—just good, honest ingredients that work together beautifully.
- Fall-Perfect Occasion: Whether you’re baking for a cozy night in, a Friendsgiving gathering, or just because the leaves are changing colors, these cookies fit the moment perfectly.
- Crowd-Pleasing Results: I’ve brought these to potlucks, office parties, and family dinners. They disappear every single time. Kids love them, adults sneak extras, and everyone asks for the recipe.
What makes this recipe different from the dozens of other chocolate chip cookie recipes out there? It’s the technique. Browning the butter isn’t just a flavor trick—it changes the entire chemistry of the cookie. The milk solids in the butter toast and develop those deep, caramelized notes that make you close your eyes after the first bite. Plus, using melted butter (instead of creaming softened butter with sugar) creates a denser, chewier texture that holds up beautifully. This isn’t just another version of chocolate chip cookies. It’s the version you’ll come back to again and again.
What Ingredients You Will Need
This recipe relies on simple, everyday ingredients to deliver something truly special. The magic happens when you take the time to brown the butter—it transforms the ordinary into the extraordinary. Here’s what you’ll need:
For the Cookies:
- 1 cup (226g) unsalted butter — Use good-quality butter here. I prefer Kerrygold or Plugrà for their higher fat content and richer flavor. The butter will be browned, so starting with a quality product makes a real difference.
- 1 ½ cups (300g) packed light brown sugar — Brown sugar adds moisture and that subtle molasses flavor that pairs perfectly with the nutty brown butter. Dark brown sugar works too for an even deeper flavor.
- ½ cup (100g) granulated sugar — White sugar helps create those crispy edges. Don’t skip it—the combination of sugars is key.
- 2 large eggs, room temperature — Cold eggs will seize the melted butter. Let them sit on the counter for 30 minutes before starting.
- 2 teaspoons vanilla extract — Pure vanilla extract, not imitation. It really does make a difference.
- 2 ¼ cups (280g) all-purpose flour — Spoon and level your flour for accurate measuring. Scooping directly from the bag can pack in too much flour and make dry cookies.
- 1 teaspoon baking soda — Make sure it’s fresh. Test by dropping a bit into vinegar—it should fizz vigorously.
- ½ teaspoon salt — I use fine sea salt. If you’re using table salt, reduce to ¼ teaspoon.
- 2 cups (340g) semi-sweet chocolate chips — I love Guittard or Ghirardelli for their consistent quality. You can also use a mix of chocolate chunks and chips for varied texture.
- Flaky sea salt, for finishing (optional but highly recommended) — Maldon or Jacobsen’s work beautifully.
Ingredient Notes & Substitutions:
- Flour: For a gluten-free version, use a 1:1 gluten-free baking flour blend. I’ve had good results with Bob’s Red Mill. Add 1 teaspoon of xanthan gum if your blend doesn’t include it.
- Butter: You can use salted butter, just reduce the added salt to ¼ teaspoon. The browning process works the same.
- Chocolate: Dark chocolate (60-70% cacao) works wonderfully here. Milk chocolate makes a sweeter cookie. White chocolate feels almost too decadent, but I won’t judge you.
- Eggs: For a vegan version, use flax eggs (2 tablespoons ground flaxseed mixed with 6 tablespoons water, let sit for 10 minutes). The texture will be slightly different but still delicious.
Equipment Needed
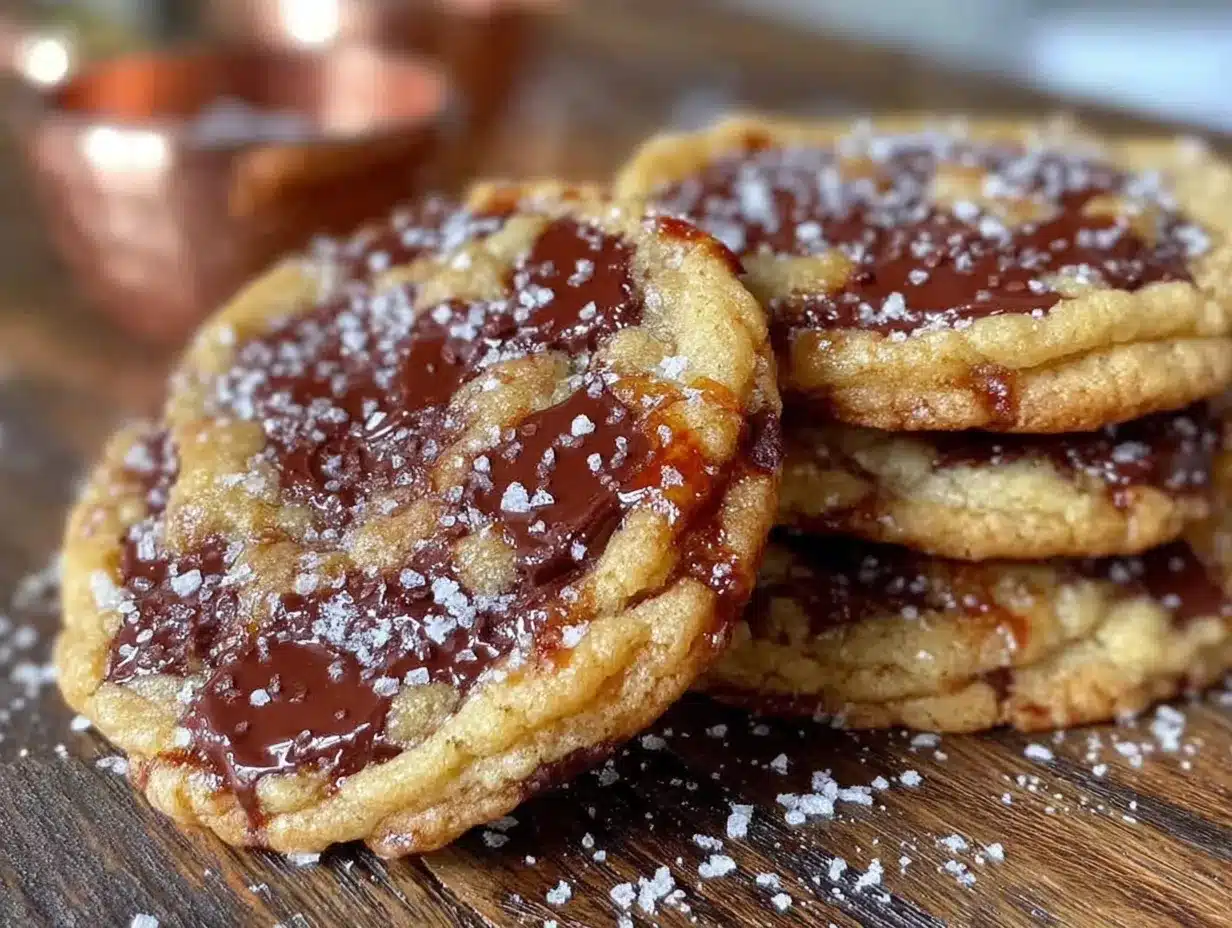
You don’t need a professional bakery setup to make these cookies. Here’s what you’ll want to have on hand:
- Medium saucepan — Light-colored is best so you can see the butter browning. Dark pans make it harder to gauge the color.
- Large mixing bowl — A sturdy glass or ceramic bowl works perfectly.
- Whisk — For combining wet ingredients smoothly.
- Rubber spatula — For folding in chocolate chips and scraping every last bit of dough.
- Baking sheets — I use rimmed half-sheet pans. If you only have dark nonstick pans, reduce the oven temperature by 25°F to prevent over-browning.
- Parchment paper or silicone baking mats — Parchment paper is my go-to for easy cleanup and even baking.
- Cookie scoop (about 2 tablespoons) — For consistent sizing. A #40 scoop is perfect.
- Cooling rack — Wire racks let air circulate so cookies cool evenly.
- Instant-read thermometer (optional) — Helpful for checking butter temperature if you’re nervous about the browning process.
Budget-Friendly Alternatives: No cookie scoop? Use two spoons to portion dough. No cooling rack? A clean kitchen towel works in a pinch. No parchment paper? Grease your baking sheets lightly with butter or nonstick spray.
Preparation Method
Let me walk you through this step by step. I’ve made these cookies so many times I could do it in my sleep, but I’ll share all the little tricks I’ve learned along the way.
- Brown the butter: Cut the butter into pieces and place in a medium saucepan over medium heat. Stir frequently with a rubber spatula or wooden spoon. The butter will melt, foam, and then start to crackle. Watch carefully as the foam subsides—you’ll see golden brown specks forming at the bottom. This happens quickly, so don’t walk away. When the butter smells nutty and is a deep amber color (about 5-7 minutes), remove it from the heat immediately. Pour into a heat-safe bowl to stop the cooking process. Let cool for 10-15 minutes—it should be warm but not hot when you add it to the sugars.
- Combine sugars and butter: In a large mixing bowl, whisk together the warm brown butter, brown sugar, and granulated sugar until well combined. It will look like wet sand. Let this mixture sit for 2-3 minutes—this helps the sugars dissolve slightly and creates a better texture.
- Add eggs and vanilla: Whisk in the eggs one at a time, making sure each is fully incorporated before adding the next. Add the vanilla extract and whisk until the mixture is smooth and glossy. It should look almost like caramel sauce at this point.
- Mix dry ingredients: In a separate bowl, whisk together the flour, baking soda, and salt. This ensures even distribution of the leavening agent and salt.
- Combine wet and dry: Add the flour mixture to the butter-sugar mixture in two additions, folding gently with a rubber spatula until just combined. Overmixing will develop gluten and make tough cookies. Stop when you see a few streaks of flour remaining.
- Fold in chocolate chips: Add the chocolate chips and fold until evenly distributed. The dough will be thick and slightly sticky. If it seems too soft to scoop, refrigerate for 15 minutes.
- Chill the dough: Cover the bowl with plastic wrap and refrigerate for at least 30 minutes, or up to 72 hours. This step is crucial—chilling solidifies the butter and allows the flavors to meld. The longer you chill, the deeper the flavor. I usually aim for 2 hours.
- Preheat and prepare: When ready to bake, preheat your oven to 375°F (190°C). Line two baking sheets with parchment paper or silicone mats.
- Scoop and shape: Use a cookie scoop to portion dough into balls about 2 tablespoons each. Place them 2 inches apart on the prepared baking sheets. For bakery-style cookies, tear each dough ball in half and press the rough sides together before placing on the sheet—this creates those lovely craggy edges.
- Bake: Bake one sheet at a time for 10-12 minutes, rotating halfway through. The edges should be golden brown and the centers should still look slightly underdone and puffy. They’ll continue to set as they cool. If you like softer cookies, pull them at 10 minutes. For crispier edges, go to 12 minutes.
- Cool and finish: Let cookies cool on the baking sheet for 5 minutes, then transfer to a wire rack. While still warm, sprinkle with flaky sea salt if using. The salt balances the sweetness and enhances the brown butter flavor beautifully.
Cooking Tips & Techniques
I’ve burned more batches of brown butter than I care to admit. Here’s what I’ve learned so you don’t have to make the same mistakes.
The Brown Butter Dance: Brown butter can go from perfect to burnt in about 15 seconds. Use a light-colored pan so you can see the color change clearly. Swirl the pan occasionally instead of stirring constantly—this helps the milk solids toast evenly. When you see amber specks and smell that nutty aroma, pull it off the heat immediately. Pour it into a cool bowl to stop the cooking. Trust me, burnt brown butter tastes bitter and acrid. It’s a waste of good butter and a ruined batch of cookies.
Temperature Matters: If your brown butter is too hot when you add the eggs, you’ll end up with scrambled eggs in your cookie dough. Let it cool for at least 10 minutes. Test it with your finger—it should feel warm, not hot. Room temperature eggs also help everything come together smoothly. Cold eggs will seize the butter and leave you with a lumpy mess.
The Chill Factor: I know waiting is hard, but don’t skip the chill time. Warm dough spreads too much, giving you flat, greasy cookies. Chilled dough bakes up thicker with better texture. If you’re in a hurry, shape the dough into balls before chilling—they’ll cool faster and be ready to bake in about 20 minutes. For make-ahead convenience, scoop the dough, freeze on a baking sheet, then transfer to a freezer bag. Bake from frozen, adding 2-3 minutes to the baking time.
Baking Sheet Strategy: Never place dough on a hot baking sheet—the butter will start melting before the cookies even hit the oven. Let sheets cool completely between batches, or run them under cold water and dry thoroughly. If you only have one sheet, portion all the dough onto parchment paper, then slide the parchment onto the cooled sheet for each batch.
Consistency is Key: Use a cookie scoop for uniform sizing. This ensures even baking and makes your cookies look professional. If you don’t have a scoop, use two spoons to portion equal amounts. A kitchen scale is even more precise—each ball should weigh about 40-45 grams.
Variations & Adaptations
Once you’ve mastered the basic recipe, feel free to play around. Here are some of my favorite variations:
Browned Butter Oatmeal Chocolate Chip Cookies: Replace 1 cup of the all-purpose flour with 1 cup of old-fashioned rolled oats. The oats add a chewy texture and nutty flavor that complements the brown butter beautifully. Reduce the baking soda to ¾ teaspoon. These are my go-to for fall mornings with coffee.
Maple Pecan Brown Butter Cookies: Reduce the brown sugar to 1 cup and add ¼ cup of pure maple syrup. Fold in 1 cup of toasted pecan pieces along with the chocolate chips. The maple and brown butter together are pure autumn magic. I made these for a Thanksgiving potluck and they were gone before the turkey was carved.
Gluten-Free Version: Substitute the all-purpose flour with a 1:1 gluten-free baking blend that contains xanthan gum. I’ve had excellent results with King Arthur’s Measure for Measure. Add an extra tablespoon of milk or water if the dough seems too dry. The texture will be slightly more delicate, but the flavor is still incredible.
Spiced Brown Butter Cookies: Add 1 teaspoon of cinnamon, ½ teaspoon of nutmeg, and ¼ teaspoon of cloves to the dry ingredients. This turns them into the ultimate fall cookie. I like to also swap half the chocolate chips for white chocolate chips—the creamy sweetness pairs perfectly with the warm spices.
Vegan Adaptation: Use vegan butter (I like Miyoko’s or Earth Balance) and follow the same browning process. Replace the eggs with flax eggs (2 tablespoons ground flaxseed + 6 tablespoons water). The cookies will be slightly less chewy but still delicious. Use dairy-free chocolate chips like Enjoy Life or Pascha.
Serving & Storage Suggestions
These cookies are best enjoyed warm, when the chocolate is still melty and the edges are crisp. But let’s be honest—they’re pretty amazing at any temperature.
Serving Ideas: Serve warm with a glass of cold milk, a scoop of vanilla ice cream, or a cup of hot apple cider. For an extra-indulgent dessert, sandwich two cookies with a layer of vanilla buttercream or salted caramel sauce. They’re also wonderful crumbled over yogurt or ice cream for a quick sundae.
Storage: Store baked cookies in an airtight container at room temperature for up to 5 days. Layer them with parchment paper to prevent sticking. If you live in a humid environment, add a slice of bread to the container—it absorbs excess moisture and keeps cookies soft. Replace the bread every other day.
Freezing: Baked cookies freeze beautifully for up to 3 months. Place them in a single layer on a baking sheet and freeze until solid, then transfer to a freezer-safe bag or container. Thaw at room temperature for about 30 minutes, or warm in a 300°F oven for 5 minutes. Unbaked dough balls can be frozen for up to 3 months—bake directly from frozen, adding 2-3 minutes to the baking time.
Flavor Development: Here’s a secret—these cookies actually taste better the next day. The brown butter flavor deepens and melds with the chocolate overnight. If you can resist eating them all immediately, store them in an airtight container and enjoy them over the next few days. They stay soft and delicious for days.
Nutritional Information & Benefits
Let’s be real—these are cookies, not health food. But knowing what’s in them helps you enjoy them mindfully. Here’s the approximate nutritional breakdown per cookie (based on 36 cookies):
| Nutrient | Amount per Cookie |
|---|---|
| Calories | 185 |
| Total Fat | 11g |
| Saturated Fat | 7g |
| Cholesterol | 30mg |
| Sodium | 95mg |
| Total Carbohydrates | 23g |
| Dietary Fiber | 1g |
| Sugars | 15g |
| Protein | 2g |
Health Highlights: Dark chocolate contains antioxidants called flavonoids that support heart health. Brown butter provides vitamin A and healthy fats. While these aren’t everyday snacks, they’re a wonderful treat for special occasions. I like to serve them after a hearty fall meal as a satisfying end to the evening.
Dietary Considerations: This recipe contains gluten, dairy, and eggs. For gluten-free, dairy-free, or vegan alternatives, see the variations section above. The cookies are nut-free as written, but be sure to check your chocolate chips for cross-contamination warnings if you have severe allergies.
Conclusion
These brown butter chocolate chip cookies are the kind of recipe that becomes tradition. They’re the cookies you make when you want to fill your kitchen with that nutty, toasty aroma that smells like autumn itself. They’re the cookies you share with friends, the ones they ask for again and again. And honestly, they’re the cookies you make just for yourself on a quiet Tuesday afternoon, because you deserve something warm and wonderful.
I hope you make these and love them as much as I do. Don’t be afraid to make them your own—add different mix-ins, adjust the sweetness, play with the spices. That’s the beauty of baking. And when you do make them, I’d love to hear about it. Leave a comment below, tag me in your photos, tell me about your own brown butter adventures. Because the best recipes are the ones we share, and this one deserves to be shared far and wide.
Happy fall baking, friend. Your kitchen is about to smell amazing.
Frequently Asked Questions
Can I use salted butter instead of unsalted?
Yes, but reduce the added salt to ¼ teaspoon. The browning process works the same with salted butter. Just be aware that different brands of salted butter have varying salt levels, so taste the dough (safely, without raw eggs) if you can.
Why did my cookies turn out flat?
Flat cookies usually mean the butter was too warm when you added the eggs, or the dough wasn’t chilled long enough. Make sure your brown butter has cooled to warm (not hot) before mixing, and chill the dough for at least 30 minutes. Also check that your baking soda is fresh—old baking soda loses its leavening power.
Can I make the dough ahead of time?
Absolutely! The dough can be refrigerated for up to 72 hours. In fact, longer chilling develops deeper flavor. You can also freeze the dough balls for up to 3 months. Bake frozen dough balls straight from the freezer, adding 2-3 minutes to the baking time.
How do I know when the brown butter is done?
Watch for the butter to turn a deep amber color with golden specks at the bottom of the pan. You’ll also smell a distinct nutty aroma. This happens quickly—about 5-7 minutes over medium heat. When you see those specks and smell that nuttiness, remove it from the heat immediately and pour into a cool bowl.
Can I use milk chocolate instead of semi-sweet?
Yes, but the cookies will be significantly sweeter. I recommend reducing the brown sugar by ¼ cup if you’re using milk chocolate. You can also use a mix of milk and dark chocolate for a balanced sweetness. White chocolate works too, but the cookies become very rich—perfect for a special treat.
Pin This Recipe!
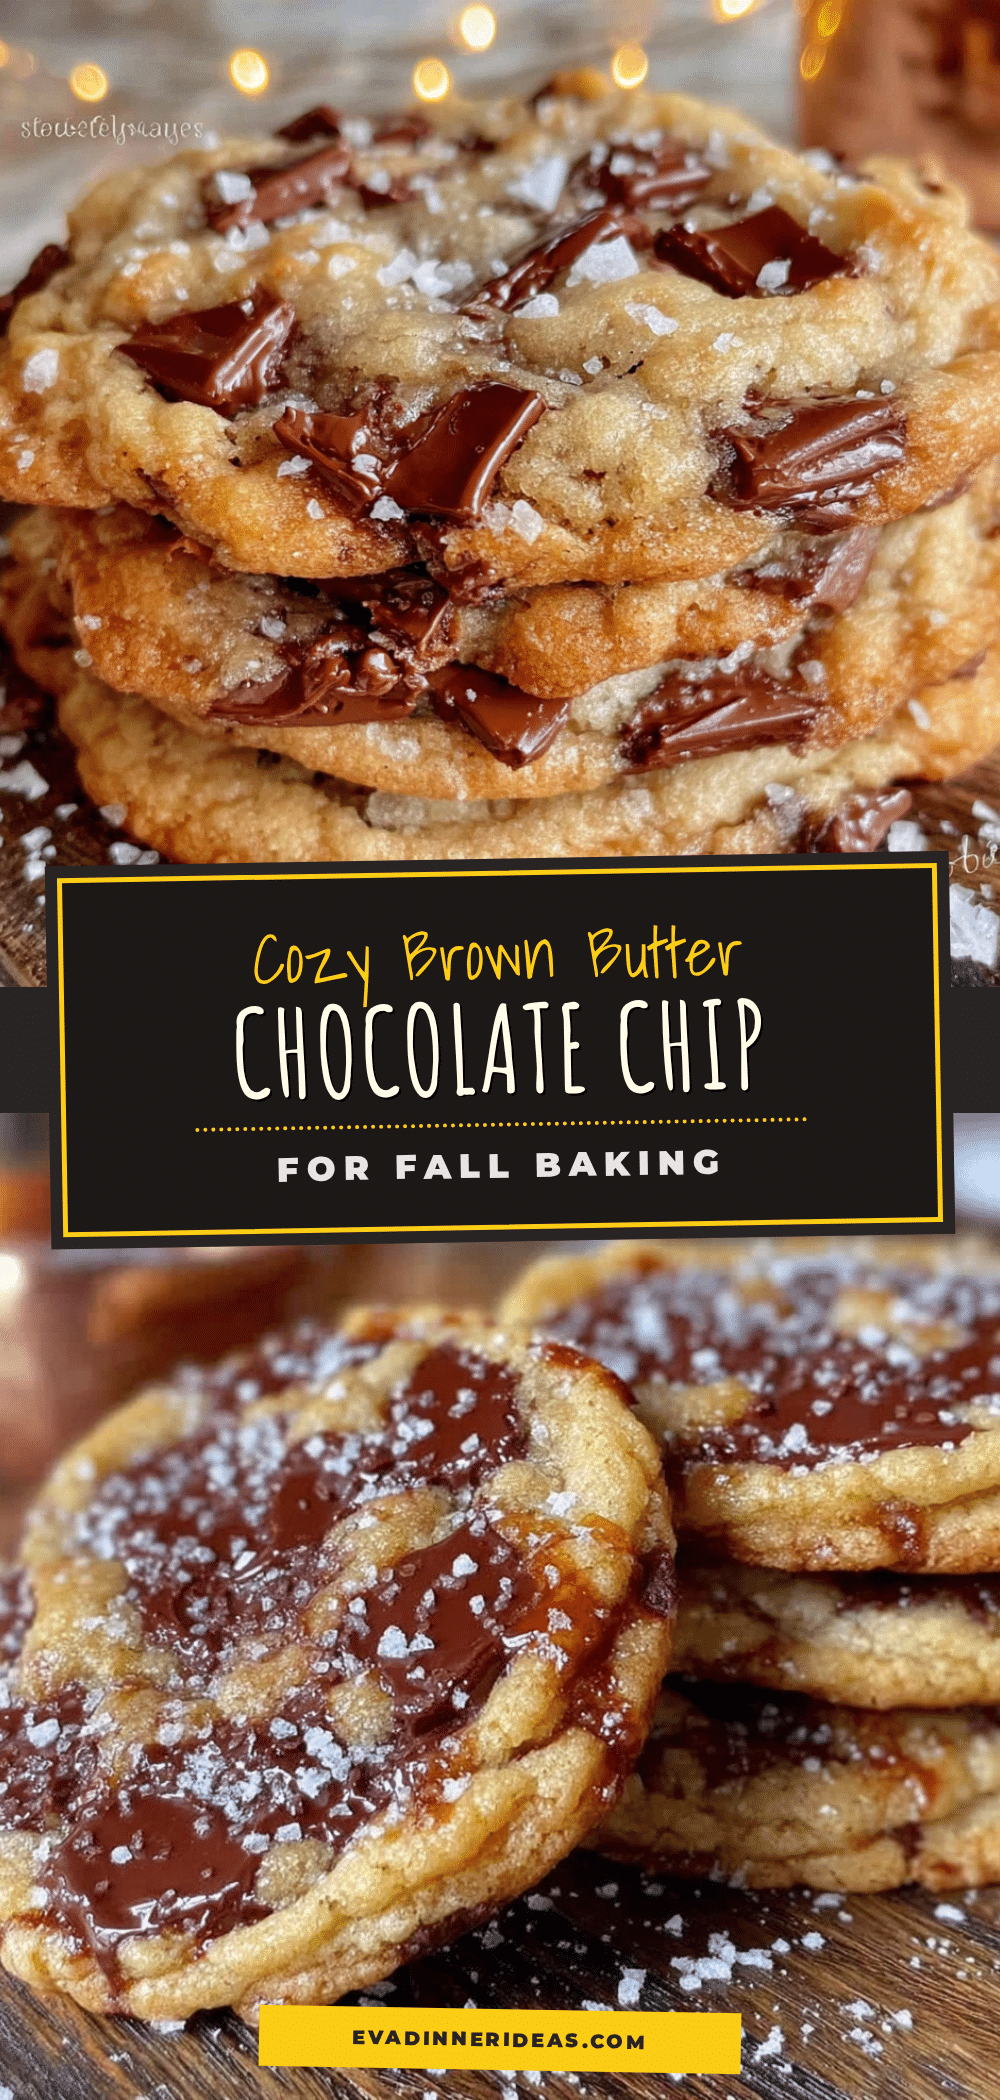
Cozy Brown Butter Chocolate Chip Cookies: Best Fall Baking Recipe
These brown butter chocolate chip cookies have deep, nutty flavor, crispy edges, and soft, chewy centers. Perfect for fall baking, they’re made with simple ingredients and a special technique that transforms ordinary cookies into something extraordinary.
- Prep Time: 15 minutes
- Cook Time: 12 minutes
- Total Time: 1 hour 30 minutes
- Yield: 36 cookies 1x
- Category: Dessert
- Cuisine: American
Ingredients
- 1 cup (226g) unsalted butter
- 1 ½ cups (300g) packed light brown sugar
- ½ cup (100g) granulated sugar
- 2 large eggs, room temperature
- 2 teaspoons vanilla extract
- 2 ¼ cups (280g) all-purpose flour
- 1 teaspoon baking soda
- ½ teaspoon salt
- 2 cups (340g) semi-sweet chocolate chips
- Flaky sea salt, for finishing (optional)
Instructions
- Brown the butter: Cut the butter into pieces and place in a medium saucepan over medium heat. Stir frequently with a rubber spatula or wooden spoon. The butter will melt, foam, and then start to crackle. Watch carefully as the foam subsides—you’ll see golden brown specks forming at the bottom. When the butter smells nutty and is a deep amber color (about 5-7 minutes), remove it from the heat immediately. Pour into a heat-safe bowl to stop the cooking process. Let cool for 10-15 minutes—it should…
- Combine sugars and butter: In a large mixing bowl, whisk together the warm brown butter, brown sugar, and granulated sugar until well combined. It will look like wet sand. Let this mixture sit for 2-3 minutes—this helps the sugars dissolve slightly and creates a better texture.
- Add eggs and vanilla: Whisk in the eggs one at a time, making sure each is fully incorporated before adding the next. Add the vanilla extract and whisk until the mixture is smooth and glossy.
- Mix dry ingredients: In a separate bowl, whisk together the flour, baking soda, and salt.
- Combine wet and dry: Add the flour mixture to the butter-sugar mixture in two additions, folding gently with a rubber spatula until just combined. Stop when you see a few streaks of flour remaining.
- Fold in chocolate chips: Add the chocolate chips and fold until evenly distributed. The dough will be thick and slightly sticky. If it seems too soft to scoop, refrigerate for 15 minutes.
- Chill the dough: Cover the bowl with plastic wrap and refrigerate for at least 30 minutes, or up to 72 hours.
- Preheat and prepare: When ready to bake, preheat your oven to 375°F (190°C). Line two baking sheets with parchment paper or silicone mats.
- Scoop and shape: Use a cookie scoop to portion dough into balls about 2 tablespoons each. Place them 2 inches apart on the prepared baking sheets. For bakery-style cookies, tear each dough ball in half and press the rough sides together before placing on the sheet—this creates those lovely craggy edges.
- Bake: Bake one sheet at a time for 10-12 minutes, rotating halfway through. The edges should be golden brown and the centers should still look slightly underdone and puffy. They’ll continue to set as they cool.
- Cool and finish: Let cookies cool on the baking sheet for 5 minutes, then transfer to a wire rack. While still warm, sprinkle with flaky sea salt if using.
Notes
Brown butter can go from perfect to burnt in about 15 seconds. Use a light-colored pan to see the color change clearly. Let brown butter cool for at least 10 minutes before adding eggs to avoid scrambling them. Chilling the dough is crucial for thicker cookies. For make-ahead convenience, freeze dough balls and bake from frozen, adding 2-3 minutes to baking time. These cookies taste even better the next day as the brown butter flavor deepens.
Nutrition
- Serving Size: 1 cookie
- Calories: 185
- Sugar: 15
- Sodium: 95
- Fat: 11
- Saturated Fat: 7
- Carbohydrates: 23
- Fiber: 1
- Protein: 2
Keywords: brown butter chocolate chip cookies, fall baking, easy cookie recipe, chewy cookies, homemade cookies


