There used to be a tiny bakery tucked behind a vintage bookstore in downtown Portland that made the most incredible pumpkin cheesecake bars I’d ever tasted. When they closed their doors three years ago—right before pumpkin season, of all times—I actually stood there reading the “For Lease” sign twice, hoping I’d misread it. That first autumn without them, I tried recreating those bars from memory maybe six times. The first batch was too dense. The third one? The crust crumbled into what basically looked like pumpkin-flavored gravel. But attempt number five—that was close. Close enough to keep going.
After eight tries—and honestly, a lot of gingersnap crumbs in my sink—I finally got it. These lighter pumpkin cheesecake bars with gingersnap crust are the version I’ve been chasing all this time. They’ve got that same creamy, spiced filling I remember, but I swapped out some of the heavy cream cheese for Greek yogurt to lighten things up without losing any of the indulgence. The gingersnap crust still snaps when you bite into it, just like the original. Maybe you’ve been there—that specific craving for a dessert that no longer exists in the world. This one’s for you.
Why You’ll Love This Recipe
Let me tell you why these lighter pumpkin cheesecake bars have become my go-to fall dessert, and why I think they’ll earn a permanent spot in your kitchen too.
- Quick & Easy : Comes together in about 30 minutes of active prep time, then the oven does the rest. Perfect for those weeknights when you need dessert but don’t want to spend hours in the kitchen.
- Simple Ingredients : No fancy grocery trips needed here. Canned pumpkin, cream cheese, Greek yogurt, and store-bought gingersnaps—you probably have most of this already.
- Perfect for Fall Gatherings : Great for Thanksgiving, Friendsgiving, or just a cozy Sunday afternoon. They travel well, which matters more than you’d think.
- Crowd-Pleaser : I brought these to a potluck last month and three different people asked for the recipe before I’d even finished my coffee.
- Unbelievably Delicious : The combination of spicy gingersnap crust and silky pumpkin filling is next-level comfort food. You won’t miss the extra calories one bit.
What makes these bars different from every other pumpkin cheesecake recipe out there? It’s the Greek yogurt trick. I spent a whole weekend testing ratios—too much yogurt and it gets tangy, too little and you’re back to full-fat cheesecake territory. This version hits that sweet spot where the texture stays luxuriously creamy but your body thanks you later. It’s the kind of dessert that makes you close your eyes after the first bite, honestly. Comfort food reimagined—healthier, faster, but with the same soul-soothing satisfaction.
What Ingredients You Will Need
This recipe uses simple, wholesome ingredients to deliver bold flavor and satisfying texture without the fuss. Most of these are pantry staples during fall, which makes these bars dangerously easy to whip up on a whim.
For the Gingersnap Crust
- 2 cups gingersnap cookie crumbs (about 8 ounces, or one standard box—I prefer Anna’s Ginger Thins for their subtle heat)
- 5 tablespoons unsalted butter, melted (use salted butter if that’s what you have, just skip the added salt)
- 2 tablespoons granulated sugar (optional, if your gingersnaps aren’t very sweet—taste your crumbs first)
- Pinch of salt (omit if using salted butter)
For the Pumpkin Cheesecake Filling
- 12 ounces reduced-fat cream cheese, softened (Neufchâtel works beautifully here—it’s about a third less fat than regular cream cheese)
- 1 cup plain Greek yogurt (I use 2% Fage for the best balance of creaminess and tang—full fat works too if you’re not watching calories)
- 1 cup canned pumpkin puree (not pumpkin pie filling—make sure you grab the 100% pure pumpkin, Libby’s is my go-to)
- 3/4 cup packed light brown sugar (dark brown sugar adds deeper molasses notes if you want a richer flavor)
- 2 large eggs, room temperature (cold eggs can make the filling seize up—trust me on this one)
- 1 teaspoon vanilla extract (pure vanilla makes a difference here, but imitation works in a pinch)
- 1 1/2 teaspoons pumpkin pie spice (or make your own: 1 teaspoon cinnamon, 1/2 teaspoon ginger, 1/4 teaspoon nutmeg, 1/4 teaspoon cloves)
- 1/2 teaspoon ground cinnamon (because you can never have too much cinnamon in pumpkin desserts)
- Pinch of salt (brings out all those warm spices)
For the Optional Topping
- 1/2 cup cold heavy cream (or coconut cream for dairy-free—chill the can overnight first)
- 1 tablespoon powdered sugar (optional, for lightly sweetened whipped cream)
- 1/4 teaspoon vanilla extract
- Extra gingersnap crumbs for garnish (because more crunch is never a bad idea)
Ingredient Selection Tips : Look for gingersnaps that have a noticeable spice kick—some brands lean more sweet than spicy, and you want that heat to cut through the creamy pumpkin filling. If your cookies are on the milder side, add an extra 1/4 teaspoon of ground ginger to the crust mixture.
Equipment Needed
- 9×9-inch square baking pan (an 8×8 works too, your bars will just be slightly thicker—adjust baking time by 5 minutes)
- Food processor or zip-top bag and rolling pin (for crushing cookies—I’ve used both, the bag method is oddly satisfying)
- Electric hand mixer or stand mixer (a whisk and some elbow grease works, but your arm will thank you for the mixer)
- Medium mixing bowl (for the crust)
- Large mixing bowl (for the filling)
- Rubber spatula (for scraping every last bit of that filling—waste not, want not)
- Parchment paper (makes lifting the bars out so much easier—don’t skip this)
- Measuring cups and spoons
- Sharp knife (for clean cuts—run it under hot water between slices for the neatest edges)
Budget-Friendly Options : If you don’t own a food processor, place the gingersnaps in a sturdy zip-top bag and go to town with a rolling pin. It takes about three minutes and doubles as a little arm workout. I actually prefer the uneven texture this method gives—it adds character to the crust.
Preparation Method
Let’s get baking. These lighter pumpkin cheesecake bars come together in stages, but none of them are complicated. Here’s exactly how to nail it.
- Preheat your oven to 350°F (175°C). Line your 9×9-inch pan with parchment paper, leaving some overhang on two opposite sides—this creates handles for lifting the bars out later. Lightly spray the parchment with cooking spray just to be safe.
- Make the gingersnap crust. If using a food processor, pulse the gingersnaps until you get fine crumbs—about 15-20 short pulses. You want a consistent texture, not powder. Pour the crumbs into a medium bowl, add the melted butter, sugar (if using), and salt. Stir with a fork until every crumb is moistened and the mixture looks like wet sand. Press this mixture firmly into the bottom of your prepared pan. I use the bottom of a measuring cup to get it really compact—loose crust means crumbly bars later.
- Bake the crust for 10 minutes. Set a timer. The crust should be fragrant and just starting to darken at the edges. Remove from the oven and let it cool while you make the filling. Leave the oven on—you’ll need it in a minute.
- Beat the cream cheese. In a large bowl, beat the softened cream cheese with an electric mixer on medium speed until smooth and fluffy—about 2 minutes. Scrape down the sides of the bowl with your spatula. This step matters more than you think; lumps in your cream cheese will show up in the final bars.
- Add the yogurt and sugar. Beat in the Greek yogurt and brown sugar until well combined, about 1 minute. The mixture should look silky and pale. Scrape the bowl again—I’m serious about this scraping thing.
- Incorporate the pumpkin and eggs. Add the pumpkin puree, eggs, vanilla, pumpkin pie spice, cinnamon, and salt. Mix on low speed until just combined—overmixing at this stage adds too much air, which can cause cracks on top of your bars. The batter should be smooth and a gorgeous deep orange color. Give it one last gentle stir with your spatula to catch anything the mixer missed.
- Pour the filling over the crust. Pour the pumpkin cheesecake mixture over your pre-baked crust. Use your spatula to spread it evenly to the edges. Tap the pan gently on the counter a few times to release any air bubbles hiding in the filling.
- Bake for 35-40 minutes. The edges should look set and slightly puffed, but the center should still jiggle just a little when you gently shake the pan—like firm Jell-O, not liquid. If the center looks completely solid, you’ve overbaked it. The bars will continue to set as they cool.
- Cool completely at room temperature. Place the pan on a wire rack and let it cool for about an hour. Don’t rush this—putting warm cheesecake in the fridge creates condensation that makes the top sticky.
- Chill for at least 4 hours (overnight is better). Once cooled, cover the pan with plastic wrap and refrigerate for at least 4 hours, preferably overnight. I know the waiting is the hardest part, but this step is non-negotiable for clean slices.
- Slice and serve. Lift the bars out using the parchment handles. Use a sharp knife to cut into 16 squares (4 rows by 4 rows). Wipe the knife clean between cuts for the prettiest presentation. Top with whipped cream and a sprinkle of extra gingersnap crumbs if you’re feeling fancy.
Sensory Cue Check : When you press on the crust mixture, it should hold together like damp sand at the beach. The filling, when poured, should ribbon off your spatula in thick folds. When baked, the kitchen will smell like a fall candle commercial—warm spices and toasted sugar.
Cooking Tips & Techniques
After eight attempts at these lighter pumpkin cheesecake bars, I’ve collected a few battle scars and a lot of wisdom. Here’s what I wish I’d known from the start.
Room temperature ingredients are not optional. Cold cream cheese creates lumps that no amount of mixing can fully fix. Leave your cream cheese and eggs on the counter for at least 30 minutes before starting. I learned this the hard way when my second batch came out looking like pumpkin cottage cheese—not a good look.
Don’t overbake, even if you’re nervous. I know it’s tempting to leave them in the oven until the center looks completely firm, but that’s how you get dry, cracked cheesecake. The center should still have a slight wobble when you pull it out. It will finish setting as it cools. My fourth batch was overbaked by about 7 minutes, and the texture was more scrambled egg than silky cheesecake.
Press that crust like you mean it. A loose crust falls apart when you try to cut or lift the bars. Use the bottom of a flat measuring cup or a drinking glass to really compact those gingersnap crumbs. I use a 1/4-cup measure and press down with about as much force as I’d use to close a stubborn jar lid.
Use a water bath alternative. Traditional cheesecake recipes call for a water bath to prevent cracking, but bars are more forgiving. If you’re worried about cracks on top, place a shallow pan of hot water on the oven rack below your cheesecake bars. The steam keeps the surface moist without the hassle of wrapping your pan in foil.
Patience is a virtue (and a strategy). Cutting into these bars before they’ve fully chilled is a recipe for sadness. The filling needs that 4-hour minimum to set properly. I once cut into a batch after only 2 hours, and it was more like pumpkin pudding than cheesecake bars. Still delicious, but not sliceable.
Variations & Adaptations
One of the best things about these lighter pumpkin cheesecake bars is how flexible they are. Here are some variations I’ve tested and loved.
Gluten-Free Version : Swap the regular gingersnaps for gluten-free gingersnaps—there are several good brands available now. I’ve used Partake’s ginger cookies with great results. The texture is slightly more delicate, so press the crust firmly and handle the bars gently when cutting.
Dairy-Free Adaptation : Use dairy-free cream cheese (Kite Hill makes a solid one) and coconut yogurt instead of Greek yogurt. The coconut flavor pairs surprisingly well with pumpkin and ginger. Use a vegan butter substitute for the crust. The texture will be slightly less firm, so chilling overnight becomes even more important.
Extra Spicy Version : If you’re like me and crave that gingersnap heat, add 1/2 teaspoon of ground ginger and 1/4 teaspoon of white pepper to the filling. I made this version for a friend who claimed pumpkin desserts were “too boring,” and she ate three bars in one sitting. Case closed.
Pecan Praline Topping : Before serving, drizzle the bars with a simple caramel sauce and sprinkle toasted pecans on top. Toast the pecans in a dry skillet over medium heat for about 3 minutes until fragrant—watch them closely, they burn fast.
Individual Mini Bars : Press the crust into a greased muffin tin instead of a square pan. Fill each cup about 3/4 full with the cheesecake mixture. Bake for 18-20 minutes at 350°F. These are perfect for parties where people want grab-and-go portions.
Serving & Storage Suggestions
These lighter pumpkin cheesecake bars are versatile enough for any occasion, but here’s how to serve and store them for the best experience.
Serving Temperature : Serve these bars cold, straight from the refrigerator. The texture is at its best when the filling is firm but not hard. If you’ve stored them in the freezer, let them thaw in the fridge for about 2 hours before serving.
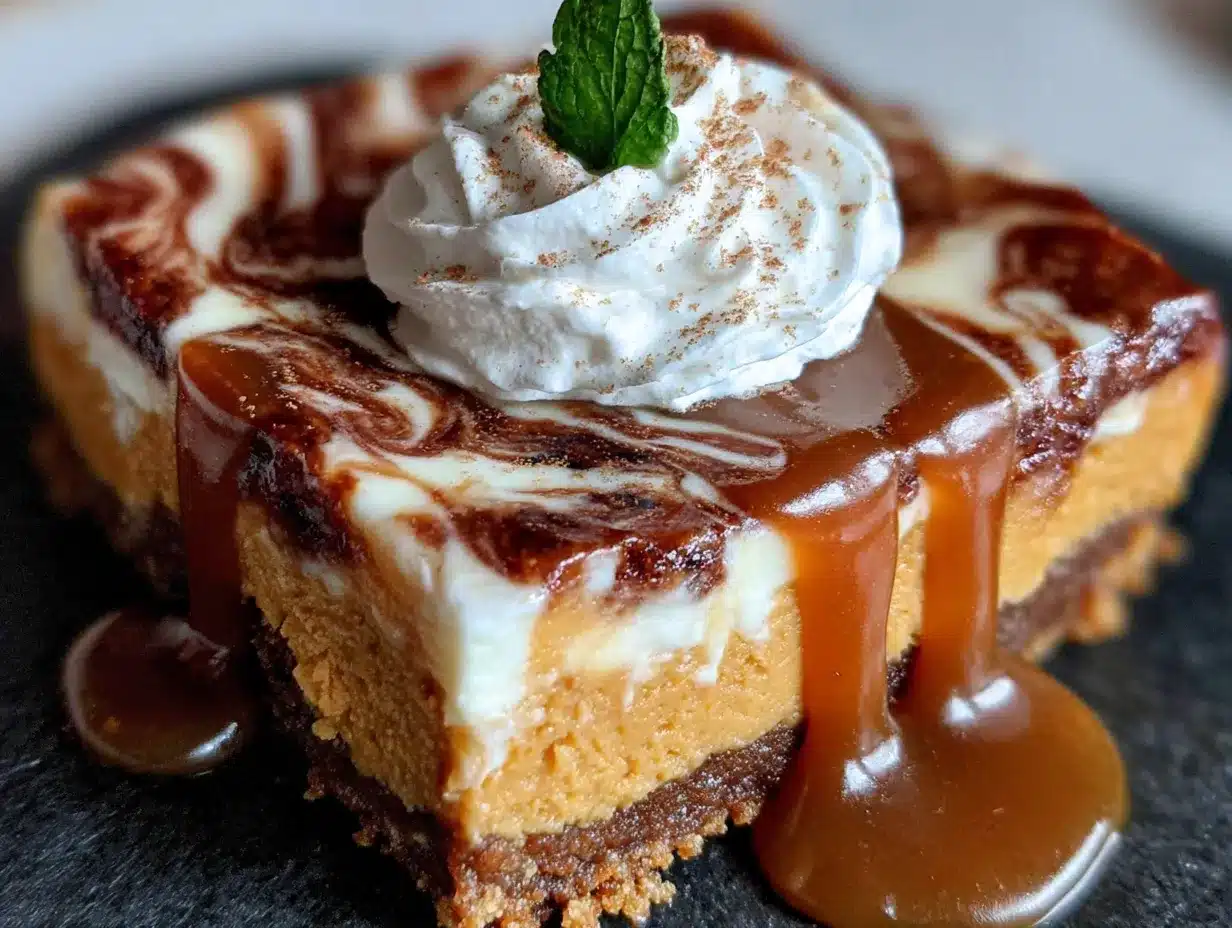
Presentation Ideas : A dollop of lightly sweetened whipped cream and a sprinkle of extra gingersnap crumbs makes these bars look bakery-worthy. For a fancier presentation, drizzle with a thin caramel sauce and add a few candied pecans on top. The contrast of creamy, crunchy, and smooth is stunning.
Complementary Dishes : These bars pair beautifully with a hot cup of chai tea or a spiced latte. For a dessert spread, serve them alongside apple crisp, pecan pie bites, or a simple vanilla panna cotta. They also work as a lighter ending to a heavy Thanksgiving meal.
Storage Instructions : Store leftover bars in an airtight container in the refrigerator for up to 5 days. Place a piece of parchment paper between layers if stacking them to prevent sticking. The flavors actually deepen after a day or two—the spices meld together and the crust softens slightly, becoming more like a cookie bottom.
Freezing Instructions : These bars freeze beautifully for up to 3 months. Wrap individual bars tightly in plastic wrap, then place them in a freezer-safe bag. To thaw, transfer to the refrigerator overnight. I always keep a stash in my freezer for unexpected guests or late-night pumpkin cravings.
Reheating Note : These bars are meant to be served cold. If you prefer a slightly softer texture, let them sit at room temperature for 10 minutes before serving. Do not microwave them—the crust will get soggy and the filling will weep.
Nutritional Information & Benefits
These lighter pumpkin cheesecake bars are proof that you don’t need to sacrifice flavor for a healthier dessert. Here’s the nutritional breakdown per bar (based on 16 servings).
| Nutrient | Amount Per Bar |
|---|---|
| Calories | 195 |
| Total Fat | 10g |
| Saturated Fat | 5g |
| Cholesterol | 45mg |
| Sodium | 180mg |
| Total Carbohydrates | 22g |
| Dietary Fiber | 1g |
| Sugars | 15g |
| Protein | 5g |
Health Benefits : Pumpkin is packed with vitamin A, which supports eye health and immune function. Greek yogurt adds protein and probiotics for gut health. By using reduced-fat cream cheese and yogurt instead of full-fat versions, you save about 80 calories and 8 grams of fat per serving compared to traditional pumpkin cheesecake bars.
Dietary Considerations : This recipe is vegetarian. For gluten-free or dairy-free options, check the variations section above. The bars contain eggs, dairy, and wheat (from the gingersnaps).
Conclusion
These lighter pumpkin cheesecake bars with gingersnap crust are everything I hoped they’d be when I started that quest three years ago. They’re creamy without being heavy, spiced without being overpowering, and just sweet enough to feel like a real treat. The gingersnap crust adds that little bit of heat and crunch that makes every bite interesting.
I love that this recipe proves you can have your pumpkin cheesecake and eat it too—without the guilt or the food coma afterward. Whether you’re bringing them to a holiday party, packing them for a fall picnic, or just treating yourself on a quiet Tuesday night, these bars deliver.
I’d love to hear how yours turn out! Did you try any of the variations? Did you add your own twist? Drop a comment below and let me know—I read every single one. And if you loved these, share the recipe with a friend who needs a little more pumpkin in their life. Happy baking, friends!
Frequently Asked Questions
Can I use fresh pumpkin instead of canned?
Yes, but you’ll need to roast and puree it first, then drain off any excess liquid using a cheesecloth or paper towels. Fresh pumpkin has more water than canned, which can make the filling too loose. I recommend starting with about 1 1/4 cups of fresh puree and draining it until you have exactly 1 cup.
Why did my cheesecake bars crack on top?
Cracks usually happen from overbaking or sudden temperature changes. Make sure you pull the bars out when the center still jiggles slightly. Also, let them cool gradually at room temperature before refrigerating—don’t put hot bars directly in the fridge. A shallow pan of water on the lower oven rack helps prevent cracks too.
Can I make these bars ahead of time?
Absolutely! These bars actually taste better after a day in the fridge—the flavors meld together beautifully. You can make them up to 3 days ahead and store them covered in the refrigerator. They’re perfect for holiday prep when you want to cross one dessert off your list early.
What can I use instead of gingersnaps for the crust?
Graham crackers work well in a pinch, though you’ll lose that spicy ginger kick. Add 1/2 teaspoon of ground ginger and 1/4 teaspoon of cinnamon to the graham cracker crumbs to mimic the flavor. Vanilla wafers or shortbread cookies are also good alternatives—just add some warm spices to the mix.
Can I freeze these pumpkin cheesecake bars?
Yes, they freeze beautifully for up to 3 months. Wrap each bar individually in plastic wrap, then place them in a freezer-safe bag or container. To serve, thaw in the refrigerator overnight. I recommend adding the whipped cream topping after thawing, not before freezing.
Pin This Recipe!
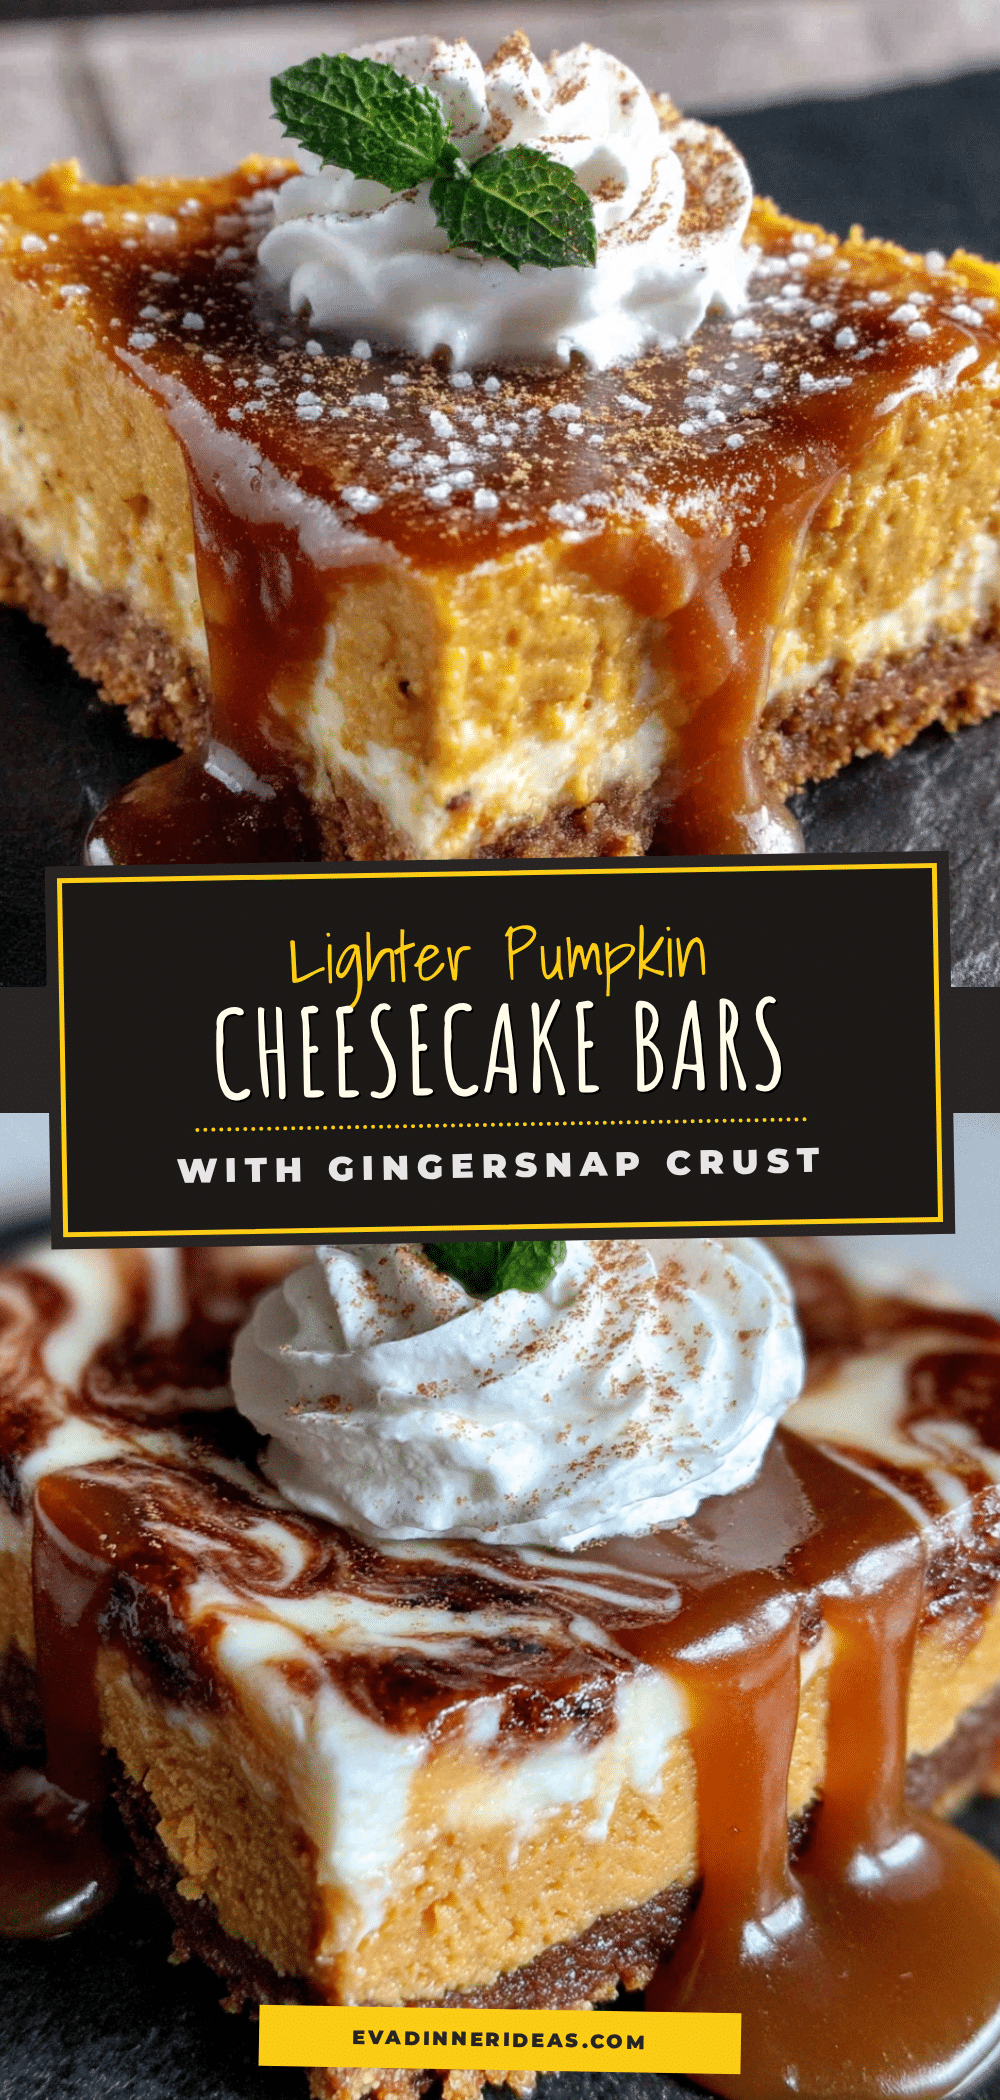
Lighter Pumpkin Cheesecake Bars with Gingersnap Crust
These lighter pumpkin cheesecake bars feature a creamy, spiced filling with a gingersnap crust, made healthier with Greek yogurt. Perfect for fall gatherings, they come together in about 30 minutes of active prep time.
- Prep Time: 30 minutes
- Cook Time: 40 minutes
- Total Time: 5 hours 10 minutes (includes chilling)
- Yield: 16 servings 1x
- Category: Dessert
- Cuisine: American
Ingredients
- 2 cups gingersnap cookie crumbs (about 8 ounces)
- 5 tablespoons unsalted butter, melted
- 2 tablespoons granulated sugar (optional)
- Pinch of salt
- 12 ounces reduced-fat cream cheese, softened
- 1 cup plain Greek yogurt (2% recommended)
- 1 cup canned pumpkin puree (not pumpkin pie filling)
- 3/4 cup packed light brown sugar
- 2 large eggs, room temperature
- 1 teaspoon vanilla extract
- 1 1/2 teaspoons pumpkin pie spice
- 1/2 teaspoon ground cinnamon
- Pinch of salt
- 1/2 cup cold heavy cream (for optional topping)
- 1 tablespoon powdered sugar (for optional topping)
- 1/4 teaspoon vanilla extract (for optional topping)
- Extra gingersnap crumbs for garnish (optional)
Instructions
- Preheat your oven to 350°F (175°C). Line a 9×9-inch pan with parchment paper, leaving overhang on two sides. Lightly spray with cooking spray.
- Make the crust: Pulse gingersnaps in a food processor until fine crumbs form. In a medium bowl, combine crumbs, melted butter, sugar (if using), and salt. Stir until mixture resembles wet sand. Press firmly into the bottom of the prepared pan.
- Bake the crust for 10 minutes until fragrant and edges darken. Remove and let cool. Keep oven on.
- In a large bowl, beat softened cream cheese with an electric mixer on medium speed until smooth and fluffy, about 2 minutes. Scrape down sides.
- Beat in Greek yogurt and brown sugar until well combined, about 1 minute. Scrape bowl again.
- Add pumpkin puree, eggs, vanilla, pumpkin pie spice, cinnamon, and salt. Mix on low speed until just combined. Do not overmix.
- Pour filling over crust and spread evenly. Tap pan gently on counter to release air bubbles.
- Bake for 35-40 minutes until edges are set and center jiggles slightly like firm Jell-O.
- Cool completely at room temperature on a wire rack, about 1 hour.
- Cover and refrigerate for at least 4 hours, preferably overnight.
- Lift bars out using parchment handles. Cut into 16 squares with a sharp knife, wiping blade between cuts. Serve cold with whipped cream and extra gingersnap crumbs if desired.
Notes
Room temperature ingredients are essential for a smooth filling. Do not overbake; the center should still jiggle slightly. For clean slices, chill overnight and wipe the knife between cuts. For a water bath alternative, place a shallow pan of hot water on the lower oven rack to prevent cracking.
Nutrition
- Serving Size: 1 bar
- Calories: 195
- Sugar: 15
- Sodium: 180
- Fat: 10
- Saturated Fat: 5
- Carbohydrates: 22
- Fiber: 1
- Protein: 5
Keywords: pumpkin cheesecake bars, lighter cheesecake, gingersnap crust, fall dessert, Thanksgiving dessert, healthy cheesecake


