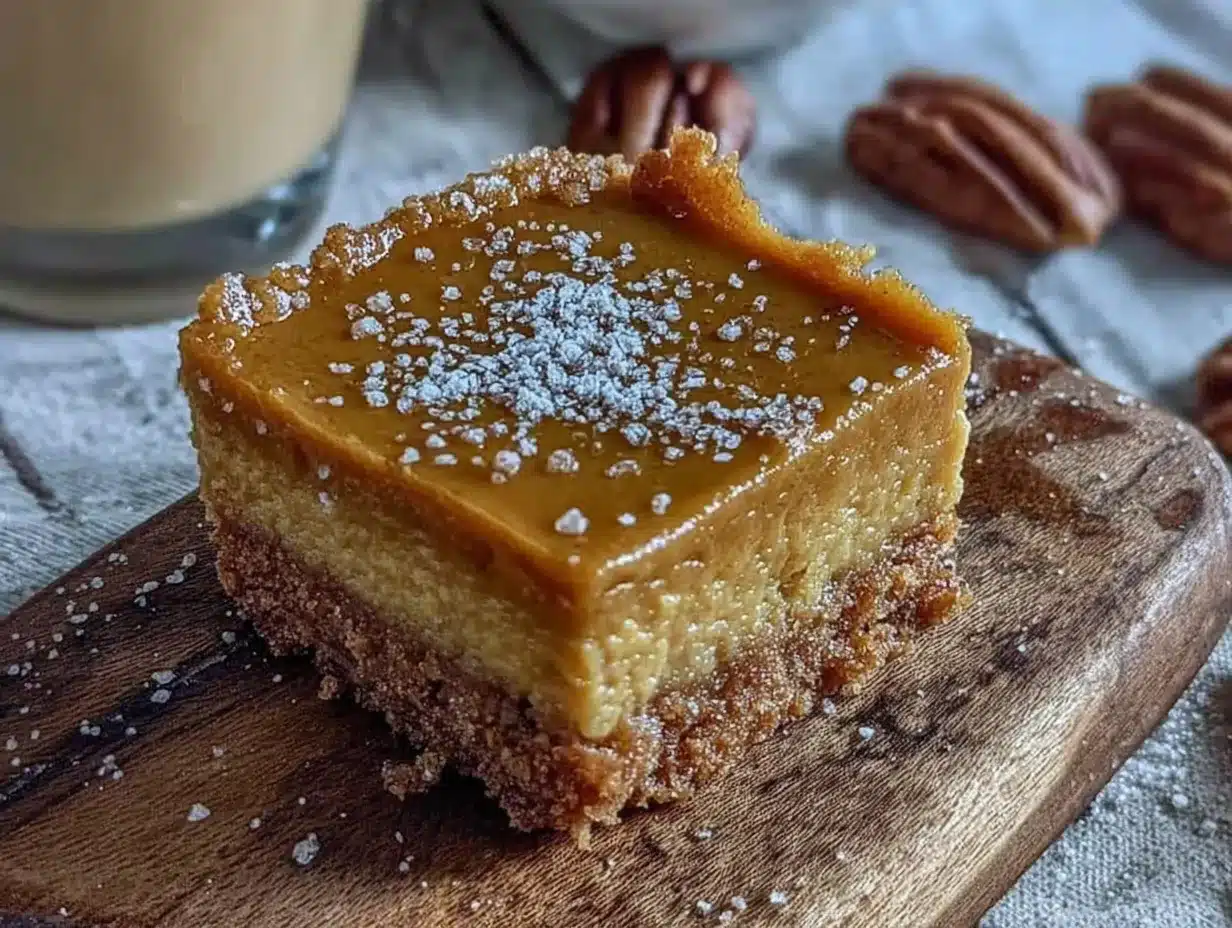
My niece Maya asked why I couldn’t just skip the crust. I stared at her, flour-dusted and slightly annoyed, holding my grandmother’s pastry blender mid-air. “Because,” I started, ready to launch into a lecture about structure and texture and the sacredness of a buttery base. I stopped. She was eight. She’d just watched me wrestle with gluten-free dough that was crumbling like a sandcastle at high tide. I looked at the sticky mess in the bowl, then back at her hopeful face. I scraped the whole thing into the trash.
And honestly? That was the best cooking decision I’ve made in years. That afternoon, we made these Easy Gluten-Free Pumpkin Pie Bars with nothing but a press-in crust that didn’t fight back. Maya stirred the filling with the serious concentration of a tiny pastry chef, and when we pulled the pan from the oven, the kitchen smelled like Thanksgiving had moved in early. The bars set perfectly. The “crust” held together better than any gluten-free dough I’d ever tortured myself with. I stood there, spatula in hand, humbled by a third-grader’s common sense.
You know that feeling when a recipe clicks into place and you wonder why you’ve been making it hard on yourself for so long? That’s these bars. They’ve become my go-to for fall gatherings, potlucks, and those random Tuesday nights when pumpkin pie cravings hit but you don’t have the energy for a full production. They’re easy in the way that good recipes should be—no stress, no special skills, just honest flavor that makes people close their eyes after the first bite.
Why You’ll Love This Recipe
I’ve tested this recipe six times. Six. Not because it was hard to get right, but because I kept tweaking it to make sure it was absolutely foolproof for busy weeknights and holiday chaos alike. Here’s what makes these pumpkin pie bars stand out from every other fall dessert recipe you’ll see this season:
- Quick & Easy: From start to oven in about 15 minutes. No rolling pins, no chilling dough, no special equipment needed.
- Simple Ingredients: Everything is available at your regular grocery store. No specialty flours or obscure sweeteners required.
- Perfect for Fall Gatherings: Great for Thanksgiving, Friendsgiving, potlucks, or just because it’s October and you deserve something warm and spiced.
- Crowd-Pleaser: I’ve served these to gluten-free friends and gluten-loving relatives alike. Everyone goes back for seconds. No one guesses they’re gluten-free unless I tell them.
- Unbelievably Delicious: The texture is exactly what you want—creamy pumpkin filling with that classic spice warmth, sitting on a buttery crust that actually stays together. It’s comfort food at its most reliable.
What makes this version different from the dozens of pumpkin bar recipes floating around the internet? It’s the crust. Instead of fighting with gluten-free pastry that cracks and crumbles, we’re using a press-in base made from simple ingredients that work every single time. No pastry blender required. No tears. Just a crust that holds up to the filling and tastes fantastic doing it.
This recipe isn’t just good for a gluten-free dessert—it’s good, period. It’s the kind you make when you want to impress without the stress, or when you need a little pumpkin therapy on a busy weeknight. One bite, and you’ll understand why I make these bars all autumn long.
What Ingredients You Will Need
This recipe uses straightforward, pantry-friendly ingredients to deliver that classic pumpkin pie flavor without any fuss. Most of these are probably already in your kitchen, which is exactly how weeknight baking should work.
For the Crust
- 1 ½ cups gluten-free all-purpose flour blend (I prefer Bob’s Red Mill 1-to-1 Baking Flour for the best texture—it already contains xanthan gum, which helps everything hold together)
- ½ cup unsalted butter, melted (salted butter works too—just reduce the added salt by ¼ teaspoon)
- ¼ cup granulated sugar (adds just enough sweetness to balance the spices)
- ¼ teaspoon salt (enhances the buttery flavor)
For the Pumpkin Filling
- 1 can (15 oz) pumpkin puree (not pumpkin pie filling—make sure you grab plain puree. Libby’s is my go-to brand for consistent results)
- ¾ cup granulated sugar (you can reduce to ⅔ cup if you prefer less sweetness)
- 2 large eggs, room temperature (cold eggs can make the filling lumpy—set them out 30 minutes before starting)
- 1 cup heavy cream (half-and-half or full-fat coconut milk work well for a lighter option)
- 2 teaspoons pumpkin pie spice (or make your own: 1 teaspoon cinnamon, ½ teaspoon ginger, ¼ teaspoon nutmeg, ¼ teaspoon cloves)
- 1 teaspoon vanilla extract (adds warmth and rounds out the spices)
- ¼ teaspoon salt (don’t skip this—it makes the flavors pop)
One note about the gluten-free flour: different blends behave differently. I’ve tested this with Cup4Cup and King Arthur Measure for Measure, and both worked beautifully. Avoid using coconut flour or almond flour alone—they don’t have the structure needed for this crust. If you’re not gluten-free, regular all-purpose flour works perfectly as a 1:1 swap.
The heavy cream is where the magic happens. It gives the filling that luxurious, silky texture that makes you wonder if you’re eating a fancy bakery dessert instead of a quick weeknight bar. If you’re dairy-free, canned coconut cream (the thick part from a can of full-fat coconut milk) works surprisingly well here.
Equipment Needed
Nothing fancy required here. Here’s what you’ll need:
- 8×8 inch baking pan (a 9×9 works too, but the bars will be slightly thinner—reduce baking time by 5 minutes)
- Parchment paper (for easy lifting and cleanup—this is non-negotiable for me)
- Two mixing bowls (one medium, one large)
- Whisk (a fork works in a pinch for the crust)
- Measuring cups and spoons
- Spatula or wooden spoon
If you don’t have parchment paper, greasing the pan well with butter or non-stick spray will work. Just be extra careful when cutting and removing the first piece—it might stick a little. I learned this the hard way and spent 15 minutes chiseling bar-shaped chunks out of my favorite baking dish. Parchment paper is worth the 50 cents, I promise.
No electric mixer needed for this recipe. Everything comes together with elbow grease and a whisk, which means less cleanup and fewer dishes. My kind of weeknight baking.
Preparation Method
- Preheat your oven to 350°F (175°C). Line your 8×8 pan with parchment paper, leaving some overhang on two opposite sides. This creates handles so you can lift the entire block of bars out later. Fold down the overhanging edges so they don’t droop into the oven.
- Make the crust: In a medium bowl, whisk together the gluten-free flour, sugar, and salt. Pour in the melted butter and stir with a spatula until the mixture looks like wet sand and holds together when pressed between your fingers. It should feel slightly greasy but not wet. If it seems too dry, add another tablespoon of melted butter.
- Press the crust into the pan: Dump the crust mixture into your prepared pan. Press it down firmly and evenly—I use the bottom of a flat measuring cup to get it smooth and compact. Don’t leave any loose crumbs, or they’ll float up into the filling later. Go all the way to the edges and into the corners. Pop the pan into the oven and bake for 12 minutes, until the edges are just barely golden and the crust smells toasty.
- While the crust bakes, make the filling: In a large bowl, whisk the pumpkin puree, sugar, eggs, heavy cream, pumpkin pie spice, vanilla, and salt until completely smooth. Whisk vigorously—you want no streaks of egg white or lumps of spice. The mixture should be glossy and uniform, like thick paint. Set it aside while the crust finishes baking.
- Pour the filling over the hot crust: This is important—don’t let the crust cool down first. As soon as it comes out of the oven, carefully pour the filling over the hot crust. The heat helps the filling start setting immediately and prevents a soggy bottom. Use a spatula to spread it gently to the edges if needed.
- Bake the bars: Return the pan to the oven and bake for 35-40 minutes. The edges should look set and slightly puffed, while the center will still jiggle just a tiny bit when you gently shake the pan. That slight jiggle is your cue that the bars are perfectly baked—they’ll continue setting as they cool. If the center looks liquid or sloshy, give it 5 more minutes.
- Cool completely: Place the pan on a wire rack and let it cool to room temperature, about 2 hours. Then transfer to the refrigerator and chill for at least 2 more hours—overnight is even better. This step is crucial. Warm pumpkin bars are delicious but messy. Cold bars cut cleanly into perfect squares.
- Slice and serve: Use the parchment handles to lift the entire block out of the pan. Place on a cutting board and slice into 9 or 16 squares, depending on how generous you’re feeling. Wipe the knife clean between cuts for the neatest edges.
Cooking Tips & Techniques
Here’s what I’ve learned from making these bars more times than I care to count:
Don’t overbake the crust. The first time I made these, I baked the crust for 18 minutes because I was distracted by a phone call. It came out dark and slightly hard. The bars were still good, but the crust was more “crunchy” than “tender.” Twelve minutes is perfect—you want it just set and lightly golden, not fully baked through, since it’ll bake again with the filling.
Room temperature ingredients matter. I know, I know—every recipe says this and it feels like a hassle. But cold eggs or cold cream can make your filling look slightly curdled or separated. If you forgot to set things out, place the eggs in a bowl of warm water for 5 minutes and microwave the cream for 10 seconds. Problem solved.
Patience with cooling is non-negotiable. My biggest failure with this recipe was trying to rush the cooling process. I popped the pan in the freezer for 30 minutes, thinking I was being clever. The bars were icy on the edges and still warm in the middle, and slicing them was a disaster. They tasted fine, but they looked like a pumpkin pie crime scene. Give them the full cooling and chilling time. Your future self will thank you when you’re serving picture-perfect squares.
Whisk, don’t beat. Over-mixing the filling can incorporate too much air, which creates bubbles and cracks on the surface. Whisk just until everything is combined and smooth. A few gentle strokes are all you need.
Check for doneness with confidence. The center should jiggle like firm Jell-O, not like a liquid. If you’re unsure, insert a knife about an inch from the center—it should come out mostly clean. The very center can look slightly wet; that’s okay. It’ll set as it cools.
Variations & Adaptations
One of the best things about this recipe is how flexible it is. Here are some ways to make it your own:
Dairy-Free Version: Swap the melted butter in the crust with coconut oil or a vegan butter stick (I like Miyoko’s). Replace the heavy cream with full-fat canned coconut cream. The flavor changes slightly—more coconut notes—but the texture stays beautifully creamy. My sister-in-law, who’s dairy-free, says these are the best pumpkin bars she’s ever had.
Lower Sugar Option: Reduce the sugar in the filling to ½ cup and use a sugar substitute like monk fruit sweetener in the crust. The bars will be less sweet but still plenty flavorful from the pumpkin and spices. I made this version for my dad, who’s watching his sugar intake, and he ate three in one sitting without complaint.
Spice It Up: Add ¼ teaspoon of cayenne pepper or chipotle powder to the filling for a warm, smoky kick that pairs amazingly with the pumpkin. This sounds weird, I know, but try it once and you’ll understand. The heat doesn’t overpower—it just makes the spices sing louder.
Nutty Crust: Replace ¼ cup of the gluten-free flour with finely ground pecans or almonds. Toast the nuts first for extra flavor. The crust becomes more fragile but also more flavorful. Press it firmly and handle the finished bars gently.
Chocolate Drizzle: Melt ¼ cup of dark chocolate chips with a teaspoon of coconut oil and drizzle over the cooled bars. The chocolate and pumpkin combination is ridiculously good. I did this for a Halloween party and the bars disappeared in 10 minutes.
Serving & Storage Suggestions
These bars are best served cold or at room temperature. I prefer them straight from the fridge—the filling firms up beautifully and the flavors are more pronounced. If you like a softer texture, let them sit on the counter for 15 minutes before serving.
For presentation, I like to top each bar with a small dollop of whipped cream and a light dusting of cinnamon. It makes them look fancy with almost zero effort. For a more decadent option, serve with a scoop of vanilla ice cream and a drizzle of caramel sauce. That’s my go-to when I’m serving these as a dessert for company.
These bars pair beautifully with a hot cup of coffee or spiced chai latte. The warmth of the drink balances the cool, creamy bars perfectly. For a fall brunch spread, serve them alongside a pumpkin spice latte and some fresh apple slices.
Storage: Keep the bars in an airtight container in the refrigerator for up to 5 days. Place a sheet of parchment paper between layers if stacking. They actually get better on day two, as the flavors meld and the texture settles.
Freezing: These freeze like a dream. Wrap individual bars tightly in plastic wrap, then place them in a freezer-safe bag or container. They’ll keep for up to 3 months. To thaw, transfer to the refrigerator overnight or let sit at room temperature for about an hour. I always keep a stash in my freezer for unexpected guests or sudden pumpkin cravings.
Reheating: If you prefer warm bars (which I sometimes do, especially on chilly evenings), microwave individual portions for 15-20 seconds. Don’t overheat, or the filling can become runny. A quick blast in a 300°F oven for 5-7 minutes works too.
The flavors actually deepen over the first 24 hours, so don’t be disappointed if they taste even better the next day. That’s just the spices settling in and getting comfortable.
Nutritional Information & Benefits
Per bar (based on 9 servings): Approximately 280 calories, 16g fat, 32g carbohydrates, 4g protein, 2g fiber, 18g sugar. Values are estimates and will vary based on specific ingredients used.
These bars actually have some redeeming nutritional qualities hiding behind that delicious pumpkin flavor. Pumpkin puree is packed with vitamin A (over 200% of your daily needs per serving), which supports eye health and immune function. It’s also a good source of fiber, which helps with digestion and keeps you feeling satisfied.
The eggs provide high-quality protein and important nutrients like choline, which supports brain health. And the spices—cinnamon, ginger, nutmeg—aren’t just for flavor. They have anti-inflammatory properties and can help regulate blood sugar levels.
This recipe is naturally gluten-free (obviously) and can easily be made dairy-free with the substitutions mentioned above. It contains eggs and dairy in the standard version, so be mindful of those allergens when serving guests. For a nut-free version, skip the nutty crust variation and stick with the basic gluten-free flour blend.
I’m not saying these are health food—they’re dessert, after all. But compared to traditional pumpkin pie, which can pack 350-400 calories per slice with more sugar and saturated fat, these bars are a reasonable indulgence. They satisfy that pumpkin craving without derailing your whole day.
Conclusion
These Easy Gluten-Free Pumpkin Pie Bars have become my most-requested fall recipe, and I’m not surprised. They capture everything I love about pumpkin pie—the silky filling, the warm spices, the nostalgic comfort—without the stress of a traditional pie crust. They’re forgiving, adaptable, and genuinely delicious.
I think about that afternoon with Maya every time I make these bars. She taught me something important that day: sometimes the best recipes come from letting go of what you think you know and listening to a simpler idea. No complicated techniques, no fancy equipment, no stress. Just good ingredients and the willingness to try something different.
I’d love to hear how these turn out for you. Did you try any variations? Did your family guess they were gluten-free? Drop a comment below and let me know. And if you’re looking for another easy fall dessert, you might enjoy my crispy garlic chicken for a savory option that’s just as weeknight-friendly.
Happy baking, friends. May your kitchen smell like cinnamon and your heart feel full.
Frequently Asked Questions
Can I use fresh pumpkin instead of canned?
Yes, but you’ll need to cook and puree it first. Roast a small sugar pumpkin at 400°F for 45 minutes, scoop out the flesh, and blend until smooth. Drain any excess liquid through a cheesecloth or paper towel—fresh pumpkin can be more watery than canned. Use the same amount called for in the recipe.
Why did my crust turn out crumbly?
This usually happens when the crust isn’t pressed firmly enough into the pan, or if the gluten-free flour blend doesn’t contain a binder like xanthan gum. Make sure you’re pressing the crust down with even, firm pressure—I use the bottom of a measuring cup to really compact it. If your flour blend lacks xanthan gum, add ½ teaspoon to the crust mixture.
Can I make these bars ahead of time?
Absolutely! These are actually better made a day ahead. Prepare and bake the bars completely, then refrigerate overnight. The flavors meld and the texture becomes perfectly set. They’ll keep in the fridge for up to 5 days, making them ideal for holiday prep.
My filling cracked on top. What went wrong?
Cracks usually mean the bars were overbaked or the oven temperature was too high. The filling should still have a slight jiggle in the center when you take it out—it will continue cooking from residual heat. Also, make sure you’re not over-whisking the filling, which incorporates too much air and can cause cracking.
Can I double this recipe for a 9×13 pan?
Yes! Double all ingredients and bake in a 9×13 pan. The crust may need an extra 2-3 minutes of pre-baking, and the filled bars will need about 40-45 minutes total. Check for doneness using the same jiggle test. You’ll get about 24 bars from the larger pan.
Pin This Recipe!
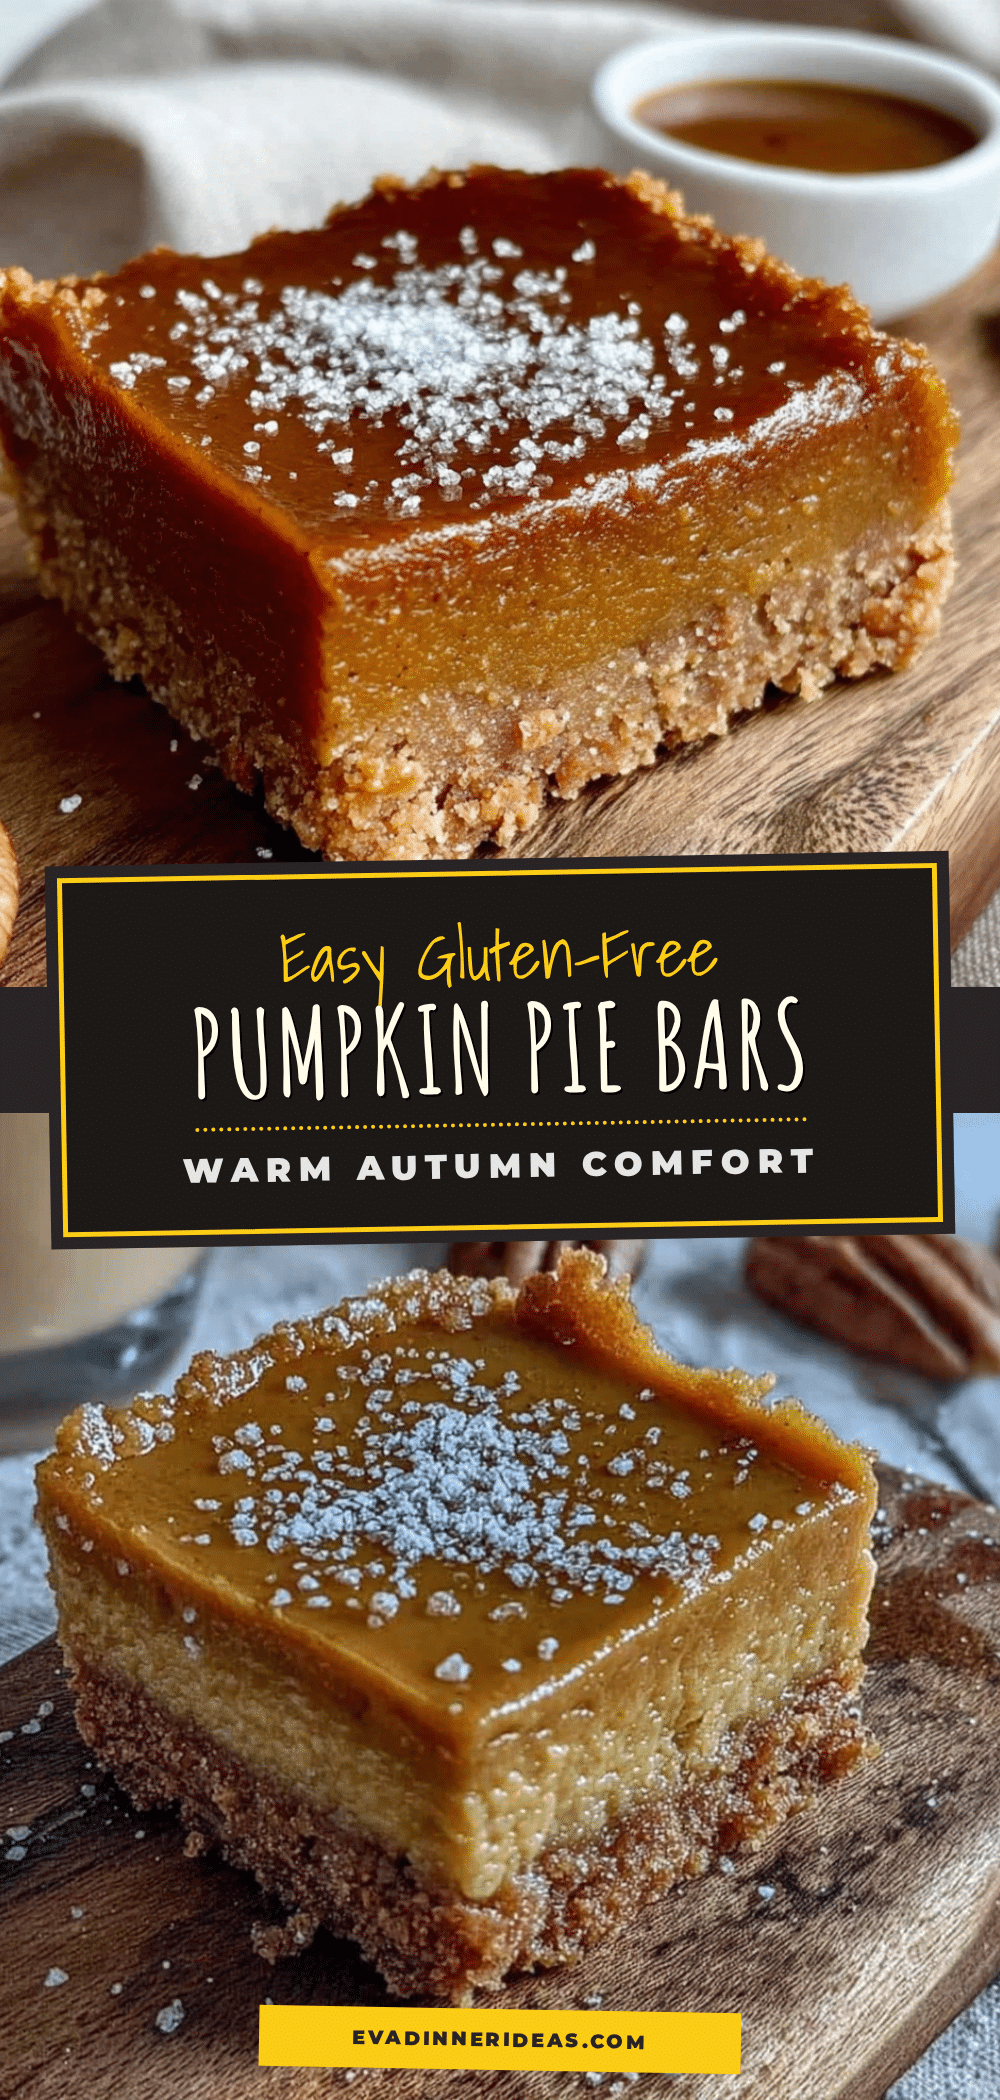
Easy Gluten-Free Pumpkin Pie Bars: Best Fall Dessert
These Easy Gluten-Free Pumpkin Pie Bars feature a press-in crust and creamy pumpkin filling for a stress-free fall dessert. Perfect for Thanksgiving, potlucks, or weeknight cravings, they’re naturally gluten-free and absolutely delicious.
- Prep Time: 15 minutes
- Cook Time: 47-52 minutes (12 min crust + 35-40 min filled)
- Total Time: 2 hours 2 minutes to 2 hours 7 minutes (plus chilling time)
- Yield: 9 servings 1x
- Category: Dessert
- Cuisine: American
Ingredients
- 1 ½ cups gluten-free all-purpose flour blend (e.g., Bob’s Red Mill 1-to-1 Baking Flour)
- ½ cup unsalted butter, melted
- ¼ cup granulated sugar
- ¼ teaspoon salt
- 1 can (15 oz) pumpkin puree (not pumpkin pie filling)
- ¾ cup granulated sugar (or ⅔ cup for less sweetness)
- 2 large eggs, room temperature
- 1 cup heavy cream (or half-and-half or full-fat coconut milk)
- 2 teaspoons pumpkin pie spice (or 1 tsp cinnamon, ½ tsp ginger, ¼ tsp nutmeg, ¼ tsp cloves)
- 1 teaspoon vanilla extract
- ¼ teaspoon salt
Instructions
- Preheat oven to 350°F (175°C). Line an 8×8 inch baking pan with parchment paper, leaving overhang on two opposite sides.
- Make the crust: In a medium bowl, whisk together gluten-free flour, ¼ cup sugar, and ¼ teaspoon salt. Pour in melted butter and stir until mixture resembles wet sand and holds together when pressed.
- Press crust mixture firmly and evenly into the prepared pan using a flat measuring cup. Bake for 12 minutes until edges are lightly golden.
- While crust bakes, make the filling: In a large bowl, whisk together pumpkin puree, ¾ cup sugar, eggs, heavy cream, pumpkin pie spice, vanilla, and ¼ teaspoon salt until completely smooth and glossy.
- Pour filling over the hot crust immediately after removing from oven. Spread gently to edges if needed.
- Bake for 35-40 minutes until edges are set and center jiggles slightly when shaken. Center should not be liquid.
- Cool completely on a wire rack (about 2 hours), then refrigerate for at least 2 hours (overnight is best) until fully set.
- Use parchment handles to lift bars out of pan. Slice into 9 or 16 squares, wiping knife clean between cuts.
Notes
Don’t overbake the crust—12 minutes is perfect. Use room temperature ingredients to avoid lumpy filling. Patience with cooling is crucial; chill at least 2 hours for clean slices. For dairy-free, substitute coconut oil or vegan butter in crust and full-fat coconut cream for heavy cream. For lower sugar, reduce filling sugar to ½ cup and use monk fruit sweetener in crust. Add ¼ tsp cayenne for a spicy kick. Bars keep in fridge up to 5 days or freeze up to 3 months.
Nutrition
- Serving Size: 1 bar (based on 9 se
- Calories: 280
- Sugar: 18
- Sodium: 220
- Fat: 16
- Saturated Fat: 9
- Carbohydrates: 32
- Fiber: 2
- Protein: 4
Keywords: gluten-free pumpkin pie bars, easy pumpkin bars, fall dessert, gluten-free dessert, pumpkin pie bars, Thanksgiving dessert