I was standing in the checkout line at the grocery store last October when a bag of pretzel rods caught my eye. The fluorescent lights flickered overhead, and for a split second, the crinkle of that plastic bag sounded exactly like the crinkle of the cellophane wrapper my Aunt Carol used to pull over her Halloween baking trays. I was eight years old again, sitting on a wobbly stool in her yellow kitchen, watching her dip pretzels into a bowl of melted white chocolate that smelled like sugar and vanilla and something I couldn’t quite name. She’d press a slivered almond onto the end, and whisper, “That’s the fingernail,” in a voice so serious it gave me goosebumps. I haven’t thought about those afternoons in years. Honestly, I’d forgotten the way she’d let me lick the spatula clean, or how the kitchen timer ticked like a countdown to something magical. I grabbed the bag of pretzels without even thinking. Maybe you’ve had that feeling—when a random sound or a familiar color yanks you straight into a memory you didn’t know you were holding. That’s how this recipe came back to me. It’s not just a snack. It’s a ticket to a moment I thought I’d lost.
Why You’ll Love This Recipe
These Light & Spooky White Chocolate Witch Finger Pretzels are the perfect Halloween treat because they deliver maximum fun with minimum effort. I mean, let’s be real—October gets busy. Between costume planning, pumpkin carving, and trying to keep the kids from eating all the candy before the big night, you don’t have time for a complicated baking project. This recipe is your shortcut to impressive, homemade Halloween goodies that look like you spent hours in the kitchen. Spoiler: you won’t.
- Quick & Easy: Comes together in under 30 minutes, including setting time. Perfect for last-minute party prep or a rainy afternoon activity with the kids.
- Simple Ingredients: You only need four things—pretzel rods, white chocolate chips, slivered almonds, and a little green food coloring. No weird specialty items or expensive tools.
- Perfect for Halloween Parties: These witch fingers are the star of any spooky spread. They’re creepy enough to impress, but sweet enough that everyone reaches for seconds.
- Crowd-Pleaser: I’ve brought these to three different Halloween gatherings now, and every single time, someone asks for the recipe. Kids love the “gross” factor. Adults love how they taste.
- Unbelievably Delicious: The salty crunch of the pretzel against the sweet, creamy white chocolate is a combination that just works. The almond adds a little nutty bite that ties it all together.
What makes this version different from the rest? It’s the texture. I tested a dozen ways to get that perfect “finger” look without the chocolate cracking or the almonds sliding off. The trick is letting the chocolate cool just slightly before dipping, so it thickens enough to hold the almond in place. It’s a tiny detail, but it makes all the difference. This recipe isn’t just good—it’s the kind that makes you close your eyes after the first bite. It’s Halloween fun, reimagined: simpler, faster, but with the same soul-soothing satisfaction.
What Ingredients You Will Need
This recipe uses simple, pantry-friendly ingredients to deliver big flavor and a seriously spooky look. You probably already have most of these on hand, which makes this the perfect last-minute Halloween project.
- Pretzel rods (12-15 rods): These form the “fingers.” I recommend using standard-sized pretzel rods, not the thin sticks. The thicker ones give you a better canvas for the chocolate and look more like actual fingers. My favorite brand is Snyder’s of Hanover—they’re sturdy and have a nice salt crunch. (Avoid the extra-thick “sourdough” style, as they’re too wide.)
- White chocolate chips or melting wafers (1 cup / about 6 oz): This is the “skin” of your witch fingers. I’ve tested this with both standard white chocolate chips and Ghirardelli white melting wafers. The wafers melt more smoothly and set with a glossier finish, but good-quality chips work just fine. (Add 1 teaspoon of coconut oil or shortening if your chips seem thick when melted.)
- Slivered almonds (about 30-40 pieces): These become the “fingernails.” Look for raw, slivered almonds that are fairly uniform in size. You want them long enough to cover the tip of the pretzel but not so wide that they look like giant claws. (Pro tip: pick through the bag and select the best-shaped ones before you start dipping.)
- Green food coloring (gel or liquid, about 3-4 drops): This gives the white chocolate that sickly, witchy green tint. I prefer gel food coloring because it’s more concentrated and won’t thin out the chocolate. Americolor brand “Leaf Green” gives the perfect eerie shade. (If you only have liquid, use sparingly—too much will seize the chocolate.)
- Optional: Red or black decorating gel (for “witches’ warts” or blood drips): A tiny dot of red gel at the base of the almond makes it look like a bloody cuticle. I skip it for a cleaner look, but my niece insists it’s essential for maximum gross-out factor.
Equipment Needed
You don’t need a professional pastry kitchen to pull these off. Here’s what you’ll actually use:
- Microwave-safe bowl (medium size): For melting the chocolate. Glass or ceramic works best—plastic bowls can hold onto heat and scorch the chocolate.
- Spatula or spoon: For stirring the chocolate and applying it to the pretzels. A small offset spatula gives you more control, but a regular spoon is fine.
- Parchment paper or silicone baking mat: To line a baking sheet. This is non-negotiable—the chocolate will stick to wax paper and foil. Trust me, I learned the hard way.
- Baking sheet: To hold the finished fingers while they set. A standard half-sheet pan works perfectly.
- Tweezers or toothpick: For positioning the almond “fingernails” without getting chocolate all over your fingers. This is optional but highly recommended.
- Small piping bag or zip-top bag: If you want to add extra chocolate details like knuckle lines. I use a sandwich bag with the corner snipped off—budget-friendly and easy to toss.
Preparation Method

Let’s get spooky. Here’s how to make these witch finger pretzels step by step.
- Set up your workspace: Line a baking sheet with parchment paper or a silicone mat. Clear a space on your counter where the pretzels can sit undisturbed for at least 20 minutes. (Trust me, you don’t want to be moving them halfway through setting.)
- Melt the white chocolate: Place 1 cup of white chocolate chips or melting wafers in a microwave-safe bowl. Microwave in 20-second intervals, stirring thoroughly after each burst. It usually takes about 60-90 seconds total. Stop heating when most of the chips are melted but a few small lumps remain—the residual heat will finish the job as you stir. (If you overheat white chocolate, it will seize into a grainy, clumpy mess. Go slow, my friend.)
- Add the green color: Once the chocolate is smooth and fully melted, add 3-4 drops of green gel food coloring. Stir until the color is evenly distributed. You’re aiming for a pale, sickly green—like a zombie’s skin. Add one more drop if needed, but remember: you can always add more, but you can’t take it away.
- Dip the pretzels: Hold one pretzel rod by the top (the “wrist” end) and dip the bottom third into the green chocolate. Twist gently as you pull it out to let excess chocolate drip back into the bowl. Lay the dipped pretzel on the parchment paper. Repeat with all pretzels, working in batches of 3-4 so the chocolate doesn’t set before you add the almond.
- Attach the fingernails: While the chocolate is still wet, press one slivered almond onto the tip of each pretzel, angled slightly upward like a real fingernail. Use a toothpick or tweezers to adjust the position if needed. The almond should cover the very end of the pretzel and extend slightly beyond. (I like to press gently so the chocolate oozes up around the base of the almond—it looks more like a real cuticle.)
- Create knuckle lines (optional but fun): If you want extra creepy fingers, transfer the remaining green chocolate to a small piping bag or zip-top bag with the corner snipped off. Once the dipped pretzels have set for about 5 minutes (they should be tacky but not hard), pipe two thin lines across each “finger” to look like knuckles. Don’t worry about perfection—real fingers aren’t perfectly straight either.
- Let them set: Allow the pretzels to sit at room temperature until the chocolate is completely firm, about 20-30 minutes. If you’re in a hurry, pop the baking sheet in the refrigerator for 10 minutes. (But don’t leave them in too long—condensation can make the chocolate look blotchy.)
- Add final details: Once set, you can add a tiny dot of red decorating gel at the base of each almond for a “bloody” cuticle effect. Or leave them clean and creepy. Your call.
Cooking Tips & Techniques
I’ve made these witch finger pretzels about a dozen times now, and let me tell you—I’ve made every mistake in the book so you don’t have to. Here are my hard-won tips.
Don’t overheat the chocolate. White chocolate is finicky. It burns easily and seizes into a thick, clumpy mess if it gets too hot or comes into contact with even a drop of water. Melt it low and slow. If it does seize, you can try whisking in a teaspoon of coconut oil or shortening to smooth it out, but honestly, it’s better to just start over.
Work in small batches. Don’t dip all the pretzels at once. The chocolate will start to set while you’re still attaching almonds, and you’ll end up with fingernails that don’t stick. Dip 3-4 pretzels, add their almonds, then move on to the next batch. It takes a little longer, but the results are worth it.
Use the right almond placement. I made the mistake of pressing the almonds straight on the first time—they looked like weird little hats. You want the almond to sit at a slight angle, with the pointed end facing outward, like a real fingernail. Press gently so the chocolate holds it in place without squishing it sideways.
Watch the humidity. If you live in a humid climate (hello, fellow Houstonians), the white chocolate may take longer to set or develop a sticky surface. Work in an air-conditioned room, and if the chocolate seems too soft, pop the finished pretzels in the fridge for 10 minutes.
Multitask strategically. While the chocolate is melting, have your pretzels and almonds laid out on the counter, ready to go. Once you start dipping, you won’t want to stop to hunt for the perfect almond. Set up an assembly line: pretzels on the left, melted chocolate in the middle, baking sheet on the right.
Variations & Adaptations
One of the best things about this recipe is how easy it is to tweak. Here are some variations I’ve tried and loved.
Dark & Spooky Version: Swap the white chocolate for dark or semi-sweet chocolate. Skip the green food coloring—the dark chocolate already looks sinister. Use whole almonds instead of slivered ones for a chunkier “nail.” This version is less sweet and has a more sophisticated flavor. I made these for an adult Halloween party and they disappeared in minutes.
Vegan-Friendly Fingers: Use dairy-free white chocolate chips (like Enjoy Life brand) and coconut oil to thin the melt. Check your pretzels are vegan—most are, but some brands use honey. The texture is slightly different, but the taste is still delicious. My vegan friend couldn’t stop eating them.
Gluten-Free Option: Swap regular pretzel rods for gluten-free pretzel rods. They’re a little more fragile, so dip gently. I found that Schär brand holds up well. The taste is slightly different, but the spooky factor is all there.
Extra Creepy Details: Add a drop of red gel food coloring to a small amount of leftover white chocolate to make “blood.” Drizzle it over the finished fingers for a gory effect. Or press a few black sesame seeds onto the chocolate to look like warts. My nephew said these were “disgusting” in the best possible way.
Finger-Lickin’ Sweet Version: Instead of green coloring, tint the white chocolate pink or purple for a more playful, less scary look. These are great for a non-scary Halloween party or a princess-themed event. I made pink ones for a toddler’s birthday party and they were a hit.
Serving & Storage Suggestions
These witch finger pretzels are best served at room temperature, straight from the baking sheet. The chocolate should be firm but not hard, with a satisfying snap when you bite into it. Arrange them on a platter in a fan shape, like a hand reaching out from the serving dish. For maximum creep factor, set them upright in a small glass jar or mug, so they look like fingers reaching up from the grave.
Complementary Treats: Serve alongside other Halloween goodies like spider web dip with apple slices, or a bowl of pumpkin spice popcorn mix for a sweet-and-salty contrast. For drinks, a glass of cold milk or a warm mug of hocus pocus hot chocolate pairs perfectly.
Storage Instructions: Store the finished pretzels in an airtight container at room temperature for up to 5 days. Do not refrigerate them unless absolutely necessary—the chocolate can develop condensation and look blotchy. If you must refrigerate (say, for a party the next day), let them come to room temperature before serving to avoid moisture issues.
Freezing Tips: You can freeze these for up to 2 months. Place them in a single layer in a freezer-safe container, with parchment paper between layers. Thaw at room temperature for about 30 minutes before serving. The texture remains excellent—I’ve tested this twice now.
Flavor Development: These pretzels are actually best the day after you make them. The chocolate sets fully, and the salt from the pretzel has a chance to meld with the sweetness. If you can resist eating them all on day one, you’ll be rewarded on day two.
Nutritional Information & Benefits
Let’s be honest—these are a treat, not a health food. But here’s the nutritional breakdown per serving (2 witch finger pretzels):
| Nutrient | Amount |
|---|---|
| Calories | 180 |
| Total Fat | 9g |
| Saturated Fat | 5g |
| Carbohydrates | 24g |
| Sugar | 16g |
| Protein | 3g |
| Sodium | 280mg |
The almonds add a small amount of healthy fats and vitamin E, while the pretzels provide a little iron from the enriched flour. White chocolate doesn’t have the antioxidants of dark chocolate, but it does contain calcium from the milk solids. If you’re watching your sugar intake, consider using a sugar-free white chocolate alternative (though the texture will be slightly different). This recipe is naturally nut-free if you skip the almonds, but check your chocolate for cross-contamination warnings if allergies are a concern.
Conclusion
These Light & Spooky White Chocolate Witch Finger Pretzels are more than just a Halloween snack—they’re a memory in the making. Every time I make them, I think of Aunt Carol’s yellow kitchen and the way she’d pretend to be a witch stirring her cauldron. This recipe is my way of keeping that feeling alive, and I hope it becomes a tradition in your home too. Don’t be afraid to customize them—add extra creepy details, swap the colors, or make them with your kids on a rainy October afternoon. The best recipes are the ones that spark joy, and these little fingers are pure joy. If you make them, I’d love to hear about it. Drop a comment below and tell me how your witch fingers turned out—did you go for bloody cuticles or clean and creepy? Share a photo on Pinterest and tag me so I can see your spooky creations. Happy Halloween, and happy snacking!
Frequently Asked Questions
Can I use almond bark instead of white chocolate chips?
Absolutely. Almond bark melts more smoothly and sets with a harder finish, which can actually be easier to work with. Just skip the food coloring if your almond bark is already white—you’ll need to add green coloring separately.
My chocolate seized and turned grainy. What went wrong?
This usually happens when the chocolate gets too hot or comes into contact with water. White chocolate is especially sensitive. Next time, melt it in shorter bursts (15 seconds instead of 20) and make sure your bowl and spatula are completely dry.
How far in advance can I make these?
You can make them up to 5 days ahead and store them in an airtight container at room temperature. They’re actually better on day two, once the flavors have had time to meld. Just don’t refrigerate them unless you have to.
Can I use pretzel sticks instead of rods?
You can, but the fingers will be much thinner and more delicate. The dipping process is trickier because the chocolate-to-pretzel ratio is off. I recommend sticking with rods for the best visual effect and easiest handling.
My almonds keep sliding off the chocolate. How do I fix this?
Make sure the chocolate is still wet when you press the almond on. If the chocolate has started to set, the almond won’t stick. Work in small batches of 3-4 pretzels at a time, and press the almond gently but firmly into the chocolate.
Pin This Recipe!
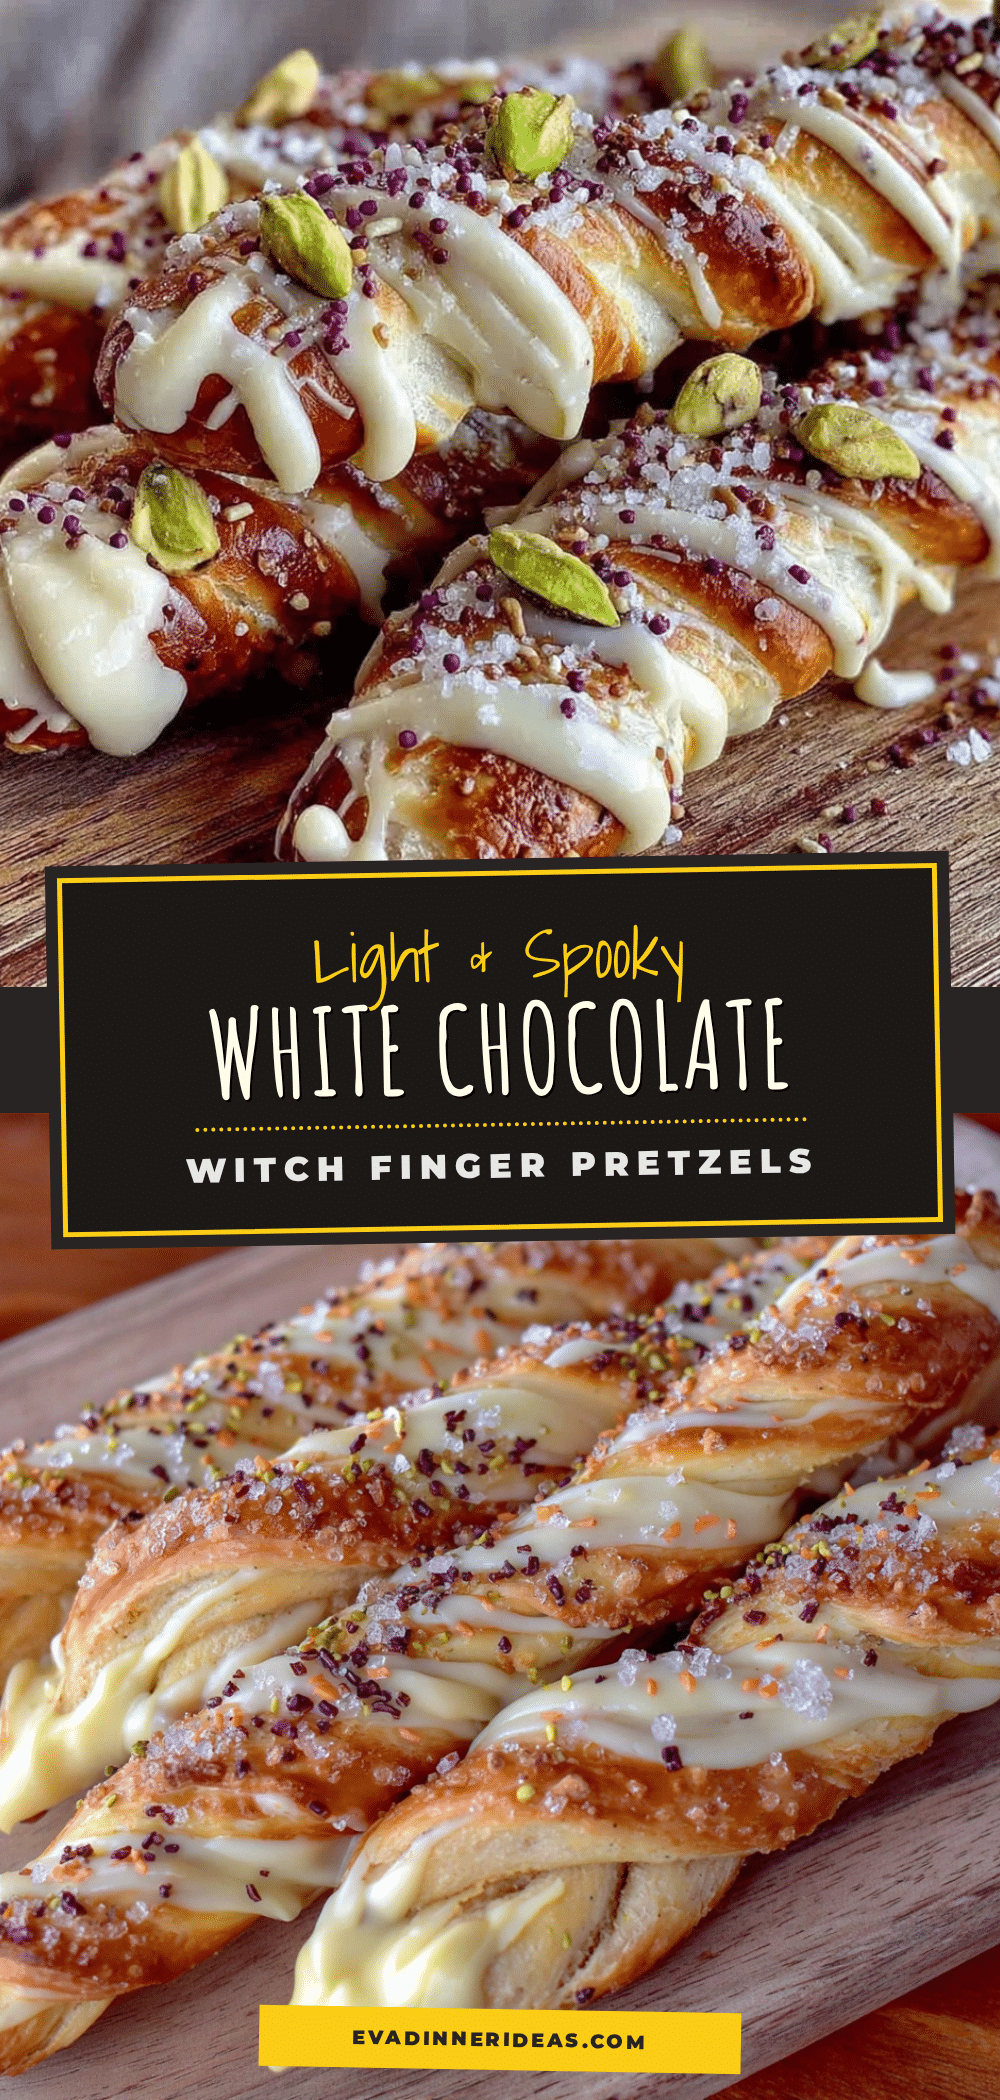
Easy White Chocolate Witch Finger Pretzels Recipe

These Light & Spooky White Chocolate Witch Finger Pretzels are the perfect Halloween treat because they deliver maximum fun with minimum effort. Quick to make with simple ingredients, they’re creepy enough to impress but sweet enough that everyone reaches for seconds.
- Prep Time: 10 minutes
- Cook Time: 2 minutes (melting chocolate)
- Total Time: 30 minutes (including setting time)
- Yield: 12-15 servings (1 witch finger per serving) 1x
- Category: Dessert
- Cuisine: American
Ingredients
- 12–15 pretzel rods (standard-sized, not thin sticks)
- 1 cup (about 6 oz) white chocolate chips or melting wafers
- 30–40 slivered almonds (raw, uniform size)
- 3–4 drops green gel food coloring (or liquid, use sparingly)
- Optional: Red or black decorating gel (for ‘witches’ warts’ or blood drips)
Instructions
- Set up your workspace: Line a baking sheet with parchment paper or a silicone mat. Clear a space on your counter where the pretzels can sit undisturbed for at least 20 minutes.
- Melt the white chocolate: Place 1 cup of white chocolate chips or melting wafers in a microwave-safe bowl. Microwave in 20-second intervals, stirring thoroughly after each burst. It usually takes about 60-90 seconds total. Stop heating when most of the chips are melted but a few small lumps remain—the residual heat will finish the job as you stir.
- Add the green color: Once the chocolate is smooth and fully melted, add 3-4 drops of green gel food coloring. Stir until the color is evenly distributed. You’re aiming for a pale, sickly green—like a zombie’s skin.
- Dip the pretzels: Hold one pretzel rod by the top (the ‘wrist’ end) and dip the bottom third into the green chocolate. Twist gently as you pull it out to let excess chocolate drip back into the bowl. Lay the dipped pretzel on the parchment paper. Repeat with all pretzels, working in batches of 3-4 so the chocolate doesn’t set before you add the almond.
- Attach the fingernails: While the chocolate is still wet, press one slivered almond onto the tip of each pretzel, angled slightly upward like a real fingernail. Use a toothpick or tweezers to adjust the position if needed. The almond should cover the very end of the pretzel and extend slightly beyond.
- Create knuckle lines (optional but fun): If you want extra creepy fingers, transfer the remaining green chocolate to a small piping bag or zip-top bag with the corner snipped off. Once the dipped pretzels have set for about 5 minutes (they should be tacky but not hard), pipe two thin lines across each ‘finger’ to look like knuckles.
- Let them set: Allow the pretzels to sit at room temperature until the chocolate is completely firm, about 20-30 minutes. If you’re in a hurry, pop the baking sheet in the refrigerator for 10 minutes.
- Add final details: Once set, you can add a tiny dot of red decorating gel at the base of each almond for a ‘bloody’ cuticle effect. Or leave them clean and creepy.
Notes
Don’t overheat the white chocolate; it seizes easily. Work in small batches of 3-4 pretzels to ensure the chocolate stays wet for almond attachment. For best results, let the pretzels set at room temperature. If refrigerating, allow to come to room temperature before serving to avoid condensation. These are best the day after making, as flavors meld.
Nutrition
- Serving Size: 2 witch finger pretz
- Calories: 180
- Sugar: 16
- Sodium: 280
- Fat: 9
- Saturated Fat: 5
- Carbohydrates: 24
- Protein: 3
Keywords: Halloween treats, witch finger pretzels, white chocolate pretzels, easy Halloween recipe, spooky snacks, pretzel rods, white chocolate, slivered almonds, green food coloring, party food