I was standing in the spice aisle at the grocery store last Tuesday when a jar of ground ginger slipped out of my hand and shattered on the linoleum floor. The air filled with that warm, sharp, almost peppery scent — and suddenly I was seven years old, sitting cross-legged on the worn kitchen floor of my aunt Dottie’s house, watching her roll cookie dough into perfect little balls while the radio played something old and crackly. She’d always let me sneak a pinch of the raw dough, even though she’d wag her finger and say it was bad for me. I never cared. That sweet, spiced, forbidden taste was the whole point. Aunt Dottie’s been gone five years now, and I still can’t make gingerbread without thinking about her stained apron and the way she’d hum off-key. This recipe for Easy Gingerbread Cookie Dough Truffles is my way of chasing that memory — all the flavor of her cookies, none of the baking, and absolutely no judgment if you eat half the batch before they’re even rolled. Honestly, I’d be disappointed if you didn’t. Maybe you’ve had that feeling too — that craving for a taste you can’t quite get back? These truffles get pretty close. They’re the reason I keep making them, even when I’m tired and the kitchen’s a mess.
Why You’ll Love This Recipe
Let me tell you why these truffles have become my go-to for holiday parties, late-night cravings, and everything in between. I’ve tested this recipe about seven times — yes, seven — to get the texture just right. Not too sticky, not too dry, with that perfect pop of spice that doesn’t overwhelm you.
- Quick & Easy: These come together in about 20 minutes of active time. No oven, no mixer, no fuss. Perfect for a Tuesday night when you need something sweet, fast.
- Simple Ingredients: You probably have most of these in your pantry right now. No weird extracts or hard-to-find spices. I’m serious — check your cupboard.
- Perfect for Holiday Treats: Great for cookie exchanges, holiday parties, or just keeping in the fridge for when you need a little something. They look fancy without any effort.
- Crowd-Pleaser: I brought these to a potluck last month, and three people asked for the recipe before I’d even set the plate down. Kids love them. Adults love them. It’s almost unfair.
- Unbelievably Delicious: The texture is soft and fudge-like, with that classic gingerbread spice blend that just hits different. It’s comfort food in a bite-sized package.
What makes this recipe different from all the other no-bake truffles out there? It’s the technique. I use a little trick — softening the butter just right and letting the dough rest in the fridge before rolling. This gives you that authentic cookie dough texture without the raw egg worry. Plus, I’ve balanced the spices so the ginger doesn’t overpower everything. It’s not just another version. It’s my best version, tested and tweaked until I couldn’t make it better. This recipe is the kind that makes you close your eyes after the first bite. It’s comfort food reimagined — faster, safer to eat raw, but with the same soul-soothing satisfaction. Perfect for impressing guests without stress, or turning a simple evening into something memorable.
What Ingredients You Will Need
This recipe uses simple, pantry-friendly ingredients to deliver that classic gingerbread flavor without any fuss. Here’s what you’ll need and why each one matters.
- All-purpose flour: 1 cup (120g) — This gives the truffles structure. I use Gold Medal or King Arthur for consistent results. Make sure to heat-treat it (see tip below) so it’s safe to eat raw.
- Unsalted butter: 1/2 cup (113g), softened — Adds richness and helps the dough come together. Let it sit out for about 30 minutes before starting. Salted butter works too, just skip the added salt.
- Brown sugar: 1/2 cup (100g), packed — This is non-negotiable for that deep, molasses-like sweetness. Light or dark both work, but dark gives a stronger flavor.
- Molasses: 2 tablespoons (30ml) — The heart of gingerbread flavor. I use Grandma’s Original brand. Don’t skip this — it’s what makes it taste like the real thing.
- Vanilla extract: 1 teaspoon (5ml) — Pure vanilla is best, but imitation works in a pinch. It rounds out the spices.
- Ground ginger: 1 teaspoon — The star spice. Freshly opened jars are more potent, so adjust if yours has been sitting around.
- Ground cinnamon: 1 teaspoon — Adds warmth and sweetness. I like McCormick for reliability.
- Ground cloves: 1/4 teaspoon — A little goes a long way. Too much can make things taste medicinal, so measure carefully.
- Salt: 1/4 teaspoon — Balances the sweetness and enhances the spices. Fine sea salt works best.
- White chocolate chips or melting wafers: 1 cup (170g) — For coating. I prefer Ghirardelli white chocolate chips for a smooth finish. You can also use dark or milk chocolate if you prefer.
- Optional: Sprinkles or crushed gingerbread cookies: For decorating. Adds a festive touch and a little crunch.
Ingredient Tip: To heat-treat the flour, spread it on a baking sheet and bake at 350°F (175°C) for 5 minutes. Let it cool completely before using. This kills any bacteria and makes the raw dough safe to eat. I learned this the hard way after a batch of cookie dough made me nervous — now I never skip this step.
Substitution Notes: For a gluten-free version, use a 1:1 gluten-free flour blend. Coconut sugar can replace brown sugar, but the texture will be slightly grainier. If you don’t have molasses, try honey or maple syrup — the flavor will be different but still good. For a dairy-free option, use vegan butter and dairy-free chocolate chips.
Equipment Needed
You don’t need much for this recipe, which is part of the beauty. Here’s what I use:
- Mixing bowls: One medium-sized bowl for the dough, another small one for the chocolate. Glass or stainless steel works best.
- Electric hand mixer or stand mixer: Makes creaming the butter and sugar much easier. A wooden spoon works too, but your arm will get a workout.
- Rubber spatula: For scraping down the bowl and folding in the flour. I have a favorite red one that’s seen better days, but it gets the job done.
- Measuring cups and spoons: Accurate measurements matter here. I use metal measuring cups for dry ingredients and glass ones for liquids.
- Baking sheet: For holding the rolled truffles while they chill. Line it with parchment paper for easy cleanup.
- Small cookie scoop or melon baller: For portioning the dough into even balls. This makes the truffles look professional without any effort.
- Microwave-safe bowl or double boiler: For melting the chocolate. I use the microwave in 20-second bursts — it’s faster and less cleanup.
- Fork or dipping tool: For coating the truffles in chocolate. A regular dinner fork works fine; just tap off the excess.
- Parchment paper: For lining the baking sheet so the truffles don’t stick.
Budget-Friendly Tip: Don’t have a cookie scoop? Use a teaspoon to portion the dough, then roll it between your palms. It takes a little longer, but the truffles will still taste amazing. I’ve done this plenty of times when my scoop was in the dishwasher.
Preparation Method
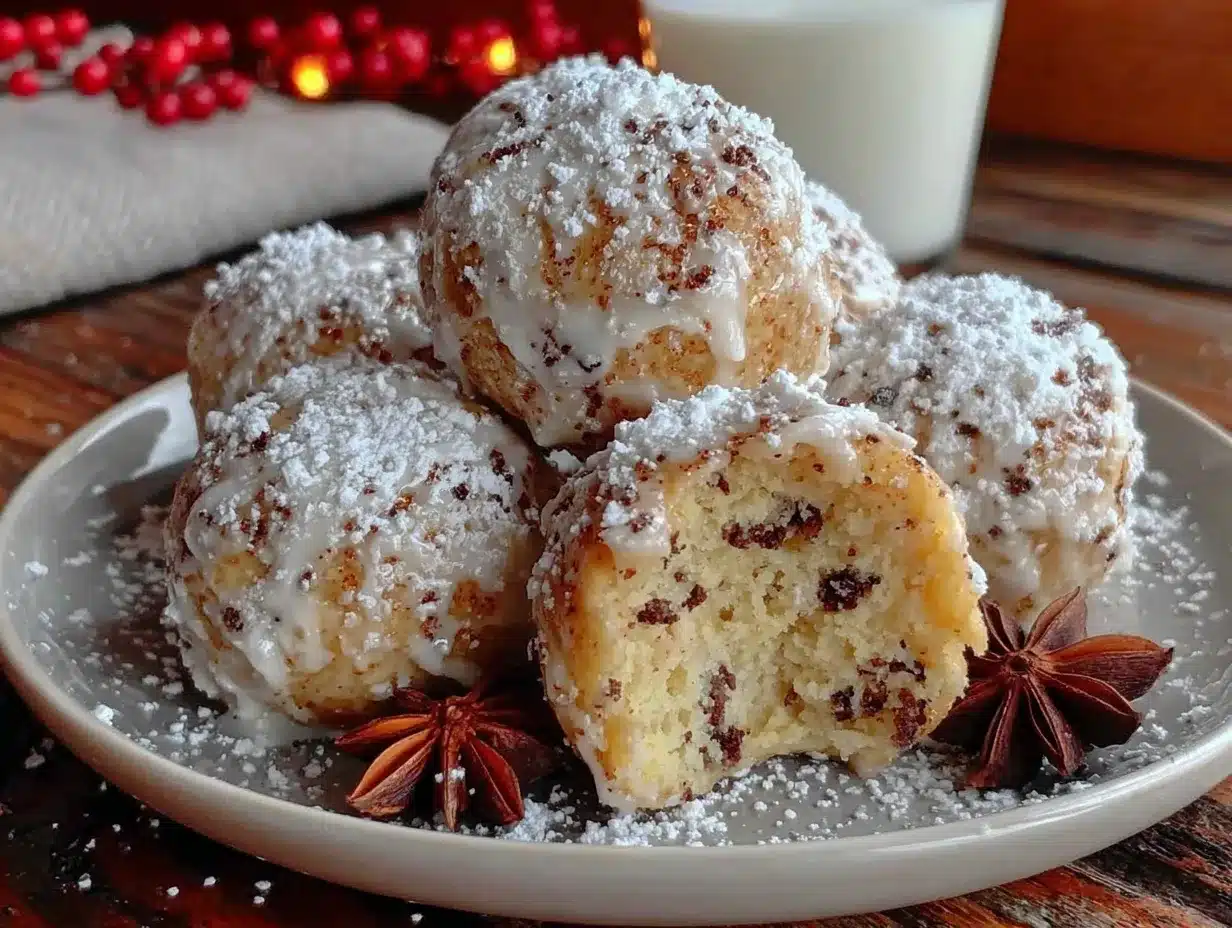
Here’s how to make these truffles step by step. Take your time — the process is simple, but patience with chilling makes all the difference.
- Heat-treat the flour (5 minutes): Preheat your oven to 350°F (175°C). Spread the flour on a baking sheet and bake for 5 minutes. Let it cool completely — about 10 minutes. This step is crucial for food safety, so don’t skip it.
- Cream the butter and sugar (3 minutes): In a medium mixing bowl, beat the softened butter and brown sugar together until light and fluffy. Use an electric mixer on medium speed for about 2 minutes. Scrape down the sides with a spatula halfway through. The mixture should look pale and creamy.
- Add the wet ingredients (1 minute): Mix in the molasses and vanilla extract until fully combined. The batter will look darker and smell amazing at this point. If it looks a little separated, that’s normal — just keep mixing.
- Combine the dry ingredients (2 minutes): In a separate small bowl, whisk together the heat-treated flour, ground ginger, cinnamon, cloves, and salt. This ensures the spices are evenly distributed. I once forgot to whisk and ended up with a truffle that was pure clove — not my finest moment.
- Mix the dough (2 minutes): Gradually add the dry ingredients to the wet mixture, stirring with a spatula or mixing on low speed until just combined. Don’t overmix, or the dough will get tough. It should look like soft, slightly sticky cookie dough.
- Chill the dough (30 minutes): Cover the bowl with plastic wrap and refrigerate for at least 30 minutes. This makes the dough firm enough to roll. If you’re in a hurry, 20 minutes might work, but the truffles will be harder to shape.
- Roll the truffles (10 minutes): Line a baking sheet with parchment paper. Use a small cookie scoop or teaspoon to portion the dough, then roll each portion into a smooth ball between your palms. Aim for about 1-inch (2.5 cm) balls. Place them on the prepared baking sheet. You should get about 20-24 truffles.
- Chill again (15 minutes): Pop the rolled truffles in the fridge for another 15 minutes. This helps them hold their shape when you dip them in chocolate. I’ve skipped this step before, and the truffles started falling apart in the chocolate — not a pretty sight.
- Melt the chocolate (3 minutes): Place the white chocolate chips in a microwave-safe bowl. Microwave in 20-second bursts, stirring after each, until smooth and fully melted. Be careful not to overheat — white chocolate burns easily. It should be warm but not hot to the touch.
- Dip the truffles (10 minutes): Using a fork, gently lower each chilled truffle into the melted chocolate. Roll it around to coat evenly, then lift it out and tap the fork on the edge of the bowl to remove excess chocolate. Place the coated truffle back on the parchment-lined baking sheet. Repeat with all truffles.
- Decorate (2 minutes): While the chocolate is still wet, sprinkle with decorations if desired. Crushed gingerbread cookies, festive sprinkles, or a tiny pinch of cinnamon all work beautifully. Work quickly — the chocolate sets fast.
- Final chill (15 minutes): Refrigerate the truffles for another 15 minutes to set the chocolate completely. Then they’re ready to serve — or sneak a few before anyone notices.
Sensory Cues: The dough should feel soft and slightly tacky but not sticky when rolled. The chocolate should flow like thick cream off the fork. When you bite into a finished truffle, the coating should snap cleanly, giving way to a soft, spiced interior.
Cooking Tips & Techniques
I’ve made these truffles more times than I can count, and I’ve learned a few things along the way. Here are my best tips for getting them perfect every time.
Softening butter the right way: Don’t microwave the butter to soften it — it’ll melt unevenly and mess up the texture. Leave it on the counter for 30 minutes. If you’re in a rush, cut it into small cubes and let it sit for 15 minutes. I’ve tried the microwave method exactly once, and the dough turned out greasy. Never again.
Chilling is not optional: I know it’s tempting to skip the chilling steps, but they’re crucial. The first chill firms the dough so you can roll it. The second chill keeps the truffles from falling apart in the chocolate. The third chill sets the coating. Each one takes less than 30 minutes, so be patient. Your truffles will thank you.
Avoiding chocolate disasters: White chocolate is finicky. If it gets too hot, it seizes up into a grainy mess. Always melt it slowly in short bursts. If it starts to look thick or lumpy, stir in a teaspoon of coconut oil or vegetable shortening to smooth it out. I’ve rescued many a batch this way.
Making uniform truffles: Use a cookie scoop for consistent size. If you’re rolling by hand, try to make each ball the same size — about 1 inch. This ensures even coating and a professional look. I once made them all different sizes, and the small ones got lost in the chocolate while the big ones looked lumpy.
Timing and multitasking: While the dough chills, clean up your workspace or prep the decorations. While the truffles chill after rolling, melt the chocolate. Working in stages like this makes the whole process feel effortless. I like to put on a podcast and just enjoy the rhythm of it.
Common mistake to avoid: Overmixing the dough. Once you add the flour, mix just until it disappears. Overworking the dough develops gluten and makes the truffles tough instead of tender. Trust me, I’ve made hockey puck truffles before, and nobody wants that.
Variations & Adaptations
One of the best things about this recipe is how easy it is to adapt. Here are some variations I’ve tried and loved.
Dark Chocolate Gingerbread Truffles: Swap the white chocolate coating for dark chocolate (70% cocoa is my favorite). The bitterness of the dark chocolate balances the sweet, spiced dough beautifully. I made these for a friend who doesn’t like white chocolate, and she ate six in one sitting.
Vegan Gingerbread Truffles: Use vegan butter and dairy-free chocolate chips. I like Miyoko’s vegan butter for its rich flavor. For the molasses, make sure it’s a vegan-friendly brand (most are). These turn out just as delicious — no one will know the difference.
Gluten-Free Version: Substitute the all-purpose flour with a 1:1 gluten-free flour blend. I’ve used Bob’s Red Mill with great results. The texture is slightly crumblier, but the flavor is spot-on. Just make sure to heat-treat the gluten-free flour too.
Spiced-Up Variation: Add 1/4 teaspoon of nutmeg and a pinch of black pepper to the dough for a more complex spice profile. The pepper adds a subtle warmth that’s surprising but delightful. I tried this on a whim one Christmas, and it’s become my go-to for holiday parties.
No-Chocolate Option: Skip the chocolate coating entirely and roll the truffles in powdered sugar, cocoa powder, or crushed graham crackers. These are great for when you want something lighter or don’t have chocolate on hand. They look rustic but taste amazing.
Seasonal Twist: In the fall, add a tablespoon of pumpkin puree to the dough and reduce the molasses slightly. In the summer, roll the truffles in toasted coconut for a tropical vibe. I love playing with seasonal flavors — it keeps the recipe feeling fresh all year round.
Serving & Storage Suggestions
These truffles are best served chilled or at room temperature, depending on your preference. I like them straight from the fridge — the cold makes the chocolate snap and the inside stay soft and fudge-like. If you prefer a softer texture, let them sit at room temperature for 5-10 minutes before serving.
Presentation Ideas: Arrange the truffles on a festive platter or in a decorative tin lined with parchment paper. For gift-giving, place them in small cellophane bags tied with ribbon. I’ve given these as holiday gifts for years, and they’re always a hit. Add a little tag with the recipe name — people will ask for it.
What to Serve With Them: These truffles pair beautifully with a cup of hot coffee, spiced tea, or a glass of cold milk. For a dessert board, arrange them alongside fresh berries, shortbread cookies, and a few squares of dark chocolate. They also make a lovely addition to a holiday cookie platter.
Storage Instructions: Store the truffles in an airtight container in the refrigerator for up to 2 weeks. Layer them between sheets of parchment paper to prevent sticking. If you’re stacking them, go easy — the chocolate can get scratched. For longer storage, freeze them for up to 3 months.
Freezing Tips: To freeze, place the truffles on a baking sheet in a single layer and freeze until solid (about 1 hour). Transfer to a freezer-safe bag or container. When you’re ready to eat them, thaw in the refrigerator overnight or at room temperature for about 30 minutes. The texture stays perfect — I’ve done this many times.
How Flavors Develop: These truffles actually taste better after a day or two in the fridge. The spices meld together, and the texture becomes more uniform. So if you can resist eating them all at once, make them a day ahead. I always try to save a few for the next day — emphasis on “try.”
Nutritional Information & Benefits
Here’s an approximate nutritional breakdown per truffle (based on 24 truffles with white chocolate coating):
- Calories: 120-130
- Total Fat: 7g
- Saturated Fat: 4g
- Carbohydrates: 15g
- Sugar: 12g
- Protein: 1g
- Fiber: 0g
- Sodium: 35mg
Health Benefits of Key Ingredients: Ginger is known for its anti-inflammatory properties and can help with digestion. Cinnamon may help regulate blood sugar levels. Molasses contains iron, calcium, and magnesium — a little sweetness with some nutritional value. Of course, these truffles are a treat, not a health food, but it’s nice to know there are some redeeming qualities.
Dietary Considerations: This recipe contains gluten, dairy, and eggs (if using). For a gluten-free version, use a gluten-free flour blend. For a dairy-free version, use vegan butter and dairy-free chocolate. For an egg-free version, the recipe is already egg-free — no substitutions needed. Always check your ingredient labels if you’re cooking for someone with allergies.
Personal Wellness Perspective: I believe in balance. These truffles are a special treat, not an everyday snack. I make them for holidays, gatherings, or when I just need a little joy. Enjoying them mindfully — savoring each bite — is part of the experience. Life’s too short to skip dessert, but it’s also too short to eat the whole batch in one sitting. Well, most of the time.
Conclusion
These Easy Gingerbread Cookie Dough Truffles are everything I love about holiday baking — without the baking. They’re quick, simple, and packed with that warm, spiced flavor that makes you feel like you’re wrapped in a cozy blanket. Whether you’re making them for a party, a gift, or just because you need a little sweetness in your life, they never disappoint.
I hope you give them a try and make them your own. Add a little extra cinnamon if that’s your thing. Roll them in sprinkles because it’s fun. Dip them in dark chocolate because you’re feeling fancy. This recipe is a starting point — the best version is the one that makes you smile.
I’d love to hear how yours turn out! Drop a comment below and let me know if you tried any variations, or share a photo of your truffles. Don’t forget to pin this recipe for later and share it with a friend who needs a little holiday cheer. Happy no-baking, friend — you’ve got this.
Frequently Asked Questions
Can I eat the dough raw without heat-treating the flour?
Technically, raw flour can contain bacteria, so heat-treating is recommended for safety. It only takes 5 minutes in the oven, and it gives you peace of mind. I never skip this step.
Why did my truffles turn out too dry?
This usually happens if the dough was overmixed or if the butter wasn’t softened enough. Make sure your butter is at room temperature and mix just until the flour disappears. If the dough feels dry, add a teaspoon of milk or water.
Can I use milk chocolate instead of white chocolate?
Absolutely! Milk chocolate or dark chocolate both work wonderfully. Just make sure to melt it slowly to avoid burning. The flavor will be different but equally delicious.
How long do these truffles last at room temperature?
They can sit out for a few hours during a party, but for longer storage, keep them in the fridge. The chocolate coating can soften or bloom if left out too long, especially in warm weather.
Can I double this recipe?
Yes! This recipe doubles easily. Just make sure your mixing bowl is big enough to handle the extra dough. The chilling times stay the same. I’ve made a double batch for holiday parties, and they disappear fast.
Pin This Recipe!
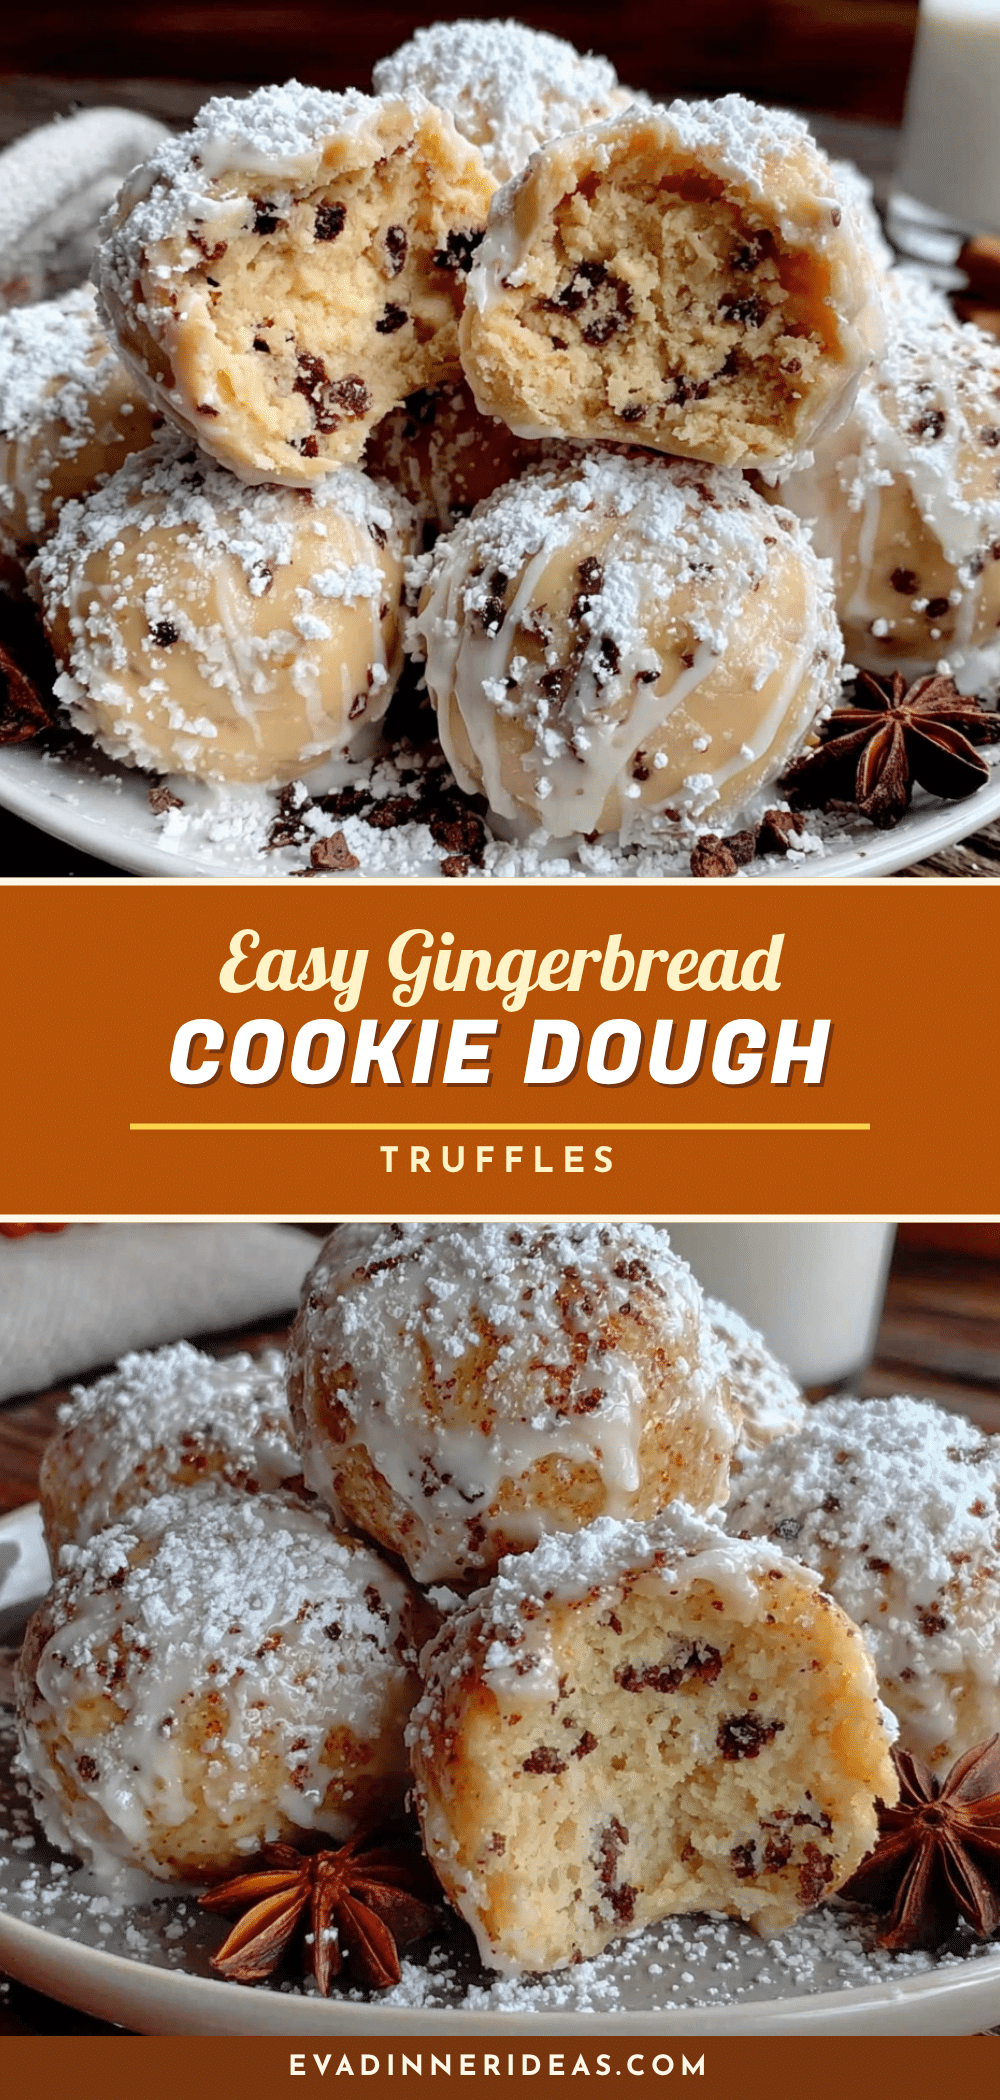
Easy Gingerbread Cookie Dough Truffles: Best No-Bake Treat
These no-bake gingerbread cookie dough truffles are quick, simple, and packed with warm, spiced flavor. Perfect for holiday parties, gift-giving, or a cozy treat any time.
- Prep Time: 20 minutes
- Cook Time: 5 minutes
- Total Time: 1 hour 25 minutes (includes chilling)
- Yield: 20-24 truffles 1x
- Category: Dessert
- Cuisine: American
Ingredients
- 1 cup (120g) all-purpose flour
- 1/2 cup (113g) unsalted butter, softened
- 1/2 cup (100g) brown sugar, packed
- 2 tablespoons (30ml) molasses
- 1 teaspoon (5ml) vanilla extract
- 1 teaspoon ground ginger
- 1 teaspoon ground cinnamon
- 1/4 teaspoon ground cloves
- 1/4 teaspoon salt
- 1 cup (170g) white chocolate chips or melting wafers
- Optional: Sprinkles or crushed gingerbread cookies for decorating
Instructions
- Heat-treat the flour: Preheat oven to 350°F (175°C). Spread flour on a baking sheet and bake for 5 minutes. Let cool completely (about 10 minutes).
- Cream the butter and sugar: In a medium bowl, beat softened butter and brown sugar until light and fluffy (about 2 minutes with an electric mixer).
- Add wet ingredients: Mix in molasses and vanilla extract until fully combined.
- Combine dry ingredients: In a small bowl, whisk together heat-treated flour, ginger, cinnamon, cloves, and salt.
- Mix the dough: Gradually add dry ingredients to wet mixture, stirring until just combined. Do not overmix.
- Chill the dough: Cover bowl with plastic wrap and refrigerate for at least 30 minutes.
- Roll the truffles: Line a baking sheet with parchment paper. Portion dough into 1-inch (2.5 cm) balls and roll smooth. Place on prepared sheet (makes 20-24 truffles).
- Chill again: Refrigerate rolled truffles for 15 minutes.
- Melt the chocolate: Microwave white chocolate chips in 20-second bursts, stirring after each, until smooth.
- Dip the truffles: Using a fork, dip each chilled truffle into melted chocolate, coating evenly. Tap off excess and place on parchment-lined sheet.
- Decorate: While chocolate is wet, sprinkle with decorations if desired.
- Final chill: Refrigerate truffles for 15 minutes to set chocolate completely.
Notes
Heat-treat flour for food safety. Chill dough thoroughly for best texture. White chocolate burns easily—melt slowly. Truffles taste better after a day in the fridge as flavors meld.
Nutrition
- Serving Size: 1 truffle
- Calories: 120130
- Sugar: 12
- Sodium: 35
- Fat: 7
- Saturated Fat: 4
- Carbohydrates: 15
- Protein: 1
Keywords: gingerbread truffles, no-bake truffles, cookie dough truffles, holiday treats, easy dessert


