My younger brother asked why I couldn’t just skip the oven entirely. I was in the middle of explaining my complicated pumpkin cheesecake routine — the water bath, the gradual cooling, the dreaded cracks — and he just looked at me with that teenage certainty. “So don’t bake it,” he said, shrugging. I started to explain why that wouldn’t work. Then I stopped.
Honestly, I almost laughed. No-bake cheesecake? For Thanksgiving? It felt like cheating. But it was a Tuesday night in late October, the kitchen smelled like cinnamon from a candle, and I was exhausted from a long week. So I grabbed the cream cheese, a can of pumpkin, and a box of ginger snaps, thinking I’d prove him wrong. Instead, I proved myself wrong — completely.
The first batch came together in about twenty minutes. I pressed the crushed ginger snaps into the pan, whipped the filling until it was silky, and slid it into the fridge, half-expecting a disaster. The next day, I cut into the most perfectly creamy, spiced, no-fuss pumpkin cheesecake I’d ever made. My brother didn’t say “I told you so,” but he didn’t have to. The empty pan said it all. These no-bake pumpkin cheesecake bars with ginger crust have been my go-to fall dessert ever since — no oven required, no stress allowed.
Maybe you’ve been there, standing in your kitchen, wanting to make something special but dreading the cleanup and the waiting. That’s exactly why this recipe works. It’s cozy, it’s forgiving, and it tastes like autumn in every single bite. Let me show you how easy it really is.
Why You’ll Love This Recipe
These no-bake pumpkin cheesecake bars with ginger crust are the kind of dessert that makes people think you spent hours in the kitchen. The secret? You barely broke a sweat. I’ve tested this recipe more times than I can count, and it delivers the same rich, creamy texture every single time — no cracked tops, no water baths, no oven drama.
- Quick & Easy: Active prep time is about 20 minutes. The fridge does the rest of the work. Perfect for busy weeknights or when you need a last-minute dessert for a potluck.
- Simple Ingredients: You probably already have most of these in your pantry. Cream cheese, pumpkin puree, ginger snaps, butter, sugar, and a few warm spices. No fancy grocery trips required.
- Perfect for Fall Gatherings: Whether it’s Thanksgiving, a cozy Friendsgiving, or just a quiet Sunday, these bars fit right in. They’re elegant enough for company but easy enough for any day.
- Crowd-Pleaser: I’ve served these to kids, grandparents, and everyone in between. The ginger crust adds a little snap, and the pumpkin filling is smooth and not too sweet. Empty plates all around.
- Unbelievably Delicious: The texture is what gets me every time. It’s dense but silky, with that perfect balance of tangy cream cheese and warm pumpkin pie spice. The ginger crust adds a peppery crunch that takes it over the top.
What makes this recipe different from the rest? It’s the ginger crust, honestly. Most no-bake pumpkin cheesecakes use a graham cracker base, but ginger snaps bring a whole new level of flavor. The spicy warmth pairs beautifully with the creamy pumpkin filling. Plus, the no-bake method means you get that perfect slice without any cracks or fuss. It’s comfort food at its finest — cozy, nostalgic, and deeply satisfying.
What Ingredients You Will Need
This recipe uses simple, wholesome ingredients to deliver big fall flavor without any complicated techniques. Here’s what you’ll need to gather before you start.
For the Ginger Crust
- Ginger snap cookies — 2 cups finely crushed (about 8 ounces or 225g). I prefer Nabisco or Anna’s ginger thins for a consistent crunch.
- Unsalted butter — 6 tablespoons (85g), melted. Salted butter works too, just skip the added salt.
- Granulated sugar — 2 tablespoons (25g). Just a touch to balance the ginger’s bite.
- Ground ginger — ½ teaspoon (optional, but I love the extra warmth).
For the Pumpkin Cheesecake Filling
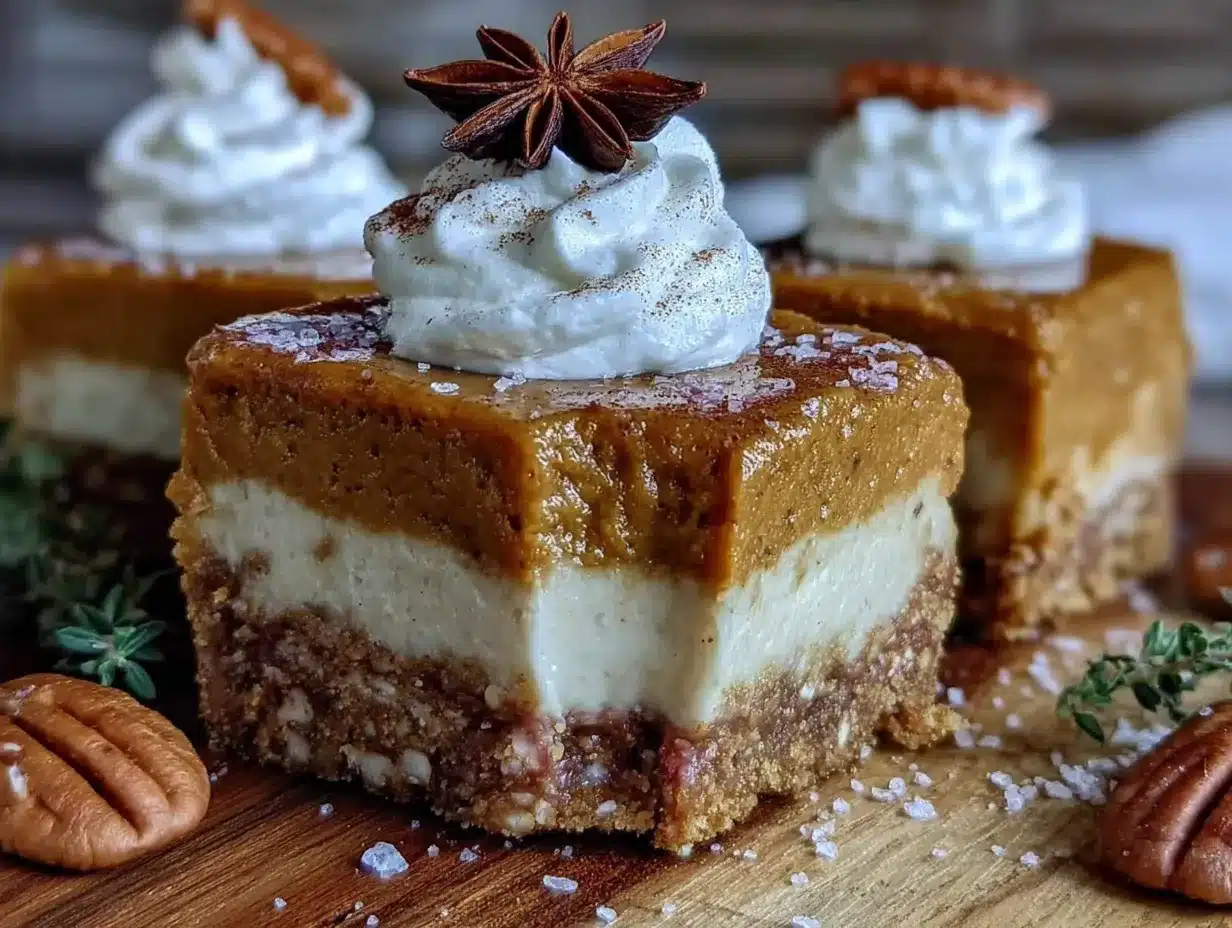
- Full-fat cream cheese — 16 ounces (450g), softened to room temperature. This is non-negotiable for that silky texture. Low-fat won’t set the same way.
- Pumpkin puree — 1 cup (245g). Not pumpkin pie filling! Make sure it’s 100% pure pumpkin. Libby’s is my go-to.
- Powdered sugar — ¾ cup (90g). It dissolves smoothly, so no grainy texture.
- Heavy cream — ½ cup (120ml). This helps the filling set without baking.
- Pumpkin pie spice — 1½ teaspoons. Store-bought is fine, or make your own with cinnamon, nutmeg, ginger, and cloves.
- Vanilla extract — 1 teaspoon. Pure vanilla adds depth.
- Salt — ¼ teaspoon. Just a pinch to brighten all the flavors.
For the Topping (Optional but Lovely)
- Whipped cream — 1 cup (240ml) heavy cream, whipped with 2 tablespoons powdered sugar and ½ teaspoon vanilla. Homemade is best, but store-bought works in a pinch.
- Crushed ginger snaps — A handful for sprinkling on top.
- Caramel sauce — Optional drizzle for extra decadence.
Equipment Needed
You don’t need a fancy kitchen to make these no-bake pumpkin cheesecake bars with ginger crust. Here’s what you’ll actually use.
- 9×9-inch square baking pan — Glass or metal both work. Line it with parchment paper for easy removal.
- Food processor or rolling pin — For crushing the ginger snaps. A food processor makes it quick, but a ziplock bag and a rolling pin work just fine.
- Electric hand mixer or stand mixer — Cream cheese needs to be whipped until smooth. A whisk will work if you have strong arms, but it’s a workout.
- Mixing bowls — One medium for the crust, one large for the filling.
- Spatula — For pressing the crust and spreading the filling evenly.
- Measuring cups and spoons — Accuracy matters for the texture.
- Plastic wrap — To cover the pan while it chills.
I’ve made this recipe with a cheap hand mixer and a wooden spoon, and it turned out great. Don’t overthink the equipment. If you have a pan and a fridge, you’re set.
Preparation Method
Follow these steps carefully, and you’ll have a gorgeous pan of no-bake pumpkin cheesecake bars with ginger crust ready to chill. The key is patience — let the fridge do its magic.
Step 1: Prepare the Pan
Line your 9×9-inch baking pan with parchment paper. Leave a little overhang on two opposite sides — this creates handles for lifting the bars out later. Set it aside.
Step 2: Make the Ginger Crust
Crush the ginger snap cookies until you have fine crumbs. If using a food processor, pulse until uniform. If using a bag and rolling pin, seal the cookies in a ziplock bag and crush them firmly — it’s a great stress reliever. You should have about 2 cups of crumbs.
In a medium bowl, combine the ginger snap crumbs, melted butter, granulated sugar, and ground ginger (if using). Stir with a fork until every crumb is coated and the mixture looks like wet sand. Press this mixture firmly into the bottom of your prepared pan. Use the bottom of a measuring cup or a flat glass to really pack it down. A tight crust means clean slices later.
Pop the pan in the fridge while you make the filling — about 10 minutes is enough to set it.
Step 3: Whip the Cream Cheese Base
In a large mixing bowl, beat the softened cream cheese with an electric mixer on medium speed until it’s completely smooth and fluffy. This takes about 2 minutes. Scrape down the sides of the bowl with a spatula halfway through. Lumps now mean a lumpy filling later, so be thorough.
Add the powdered sugar and beat again until combined. The mixture should look light and airy.
Step 4: Add the Pumpkin and Spices
Add the pumpkin puree, pumpkin pie spice, vanilla extract, and salt to the cream cheese mixture. Beat on low speed until just combined. Don’t overmix — you don’t want to incorporate too much air, which can cause cracks as it sets. Scrape the bowl once more to make sure everything is evenly incorporated.
Step 5: Whip the Heavy Cream
In a separate small bowl, pour the cold heavy cream. Using clean beaters, whip the cream on medium-high speed until stiff peaks form. This means when you lift the beaters, the cream holds its shape without drooping. It takes about 3-4 minutes. Be careful not to overwhip, or you’ll end up with butter.
Step 6: Fold It All Together
Gently fold the whipped cream into the pumpkin-cream cheese mixture. Use a spatula and a light hand — cut through the center, scrape the bottom, and fold over. Repeat until no white streaks remain. The filling should be uniform, thick, and beautifully orange.
Step 7: Assemble and Chill
Remove the crust from the fridge. Spoon the filling over the crust and spread it evenly with your spatula. Give the pan a gentle tap on the counter to release any air bubbles. Cover tightly with plastic wrap and refrigerate for at least 6 hours, but overnight is better. The longer it chills, the cleaner your slices will be.
Step 8: Slice and Serve
Once fully set, lift the bars out of the pan using the parchment overhang. Place on a cutting board and use a sharp knife to cut into 9 or 16 squares. Wipe the knife clean between cuts for neat edges. Serve cold, topped with whipped cream and a sprinkle of crushed ginger snaps.
Cooking Tips & Techniques
I’ve made this recipe about a dozen times, and I’ve learned a few things the hard way. Here’s what I wish someone had told me.
Don’t rush the cream cheese. Cold cream cheese creates lumps that never fully disappear, no matter how long you beat it. Leave it on the counter for at least 30 minutes before starting. If you’re in a hurry, cut it into small cubes and microwave for 10 seconds — but watch it carefully.
Press the crust firmly. A loose crust crumbles when you cut the bars. Use the bottom of a glass or a measuring cup to really compact it. I once forgot this step, and my crust fell apart into a sandy mess. Beautiful flavor, terrible presentation.
Fold, don’t stir. When adding the whipped cream, be gentle. Stirring vigorously deflates the air you just whipped in, resulting in a dense, heavy filling. A light folding motion keeps it airy and mousse-like.
Patience is everything. I know it’s tempting to dig in after a few hours, but 6 hours is the minimum. Overnight is ideal. The filling needs time to set fully, and the flavors meld together beautifully. One time I cut into it after 4 hours, and the bars were too soft to hold their shape. They still tasted amazing, but they looked sad.
Use a wet knife for clean cuts. Run your knife under hot water, dry it, then slice. Wipe clean between each cut. This gives you those Instagram-worthy edges.
Variations & Adaptations
One of the best things about these no-bake pumpkin cheesecake bars with ginger crust is how easy they are to adapt. Here are some ways to make them your own.
Gluten-Free Option: Use gluten-free ginger snap cookies. Many brands make them now, and the texture is almost identical. I’ve tried this with Schär ginger thins, and no one noticed the difference.
Dairy-Free Version: Substitute the cream cheese with a high-quality dairy-free block cream cheese (like Kite Hill or Violife) and use coconut cream instead of heavy cream. Chill for a full 12 hours — dairy-free versions need more time to set. The flavor is slightly different, but still delicious.
Extra Spicy: Add ¼ teaspoon of cayenne pepper or black pepper to the filling. It sounds weird, but the heat brings out the sweetness of the pumpkin and the warmth of the ginger. I tried this on a whim one year, and now it’s my secret weapon.
Chocolate Twist: Melt 4 ounces of dark chocolate and drizzle it over the crust before adding the filling. The chocolate and ginger combo is incredible. Or fold ½ cup of mini chocolate chips into the filling for little bursts of richness.
Maple Pumpkin: Replace the powdered sugar with ⅓ cup of pure maple syrup. The flavor is deeper and more complex. Just note that the filling will be slightly softer, so chill for a full 8 hours minimum.
Serving & Storage Suggestions
These bars are best served cold, straight from the fridge. The texture is firm but creamy, and the ginger crust stays perfectly crunchy. Here’s how to make the most of them.
Serving: Place the bars on a platter and top each one with a dollop of homemade whipped cream. A sprinkle of crushed ginger snaps or a light dusting of cinnamon adds a beautiful finish. For a truly decadent touch, drizzle with warm caramel sauce just before serving.
Pairings: These bars pair beautifully with a hot cup of spiced chai, a bold black coffee, or a glass of cold milk. For a dessert spread, serve them alongside apple cider donut cake or cranberry orange scones for a cozy fall brunch.
Storage: Store leftover bars in an airtight container in the refrigerator for up to 5 days. The flavor actually improves after a day or two as the spices meld together. I’ve never tested beyond 5 days because they’re always gone by then.
Freezing: These bars freeze beautifully. Wrap individual slices tightly in plastic wrap, then place them in a freezer-safe bag or container. Freeze for up to 2 months. To serve, thaw in the refrigerator overnight. The texture remains creamy and the crust stays crisp.
Reheating: Don’t reheat these — they’re meant to be cold. If you want a warm dessert, let a bar sit at room temperature for 10 minutes before serving. That slight softening makes the filling even more luscious.
Nutritional Information & Benefits
While these no-bake pumpkin cheesecake bars with ginger crust are a treat, they do offer some surprising nutritional perks. Here’s an approximate breakdown per bar (based on 16 servings).
| Nutrient | Amount per Serving |
|---|---|
| Calories | 245 |
| Total Fat | 16g |
| Saturated Fat | 10g |
| Carbohydrates | 22g |
| Sugar | 14g |
| Protein | 4g |
| Vitamin A | 45% DV |
| Calcium | 4% DV |
| Iron | 6% DV |
Pumpkin is packed with vitamin A, which supports eye health and immunity. Ginger is known for its anti-inflammatory properties and can aid digestion. The cream cheese provides calcium and protein, though it’s best enjoyed in moderation. If you’re watching your sugar intake, you can reduce the powdered sugar to ½ cup — the filling will be slightly less sweet but still delicious.
For a lighter version, use reduced-fat cream cheese and skip the whipped cream topping. Each bar saves about 60 calories. Not bad for a dessert that feels this indulgent.
Conclusion
These no-bake pumpkin cheesecake bars with ginger crust have become my official fall dessert. They’re the recipe I bring to Friendsgiving, the one I make on chilly Sundays when I want something sweet without turning on the oven. Every time I cut into that perfectly set filling and see the golden ginger crust underneath, I think about my brother and his simple question. Sometimes the best ideas come from the most unexpected places.
I hope you give these bars a try. Make them your own — add extra spice, swap the crust, drizzle with caramel. That’s the beauty of a forgiving recipe. And when you do, I’d love to hear about it. Leave a comment below and tell me how yours turned out. Did you add a twist? Did your family fight over the last piece? Share your story — I read every single one.
Until next time, happy fall baking. Or, you know, happy fall no-baking. That’s the whole point.
Frequently Asked Questions
Can I use pumpkin pie filling instead of pumpkin puree?
No, don’t do that. Pumpkin pie filling is already sweetened and spiced, which will throw off the balance of this recipe. Stick with 100% pure pumpkin puree for the best texture and flavor.
How long do these bars need to chill?
At least 6 hours, but overnight is ideal. The filling needs time to set properly, and the flavors deepen as they rest. If you cut them too early, they’ll be too soft to slice cleanly.
Can I make this recipe in a different pan size?
Yes. An 8×8-inch pan will give you thicker bars — just increase the chilling time to 8 hours. A 9×13-inch pan will yield thinner bars, so reduce the chilling time to 4 hours. Adjust the crust and filling quantities accordingly.
Why did my filling turn out lumpy?
Lumpy filling usually means the cream cheese wasn’t soft enough. Make sure it’s at room temperature before you start. If you’re still seeing lumps, beat the mixture for an extra minute on medium-high speed until smooth.
Can I freeze these no-bake pumpkin cheesecake bars?
Absolutely. Wrap individual slices tightly in plastic wrap, then store in a freezer bag for up to 2 months. Thaw overnight in the refrigerator before serving. The texture stays creamy and the crust remains crunchy.
Pin This Recipe!
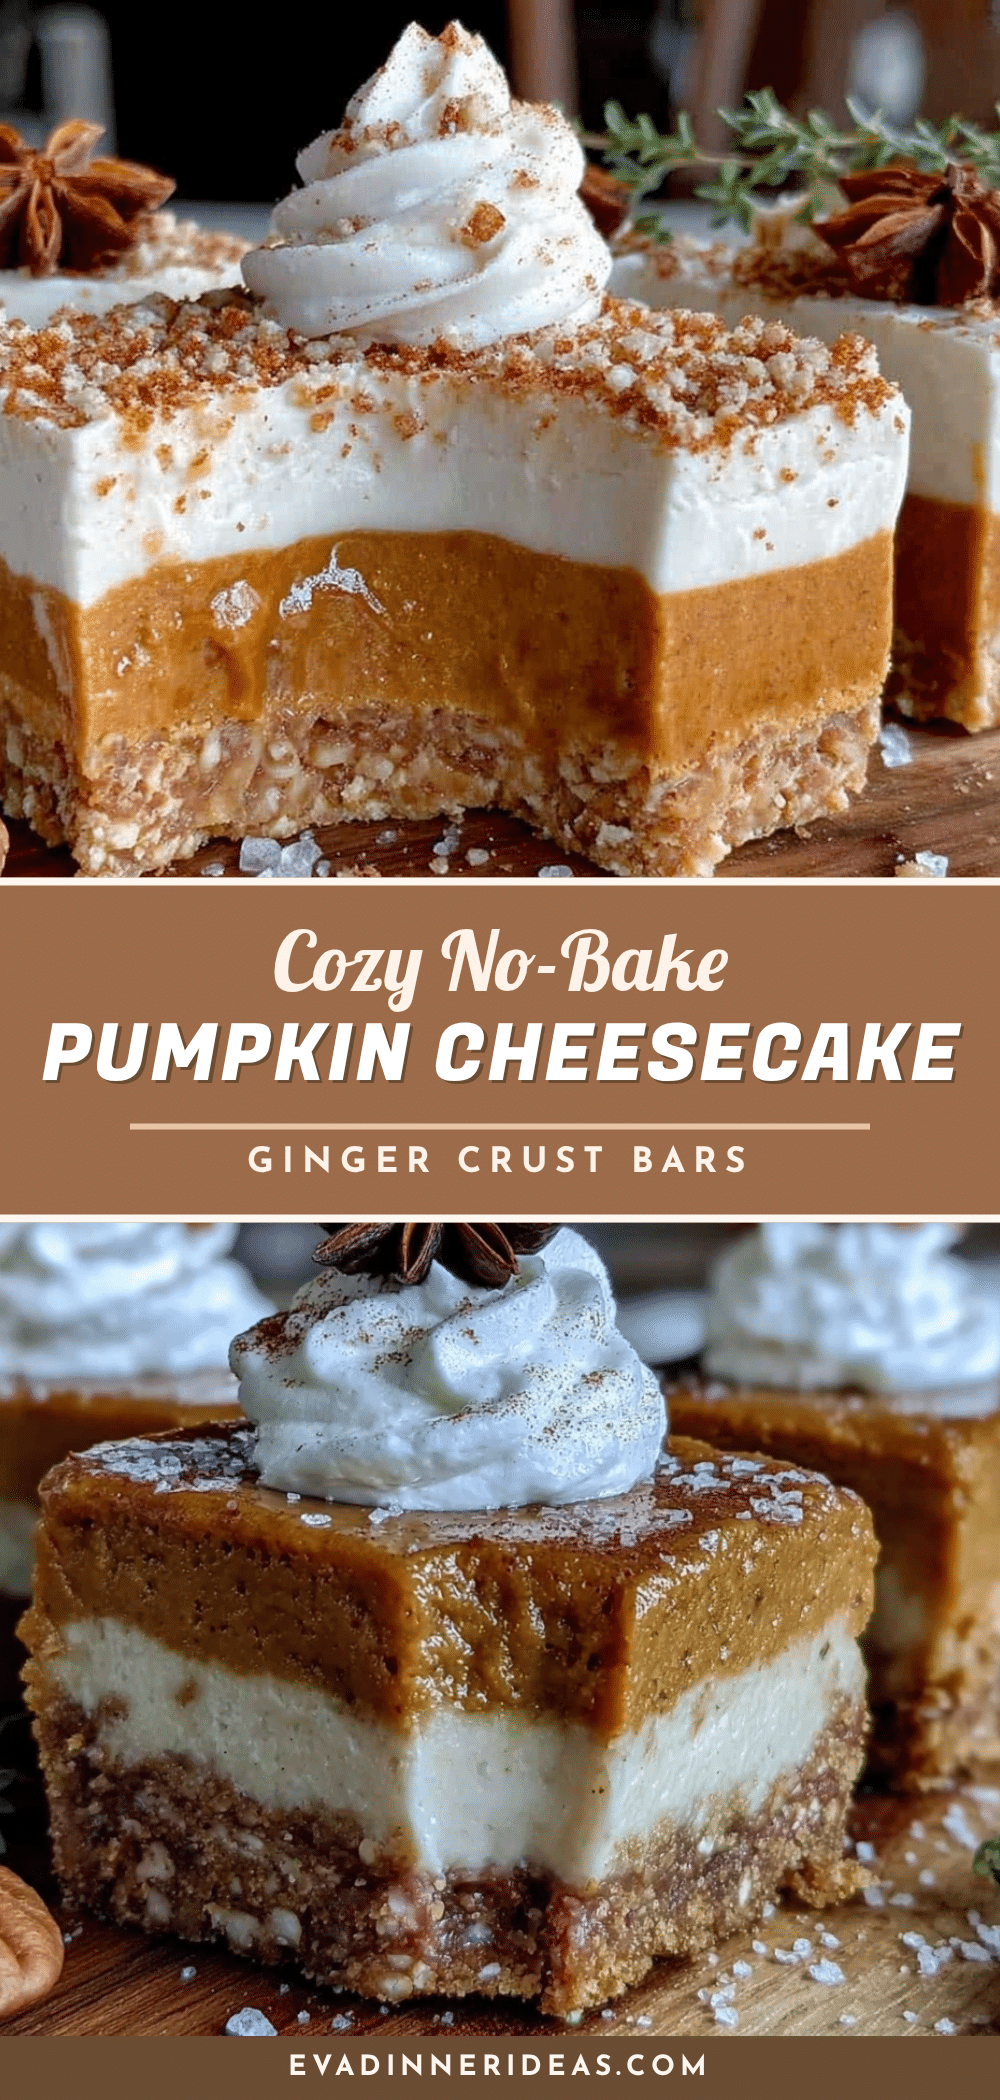
No-Bake Pumpkin Cheesecake Bars with Ginger Crust
These no-bake pumpkin cheesecake bars with ginger crust are the perfect easy fall dessert. With a crunchy ginger snap crust and a creamy, spiced pumpkin filling, they come together in just 20 minutes of prep and require no oven.
- Prep Time: 20 minutes
- Cook Time: 0 minutes
- Total Time: 6 hours 20 minutes (includes chilling)
- Yield: 16 servings 1x
- Category: Dessert
- Cuisine: American
Ingredients
- 2 cups finely crushed ginger snap cookies (about 8 ounces or 225g)
- 6 tablespoons unsalted butter, melted (85g)
- 2 tablespoons granulated sugar (25g)
- ½ teaspoon ground ginger (optional)
- 16 ounces full-fat cream cheese, softened to room temperature (450g)
- 1 cup pumpkin puree (245g), not pumpkin pie filling
- ¾ cup powdered sugar (90g)
- ½ cup heavy cream (120ml)
- 1½ teaspoons pumpkin pie spice
- 1 teaspoon vanilla extract
- ¼ teaspoon salt
- 1 cup heavy cream (240ml) for whipped topping (optional)
- 2 tablespoons powdered sugar for whipped topping (optional)
- ½ teaspoon vanilla extract for whipped topping (optional)
- Crushed ginger snaps for garnish (optional)
- Caramel sauce for drizzling (optional)
Instructions
- Line a 9×9-inch baking pan with parchment paper, leaving overhang on two opposite sides.
- Crush ginger snap cookies into fine crumbs. In a medium bowl, combine crumbs, melted butter, granulated sugar, and ground ginger (if using). Stir until mixture resembles wet sand. Press firmly into the bottom of the prepared pan. Refrigerate for 10 minutes.
- In a large bowl, beat softened cream cheese with an electric mixer on medium speed until smooth and fluffy, about 2 minutes. Add powdered sugar and beat until combined.
- Add pumpkin puree, pumpkin pie spice, vanilla extract, and salt. Beat on low speed until just combined. Scrape bowl.
- In a separate small bowl, whip cold heavy cream on medium-high speed until stiff peaks form, about 3-4 minutes.
- Gently fold the whipped cream into the pumpkin-cream cheese mixture until no white streaks remain.
- Remove crust from fridge. Spoon filling over crust and spread evenly. Tap pan gently on counter to release air bubbles. Cover tightly with plastic wrap and refrigerate for at least 6 hours, preferably overnight.
- Once set, lift bars out using parchment overhang. Cut into 9 or 16 squares with a sharp knife, wiping clean between cuts. Serve cold, topped with whipped cream and crushed ginger snaps if desired.
Notes
Don’t rush the cream cheese; it must be at room temperature. Press the crust firmly for clean slices. Fold whipped cream gently to keep filling airy. Chill at least 6 hours, overnight is best. Use a wet knife for clean cuts.
Nutrition
- Serving Size: 1 bar
- Calories: 245
- Sugar: 14
- Sodium: 180
- Fat: 16
- Saturated Fat: 10
- Carbohydrates: 22
- Fiber: 1
- Protein: 4
Keywords: no-bake pumpkin cheesecake bars, ginger crust, fall dessert, easy pumpkin dessert, no-bake cheesecake


